Most of the versions of this game I ran across where I could determine the size were on the order of 10 inches long and high, so I decided to make one similar in size. It was a bit unclear how those went together since presumably they are shipped unassembled. One said "Insert the accessories up and down according to the hole position to get a satisfactory feeling." which would be very easy to misinterpret but I'm pretty sure they are somehow referring to the game assembly. That didn't, however, help me much.
I thought being able to take it apart for storage would be convenient so that became part of the plan. I would have liked to do a wooden thread but I didn't really have the proper equipment so instead I opted for 1/4-20 bolt threads.
I thought being able to take it apart for storage would be convenient so that became part of the plan. I would have liked to do a wooden thread but I didn't really have the proper equipment so instead I opted for 1/4-20 bolt threads.
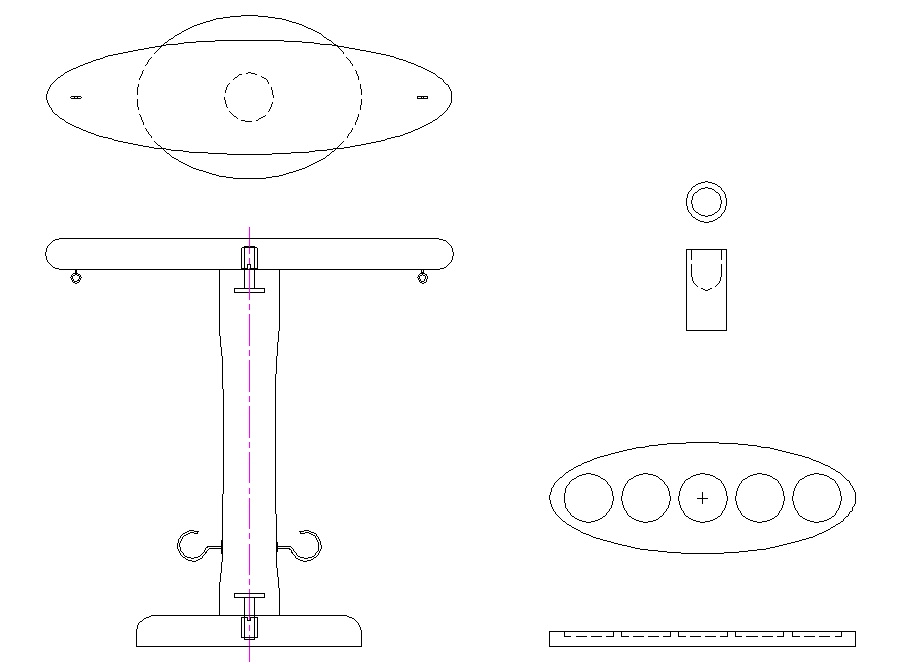
A pretty straightforward plan
Post and Marker
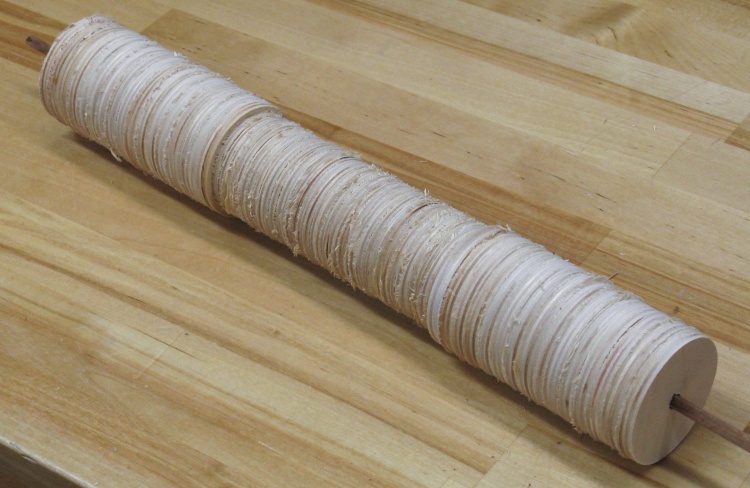
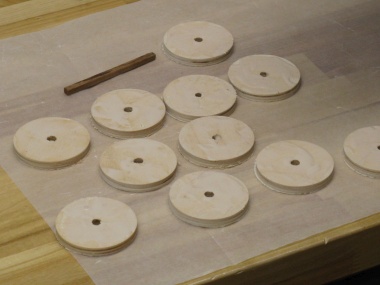
A long stack of scrap plywood discs
I had made a plywood drawer rack some time back and ended up saving the cut-out circles. Once I settled on making the ring toss game out of plywood, it seemed like the ideal use for those saved discs.
There were discs of both 1/4" and 1/8" thickness (the 1/8" being the slightly smaller ones in the middle of the stack in this photo) and I ended up using both types.
There were discs of both 1/4" and 1/8" thickness (the 1/8" being the slightly smaller ones in the middle of the stack in this photo) and I ended up using both types.
The vertical post of the game was going to have 1/4-20 threads protruding from the ends which would mate with threaded inserts in the top and the base. I used T-bolts in the post (which have thin oval heads), mostly since I had lots around.
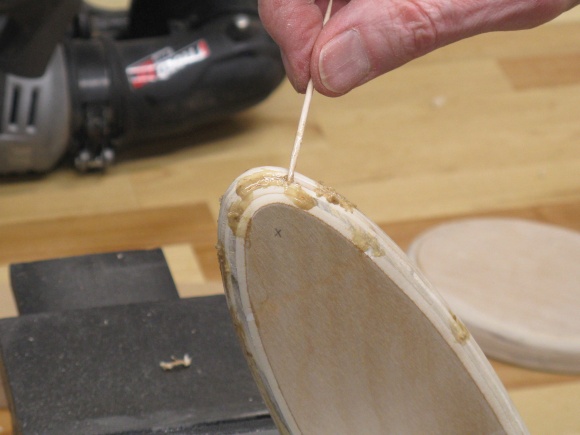
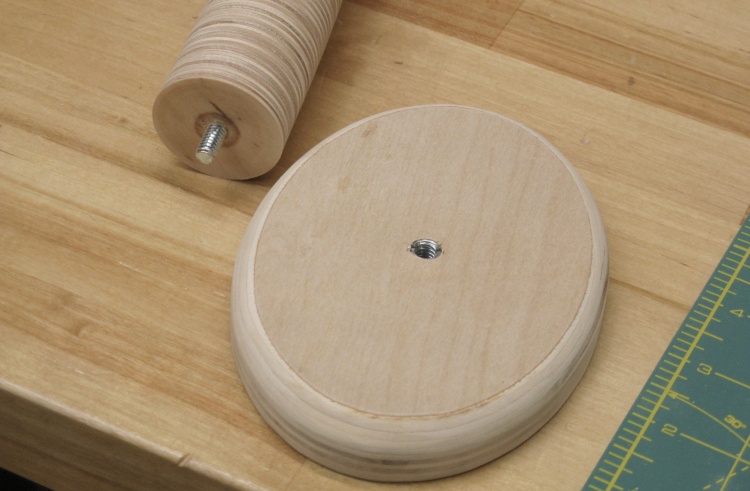
The bolts needed to be embedded so the first step was to cut out a recess for the head in a plywood disc. The first photo shows that process with the next showing the bolt being assembled into a short 4-disc assembly that will eventually go at one end of the post.
The bolts needed to be embedded so the first step was to cut out a recess for the head in a plywood disc. The first photo shows that process with the next showing the bolt being assembled into a short 4-disc assembly that will eventually go at one end of the post.

Cutting out space to fit the T bolt head
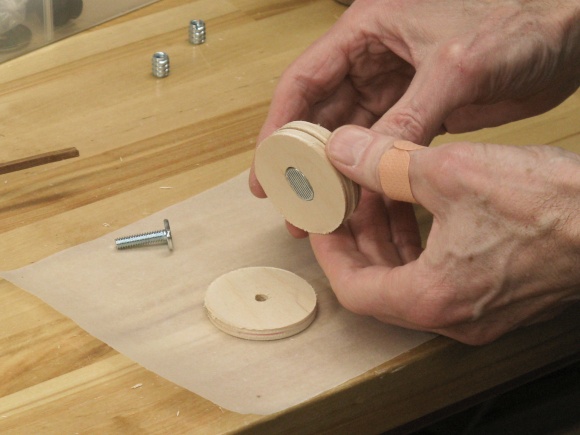
Bolt fitted
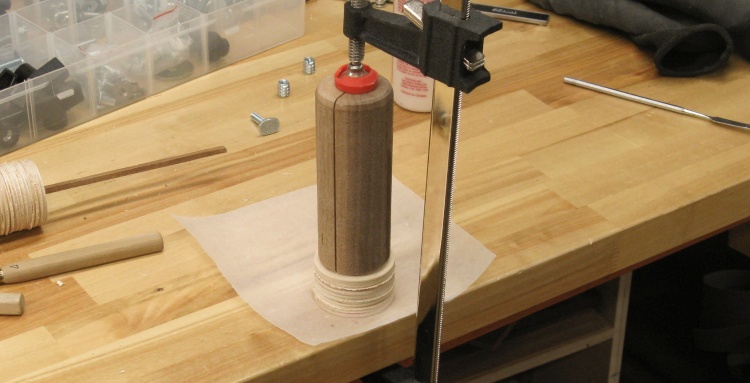
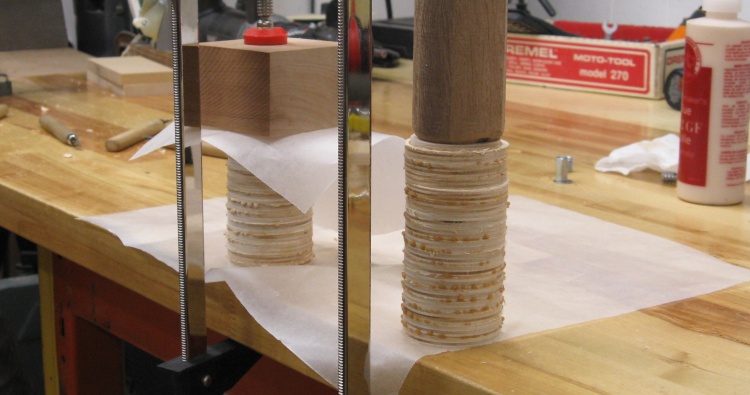
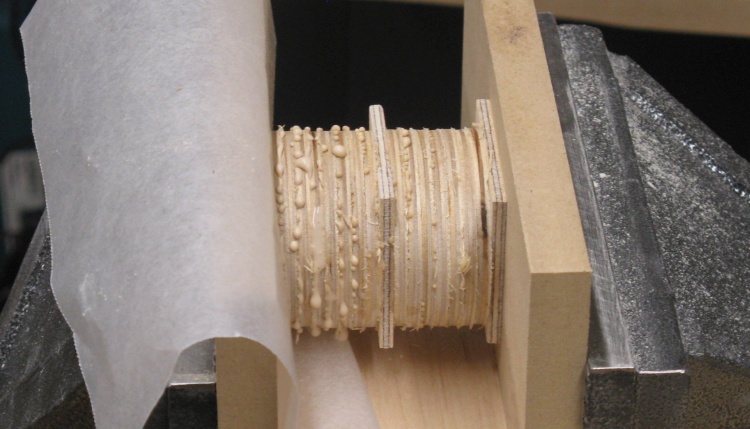
Gluing a short stack with the bolt
The four discs were glued together with the bolt embedded and protruding from one end. This shot shows that stack being clamped, with the brown item being a hollow dowel to provide clearance for the upward-protruding bolt end.
I made one of these bolt stacks for each end of the post.
I made one of these bolt stacks for each end of the post.
The center part of the post was just a big stack of 1/4" discs all glued together. I assembled short stacks on short wooden axles and then put them together into the full post. These shots show the construction of one of those stacks.
Glue applied to discs
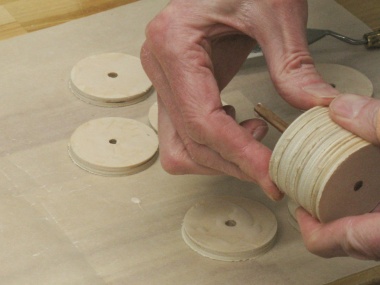
Building up a short stack
Clamping the glued stack
A couple more stacks being clamped
On the left in this shot is another short stack being clamped while to the right an already-dried stack is getting the bolt-equipped end piece added.
A short stack for the score marker
The game marker was made the same way as the post; just a stack of discs glued together although using the 1/8" discs rather than 1/4". There are a couple pieces of square plywood added in which served to cover up the center holes in the discs.
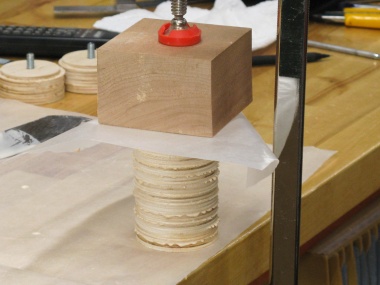
Here the marker stack has been glued and then clamped using the bench vise.
Here the marker stack has been glued and then clamped using the bench vise.
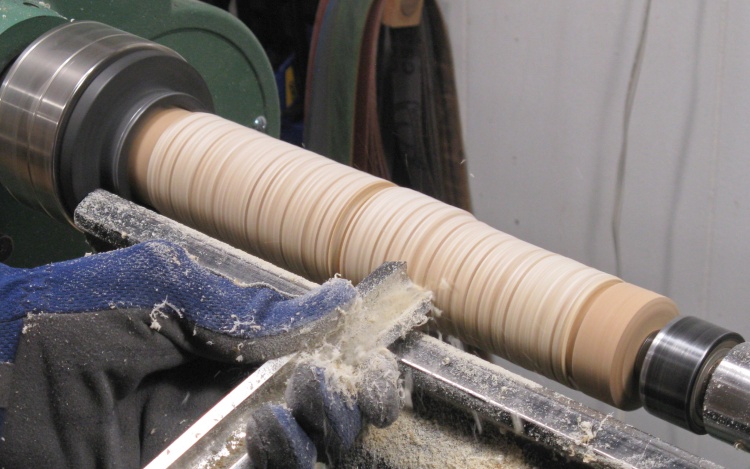
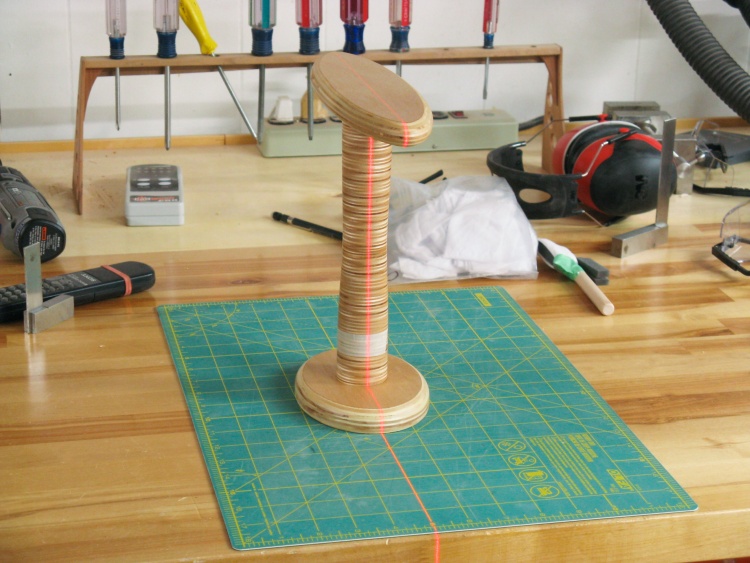
Post blank mounted on lathe
In this shot the main post has been fully assembled and mounted to the lathe. It turned out that there wasn't quite enough 1/4"-thick discs to get the length needed so I added a couple 1/8" discs in the center to make up the deficit.
To acommodate the screw threads protruding from both ends, little "adapter" pieces covering the threads were added.
It's evident from this shot that the stacks of discs weren't particularly straight but some judicious turning prior to final gluing stages ensured the two ends were concentric and parallel.
Shaping the post
Then it was just a matter of turning the post down to a reasonable diameter and profile.
I say "just" but it turned out that this is by far the most difficult piece of wood I have tried to turn. The Birch in the plywood shouldn't be particularly hard so perhaps the alternating grain direction and/or the copious amounts of glue is what made it very difficult to cut. I never got shavings but only coarse dust and needed to sharpen the gouge several times.
I say "just" but it turned out that this is by far the most difficult piece of wood I have tried to turn. The Birch in the plywood shouldn't be particularly hard so perhaps the alternating grain direction and/or the copious amounts of glue is what made it very difficult to cut. I never got shavings but only coarse dust and needed to sharpen the gouge several times.
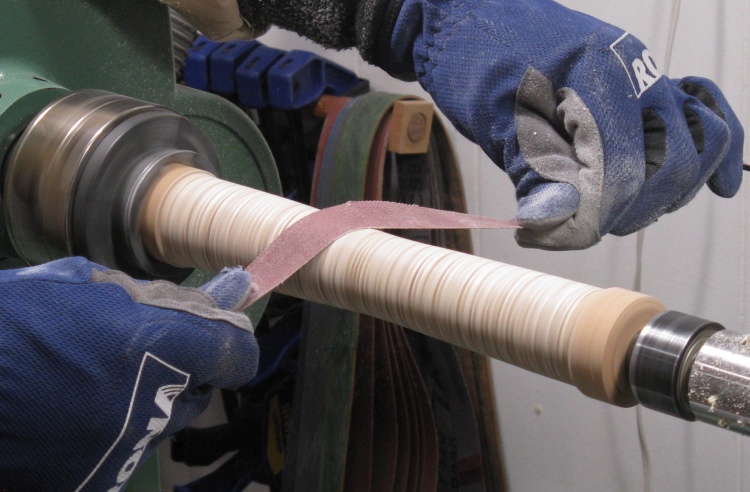
Doing some sanding on the lathe
After finally getting the shape down to something reasonable, I sanded it on the lathe as shown here, going up to 320 grit.
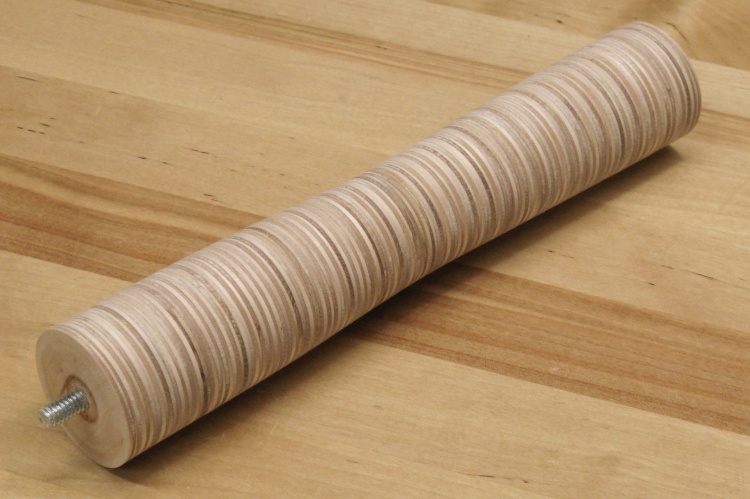
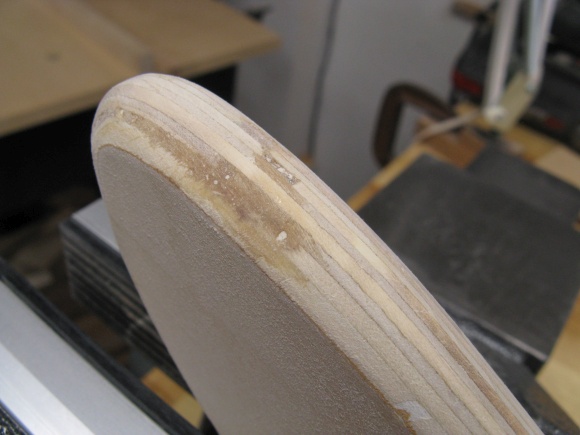
Post done
This shows the completed post.
The marker stack ready to go
Then it was the score marker's turn to be...turned. A short disc was glued to one end to provide a means to mount it.
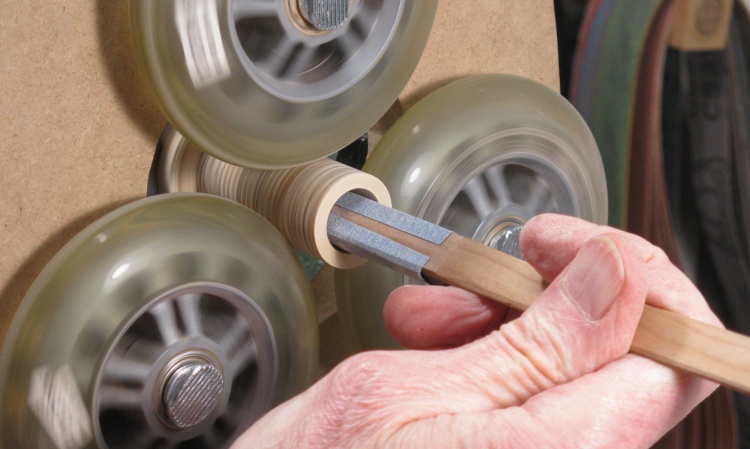
Sanding the inside of the marker
After cutting the diameter down to about an inch in the same slow process as the post, the center was drilled out to about halfway down and then sanded as seen in this shot.

Marker done
This shows the completed marker.
There's no actual function to the hole in the top of the marker; it was there in some of the commercially-made games and I added it since it makes the marker slightly less plain-looking.
There's no actual function to the hole in the top of the marker; it was there in some of the commercially-made games and I added it since it makes the marker slightly less plain-looking.
The Flat Bits
There were three flat bits needed for the game; the top, the base and the scoreboard. The top and base were made from 3/4" (technically 18mm) plywood while the scoreboard came from a 3/8"-thick version. These shots show the start of fabrication of the top.
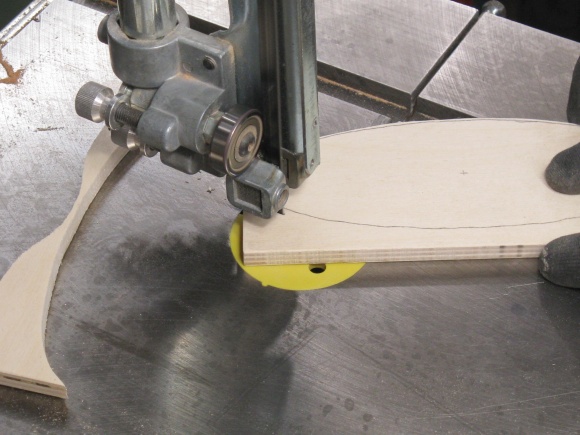
Cutting a blank for the top
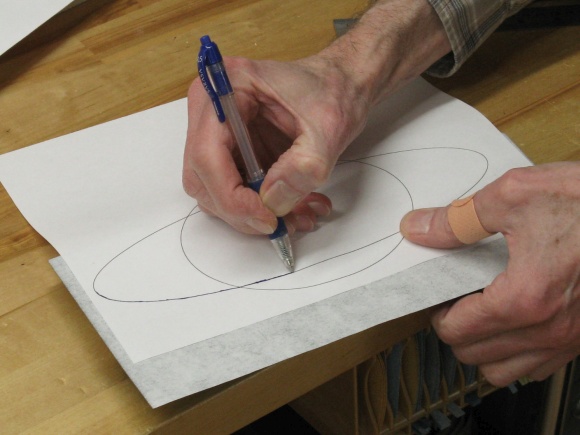
Tracing the elliptical shape onto the top
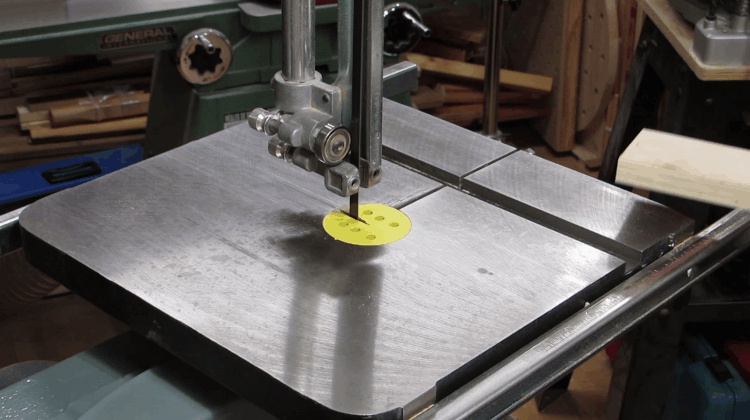
Hover (or tap) for cutting action
The top was cut out to the marked line using the bandsaw. This photo gives a 25-frame summary of the cut.
And same for the base and scoreboard (minus the cool animation).
Cutting out the base
...and the scoreboard

The three plywood bits roughly cut out
These are the three flat bits roughly cut out and needing a bit more attention.
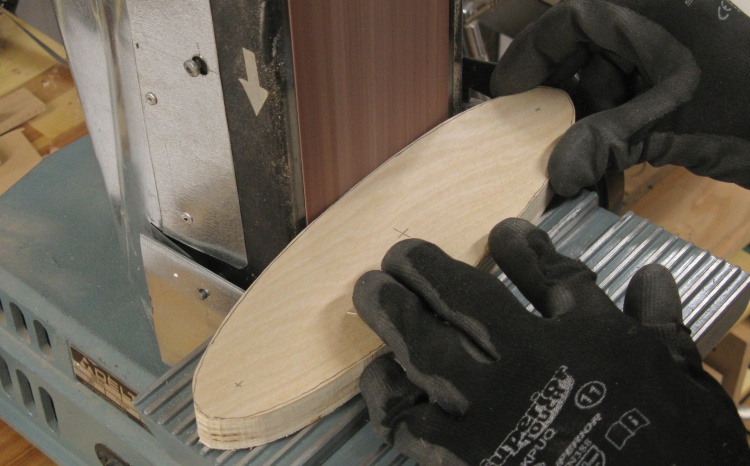
Sanding for a smoother outline
The edges were smoothed on the belt sander a bit closer to the rather wiggly line, and until the edges looked and felt like a smooth curve.
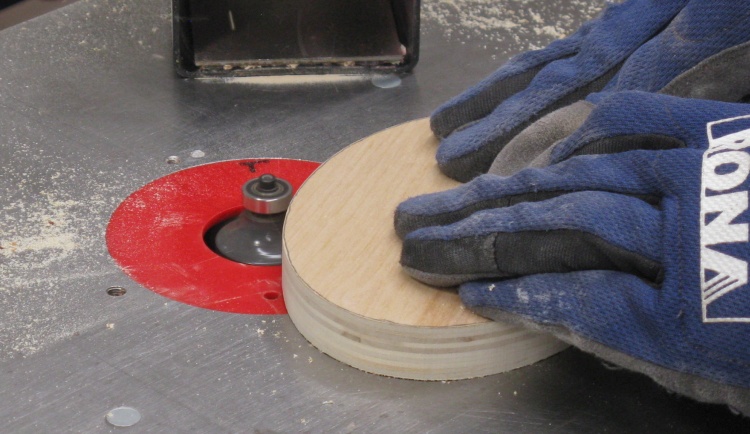
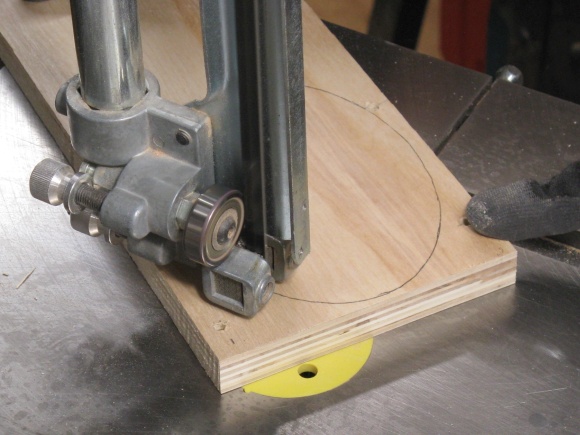
Using the router to round a corner
The edges of the flat parts were rounded on the router table. In this shot, the top edge of the base is being done.
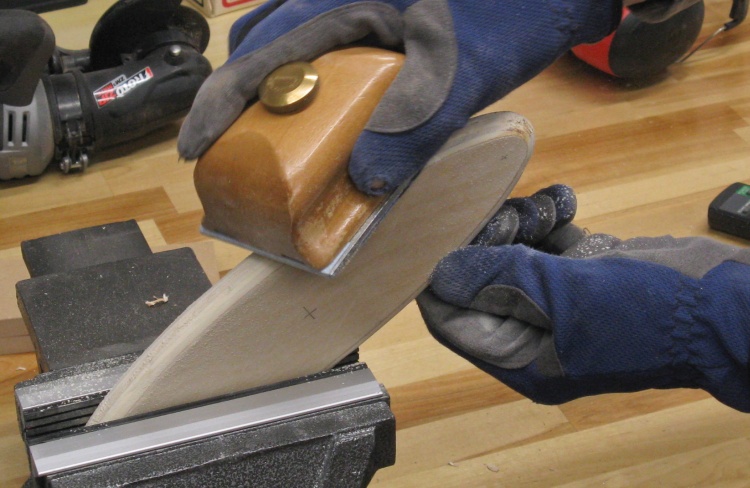
And then some post-routing sanding
The top was rounded on both edges forming a round profile. That was followed by a bit of hand sanding to smooth things out.
Unfortunately the piece chosen for the top had an unusual number of voids where plys were missing, forming long holes. I thought I'd try to fill those so they'd look less obvious. These photos show me applying some epoxy/sawdust filler and the end result after curing and sanding; still kinda ugly.
Filling the alarming number of voids in the top
Full, but still ugly
Top, version 2 (only two small voids)
Well it's not like the top was to tough to make.
So another plywood scrap was cut to length, had the ellipse traced on, got cut out with the bandsaw, sanded on the belt sander, rounded on the router and hand-sanded. The new piece fortunately turned out to have only two small voids which I dealt with by gluing in a couple thin plugs as shown here.
Once the glue was dry those plugs were sanded flush and the edges ended up looking much more respectable than the first version.
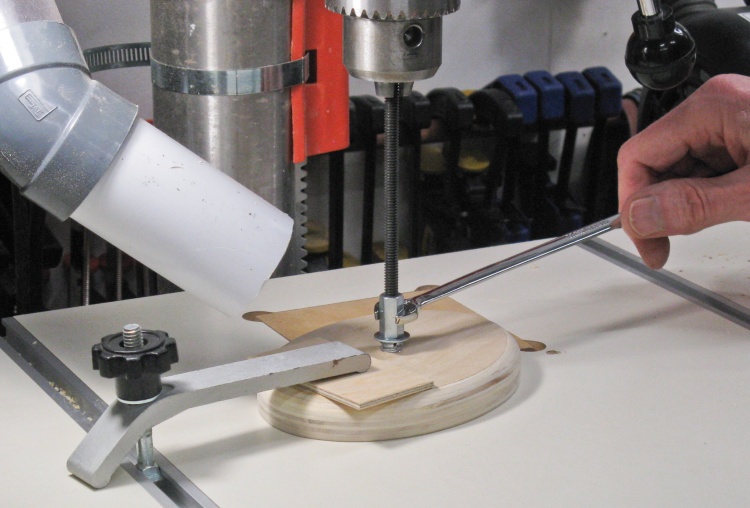
Installing the threaded insert in the base
Both the top and the base received threaded inserts to hold the post bolts.
To ensure they went in straight I used the chuck of the (not turning) drill press to hold the insert vertical via a threaded rod and included a tall nut so I could turn the insert in with a wrench.
To ensure they went in straight I used the chuck of the (not turning) drill press to hold the insert vertical via a threaded rod and included a tall nut so I could turn the insert in with a wrench.
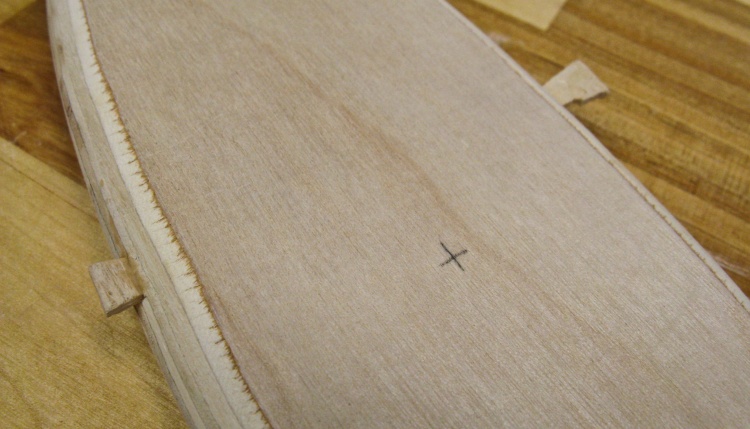
Base and the mating end of the pole
This shot shows the base with insert along side the mating end of the post.
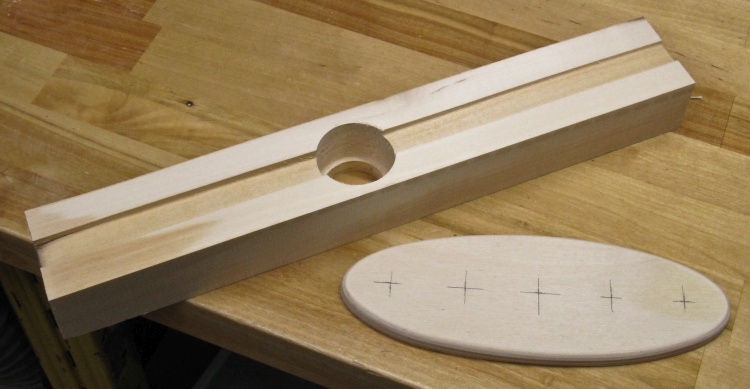
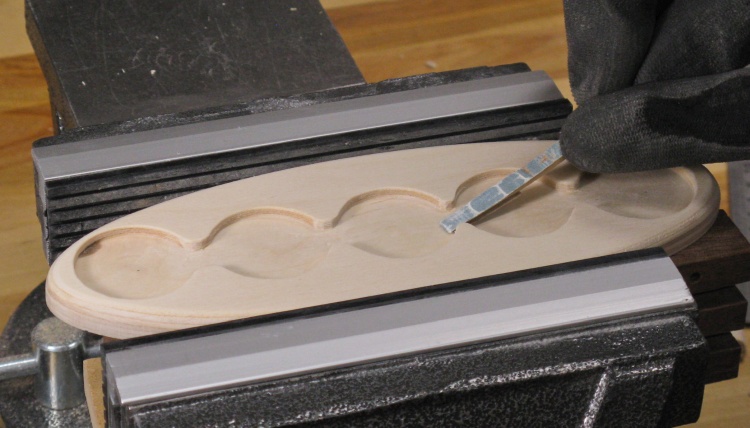
A jig to help route smooth-bottomed circles in the scoreboard
The commercial versions had the shallow holes in the scoreboard formed with some sort of drill bit with a center guide spur which left a divot in the center. That seemed rather crude so I contrived to form divot-less holes.
The plan was to use a pattern bit on the router to form the holes. That requires just the end of the bit but since it was almost 2" long I needed a jig to hold the scoreboard at the proper height. A few minutes with another scrap of wood* resulted in the long jig shown here.
*This scrap I think was support material from getting a shipment of wood for a fence.
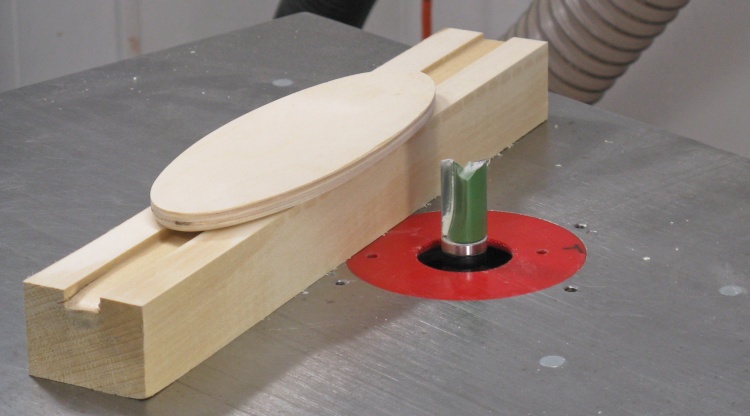
Router setup
The scoreboard was taped to the jig with one of the holes to be formed above the jig hole. That was then lowered over the router bit to route out a 1/8" depth of wood to form a flat-bottomed hole.
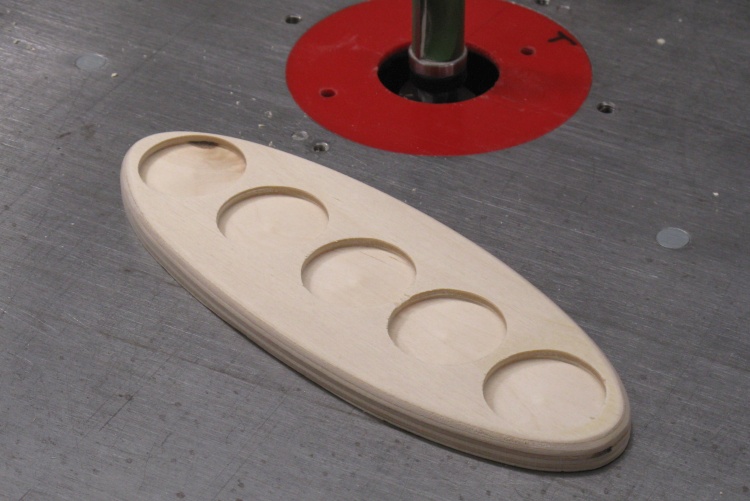
Position holes done
Five of those gave the result shown here.
A bit more work was done to join the holes
It was a bit tricky to precisely align the scoreboard over the the jig hole and an imperfection gremlin managed to sneak in. As a result a couple holes ended up a bit too close together which chipped the plywood.
One thing I get a great deal of practise at is correcting my errors. Yup - more practise. In this case I decided to connect the holes to disguise my imprecision (and give the scoreboard a slightly more interesting look to boot).
Here I've already cut out between the holes and am in the process of sanding the floor flat.
Finishing
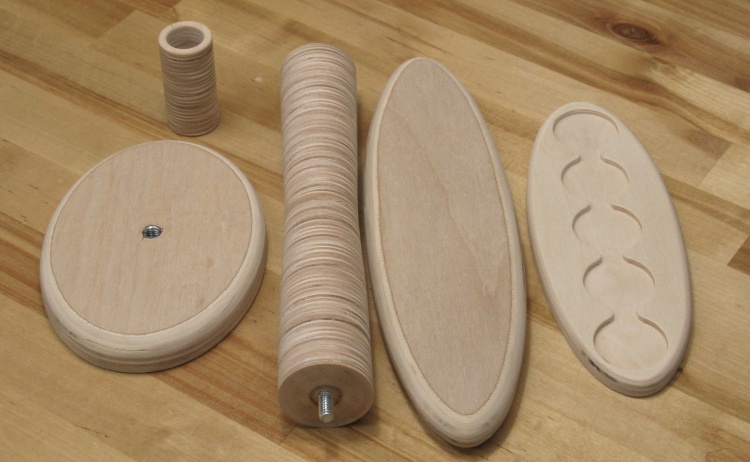
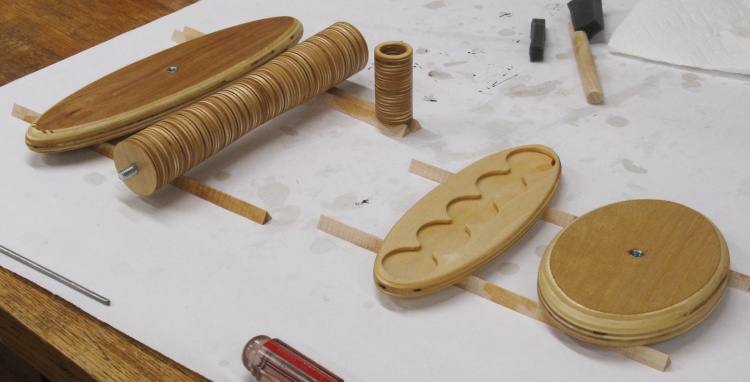
The full set of woodwork
That was it for the woodworking. This shot shows the full set of parts, ready for finishing.
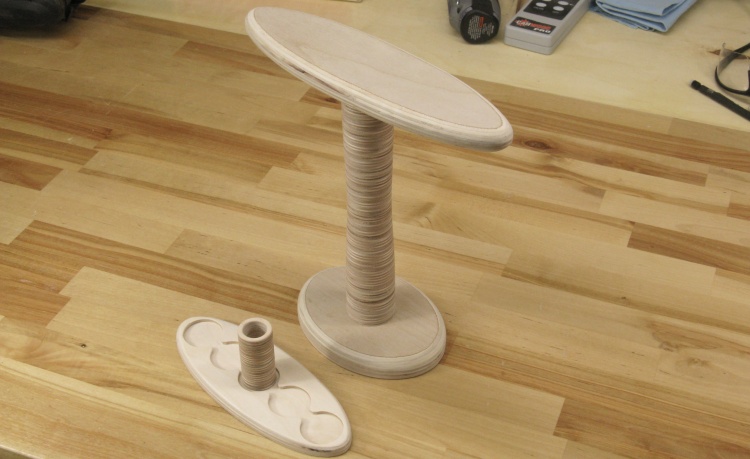
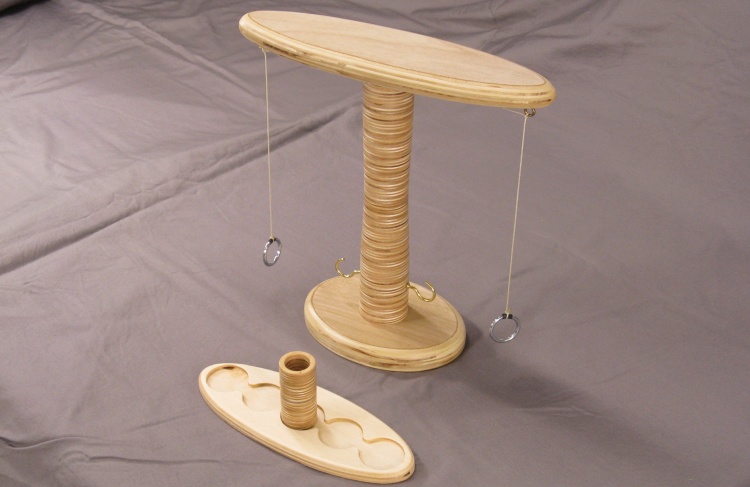
...which assembled looks like this
...and of course the assembled look.
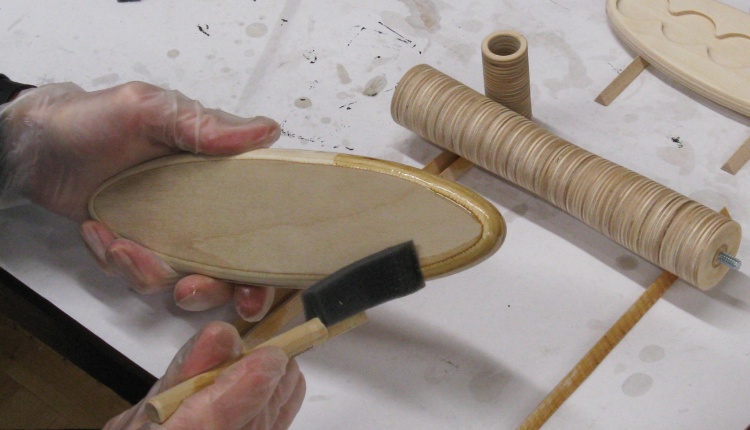
Starting on the varnishing
The pieces were coated with MiniWax Wipe-on Ployurethane. In this shot I'm applying the first coat with a foam brush.
First coat of varnish on all the pieces
The traditional First Coat of Varnish shot.
Final Assembly
Setting up to mark the hook positions
After a couple coats of varnish the game was ready to have the hardware added.
I wanted to be sure the hooks were properly centered so I did some alignment using my gridded cutting mat along with the levelling laser. Really, any opportunity to use the laser should be embraced.
In this case I marked the center of the post on the masking tape as a guide to hook positioning.
I wanted to be sure the hooks were properly centered so I did some alignment using my gridded cutting mat along with the levelling laser. Really, any opportunity to use the laser should be embraced.
In this case I marked the center of the post on the masking tape as a guide to hook positioning.

Installing a hook
After marking the two appropriate locations with centerpunch divots and drilling pilot holes, the hooks were then screwed in by hand.
Kludging a ring out of a pegboard holder
For hardware, the game required hooks, eyes and rings. Now while the first two are readily available in various sizes and materials, the rings are rather thinner on the ground. I failed to find any appropriate rings in my urban retail milieu (OK, I actually checked just at the Co-Op Home Center) so was forced to improvise.
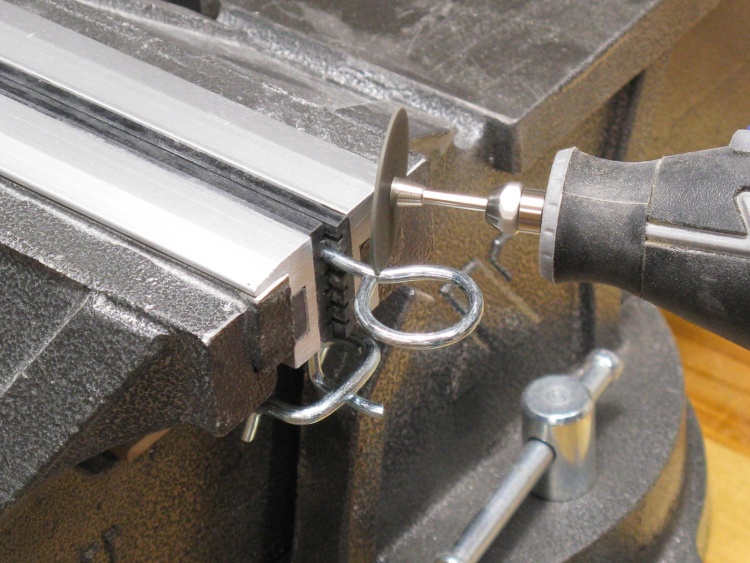
My improvisation was to use a ring from a pegboard screwdriver holder. The first step was to cut off the ring portion as shown in the photo.
My improvisation was to use a ring from a pegboard screwdriver holder. The first step was to cut off the ring portion as shown in the photo.
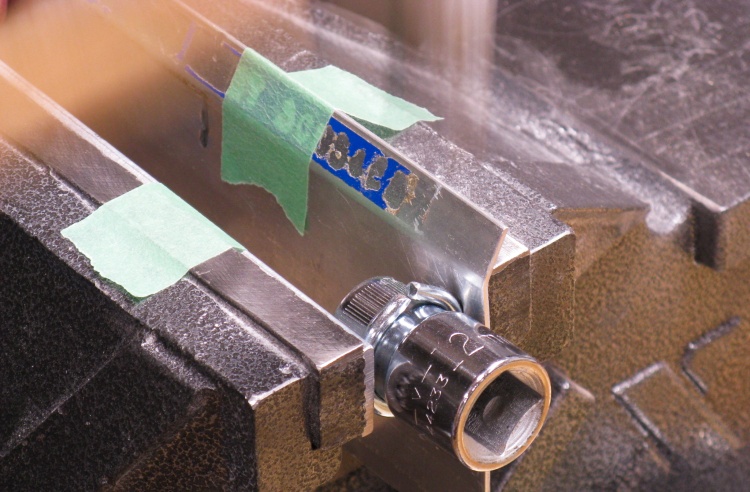
Hammering it round (note ghostly hammer at top)
The ends were not quite right so I located an appropriately-sized mandrel (AKA socket) and hammered them into conformity. The ends, unsurprisingly, were still less than perfect so I hid them with a short length of black heat-shrink tubing.
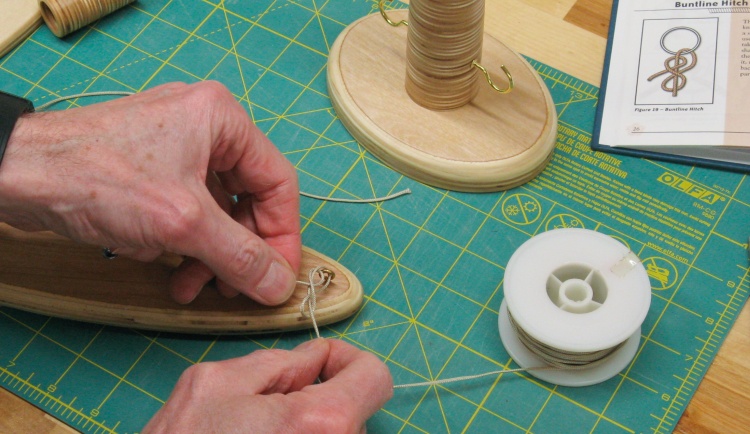
Tying to the top eye
Then it was time to string things together.
I found a suitable knot for tying to a ring (the buntline hitch of course) and followed the overs, unders and throughs to tie a light woven string to the eyes I'd screwed into the bottom side of the top.
I found a suitable knot for tying to a ring (the buntline hitch of course) and followed the overs, unders and throughs to tie a light woven string to the eyes I'd screwed into the bottom side of the top.
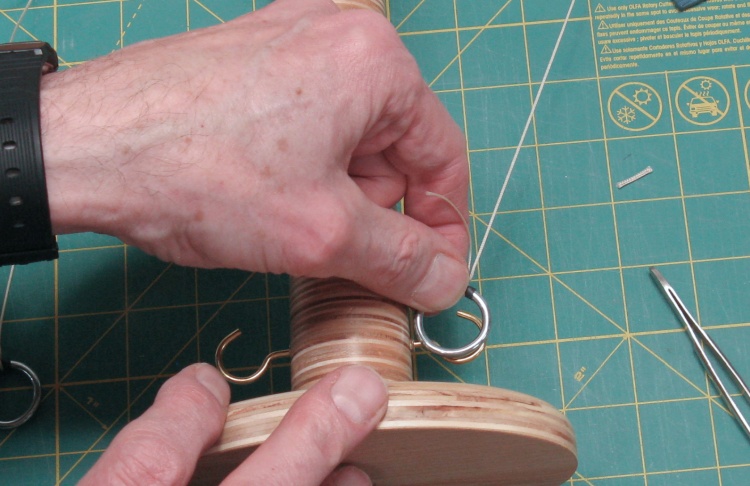
Gauging the string length
The same knot was used to tie the string to the ring at the heatshrinked joint. I made sure to have both sides of the game of equal length at the position shown in this shot (which seemed to be best for catching the hook).
The knot at the ring end was given a bit of glue to make sure it didn't shift, while the eye end was left unadulterated with an inch of extra string in case the length needed adjusting.
The knot at the ring end was given a bit of glue to make sure it didn't shift, while the eye end was left unadulterated with an inch of extra string in case the length needed adjusting.
All the hardware in place
And the game was complete.
I'm Not Done, Yet...
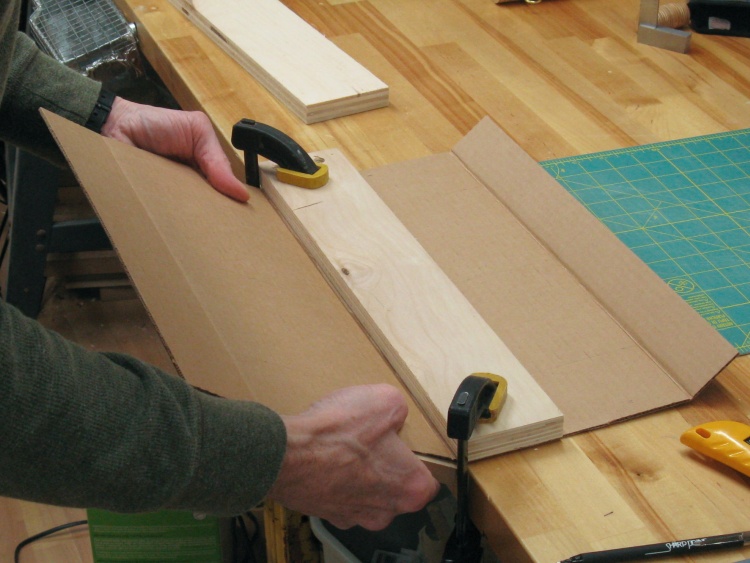
Bending cardboard for a storage box
So when you make something that comes apart for storage, that kind of implies that there is some suitable means to store it.
I decided on a cardboard box to handle the storage duties. Of course I had nothing appropriate kicking around so I made one up. This photo shows one of the bends being made in a sheet of cardboard.
I decided on a cardboard box to handle the storage duties. Of course I had nothing appropriate kicking around so I made one up. This photo shows one of the bends being made in a sheet of cardboard.

Trimming up some side walls
I'd found some nice white cardboard to use for the box but it wasn't quite the right shape to let me make the box from one big foldy piece. Fortunately there was enough real estate to make separate box sides that could be glued into place.
This photo shows one of the sides being trimmed into shape.
This photo shows one of the sides being trimmed into shape.
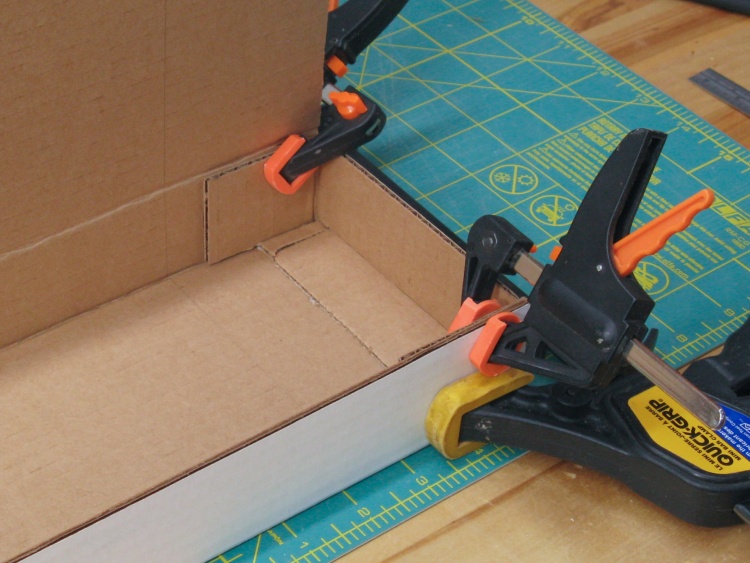
Gluing in a side wall
One of the separate side walls gets glued into the box.
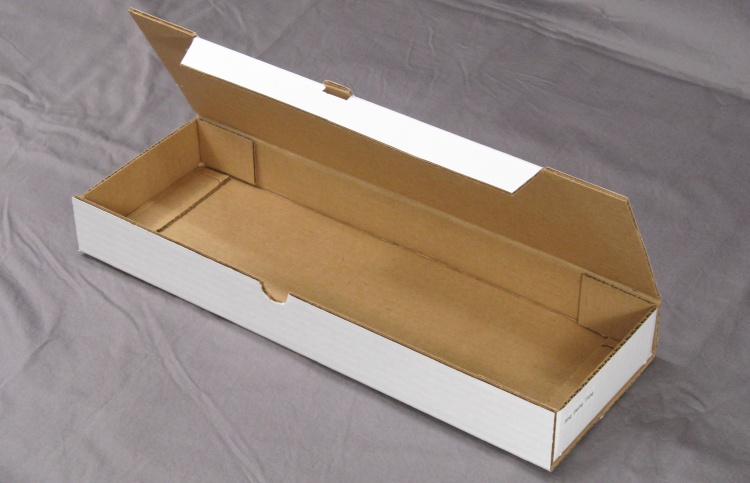
The completed box
A bit more gluing, a bit more trimming and the box is complete.

Game packed in box
The pieces forming the game are irregularly shaped so they don't exactly pack nicely into the box. However there is enough room for everything if you don't mind a bit of rattle when the box is closed.
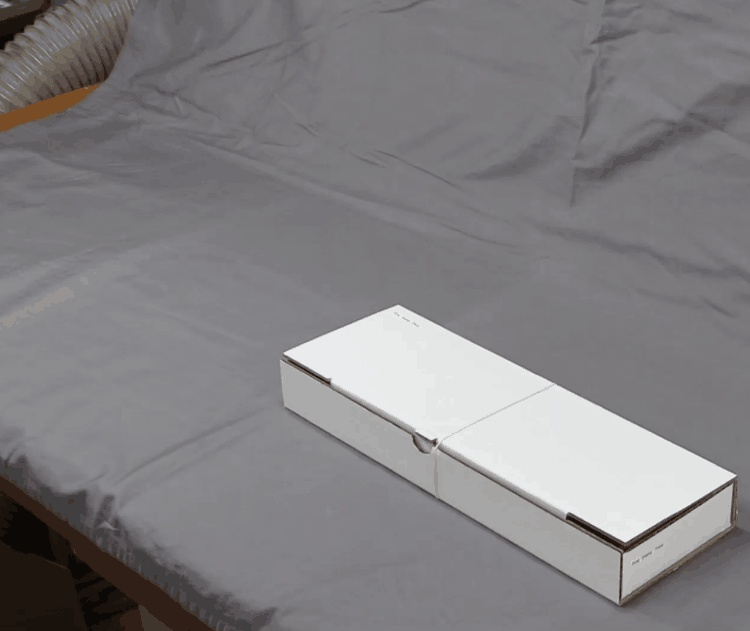
Hover (or tap) for rapid assembly
Here it's ready for storage in the unlikely event that anyone ever got tired of playing the game.
Hover or tap for detailed assembly instructions.
Hover or tap for detailed assembly instructions.


