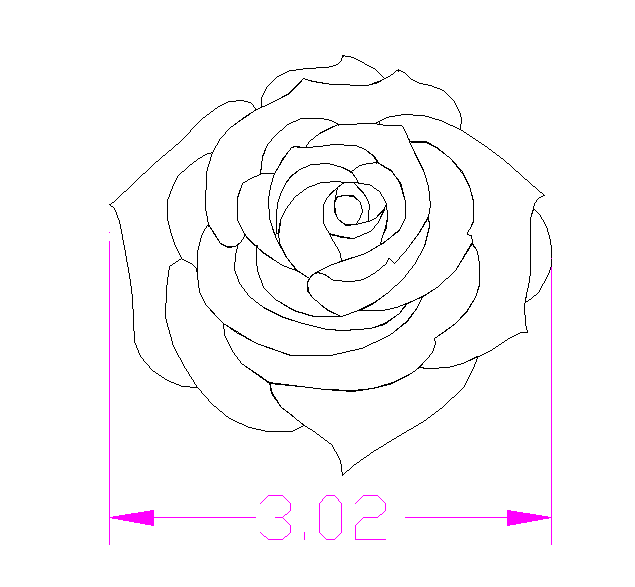
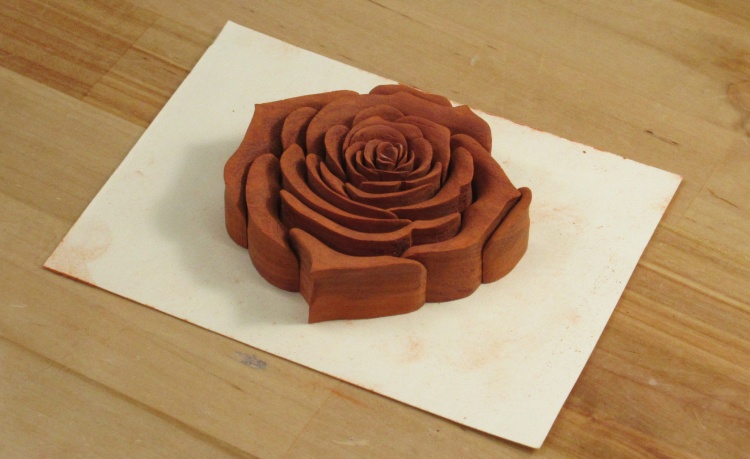
My scroll saw was still sitting out from my last project and I didn't want to have to find a place to stash it since there isn't really room in my workshop. So I thought I'd better just use it for a while longer. I had come across this rose design by virtue of having a video about it pop up as a YouTube suggestion (Acutabove Woodworking). I liked its nice 3-D aspect so it seemed like a fine candidate for storage procrastination. As mentioned on the main page, I didn't really have a specific application for the rose and neither myself nor Sue came up with anything we particularly liked but I thought it would be interesting to make anyway.
I checked for suitable rose drawings on-line but didn't see anything better than the one that had been found by the maker of the video so I thought I'd use that one as well.
I checked for suitable rose drawings on-line but didn't see anything better than the one that had been found by the maker of the video so I thought I'd use that one as well.
Cut along these lines
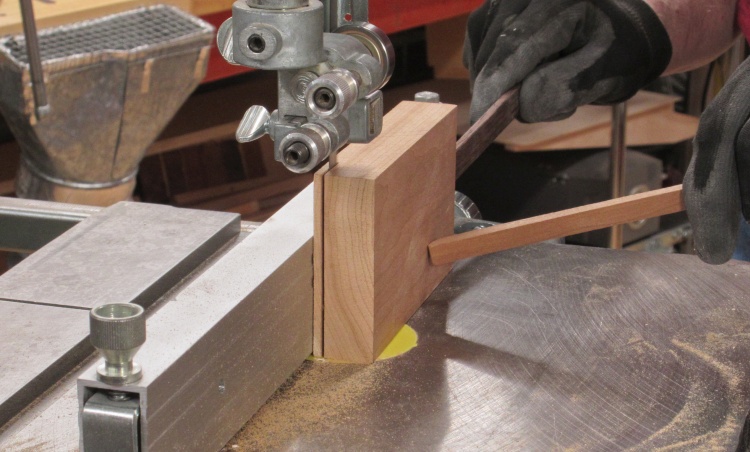
Thinning some Cherry
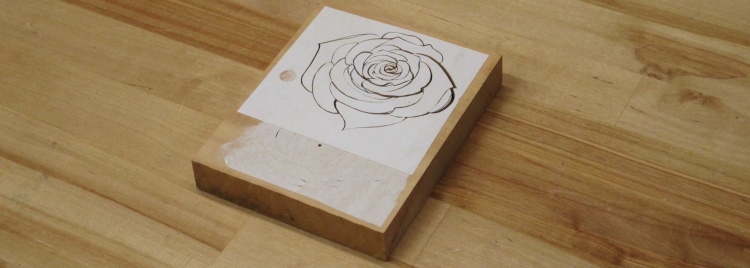
I started with a suitably-sized piece of Cherry that was about an inch thick. The plan was to add a thin base after the rose was done, so I cut off about 1/8" for that purpose. Using the cut-off piece would ensure a matching grain and make the separate base piece less obvious.
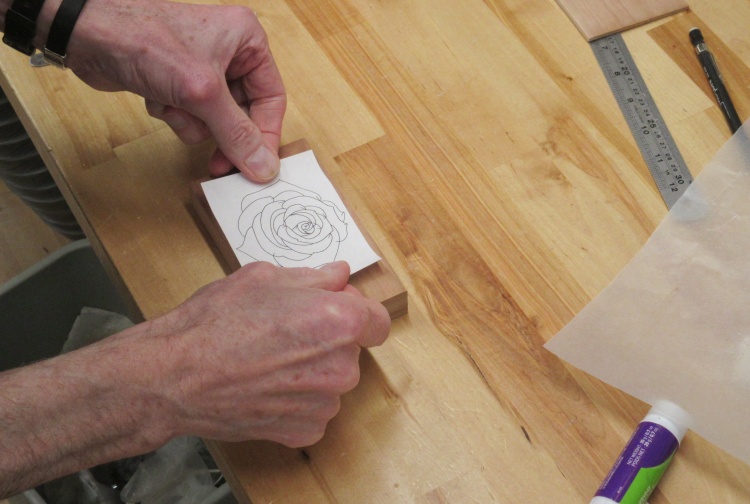
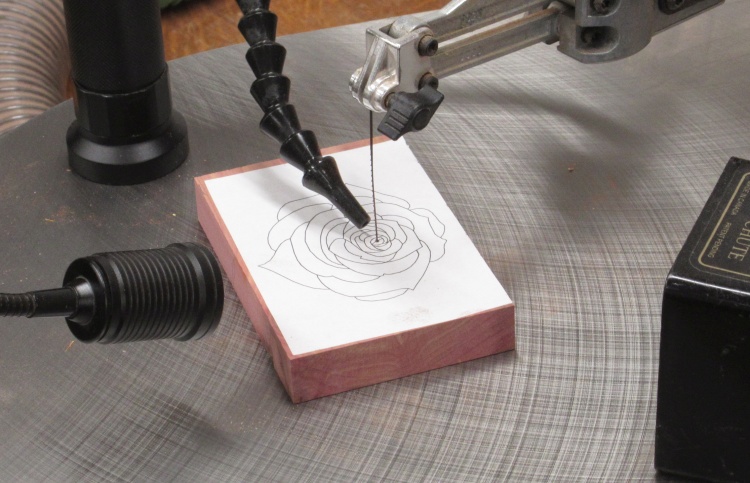
Sticking on a paper pattern
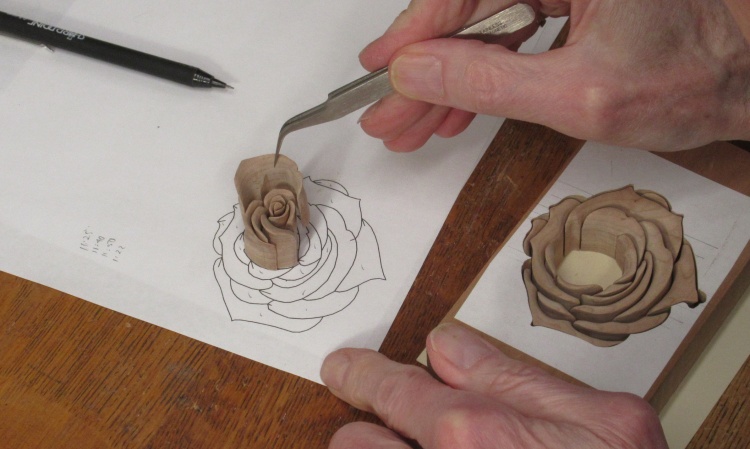
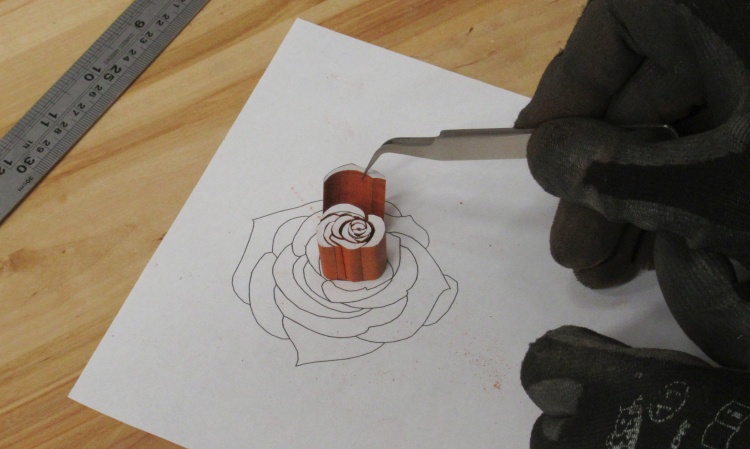
I printed out a full-sized pattern and just stuck it to the wood using a glue stick.
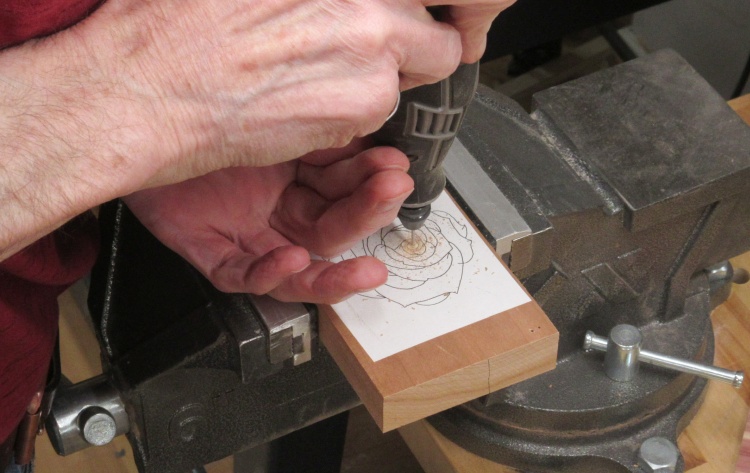
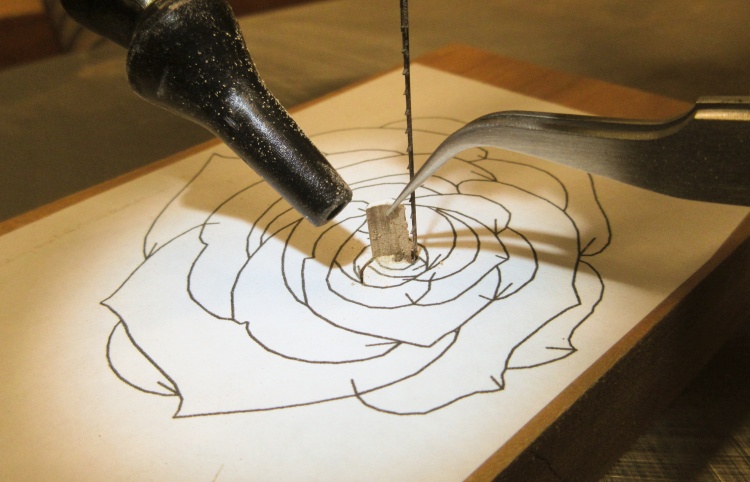
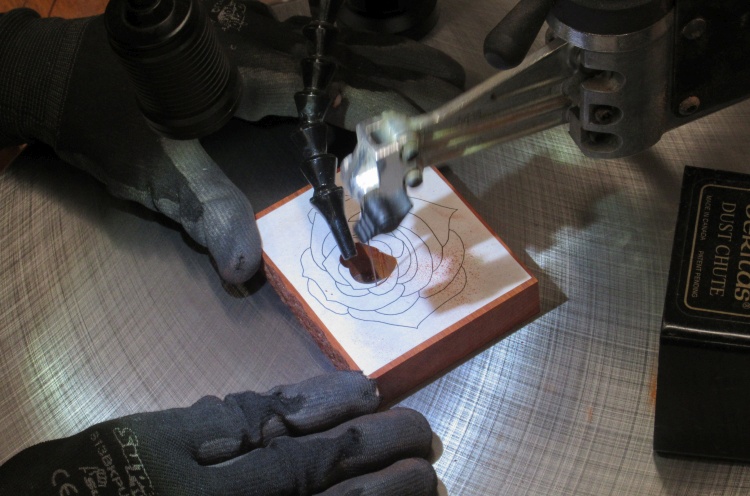
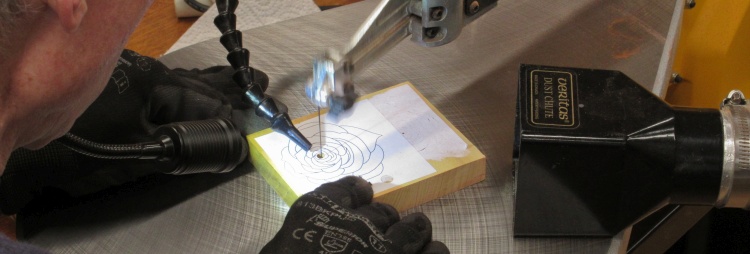
Drilling the starting hole
The rose would be cut out starting at the center, so a hole was needed to stick the blade through. The #5 blade I planned to use needed a hole of around 0.05" (yes, it is a small blade) so I drilled one smack dab in the middle of the blossom using the Dremel.
The first little piece cut out
I started at the center and cut out pieces one by one.
This shows me removing the first (and consequently smallest) piece of the rose.
This shows me removing the first (and consequently smallest) piece of the rose.
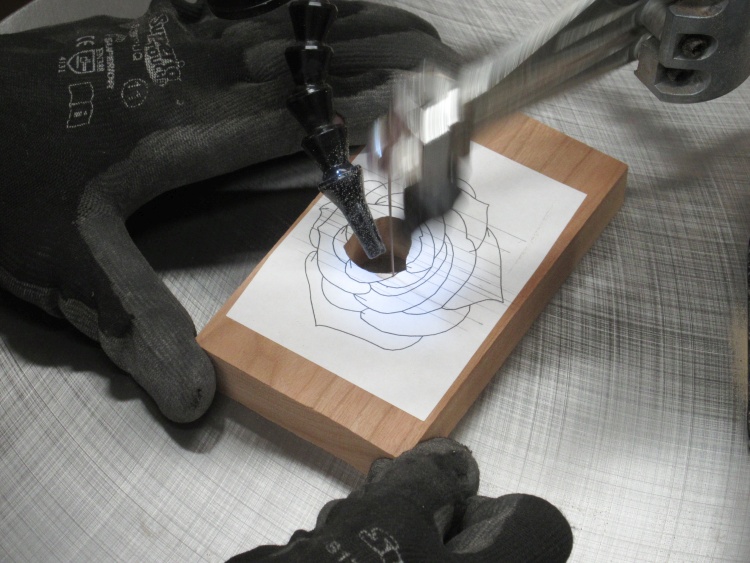
Working my way outside
I carried on cutting out and removing pieces and by the time of this shot I've done the first half-dozen or so.
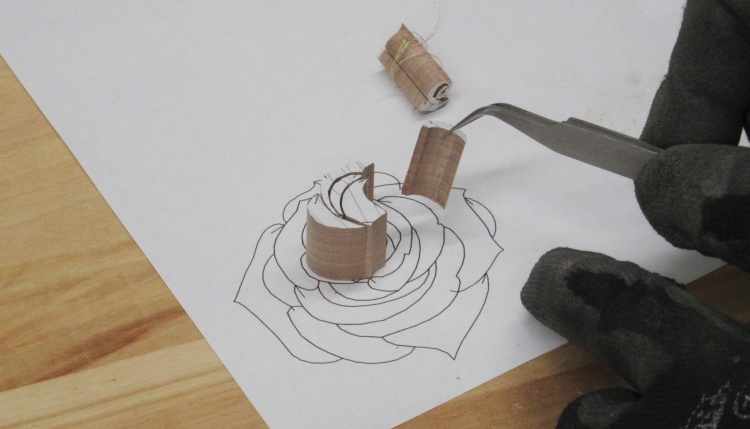
Storing the cut pieces on a plan
The pieces were set onto another pattern sheet to keep track of them.
That separate bundle is a group of the smallest center pieces wired together since they didn't stand well on their own.
That separate bundle is a group of the smallest center pieces wired together since they didn't stand well on their own.
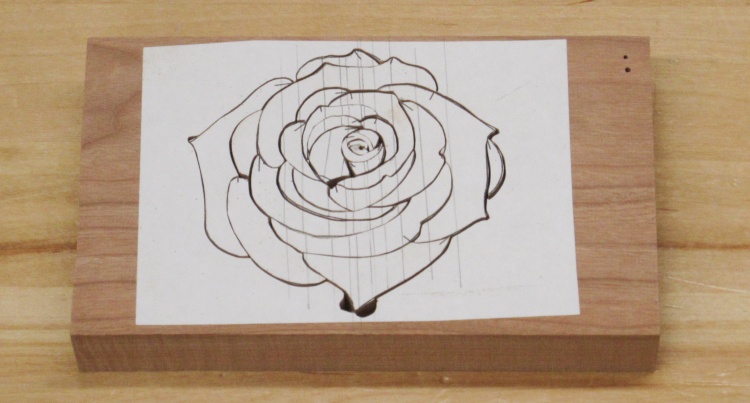
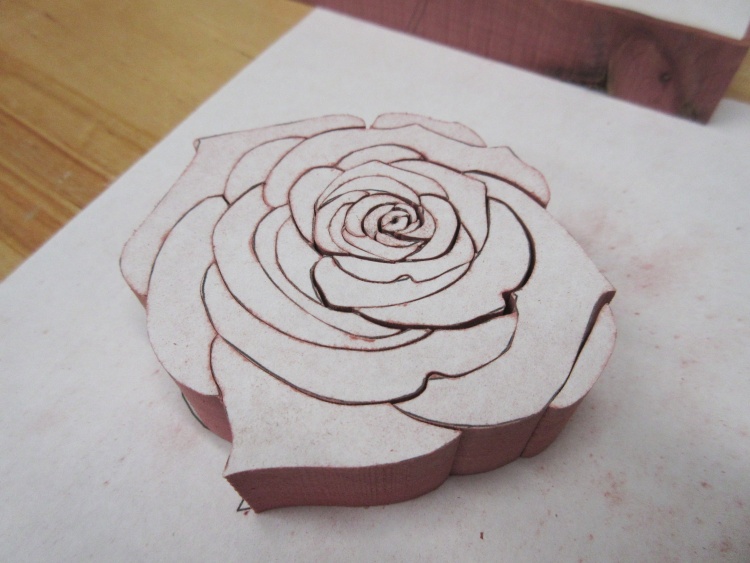
All cut out and held by the original block
With all 26 pieces cut out, they were relocated to the original blank to keep everything together.
The pencil lines had been added to aid in post-cutting realignment but they turned out to not really be needed.
The pencil lines had been added to aid in post-cutting realignment but they turned out to not really be needed.
Starting to round off the pieces
Then it was time to add the contour to the rose petals. That mostly meant rounded corners, a curved inner surface and a slightly hollowed outer surface. Any remnants of the pattern paper were also sanded off.
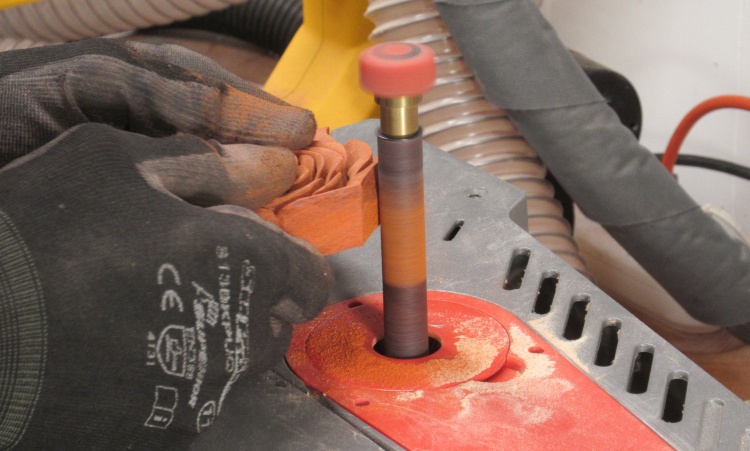
My most-ancient Dremel with a sanding drum was used for most of the shaping.
My most-ancient Dremel with a sanding drum was used for most of the shaping.
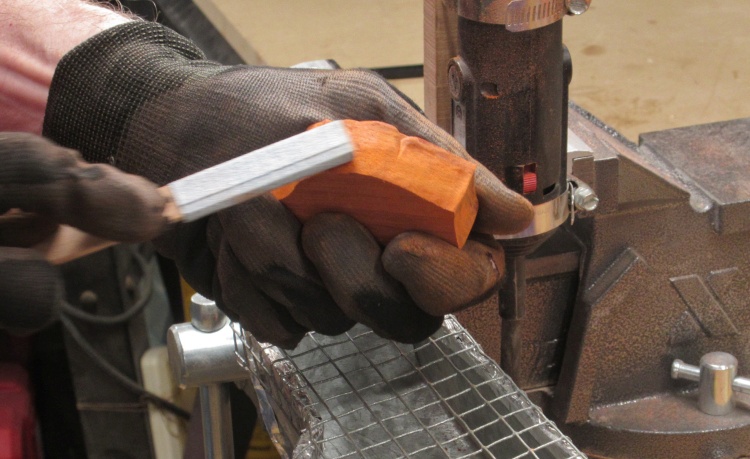
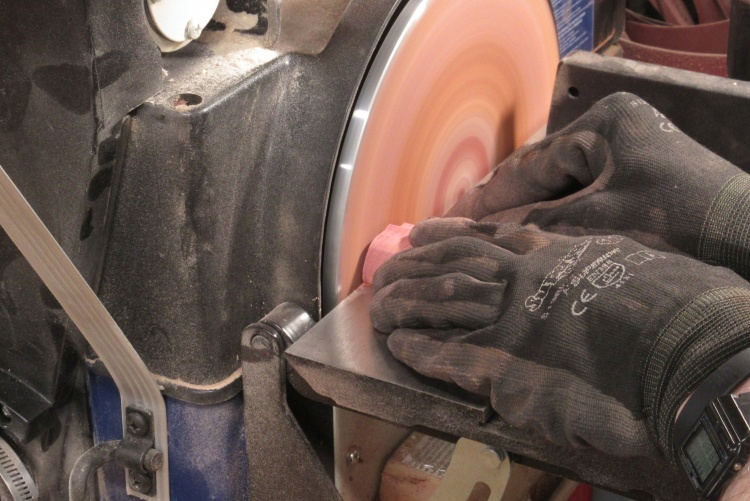
Smoothing out the curves
The curves were smoothed using 120-grit sandpaper strips, followed by 220-grit strips.
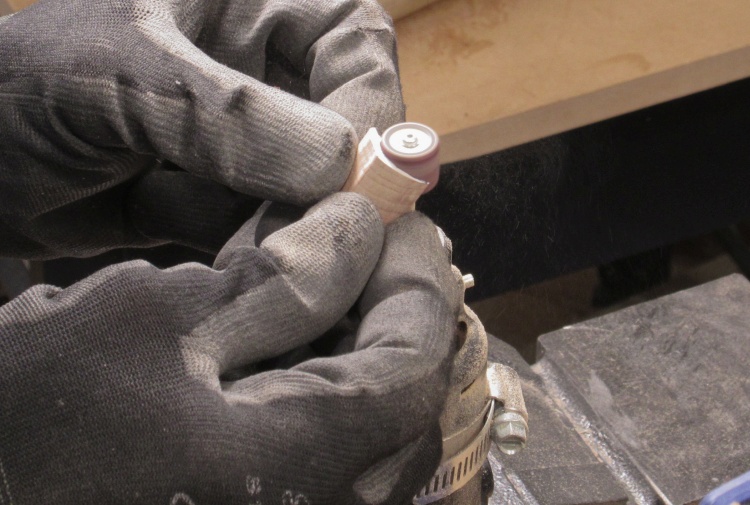
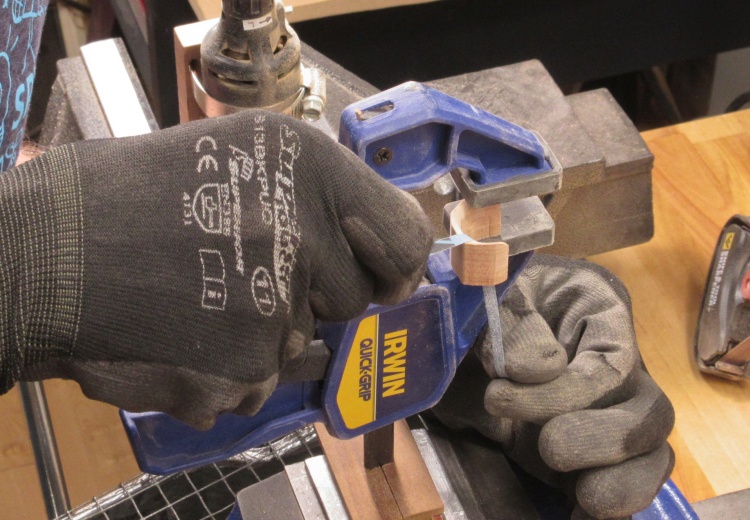
I used this clamp setup to bring the work to a convenient height. It was right beside the Dremel as they shared a common dust collector duct.
I used this clamp setup to bring the work to a convenient height. It was right beside the Dremel as they shared a common dust collector duct.
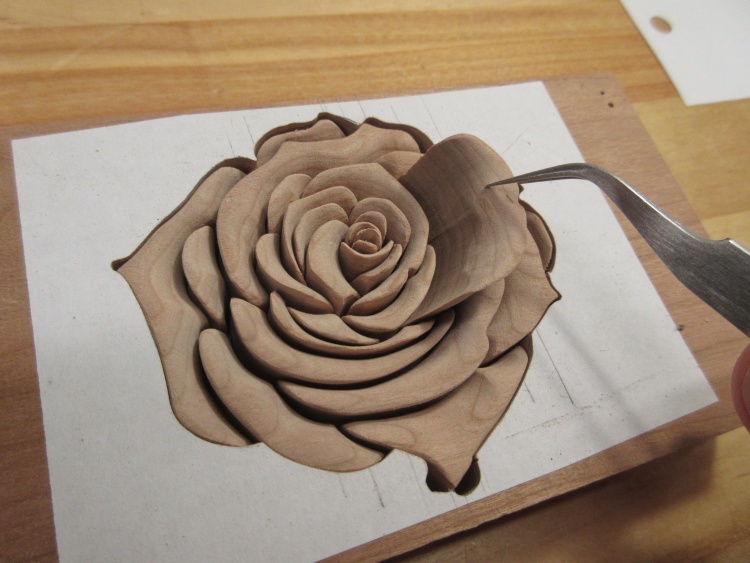
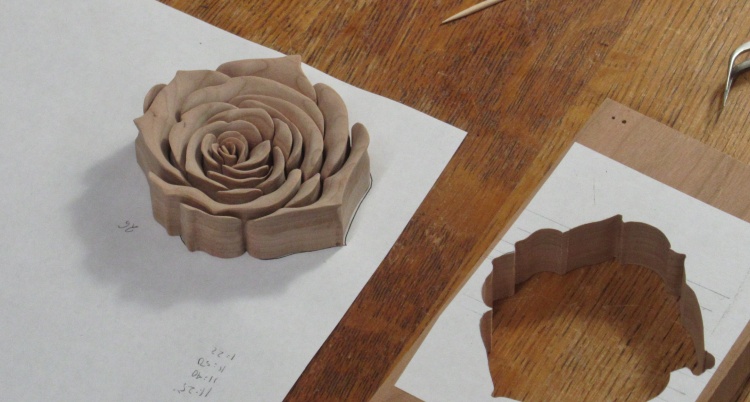
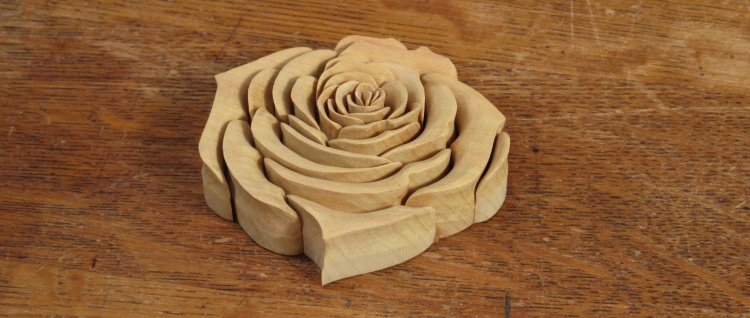
Pretty much done the shaping
This shot shows the first pass of the shaping. I did a bit more refinement before calling it done.
The pieces didn't fit back together perfectly due to the narrow slots cut out by the blade. The blade kerf was only about 0.018" but some of the petal geometry prevented just moving everything closer. That resulted in a couple gaps but they're not obvious in the finished rose.
The pieces didn't fit back together perfectly due to the narrow slots cut out by the blade. The blade kerf was only about 0.018" but some of the petal geometry prevented just moving everything closer. That resulted in a couple gaps but they're not obvious in the finished rose.
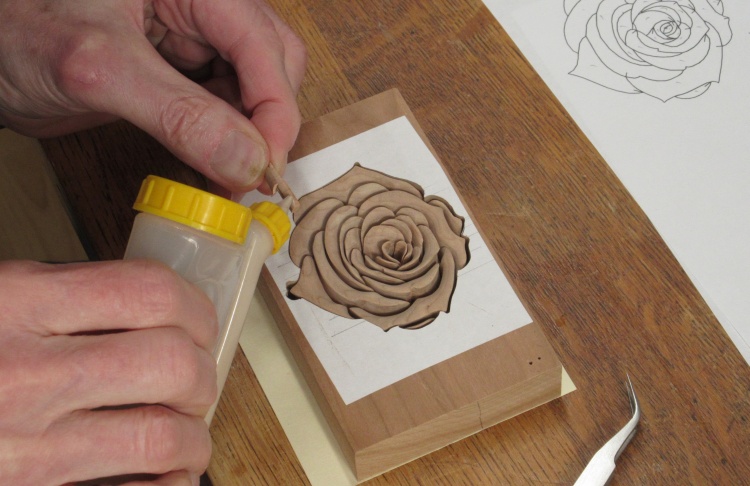
Starting to glue pieces together from the inside out
Just like the cutting procedure, the gluing was approached a piece at a time from the center.
In this photo I'm adding glue to one of the middle-most pieces.
In this photo I'm adding glue to one of the middle-most pieces.
Adding another piece to the glued ones on the pattern
The rose was built up with glued-on petals from the center outward, again done on a pattern to guide placement of the pieces.
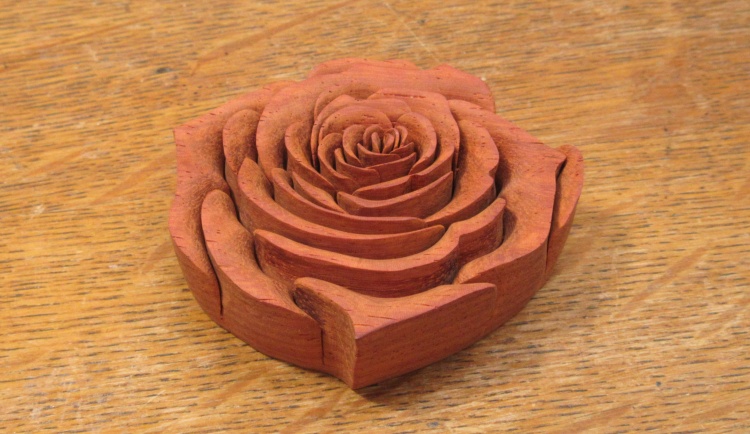
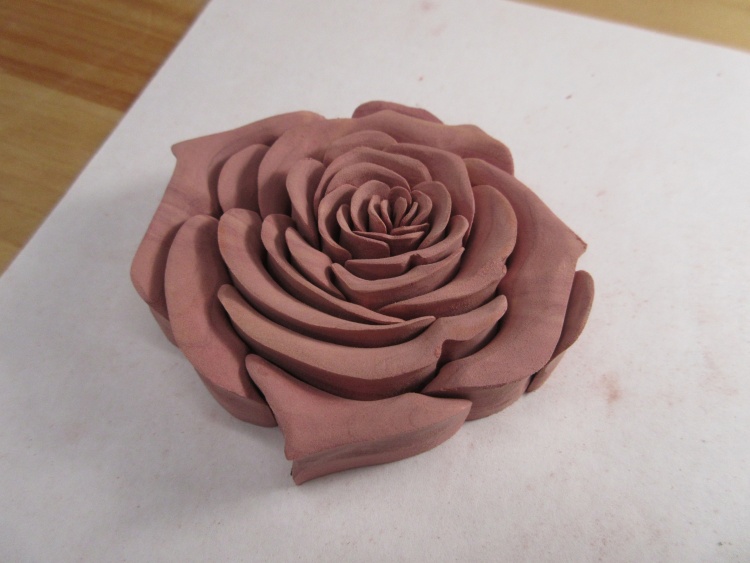
All the pieces glued
All glued.
Cutting out the base piece
Then back to the thin slab that was cut off the blank way back at the beginning:
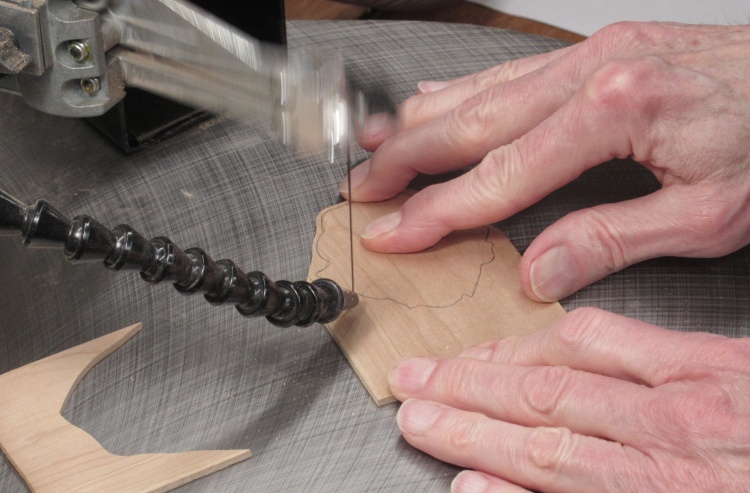
The rose shape was marked on the wood and it was cut out larger to make alignment easier.
The rose shape was marked on the wood and it was cut out larger to make alignment easier.
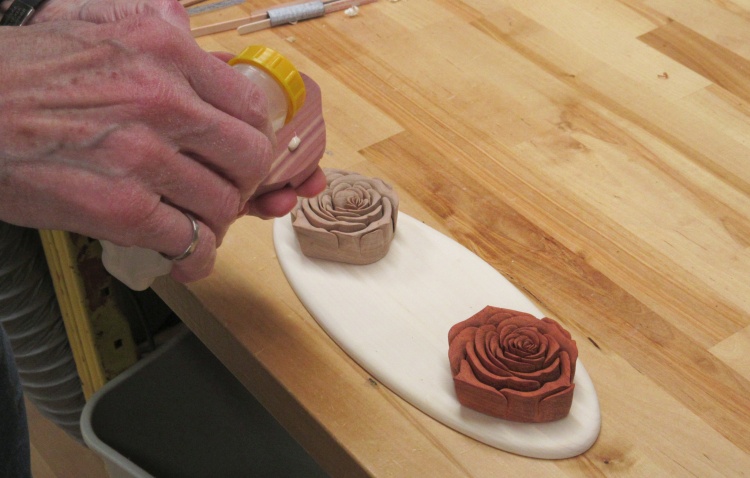
Gluing on the base
The rose (after sanding off the paper bits stuck to the bottom from the gluing process) was then glued to the base.
That thicker piece of wood on the bottom is just there to keep things flat.
That thicker piece of wood on the bottom is just there to keep things flat.

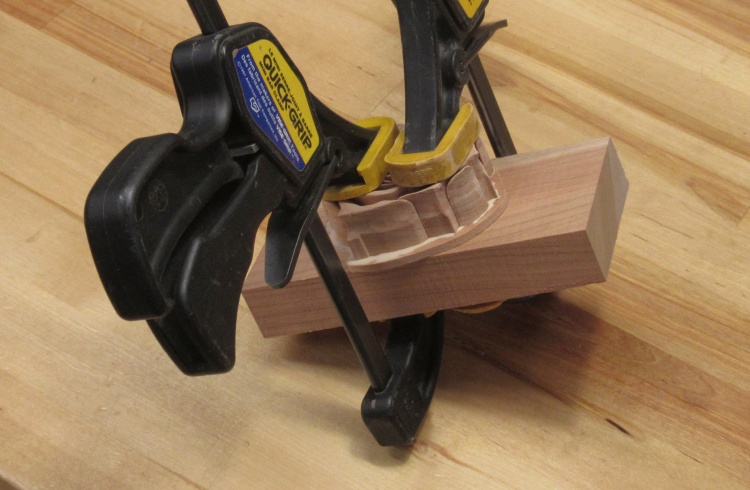
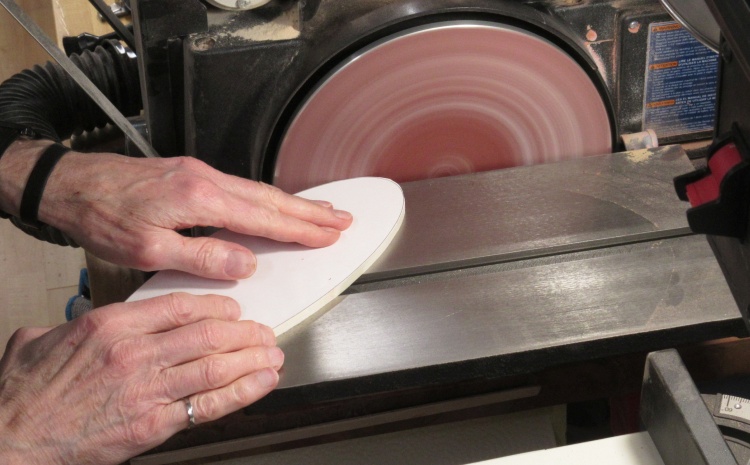
Some outside shaping
Once the glue was dry, the rose got some outside shaping to smooth off the bottom and give the sides a bit of a taper.
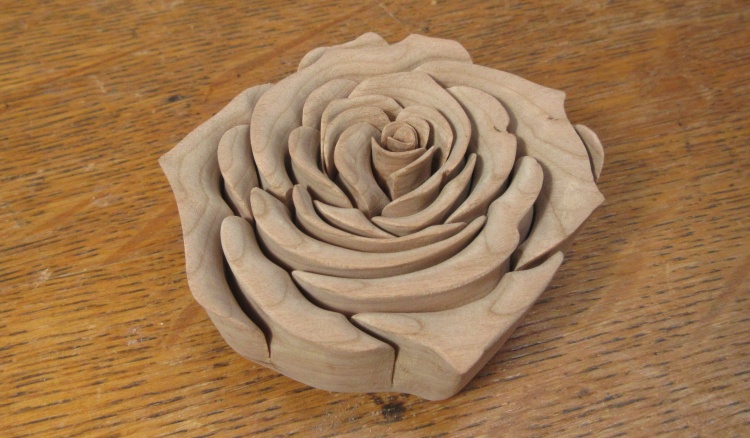
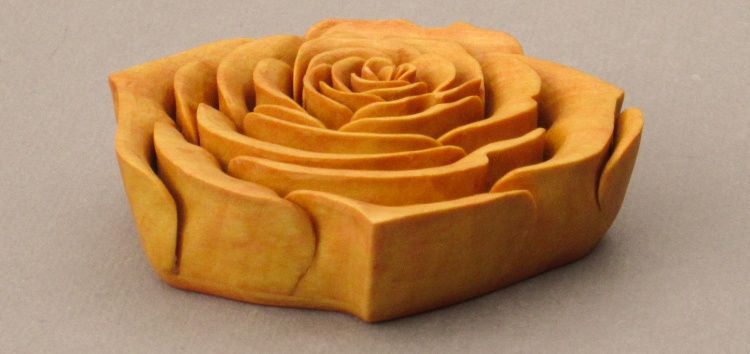
Woodworking done
And that was it for the rose.
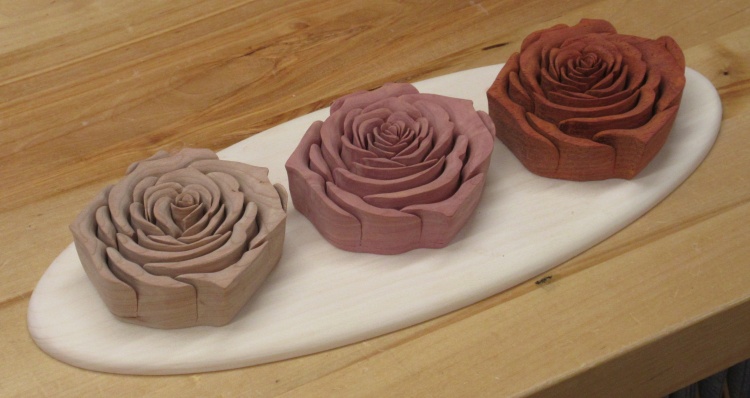
Another couple of blanks - Padauk and Aromatic Cedar
I still didn't have a particular application in mind for the rose but it was satisfying to make so I thought I might do a couple more.
For the new ones I selected wood that was a bit closer to rose color (well, red rose anyway).
For the new ones I selected wood that was a bit closer to rose color (well, red rose anyway).
Padauk rose in progress
I started on the Padauk rose first. In this shot I've already cut out the first half-dozen or so pieces.
Unfortunately the first tiny piece that was cut out got sucked up by the dust collection system. I immediately turned it off and went to check the half-full collection bin
Unfortunately the first tiny piece that was cut out got sucked up by the dust collection system. I immediately turned it off and went to check the half-full collection bin
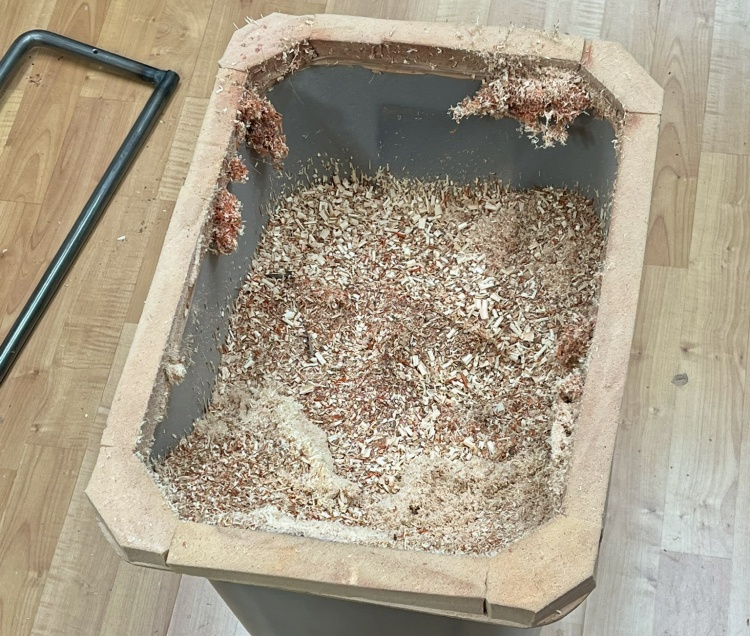
Ummm...don't see it?
I carefully removed the dust collector bin to avoid disturbing the lay of the dust. Upon inspection I failed to spot the piece so I hoped that it was still stuck somewhere in the system.
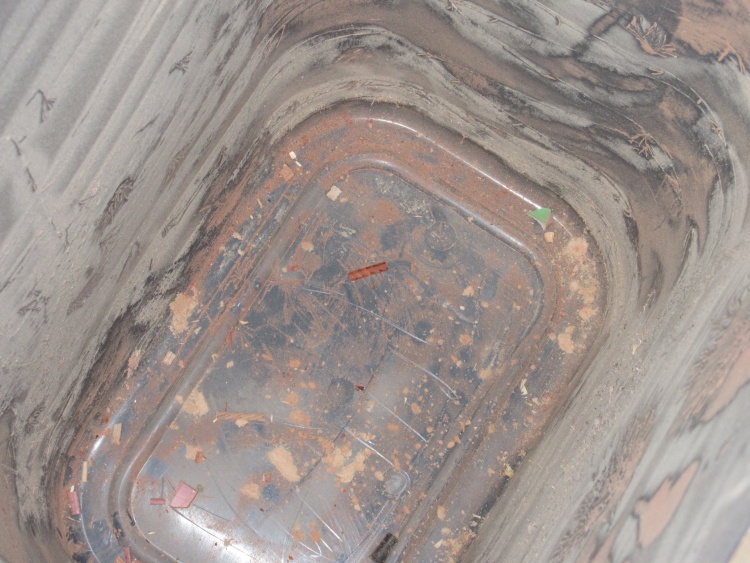
Itsy-bitsy piece recovered from dust collector
I emptied and cleaned out the bin, reinstalled it and then tried to get any hung-up pieces through; the system was turned on again and I opened other ports and banged things around a bit.
Fortunately when I rechecked, my little reddish-coloured piece had shown up - in the middle of the shot here. I took some measures to prevent a repeat of the situation and carried on with the cutting.
Fortunately when I rechecked, my little reddish-coloured piece had shown up - in the middle of the shot here. I took some measures to prevent a repeat of the situation and carried on with the cutting.
Stacking cut pieces
As before, the cut pieces were stacked in place on another plan as they came off the saw.
Ergonomics Corner
Crude seat raiser
Better-height seat raiser
A neater seat-raising solution
Crude seat raiser
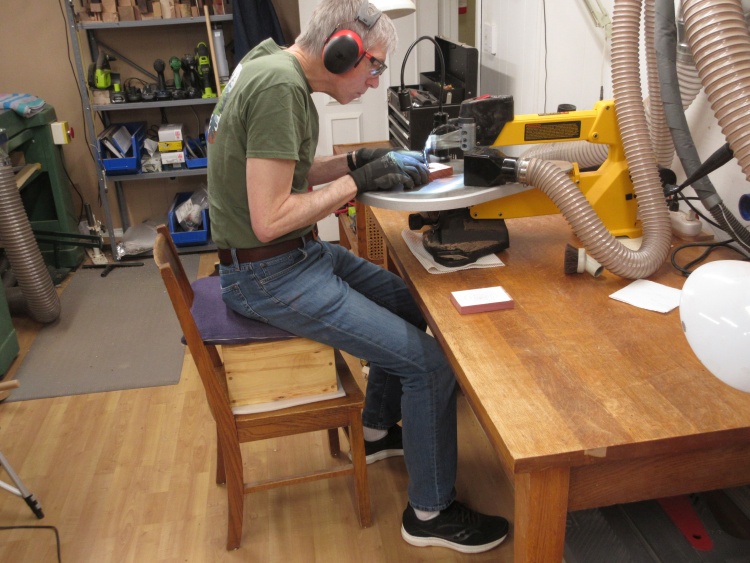
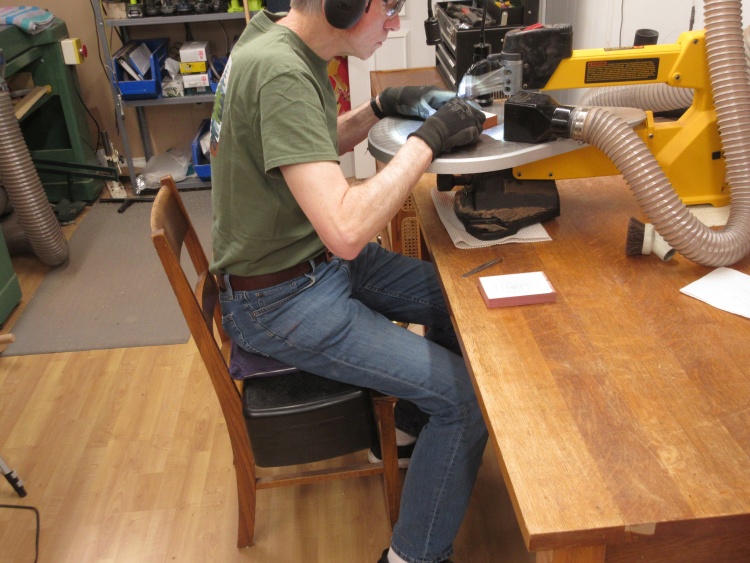
The scroll saw sat on my old oak table but that put the work surface up pretty high. Sitting on my equally old oak chair with my arms up high enough to hold the wood for cutting, my arms started tingling due to blood loss after several minutes of work.
As seen in this shot, the first thing I tried (more due to proximity than appropriateness) was a step that raised the seating surface...too far.
Various layers of padding were used to save the chair's, and my, seat from damage.
As seen in this shot, the first thing I tried (more due to proximity than appropriateness) was a step that raised the seating surface...too far.
Various layers of padding were used to save the chair's, and my, seat from damage.
Better-height seat raiser
Also not far away was an exercise step with a more modest rise. This one was actually pretty good for height, although balancing a thin-walled, too-wide plastic step on the chair wasn't particularly conducive to a relaxed work environment.
A neater seat-raising solution
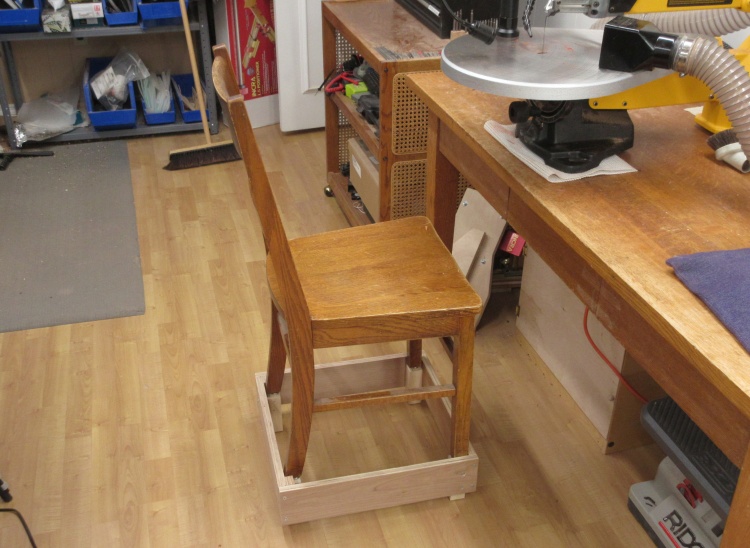
I thought I should make a more-customized chair lift. Rather than try to replicate the more-critical seating surface, I opted to just raise the whole chair. This scrap-plywood 'n maple assembly is the result.
The chair just sits inside the lift with the walls preventing feet misalignment and subsequent catastrophic toppling. The lift can be stored away with the saw when I eventually mount it onto its dedicated metal stand.
The chair just sits inside the lift with the walls preventing feet misalignment and subsequent catastrophic toppling. The lift can be stored away with the saw when I eventually mount it onto its dedicated metal stand.
Padauk pieces ready for gluing
Where were we? Ah yes - the Padauk rose.
Here it is with the pieces cut out and shaped, ready for gluing.
Here it is with the pieces cut out and shaped, ready for gluing.
Shaping Padauk outsides
Following the same procedure as the Cherry version, the pieces were glued, a thin base was added and the sides were tapered - with the latter process happening here on the spindle sander.
Some hand sanding
It is the rare project that can be completed without hand sanding, and this wasn't one of them.
The Padauk sanding generated unusual bright-orange sawdust.
The Padauk sanding generated unusual bright-orange sawdust.
Padauk rose done
That's the Padauk rose completed.
Aromatic Cedar ready for cutting
Last up was the Aromatic Cedar rose.
In this shot the sawing is about to begin.
In this shot the sawing is about to begin.
Cedar all cut up and reassembled
And in this shot the sawing is all done.
Tweaking petal heights
The roses are nominally similar but the exact design of the petals was tweaked slightly differently in each rose for better look or fit, although the differences are pretty subtle.
In addition, the last two roses were given a bit more "texture" by shortening the petals near the periphery.
For the latter change, I used the disc sander to reduce the petal height by as much as 1/10" prior to the shaping stage.
In addition, the last two roses were given a bit more "texture" by shortening the petals near the periphery.
For the latter change, I used the disc sander to reduce the petal height by as much as 1/10" prior to the shaping stage.
Cedar rose done
This shows the completed Cedar rose.
Shaping the mounting plate
As to the final disposition, the rose shapes are somewhat abstract and actually incorporate some perspective so I didn't think giving them stems and leaves in any manner would really work.
I ultimately settled on arranging the roses on a mounting plate. For simplicity it was just an ellipse with curved edges, made from the almost-white Aspen wood for good contrast (covered in paper here, so looking totally white).
In this shot I'm smoothing off the edges after cutting out the ellipse shape.
Gluing on the Cedar rose
A bit of edge rounding, a bit of sanding and the plate was complete.
Then the roses were simply glued into place.
Then the roses were simply glued into place.
Woodworking done
The completed piece, just needing a finish.
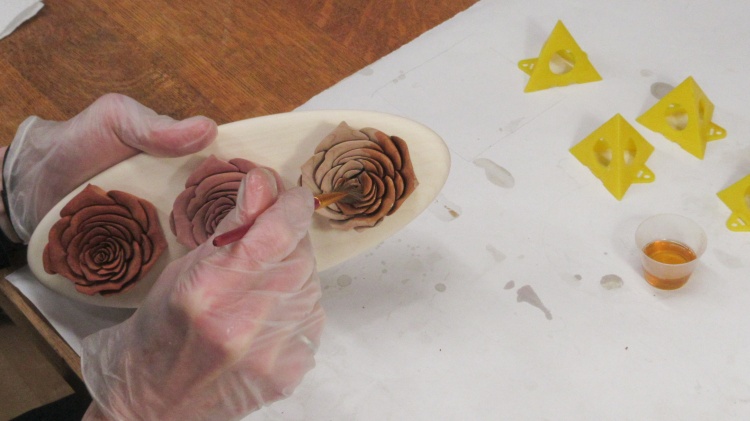
Starting on the finishing
I used Danish Oil for the finish, using a brush with fine bristles to apply it.
First coat of finish on
The Cherry coloured up nicely while the Cedar and Padauk roses mostly got darker.
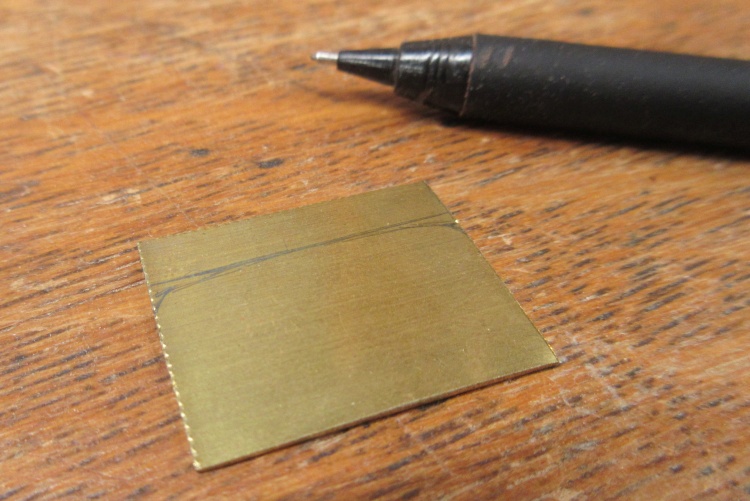
A little piece of brass
This is a hang-on-the-wall piece so I needed to come up with a suitable hanging method. I decided on a brass hanger, similar to one I'd made years ago for a custom frame.
I started with this small piece of 0.01" brass.
I started with this small piece of 0.01" brass.
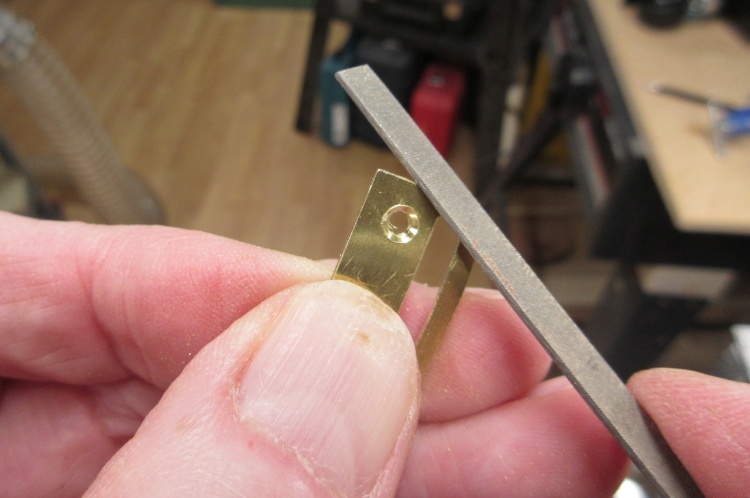
Finishing off a hanging hook
The brass received a slot, a couple of countersunk holes for mounting and a top section bent out to engage a wall hook.
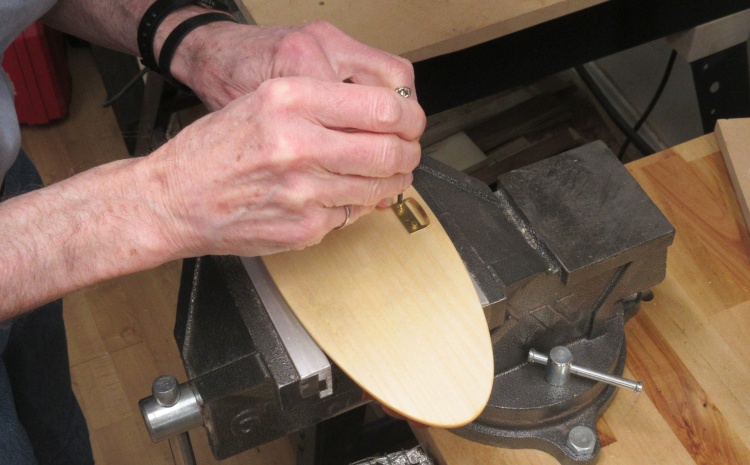
Attaching the hook
A pair of #3 brass screws were used to fasten the hook to the back of the plate.
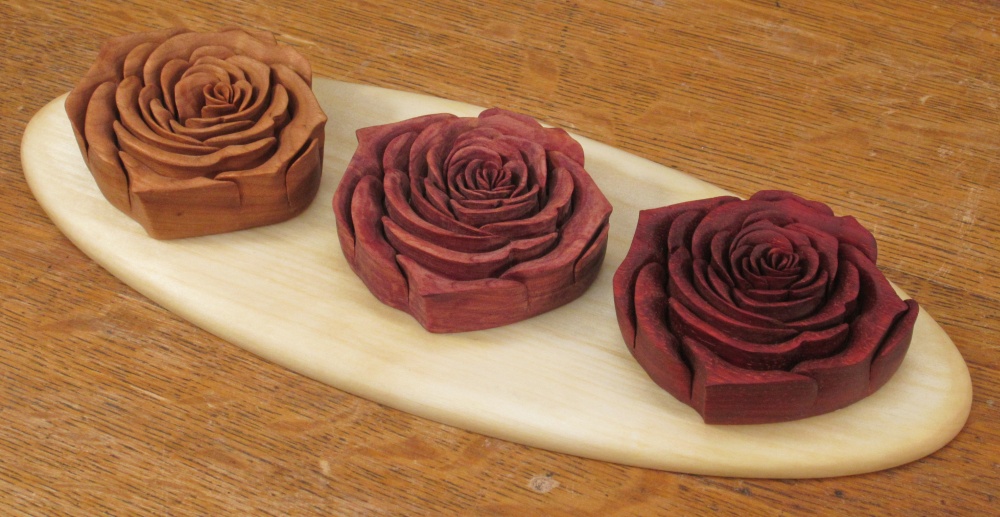
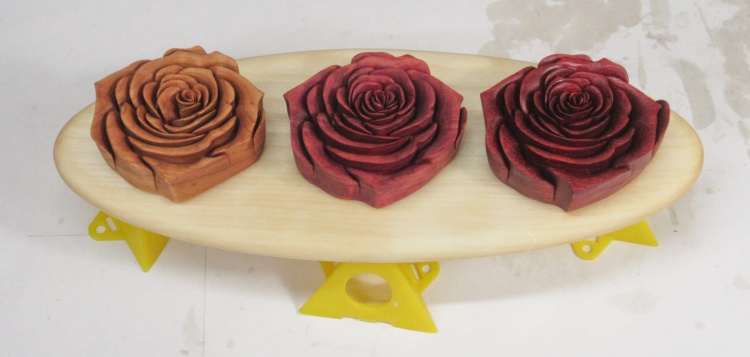
The completed piece
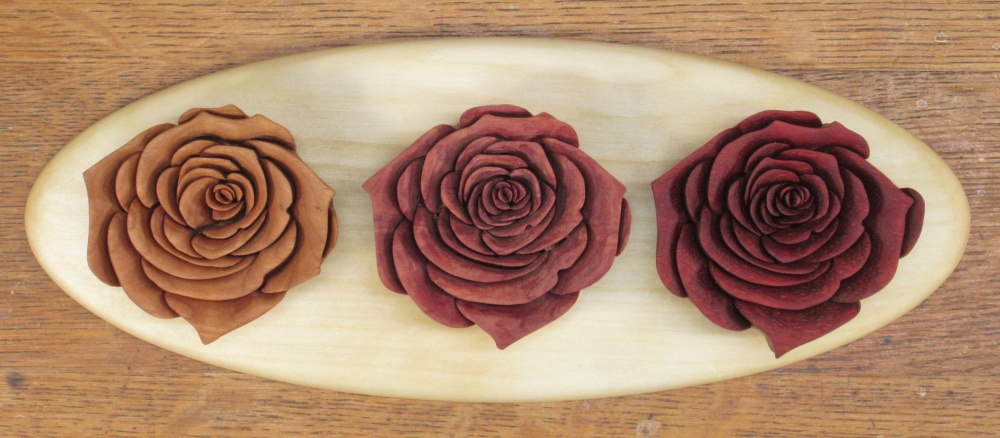
Front view
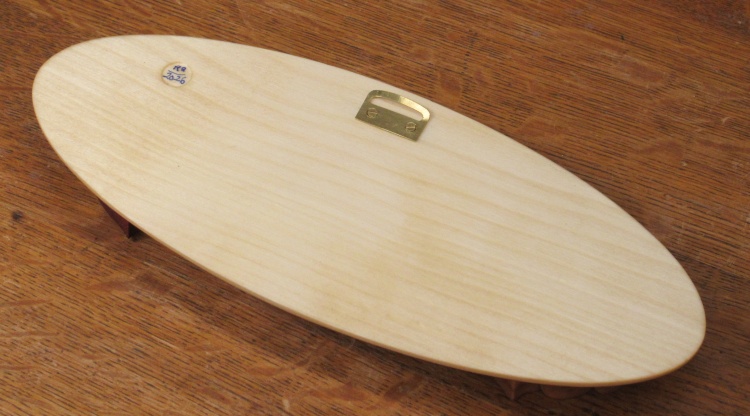
...and the back
Done
Appendix A - An Extra Yellow Rose
Starting the cutting
All the cuts made
Petals shaped and glued back together
Checking out a couple finishes
Done
The closeup
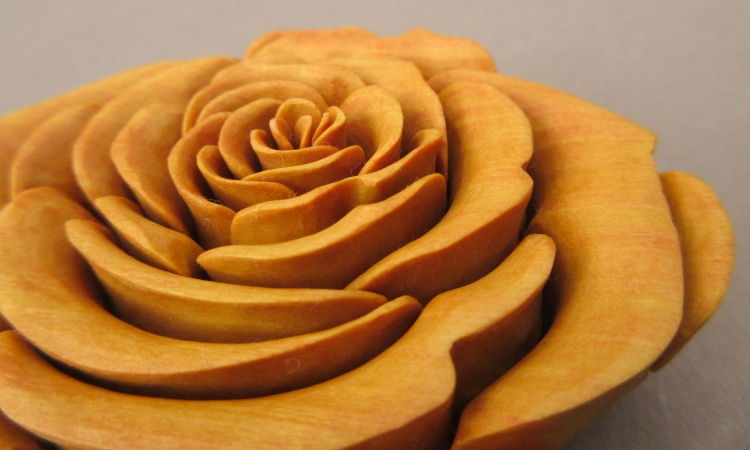
After I had finished the three roses used above, I thought a yellow rose might look nice. I pretty much had the technique down pat, so I just got to work.
Starting the cutting
Here I'm starting on the cutting of a piece of Yellowheart (Euxylophora paraensis or Pau Amarello), a hard Brazilian-sourced wood.
All the cuts made
That's all the cutting done. Then it's on to the shaping.
Petals shaped and glued back together
In this shot the shaping has been completed and the pieces glued back together. The outside still needs a bit of work to add some taper.
Checking out a couple finishes
I've found that more exotic woods seem to have more issues with finishes drying correctly on them so I usually like to try them out on samples ahead of time. Here I checked Wipe-On Poly and Danish Oil and they both turned out to work fine.
Done
The colour ended up being fairly vibrant after finishing. The wood actually had some pink areas but none of them made it into the blossom.
The closeup
A closer view.


