The design I used for the scarf rack was pretty straightforward, consisting of six wooden hooks in line. I had initially envisioned the backplate as a single piece with horizontal grain direction and the hooks as separate pieces with a vertical grain orientation for strength. However it seemed likely that the grain direction change might look odd, so I switched that over so that everything had a vertical grain orientation. This necessitated making a laminated construction since a twenty-inch-wide board would be rather tough to come by.
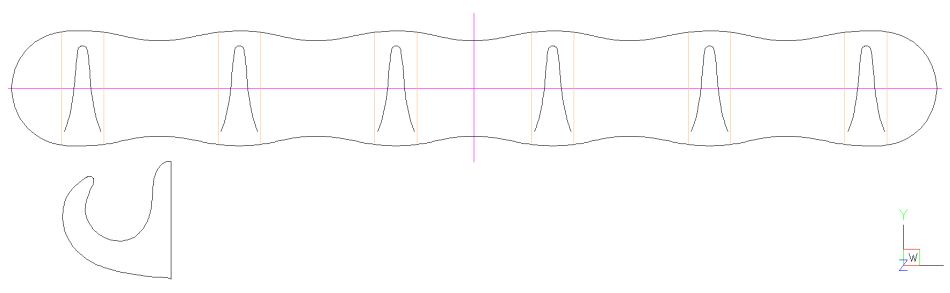
A rough plan
I used purpleheart for it's dark red colour. This is also a pretty strong wood so the hooks should have adequate strength. I had sketched up a hook shape as part of the original plan but I wasn't sure how scarves would fit on it. So rather than not find out until the project was complete, I made a prototype hook.
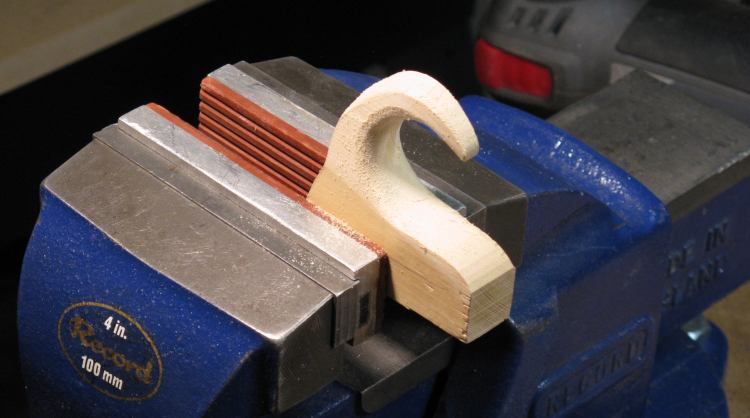
Prototype hook being shaped
I used some nice soft wood that would be easy to work with (spruce, I'm guessing). This shot shows it in the middle of being shaped to round the hook portion.
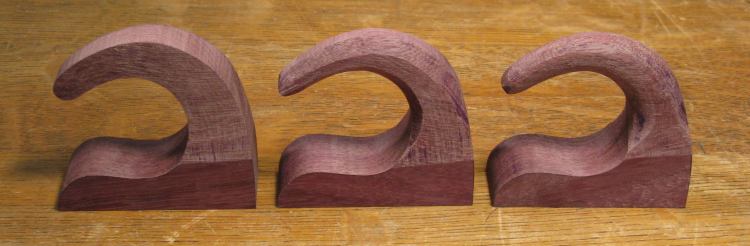
The prototype turned out to be a good idea since after trying it out with some scarves it became apparent that the hook wasn't really large enough.
The prototype turned out to be a good idea since after trying it out with some scarves it became apparent that the hook wasn't really large enough.
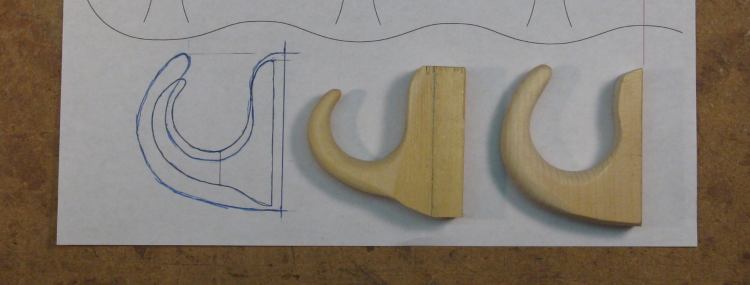
Prototype hooks
I made up a second larger version visible on the right here, which turned out to be a better size. The blue sketch over the original black drawing shows the size difference.
Purpleheart plank
Then to make the real hooks, I started with this rather rough-looking plank.
Plank cleaned up
Which after some jointing and planing to square it up looked somewhat better.
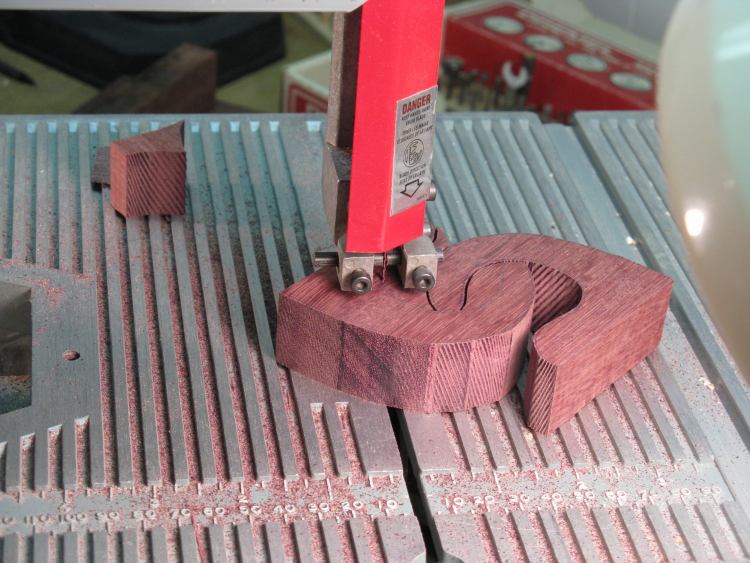
Cutting out a pair of hooks
I made a cardboard cutout of the hook shape and traced around that with an ink pen to mark the hooks on the plank.
Then I used a small bandsaw to cut out the hooks, primarily because I had a narrow blade for it. The blade allowed for tight-radius cuts, which let me nest the hooks to avoid wasting too much wood.
This is a little 8" delta saw which was never able to make very smooth cuts as is evident from the striped-looking finish of the edges. However, it worked fine for this application since the pieces were to be shaped afterwards.
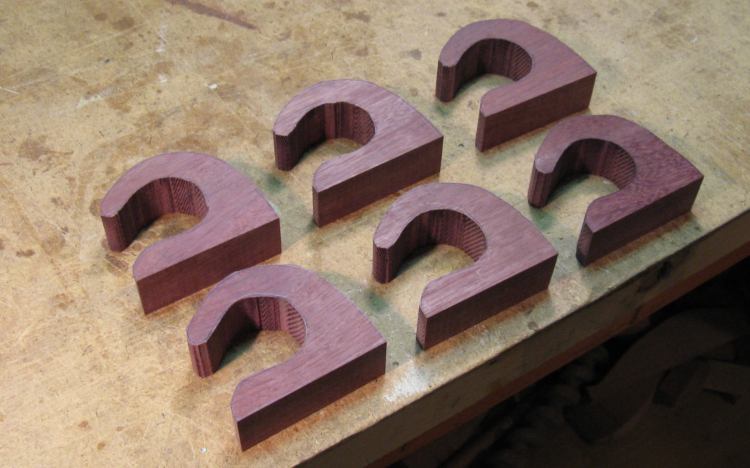
Six hooks cut out
Here the six hooks have been cut out. I made them with a full "C" shape so the hooks themselves were single pieces for the best strength.
The ends would eventually need to be tapered, but it made sense to sand them to the proper contour beforehand while they could still sit flat and square to the sanding machines I planned to use.
The ends would eventually need to be tapered, but it made sense to sand them to the proper contour beforehand while they could still sit flat and square to the sanding machines I planned to use.
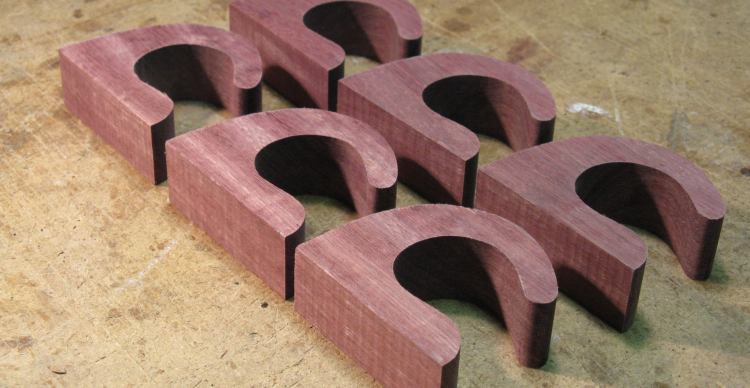
Hooks with outsides shaped
And here the hooks are looking a bit more dapper after having been sanded to the proper contour using a belt sander for the outside curves and a spindle sander for the insides.
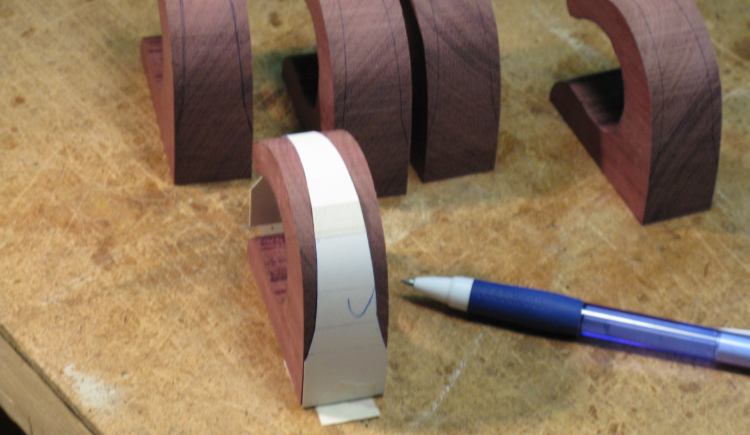
Marking tapers on hooks
Again a cardboard pattern was made which was taped to each hook to allow the shape to be marked.
The technique for removal of the extra material was an interesting puzzle. The odd angle next to a wider section and a desire for decent accuracy precluded a number of techniques. The wood was hard enough to make sanding or filing impractical.
The technique for removal of the extra material was an interesting puzzle. The odd angle next to a wider section and a desire for decent accuracy precluded a number of techniques. The wood was hard enough to make sanding or filing impractical.
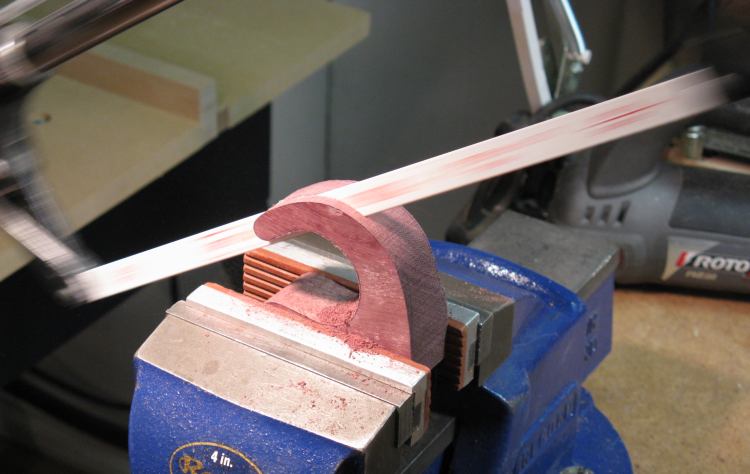
Cutting tapers in ends of hooks
I finally settled on using a hacksaw with a fairly coarse blade. The narrow kerf made cutting easier and I was able to cut fairly close to the line.
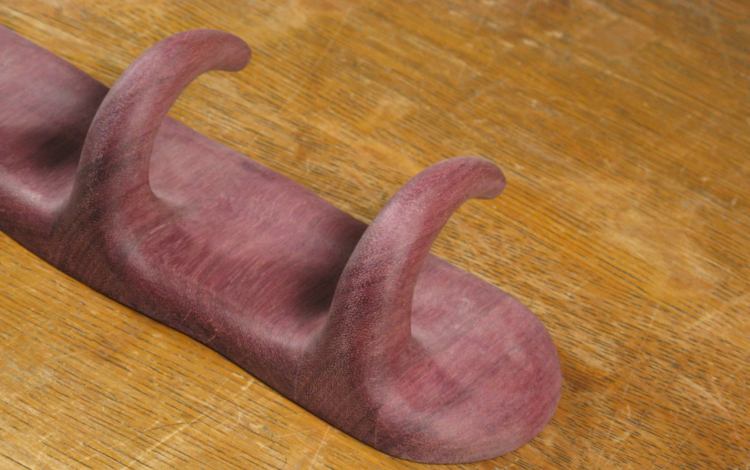
Shaping the ends of the hooks
This shot shows the shaping done to the ends of the hooks. After the taper was cut, the edges were drum-sanded giving the shape shown by the leftmost hook here. The square cross section was converted to octagonal using a small drum sander on the lathe, giving the middle shape, and finally a half-round file, 80 grit sandpaper and elbow grease completed the rounding.
Spacer prototype
The next step was to make the spacers that go between the hooks. I wanted to try out the compound curves to make sure I was starting with the correct shape, so I made another softwood prototype, shown here attached to a hook. This looked OK, so I proceeded to making Purpleheart versions.
Spacers and hooks
Here blocks for the spacers have been cut to size and marked on the sides and ends.
One spacer cut to approximate shape
I used the small bandsaw again and cut the spacer blocks to shape.
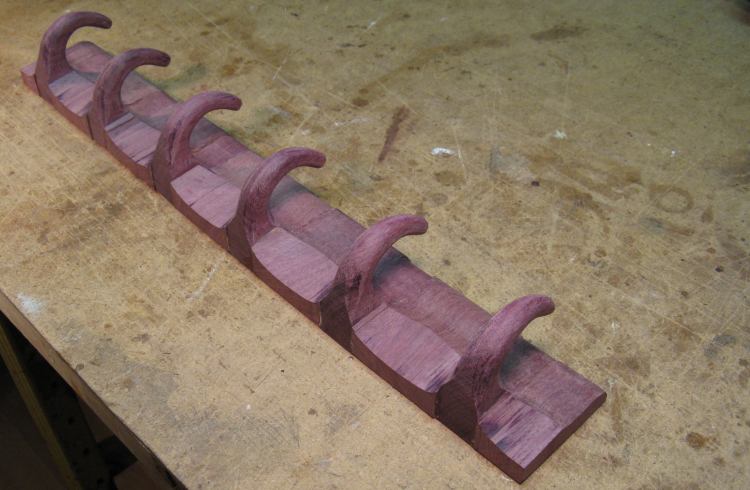
Spacers and hooks glued together
Unfortunately I completely missed the riveting glue-squeezing-out photos, but rest assured that the spacers and the hooks were glued together in the typical slippery, gushy process and this shows the full assembly after drying.
Shaping started
Here I've started to blend the hooks into the spacers. The first chamfer to form the radius on the back edge is also visible. As before, this was done with an 5/8"-diameter sanding drum chucked into the lathe, as well as by hand using a coarse half-round file.
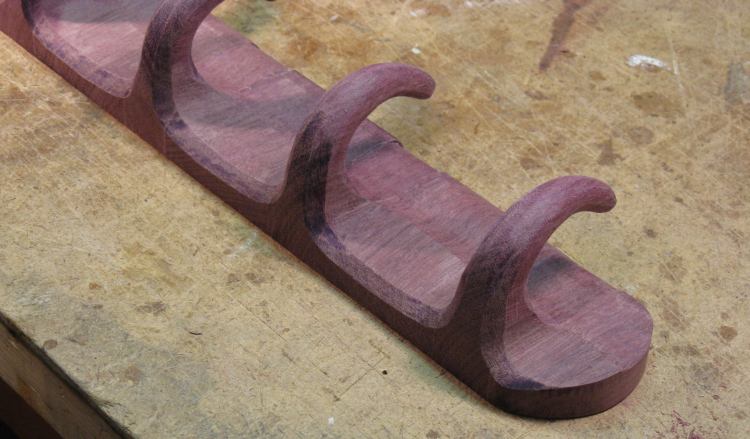
Shaping proceeding
This shot has a bit more shaping done, with the edges having been contoured a bit and the end shaped.
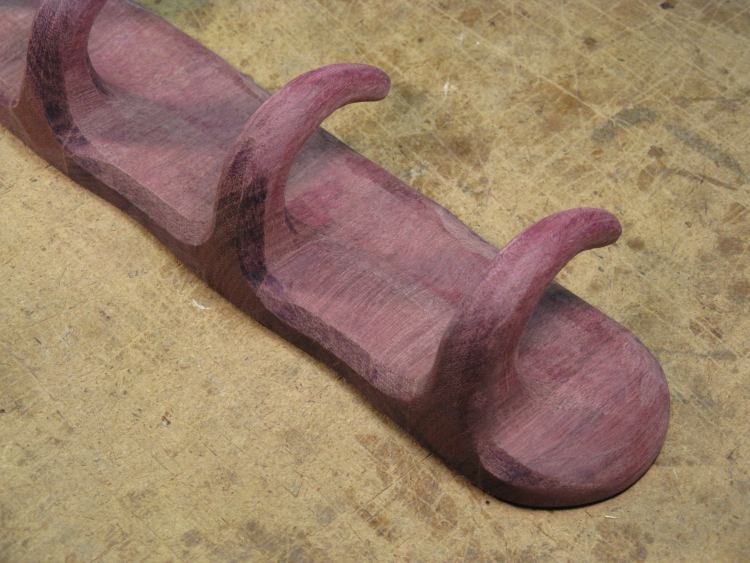
Shaping done
And here the shaping is complete. After the drum sanding and filing, strips of 50, 80, 120 and 220 grit sandpaper were used to smooth the surface.
Often it is difficult to see small scratches or sanding marks on a dry piece of wood, but they become much more visible when the first coat of finish goes on. One technique to highlight them beforehand is to wipe the wood with a solvent, but sometimes that will change the look of the wood. Rather than do that, I thought I would just add the first coat of finish. The polyurethane I use is pretty repairable in that you can sand through it if necessary and the next coat will seamlessly cover. The plan was to sand out any visible problems and carry on.
Often it is difficult to see small scratches or sanding marks on a dry piece of wood, but they become much more visible when the first coat of finish goes on. One technique to highlight them beforehand is to wipe the wood with a solvent, but sometimes that will change the look of the wood. Rather than do that, I thought I would just add the first coat of finish. The polyurethane I use is pretty repairable in that you can sand through it if necessary and the next coat will seamlessly cover. The plan was to sand out any visible problems and carry on.

First coat of finish applied
Here the first coat has been applied and is still wet in this photo.
Ultimately, when it dried the wood looked fine and I didn't need to do any additional sanding. Bonus!
Ultimately, when it dried the wood looked fine and I didn't need to do any additional sanding. Bonus!
Making flat-bottomed hole
One thing I had neglected to accommodate was a facility to mount the rack to the wall. Since I didn't want visible screws, I opted for a set of "keyholes" on the back into which the head of a mounting screw could slide.
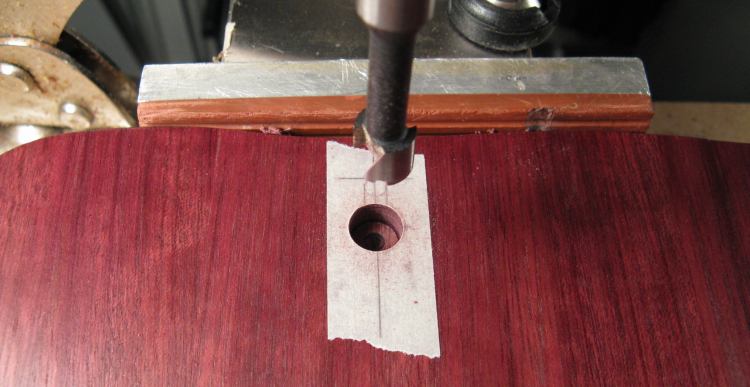
I didn't have a specialized keyhole bit so I used a three-stage procedure to cut the holes. First was a 3/8" diameter blind hole drilled with the forstner bit shown here.
I didn't have a specialized keyhole bit so I used a three-stage procedure to cut the holes. First was a 3/8" diameter blind hole drilled with the forstner bit shown here.

Milling the slot
Next was to mill out the slot which was accomplished with the help of a 1/8" (Dremel) cutting bit.

Undercutting the slot
And the last step was the undercut, accomplished with another cutter as shown here (not yet used in this shot). This cutter was lowered into the main hole and moved into the slot to undercut it.

Completed keyhole
This shows a close-up of the completed keyhole before the surface was cleaned up.
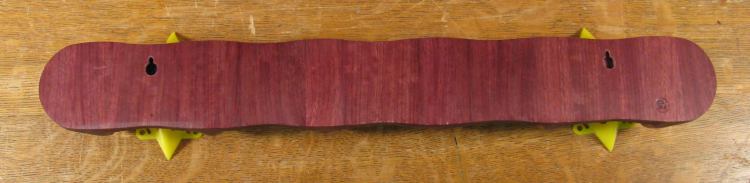
Back of the rack showing the mounting holes
And here both mounting holes are visible.

Mounted in closet
The rack was mounted in the side of the closet with a couple of drywall anchors, shown here before being covered in scarves.


