The design for this stitching pony was based on a commercially-available model that had been pointed out to me. Based on some investigation of what's out there in Stitching-Pony Land, it seems that there are a couple predominant designs; ones like this with curved arms and integrated jaws and then a somewhat cruder-looking version using straight arms with large jaws often separately attached. The latter design is probably somewhat simpler to manufacture and may have some subtle advantage over the curved design that isn't evident to this leather-stitching neophyte but the curved-arm design definitely looks cooler; Case closed.
I made up the plan by shamelessly copying web-based images of wooden ponies. There actually seems to be a pretty consistent design approach with a few variations in size, securing method, etc. At the low end lurks unfinished nailed-together flat-board models but I trust this one should be a bit less embarrassing to use.
I made up the plan by shamelessly copying web-based images of wooden ponies. There actually seems to be a pretty consistent design approach with a few variations in size, securing method, etc. At the low end lurks unfinished nailed-together flat-board models but I trust this one should be a bit less embarrassing to use.
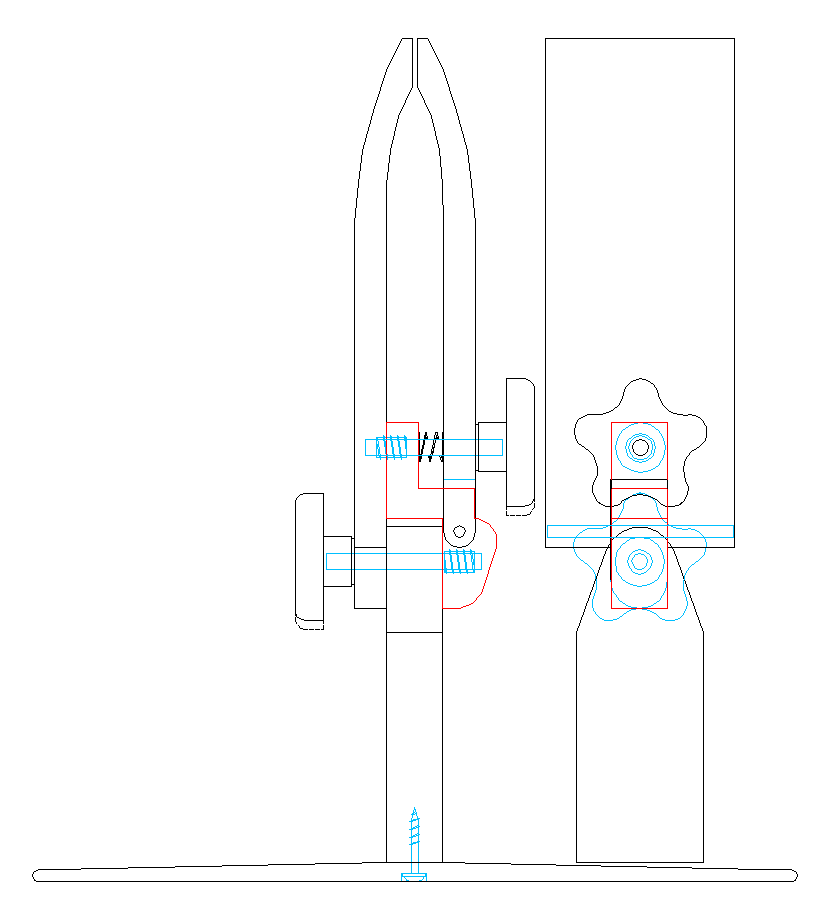
The pony in all its orthographic-projection glory
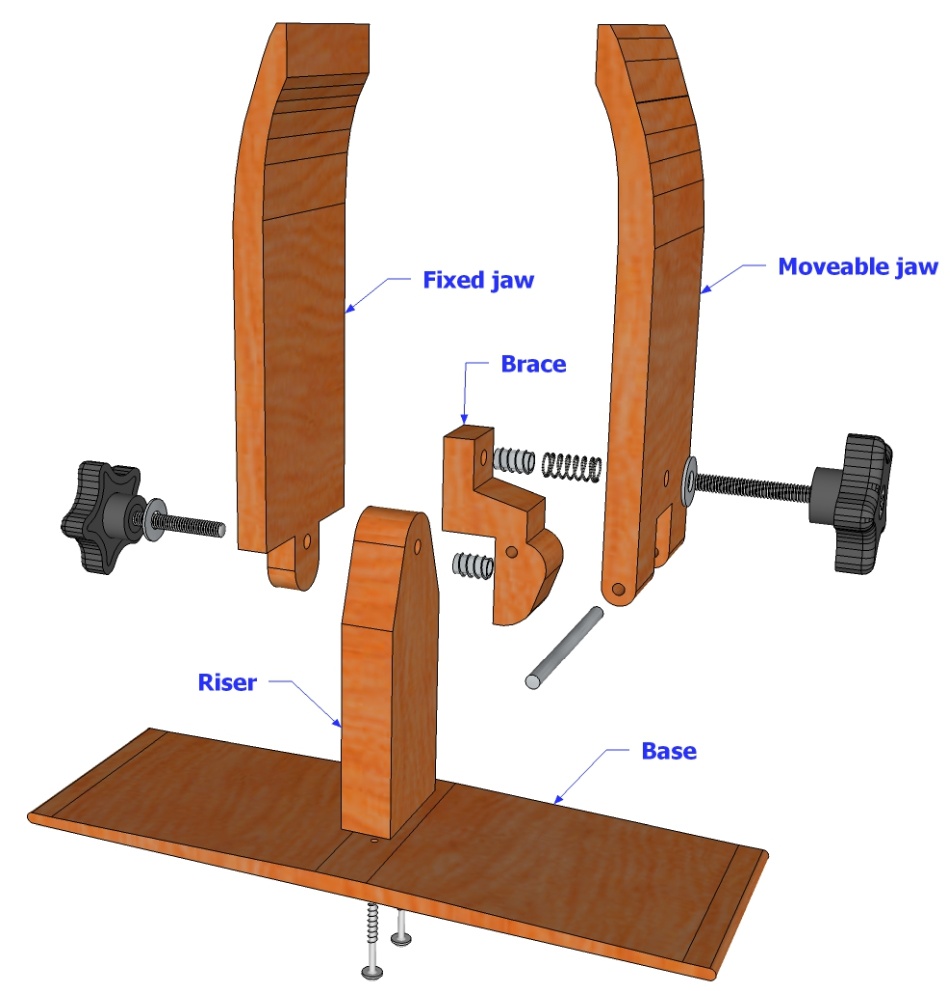
5 pieces to form the whole (and the hardware to keep it together)
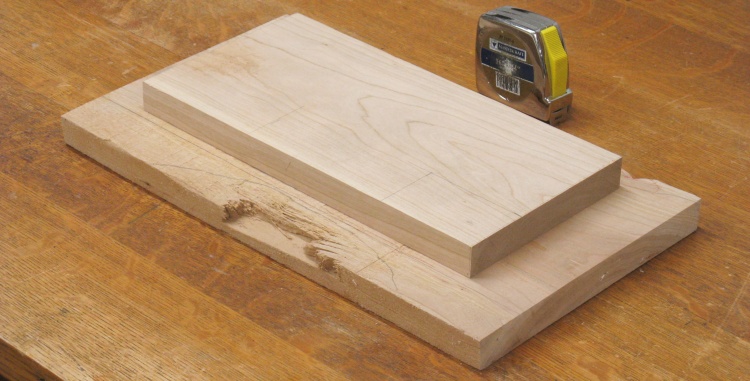
Enough "prime" Cherry for the pony
I dived into the specification document for wood type and eventually found this requirement:
3.7.14a Wood Species: Whatever wood you want.
Well, that left me plenty of latitude so I prowled around the shop avoiding anything too fancy or too plain or too small or too cracked and ended up settling on Cherry. I had a number of imperfect scraps but I figured I could cut enough good bits out of these two pieces for the pony.
Following wood selection, the cut-to-size process swung into gear using the usual methods and photographically sampled here;
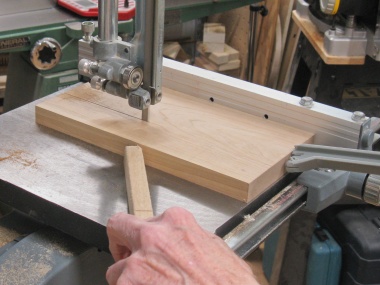
Ripping a jaw
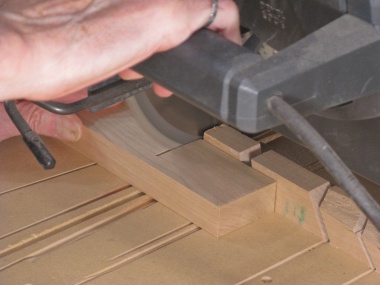
Chopping a brace
Ripidy ripidy rip
Some nice rectangular pieces to start shaping
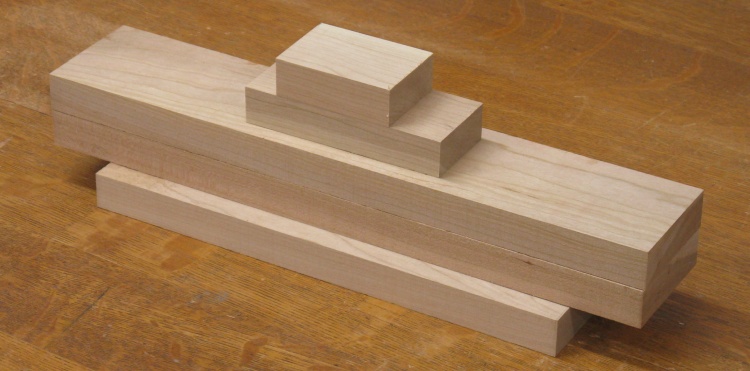
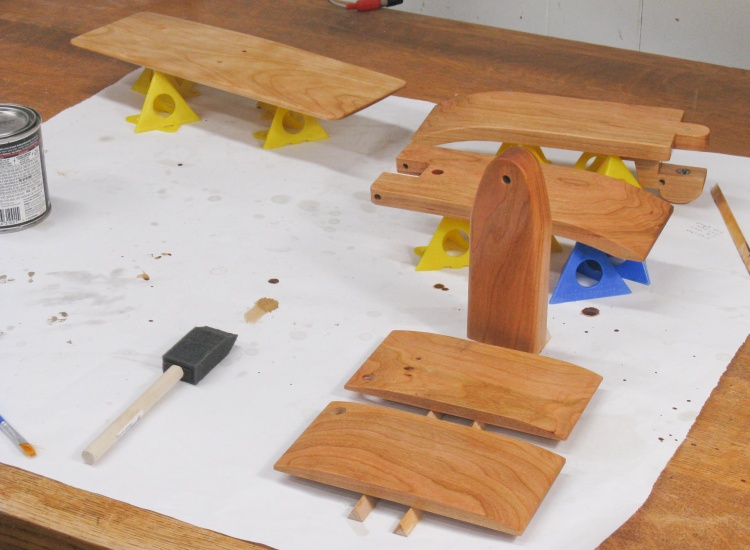
5 blanks for the 5 pieces, ready for some shaping.
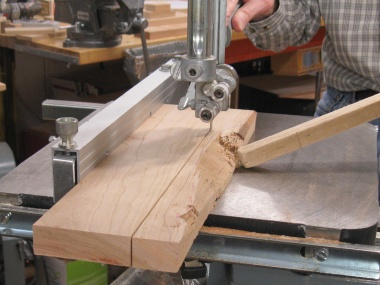
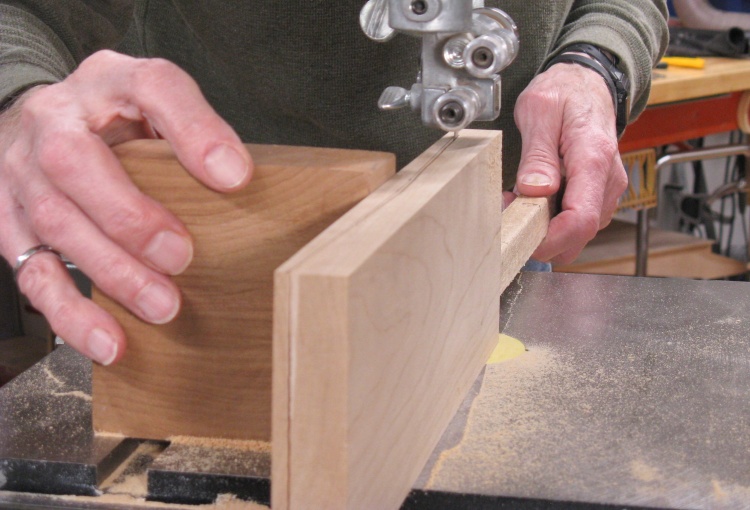
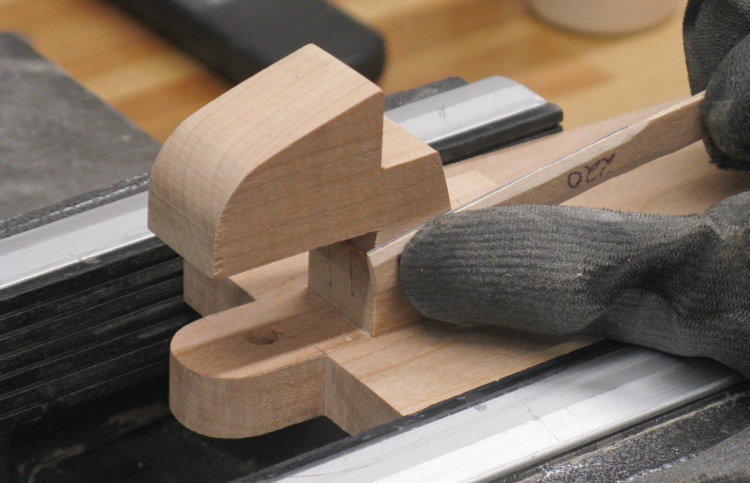
Cutting a curve into one of the jaws
The jaws were cut to shape on the bandsaw, following pencilled-on lines for the curves.
The brown wood block on the right is taped to the jaw and serves a couple purposes;
First: Provide a convenient handle and
Second: Ensure the jaw remains perfectly vertical going through the saw.
The brown wood block on the right is taped to the jaw and serves a couple purposes;
First: Provide a convenient handle and
Second: Ensure the jaw remains perfectly vertical going through the saw.
Bandsaw cuts are never smooth so a remediation process follows wherever one cares about surface finish. That often ends up being sanding (although I've done scraping, planing and filing where appropriate as well). After the machines were through with them, I followed up with hand sanding to 220 grit to get to a decent-looking surface.
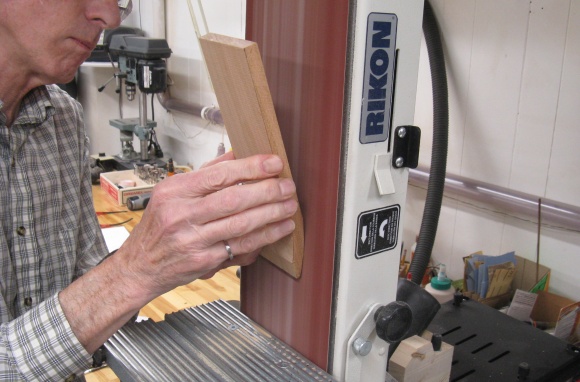
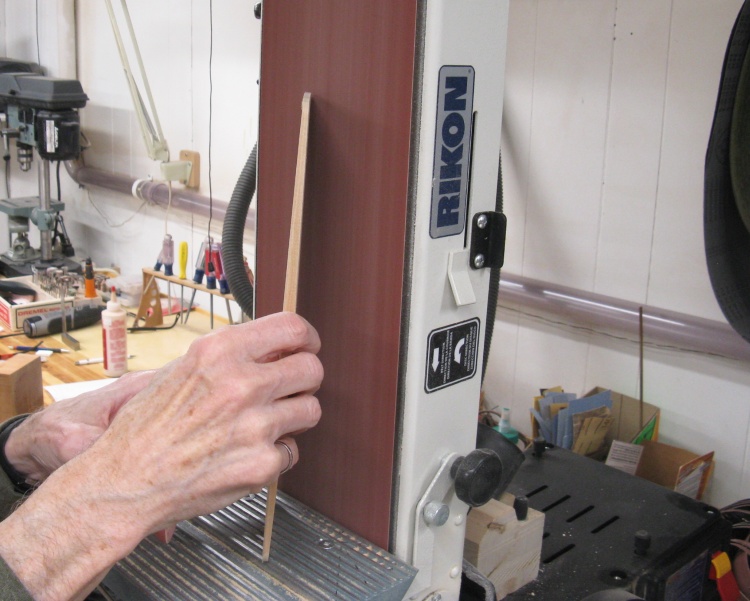
Belt sander for outside curve
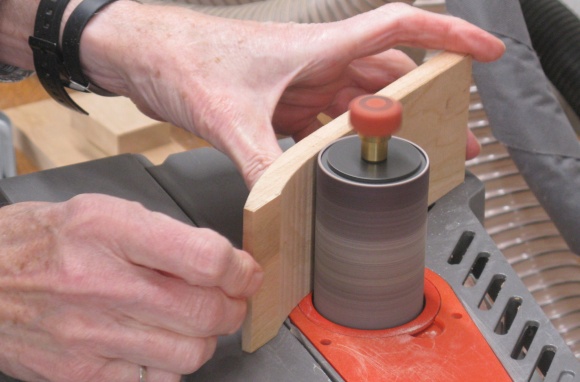
...and spindle for inside
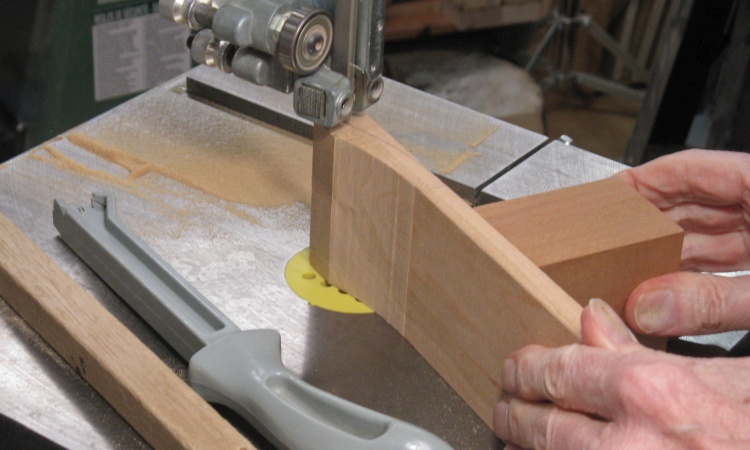
Marking up the brace
The oddly-shaped middle piece which I've designated the brace was marked up with pencil and then shaped with a few cuts on the band saw.
And then of course the cut surfaces were smoothed with filing and sanding.
And then of course the cut surfaces were smoothed with filing and sanding.
Gluing the formed brace to one of the jaws
Using the vise as an alignment tool, the brace was glued to the inside of the fixed jaw
Cutting the rather thin base
The base was cut out of a 4 x 12" piece as seen here. It doesn't need a huge amount of strength and can be quite thin; It's around 8 mm at the thickest part and the rest is tapered to be more comfortable to sit on.
Rounding the brace edges
Edges and corners of the base were rounded on the belt sander to avoid puncturing upholstery or people.
D'oh!
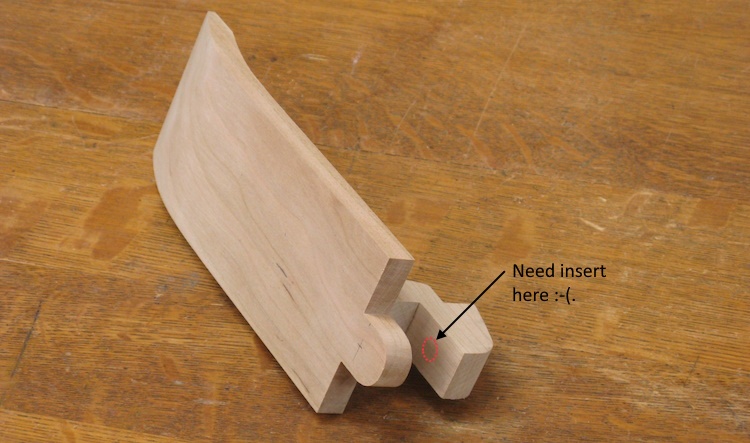
A tragic lack of pre-planning
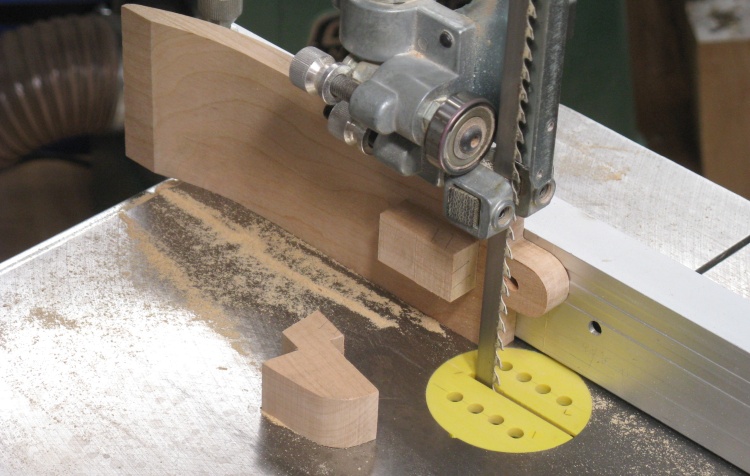
Biting the bullet
Installing the threaded insert
I should have known that would happen
Better-controlled insert installation
Putting 'er back together
Sanding out the evidence
A certain commonality of angle-y bits
Insert in place with only minimal evidence of screw-up
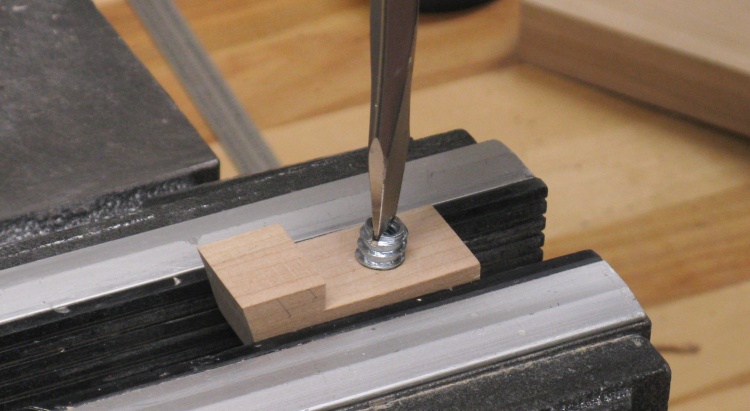
Yes, Homer's favourite expression is appropriate here since I made a Homer-quality error when I glued the brace to the jaw. I had forgotten that the brace needed an insert installed which wasn't possible to do with a chunk of wood an inch away. I considered various mitigation techniques but the best and least evident would just be chopping the brace off, adding the insert and gluing it back on again. Yeesh.
A tragic lack of pre-planning
Ya. Right there.
Biting the bullet
Fortunately I have no shortage of saws in the shop.
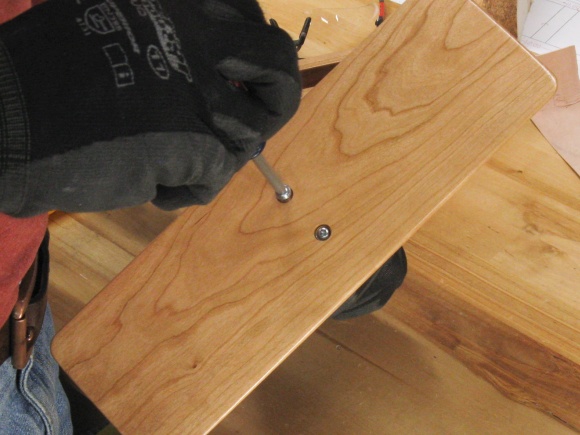
Installing the threaded insert
So then I just drilled a hole and screwed in a 1/4-20 threaded insert.
Of course the sharp of eye will see a problem already.
Of course the sharp of eye will see a problem already.
I should have known that would happen
Ya - a crazy angle.
How? The hole was straight!
How? The hole was straight!
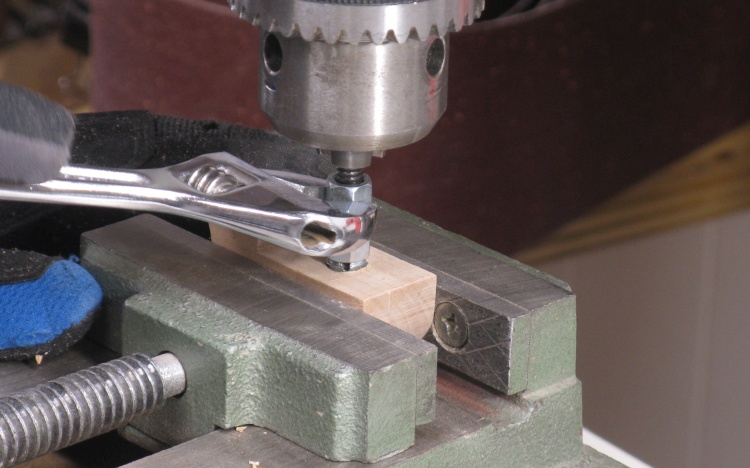
Better-controlled insert installation
I belatedly recalled that I had run into this problem using these inserts in the past.
Fortunately I also had a solution which was to thread them in using a guaranteed-orthogonal setup as seen here.
Unfortunately that didn't work either - the insert somehow followed the old thread slots. Eventually I got lucky and managed to get it straight by re-insertion a few times using a cordless drill. Whew!
Putting 'er back together
So then it went back together. I used a 0.05"-thick piece of cherry to replace the width of wood cut out by the saw. That would hopefully let the double joint blend in well with the existing wood.
Sanding out the evidence
The joint piece was trimmed flush and then sanded on all sides.
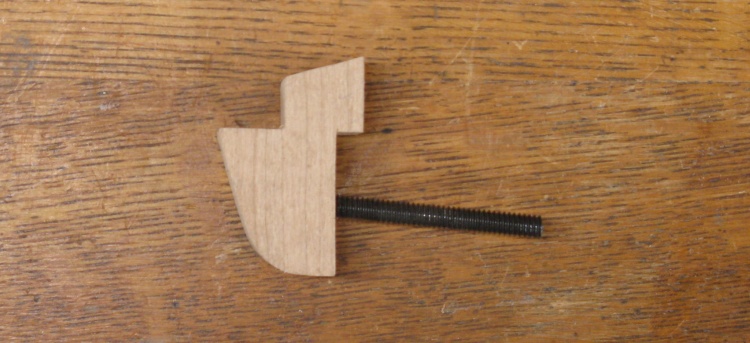
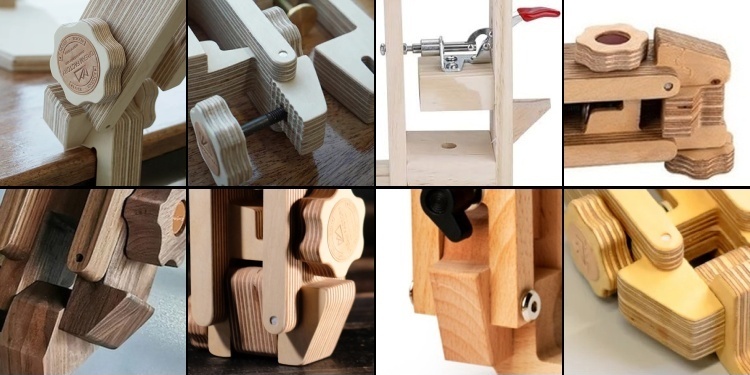
A certain commonality of angle-y bits
And I'll just take this opportunity to point out that the odd triangular shape on one side of this piece was really a legacy of what is out there, as evidenced by this array of photos.
Yet I can't really see any function for it sticking out next to the knob and when I checked out the operation, it interfered with fingers turning the knob.
Right, screw "legacy" - off it comes. The triangular shape was changed to a curve, providing much more room for the fingers.
Yet I can't really see any function for it sticking out next to the knob and when I checked out the operation, it interfered with fingers turning the knob.
Right, screw "legacy" - off it comes. The triangular shape was changed to a curve, providing much more room for the fingers.
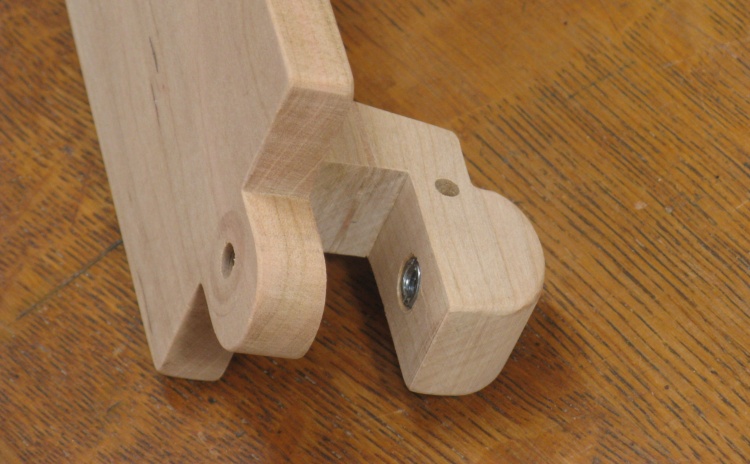
Insert in place with only minimal evidence of screw-up
The insert in place and the brace rounded.
End of D'oh distraction.
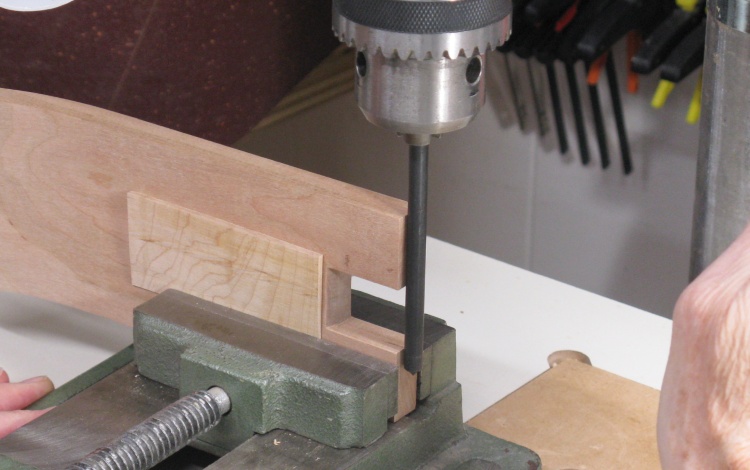
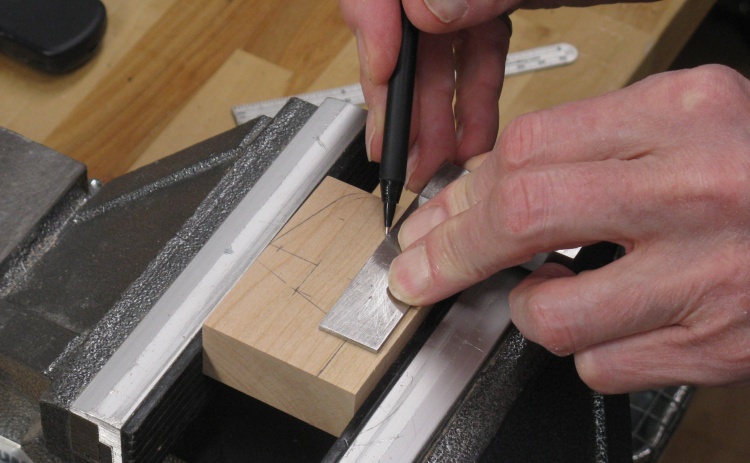
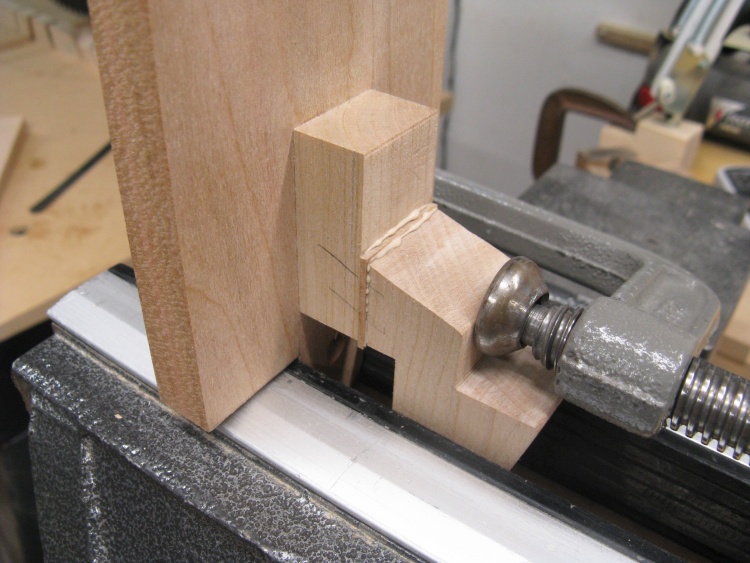
Precisely aligning prior to hinge hole drilling
The moveable jaw will hinge on a 3/16"-diameter steel pin. I would need to drill for the pin but there isn't much leeway going through 3" of 1/2"-thick wood. So I spent a while making sure the wood was exactly in line with the drill bit - that thin wedge helps in one dimension.
By the way - that's a transfer punch in the drill press for this calibration. It's one of a range of diameters that nominally get used for marking the centers of holes but useful for an eclectic selection of random tasks like this one here.
Calibration paid off and the hole was nicely aligned.
By the way - that's a transfer punch in the drill press for this calibration. It's one of a range of diameters that nominally get used for marking the centers of holes but useful for an eclectic selection of random tasks like this one here.
Calibration paid off and the hole was nicely aligned.
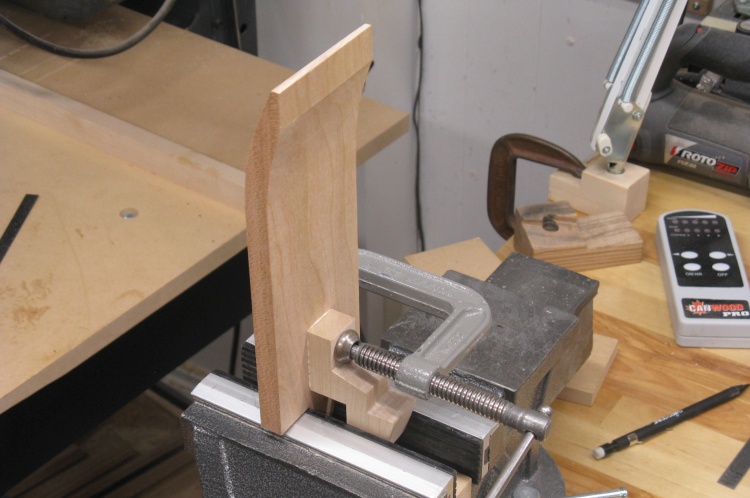
Starting to hand-sand all the parts (the riser in this photo)
The last step was to do finish sanding on all the pieces. The edges and corners were rounded where appropriate and this shot shows the riser getting its turn.
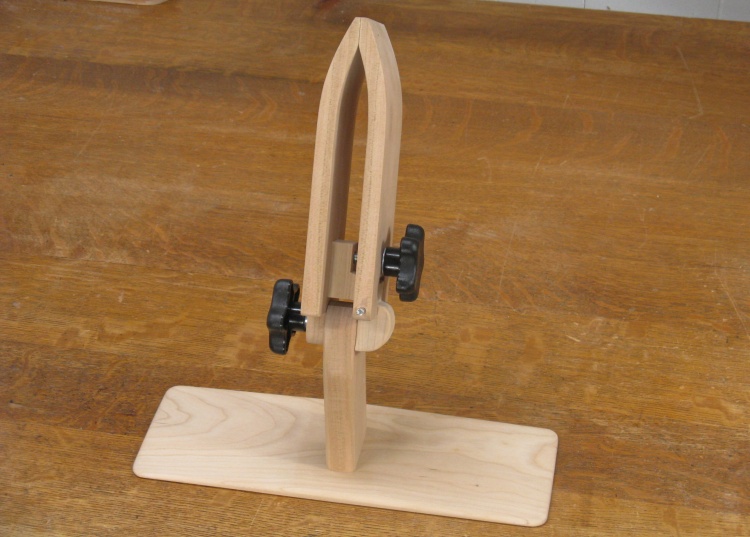
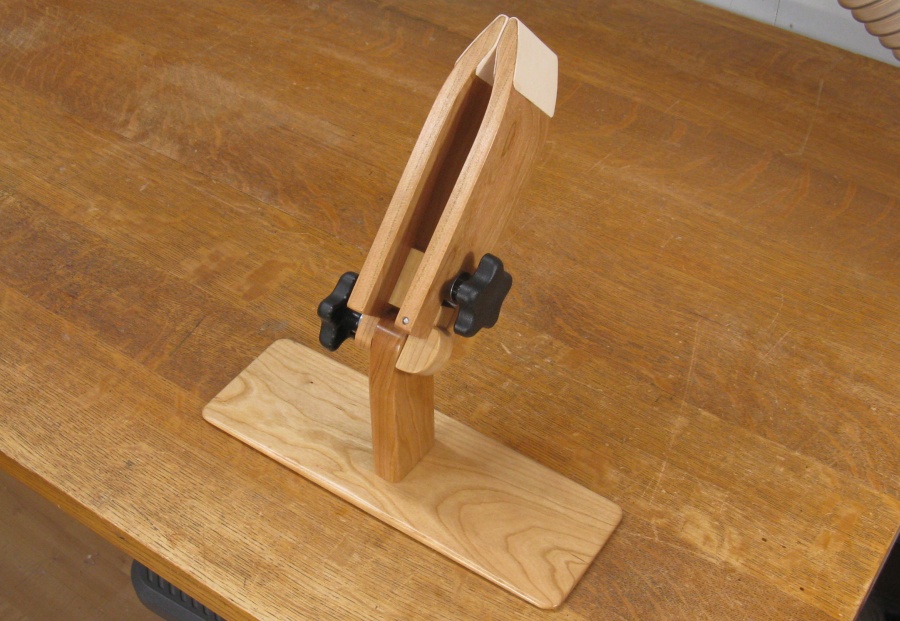
Woodworking done and test assembly looking good
With all the pieces done it was time for a test assembly.
Everything went together as expected but I took the opportunity for a Preliminary Customer Acceptance Test and was informed that there would be no ECOs. Wohoo!
So then it's on to finishing.
Everything went together as expected but I took the opportunity for a Preliminary Customer Acceptance Test and was informed that there would be no ECOs. Wohoo!
So then it's on to finishing.
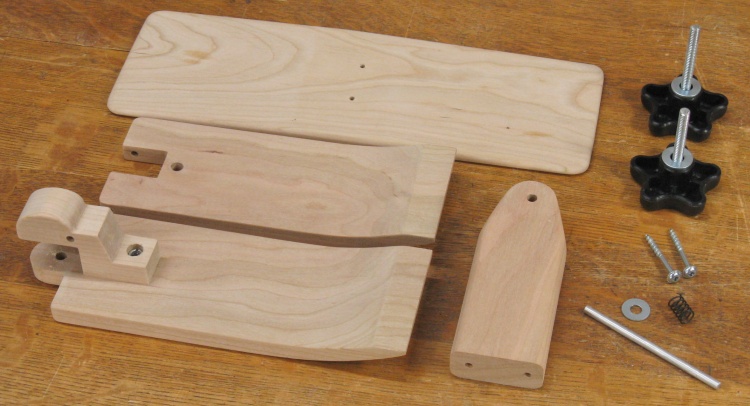
All the bits 'n pieces
Of course it needed to come apart for finishing and this shot conveniently shows all the pieces.
In addition to what can be seen here, there are of course two threaded inserts as well but they will remain embedded in the wood of the fixed jaw.
In addition to what can be seen here, there are of course two threaded inserts as well but they will remain embedded in the wood of the fixed jaw.
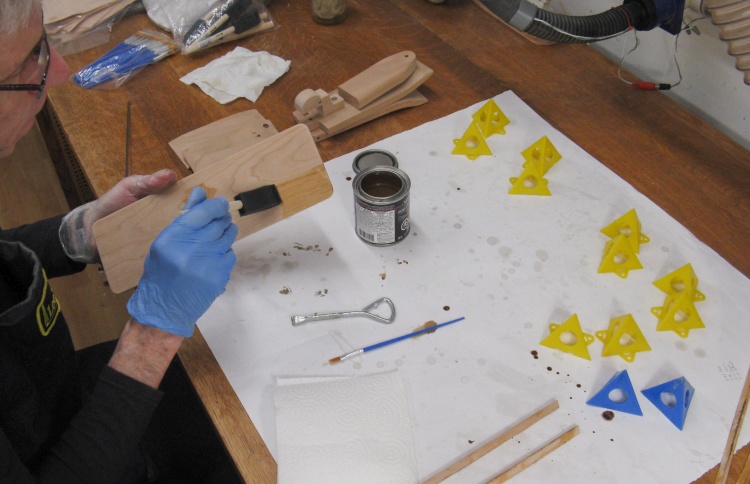
Getting started on the varnishing
I used my usual Minwax Fast-Dry Poly although it should be noted that it does not in fact dry particularly fast.
The first coat went on with a sponge brush along with the tiny blue-handled job on the bench for tight spots.
The first coat went on with a sponge brush along with the tiny blue-handled job on the bench for tight spots.
First coat of varnish in place
The pieces have their first coat of varnish installed in this shot.
The two pieces in the foreground are test articles for checking adhesive performance for when it comes to gluing on the jaw padding.
The pony received three coats of varnish with the usual steel-wool roughing between coats.
The two pieces in the foreground are test articles for checking adhesive performance for when it comes to gluing on the jaw padding.
The pony received three coats of varnish with the usual steel-wool roughing between coats.
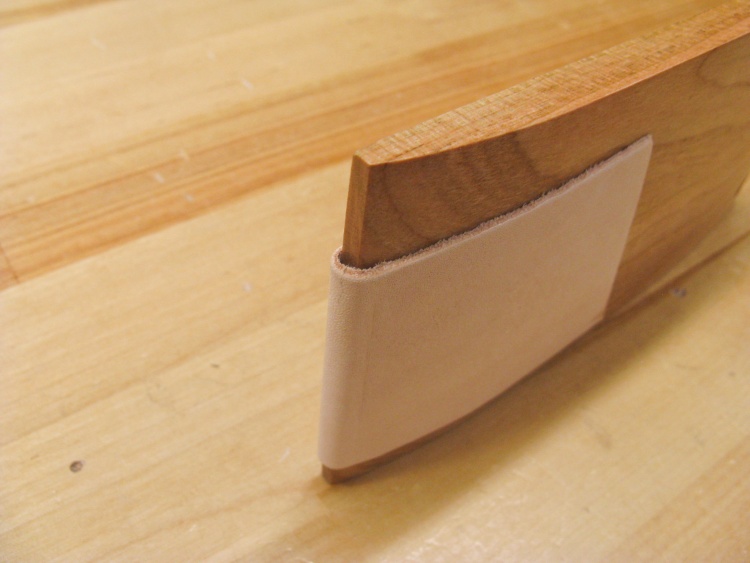
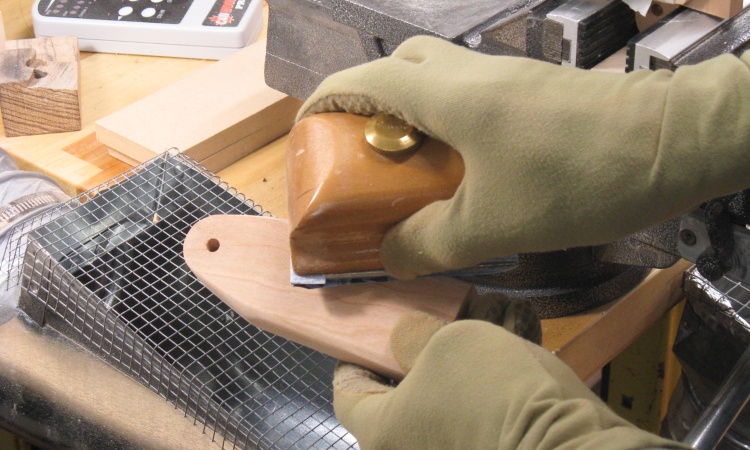
An...imperfect test wrap of leather
Once the varnishing was done I used one of the test articles to check mounting the leather. I had planned to use a latex adhesive and that seemed to work fine but the wrap around the end was looser than I wanted (despite using a custom-cut end clamp).
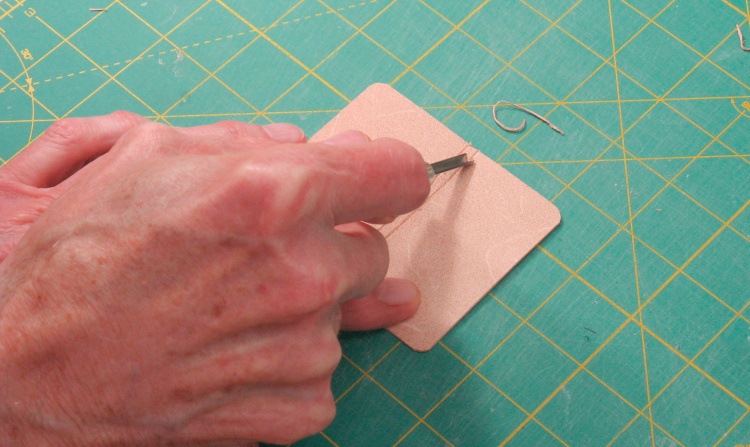
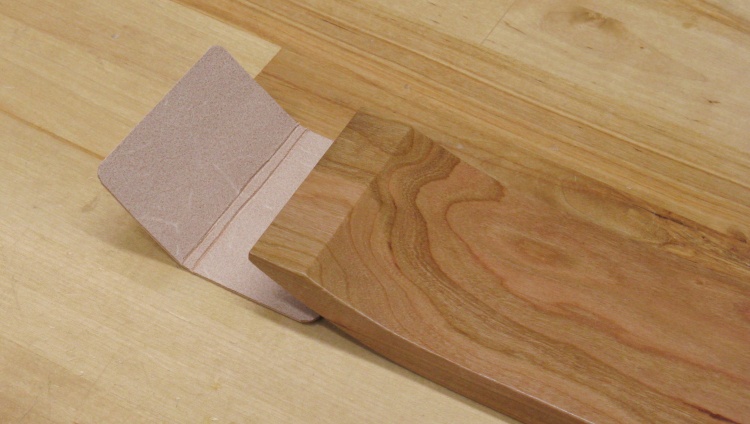
Easing the inside corners
The too-round leather wrap was solved by easing the inside corners. In this shot I'm carving a small v-shaped trough where the leather wraps around the corners of the jaw. That should allow for closer-to-90° corners.
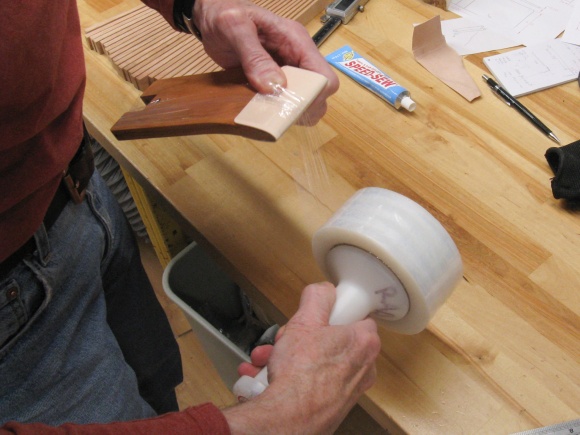
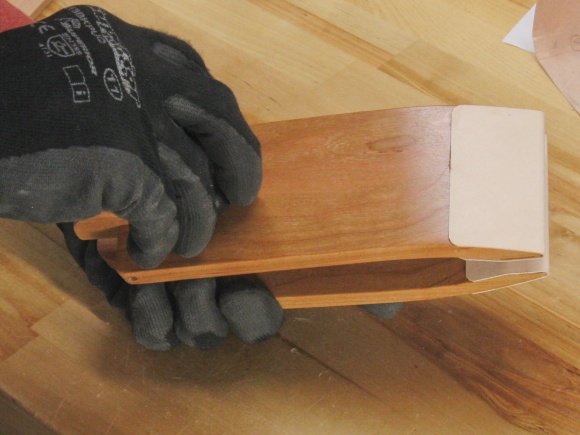
Official wrap ready to go on first jaw
Here the liner is ready to go for the first jaw.
These shots show the liner going into place. To apply pressure on the end where I want a nice 90° corner, I used a stretchy plastic wrap. Then to hold the leather against the non-flat faces of the jaw, some dense foam was added to each side before clamping.
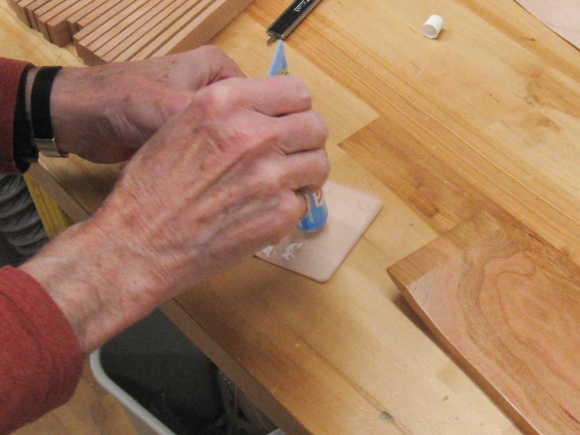
Applying latex adhesive to leather
A tight wrap to hold the end flat
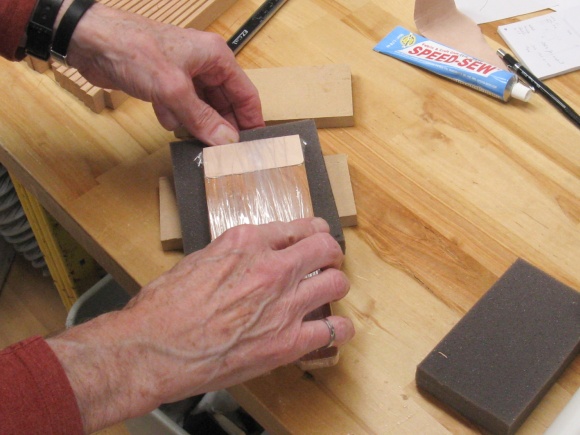
Adding foam to mould to the jaw contours
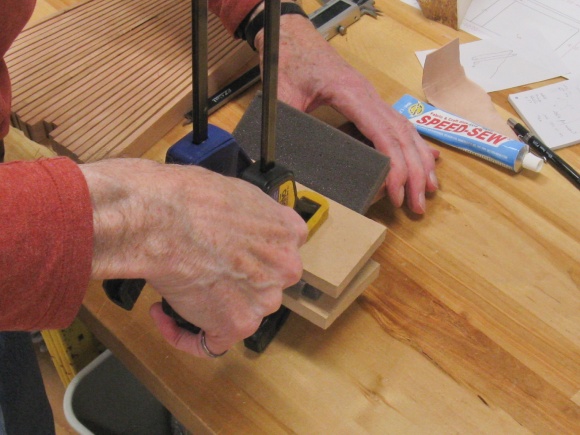
Clamping the foam
Lining the jaws was the last bit of "woodwork", so that just left final assembly;
Adding the tightening knob parts
Attaching the base
Complete
Done


