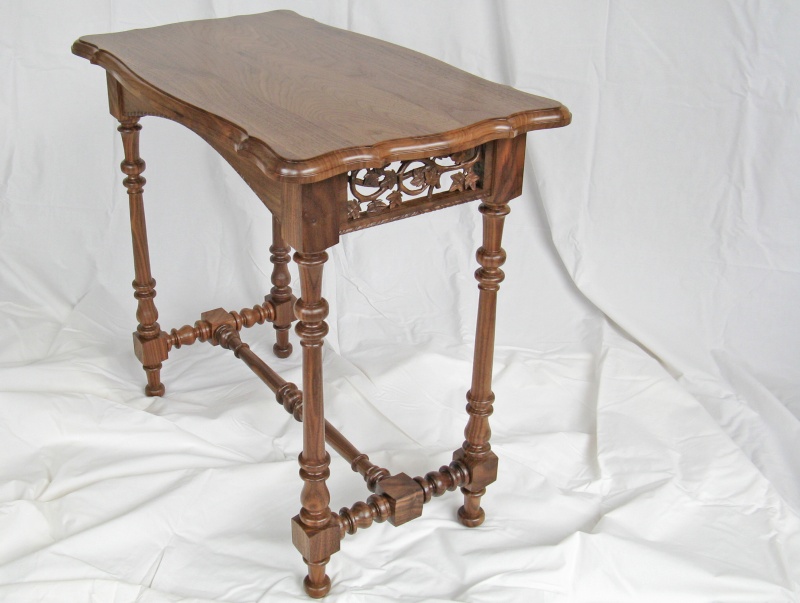
I kind of like antique furniture, and wanted to replace our living room tables with antique side tables. Unfortunately, the kind we were looking for were pretty hard to come by. After checking a number of antique stores (in three different cities) and coming up empty-handed, I decided to try my hand at making some. I was originally just going to replicate an existing table we had, but with antiques (or more precisely antique-style) tables, having different designs kind of appealed to me.
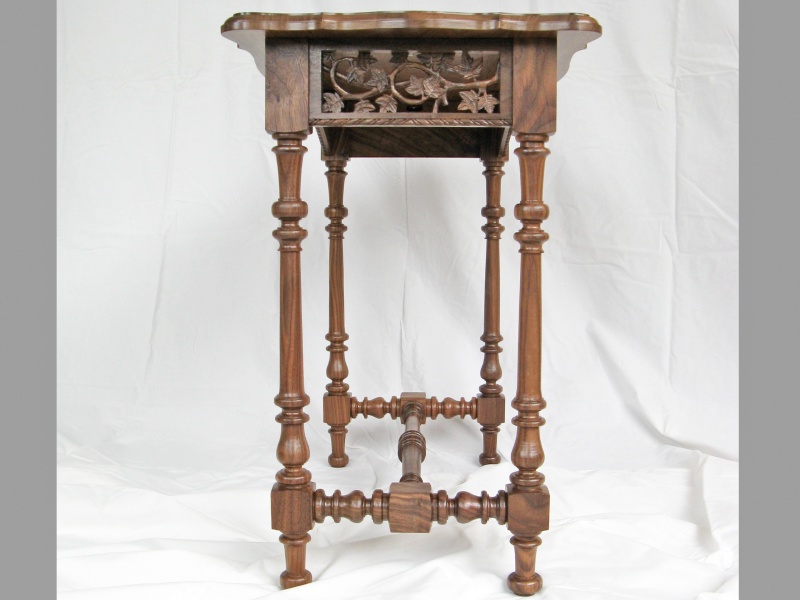
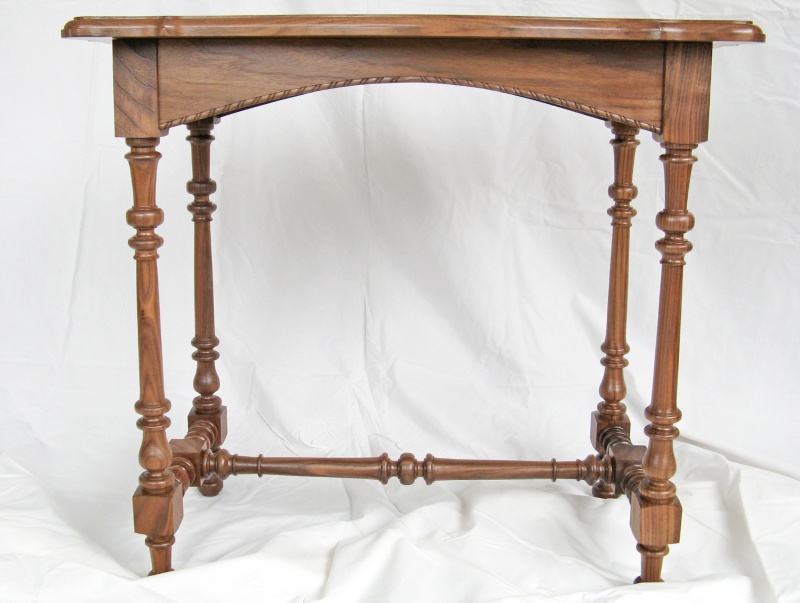
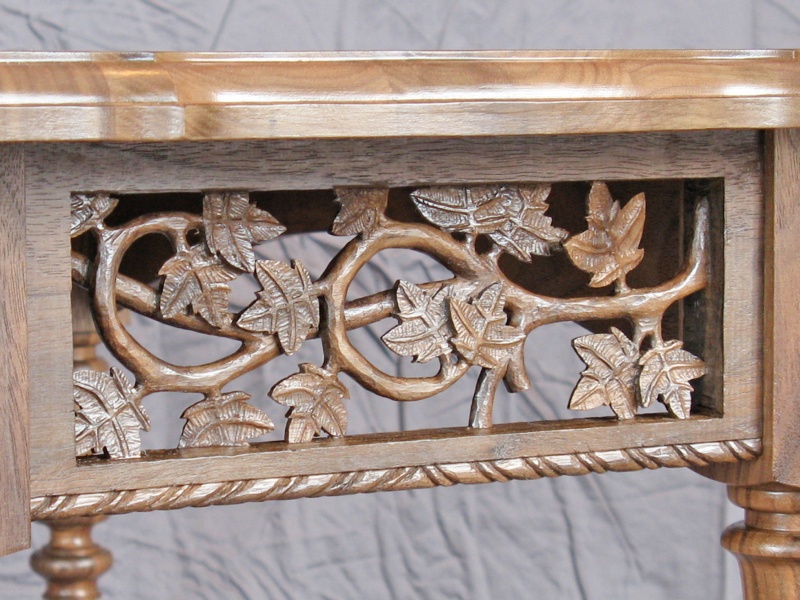
I often like the detailed carving sometimes seen in antique furniture, so I thought I'd include a carved end-piece. While investigating vine-carving designs for ideas, I found that many had highly stylized leaves that didn't appeal to me. Instead, I based the leaf design on an ivy plant we happened to have. I also thought it would look better as a pierced rather than just a relief carving, That turned out to be rather more work to carve, but I think the end result was worth it. Since I wasn't intending to carve vines into all four sides, I instead tied them together (in a style sense) with a rope-motif edging.
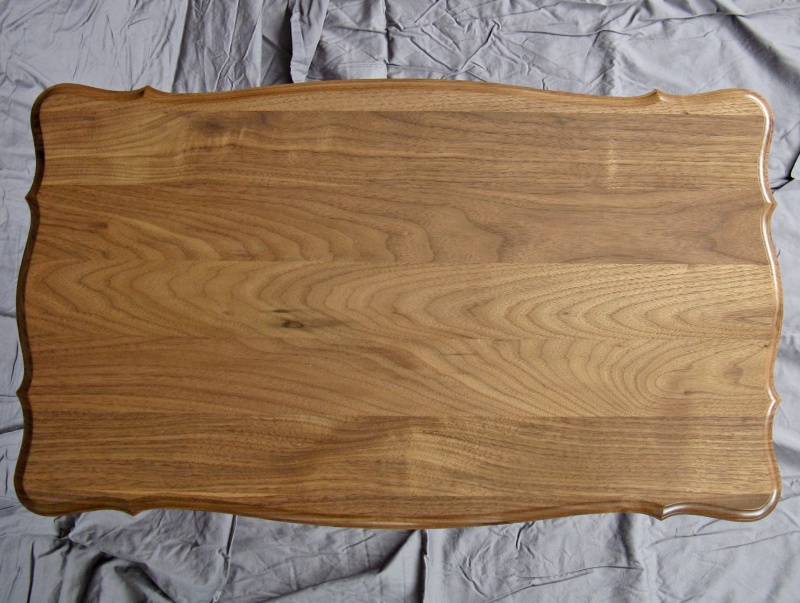
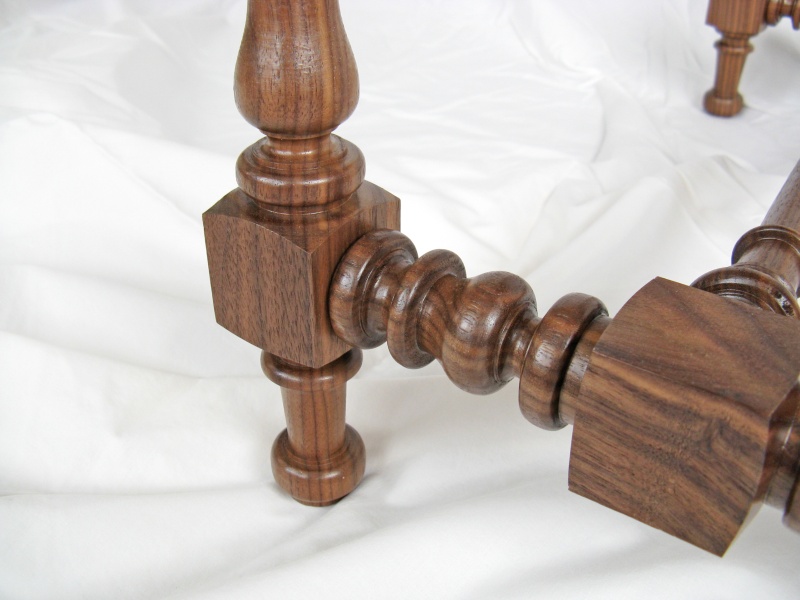
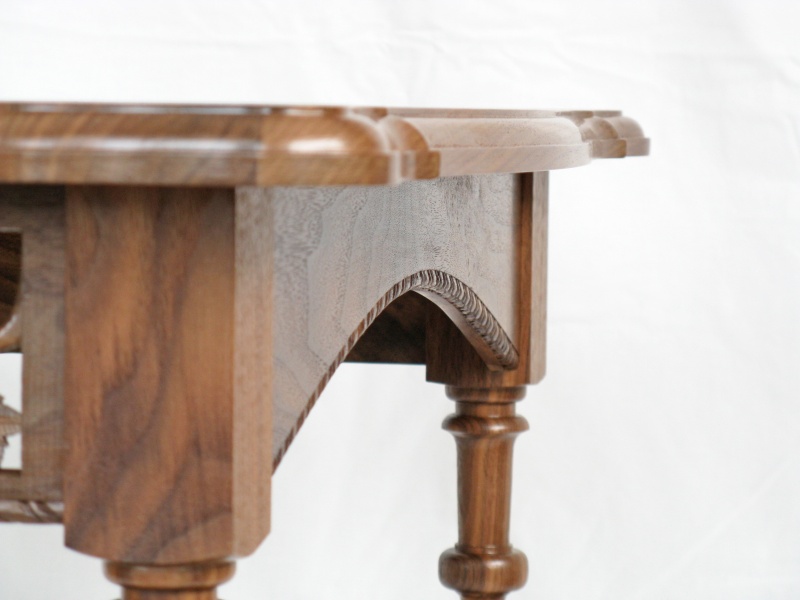
In keeping with the more ornate design philosophy, the legs were turned with lots of detail, leaving square sections for attachment, and with stretchers that were turned to match. Our original antique side table had an ornate-shaped, plank-style top with a decorative edge, and this top was made with a similar design.
Construction is all mortise-and-tenon or dowelled with wood glue. The exception is the attachment of the top, which is held on with walnut clamps (sometimes called turnbuttons). These are little blocks that get screwed to the top. They each have a tongue that fits into a groove in the sides to clamp down the top. This permits a bit of movement for seasonal expansion and contraction. There is more detail on the construction
here.
| Material: | Walnut |
| Finish: | 2 (legs) to 4 (top) coats Miniwax Wipe-on Poly, clear satin |
| Size: | 24.5" h x 15.5" w x 26.5" d |
| Time: | 120 hours |
| Done: | March 2, 2011 |