This table will sit at one end of the loveseat but there isn't a lot of room since that's one side of the path into the living room, not to mention that a lamp is also at that end of the loveseat, further reducing the available space.
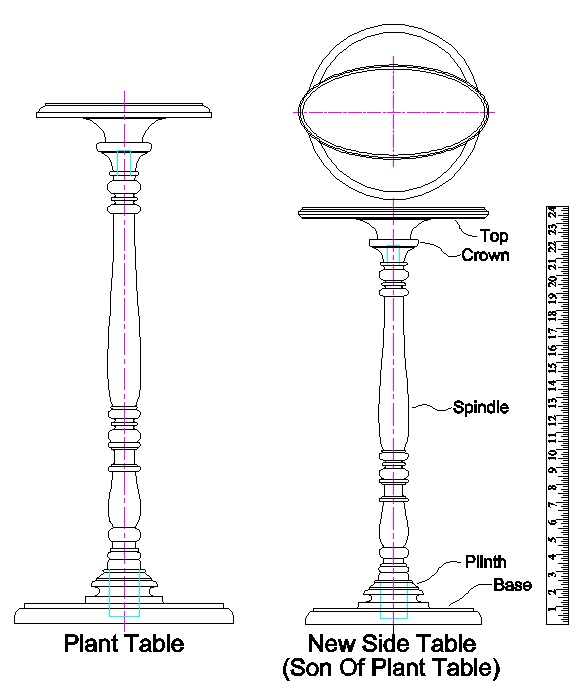
Those restrictions pointed toward a small table - no magazine/book storage in this one - and after sketching up 6 or 8 designs which all failed to turn my crank, I finally considered a turned-spindle design which seemed to fit the bill. I liked the design of the plant table I had done in 2017 so I based the new one on that.
The new table needed to be shorter than the plant table so rather than redesign the spindle, I just scaled it to 80% to get it to the correct height. That made it a bit thinner than I wanted, so I scaled the width to only 90% rather than 80 to beef it up a bit. It is otherwise identical except that the top was made elliptical to better snuggle up to the arm of the loveseat.
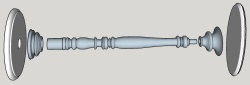
The new plan. A lot like the old plan.

Old & new posed in a virtual snowbank

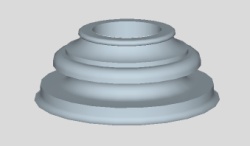
An exploded view showing the table components
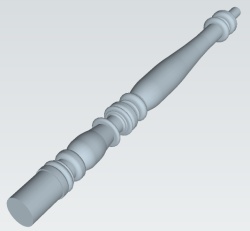
Spindle
Getting in a bit of practice before it actually matters
I began in a similar manner to the plant table - with practice in using the skew chisel. I even managed to find the test piece I'd used before - or at least the remaining bit after I'd used the rest of it for something else.
A nice length of cherry
I didn't didn't spend too long on practice this time and in fairly short order I was prepared to risk my actual spindle blank with my existing skill level.
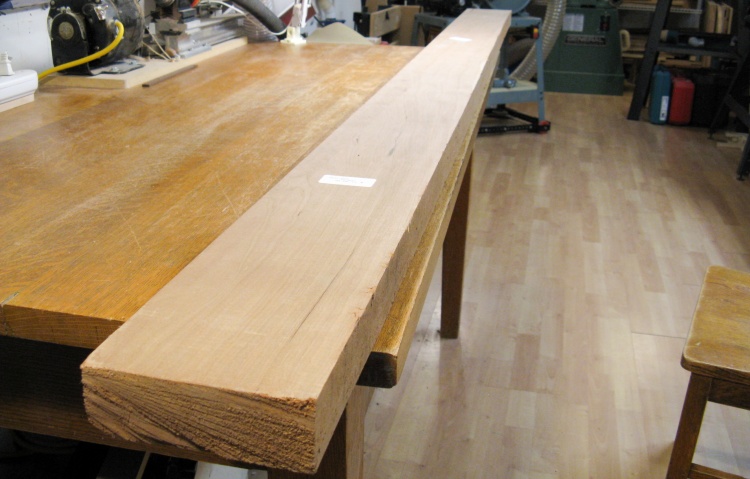
I didn't have enough wood on hand so I bought the nice piece of 8/4 cherry shown here. This would be more than I needed but leftovers would eventually get used.
I didn't have enough wood on hand so I bought the nice piece of 8/4 cherry shown here. This would be more than I needed but leftovers would eventually get used.
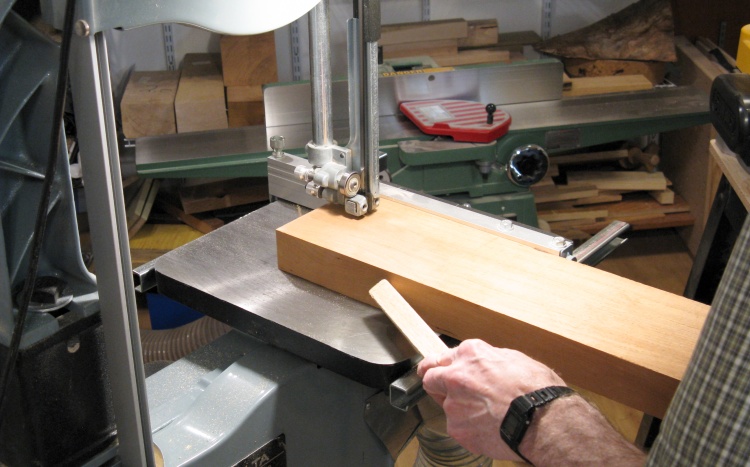
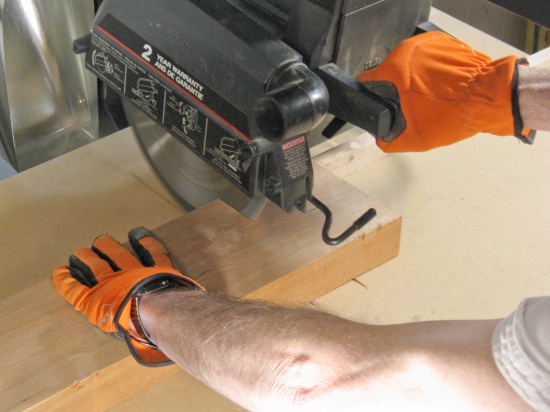
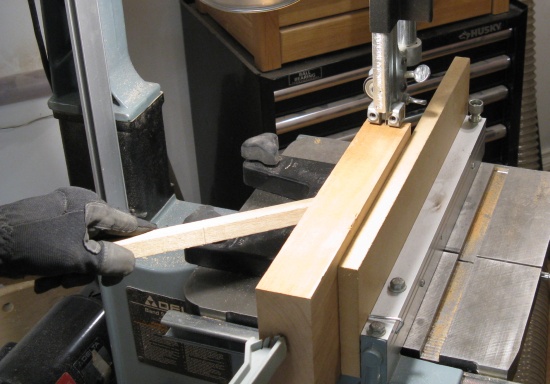
Cutting a piece for the spindle
I started off with a 2-foot-long piece and cut off a narrower slice to use as the spindle turning blank.
Spindle blank after rounding
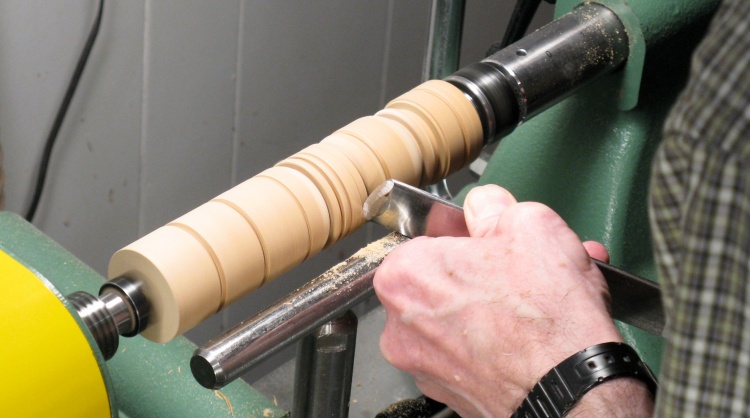
The blank was mounted between centers on the lathe and the first step was to round it off, which brings us up to this rather long photo.
Marking the edges of all the features
As usual, I'd printed a full-size plan and here I've folded it in half to put the lines on the edge and started marking the position of all the features along the length.
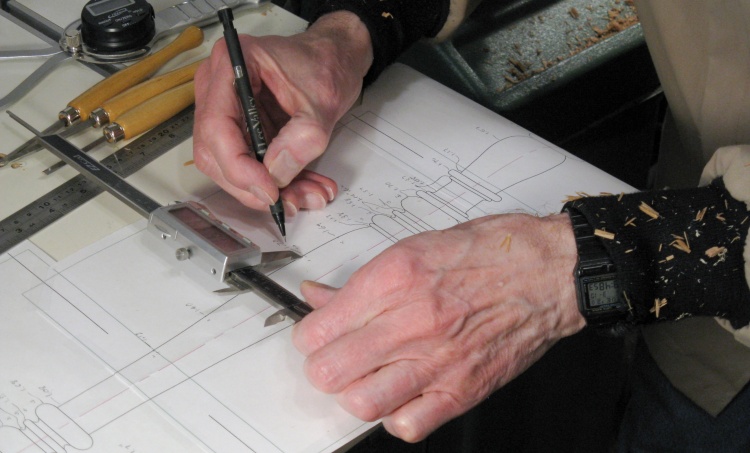
Writing down diameters at strategic points to prep for turning
I did some measuring and marked down diameters for the features. Then while turning I could just use calipers on the wood and compare the reading against the number on the plan.
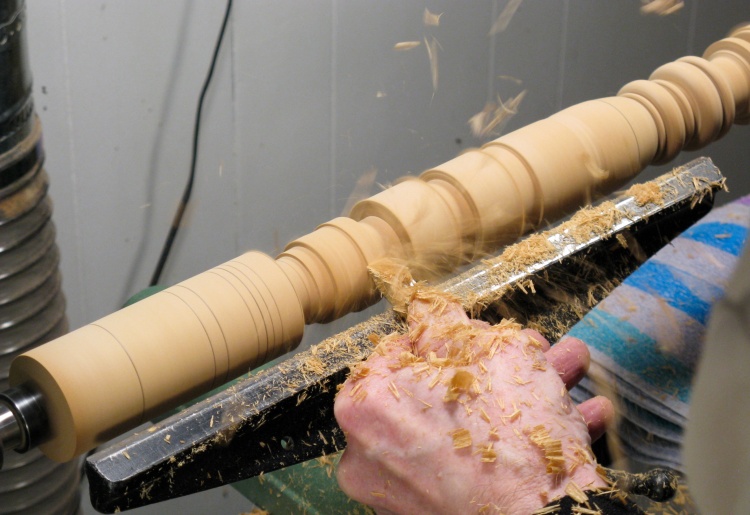
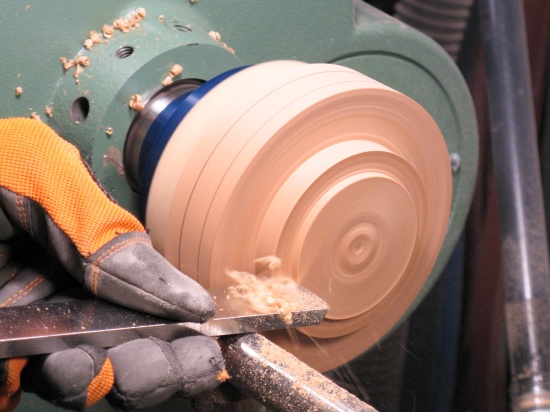
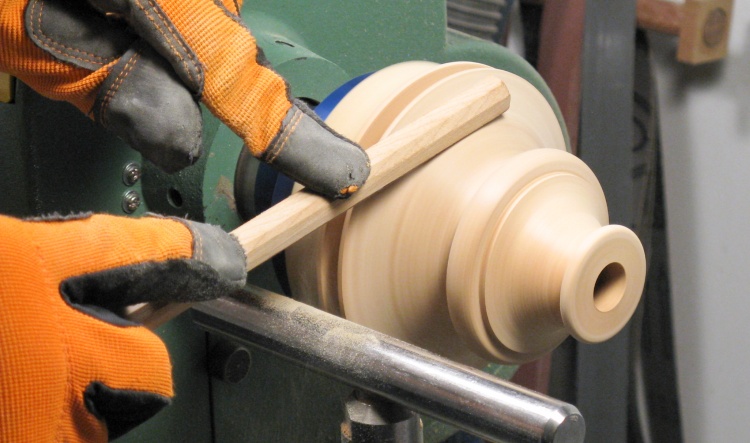
Getting on with the turning
Here's a nice flying-shavings shot as I reduce diameter of a little section using a biggish chisel. I already have a section done off to the right.
I started with the sections nearer the ends since there tends to be more vibration in the center area.
I started with the sections nearer the ends since there tends to be more vibration in the center area.
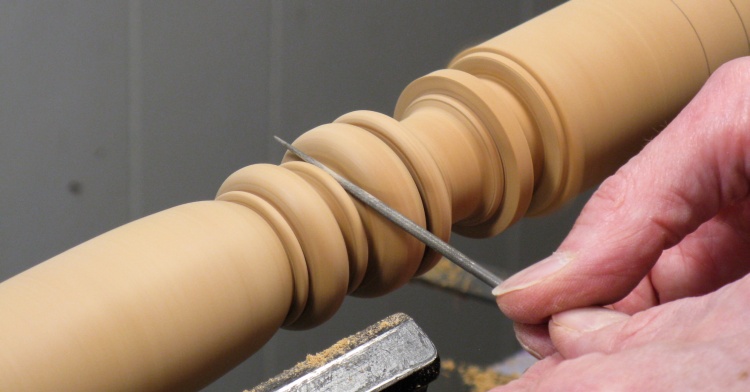
Filing a little cove
My just-turned surfaces are not always as smooth as one might hope for so I used files to improve them. Here I'm using a round needle file to work on a small cove.
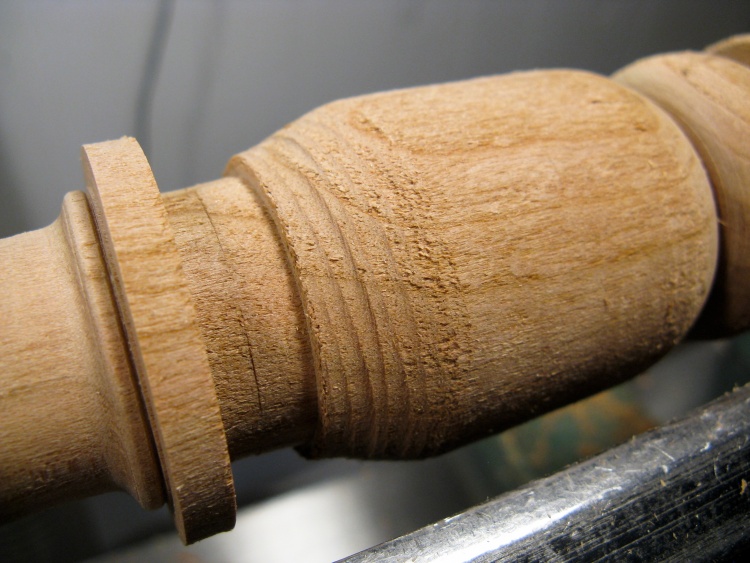
The effects of vibration
This close-up shows the effects of the vibration that tends to be worst near the middle of a long piece. The wood jumps around a bit giving the irregularly-cut effect seen here on the tapered edge.
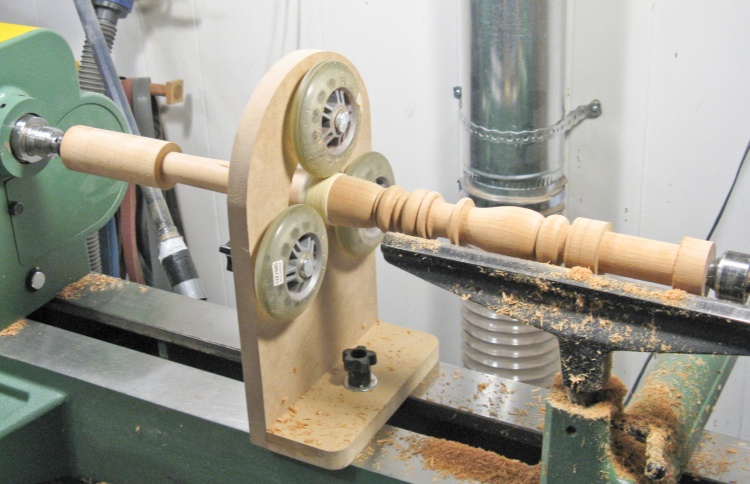
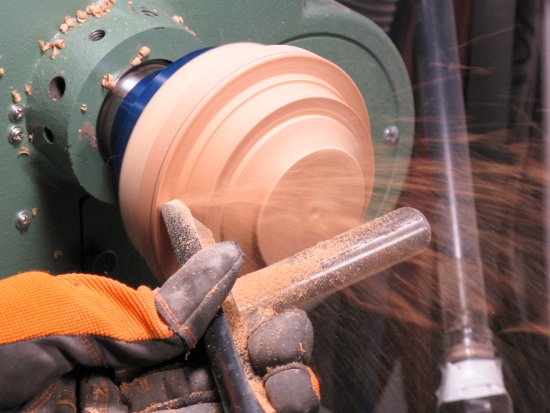
Stabilizing the spindle
The solution to vibration is to provide more support. Here a steady rest has been positioned around the middle of the spindle, which keeps the wood from flappin' around and let me work on either side of it.
Here is a rather short sequence of four shots showing the turning progress.


A quickie turning sequence
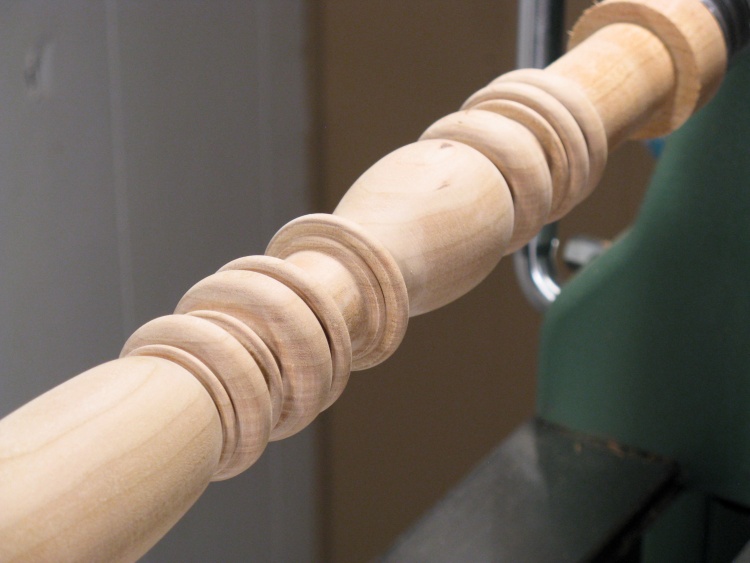
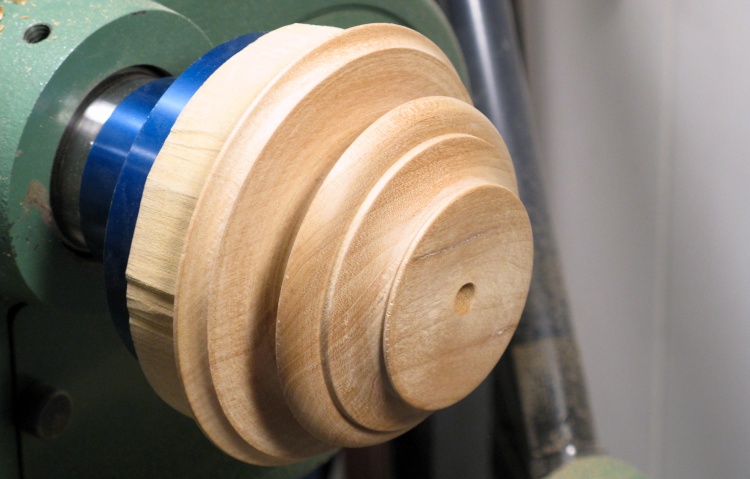
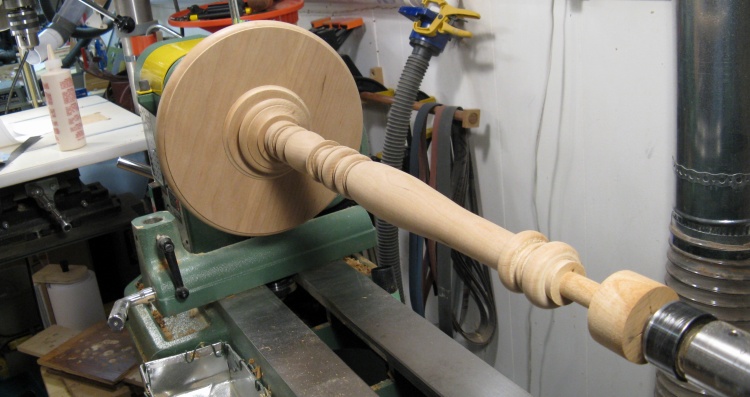
Spindle turned and sanded
And this is the finished and smoothed spindle (bottom half anyways).
The bottom section at the right-hand end of the photo is unsmoothed since that will just be glued into the bottom section. The knob at the very end is extra and will be cut off before assembly.
The bottom section at the right-hand end of the photo is unsmoothed since that will just be glued into the bottom section. The knob at the very end is extra and will be cut off before assembly.
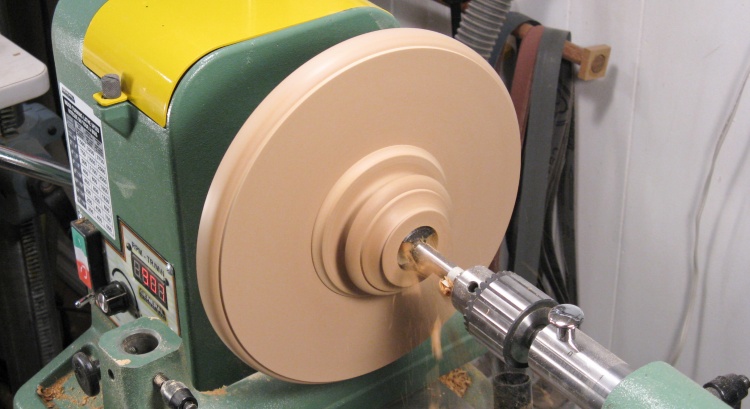
Plinth
The plinth was pretty straightforward; cut a blank, mount it to the lathe, turn it to shape and sand it smooth.
The plinth eventually needs a large hole to accept the bottom end of the spindle, but that gets drilled later.
The plinth eventually needs a large hole to accept the bottom end of the spindle, but that gets drilled later.
Cutting plinth block
Rounding the block
Starting to shape
A more-exiting shaping shot
Plinth turning done
The above photos show the plinth fabrication.
After the turning and some sanding it ended up looking a lot like this photo.
The cherry end grain was not too happy about being cut so it showed some roughness. You can still see some imperfect areas (whitish) even after the fairly significant amount of sanding done before this photo was taken. I'd do a bit more later to help it look more finished.
Crown
Crown blank rounded

The crown fabrication was a whole lot like the plinth except being taller, it needed to start with two stacked pieces of wood for the blank.
This photo shows the larger section already rounded with the smaller section just having the corners started.
This photo shows the larger section already rounded with the smaller section just having the corners started.
Shaped and getting sanded
And then with a deft bit of turning, a quick bit of drilling and some long and boring sanding (still going at it here), it looked like this.
To make it less obvious, the glue joint between the two pieces of wood was arranged to be in that little flat section near the middle.
To make it less obvious, the glue joint between the two pieces of wood was arranged to be in that little flat section near the middle.
4. Base

Cutting a length for the base
The base was started by cutting off a too-long piece of my cherry board. I had decided to make it long enough to cut off and discard the sniped sections caused by the planer. Those sections are around 3" for my current Dewalt planer so for my 10" circle I needed a 16"-long board.
Resawing into 1" thickness
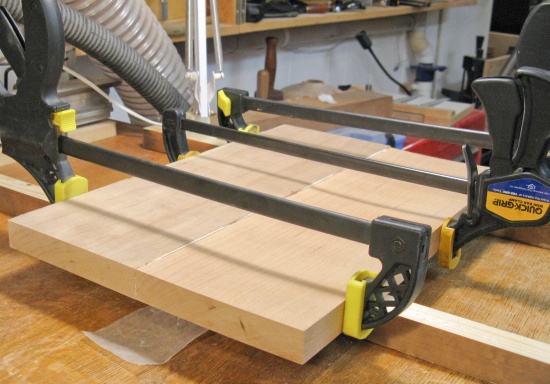
Laminating together to get 10" width
The insidious snipe (at 3" mark)
The above shots show the wood being cut into two thinner pieces and then edge-laminated. Once the glue was dry, they went through the planer to have the surfaces evened out and smoothed.
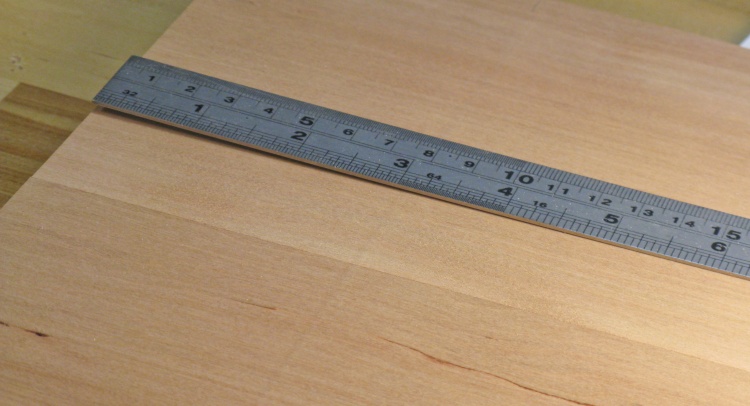
This photo shows one end of the wood where the end snipe can be seen as the faint line around the 3" mark of the ruler. The snipe is a thinning of the end of the board, in this case by about the thickness of a sheet or two of paper. For this application where surface flatness isn't critical it could probably have been smoothed with scraping and sanding but I thought for once I'd try to avoid it. Of course it cost an extra 6" of wood, but the cut-offs actually came in handy later in the project.
This photo shows one end of the wood where the end snipe can be seen as the faint line around the 3" mark of the ruler. The snipe is a thinning of the end of the board, in this case by about the thickness of a sheet or two of paper. For this application where surface flatness isn't critical it could probably have been smoothed with scraping and sanding but I thought for once I'd try to avoid it. Of course it cost an extra 6" of wood, but the cut-offs actually came in handy later in the project.

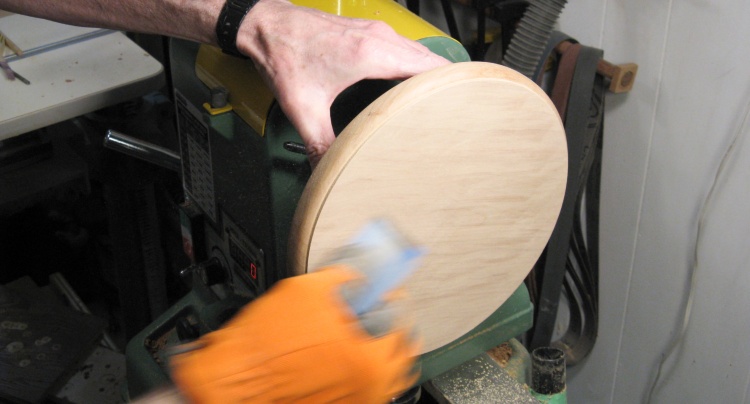
Base blank cut out and taped to faceplate
So then a 10" circle was cut out of my 10x16" board and attached to a faceplate (with wood screwed to it) using double-sided tape.
The simple shaping is done and now it's being sanded
Only a small amount of turning was needed to round the blank and then round over the edge. The face was then sanded with the lathe off as shown here, which completed the base.
Top
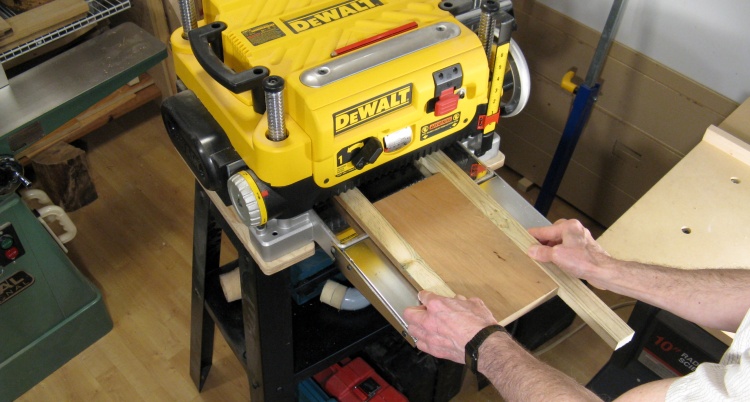
Top blank between anti-snipe rails
I decided not to cut the piece for the top extra-long so instead it was just made the correct length. The consequence was that the ends would have snipe if it was put alone through the planer so here I'm doing the planing between a pair of disposable rails so the snipe is on the end of the rails rather than the top.
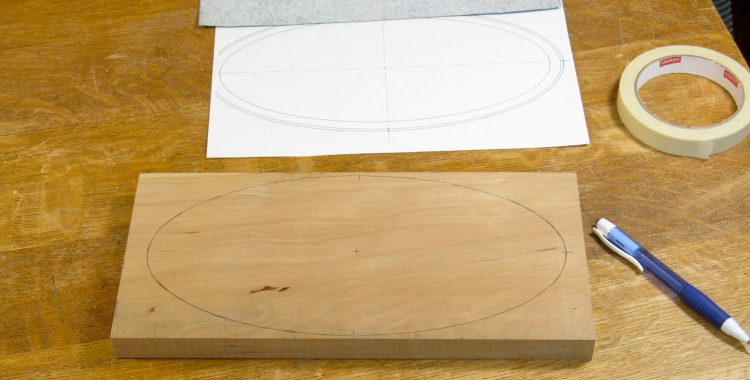
Top shape traced on in classic carbon
Once planed to smoothness and the correct thickness I marked the shape by tracing the pattern using carbon paper.

cutting out the shape
The next step was to cut the shape out close to the line on the bandsaw. This was followed by sanding of the edge closer to the line using a belt sander.
Since the line was just hand-drawn, it was imperfectly smooth so I just sand close to the line and then make sure the curves are smooth to the hand and eye.
Since the line was just hand-drawn, it was imperfectly smooth so I just sand close to the line and then make sure the curves are smooth to the hand and eye.
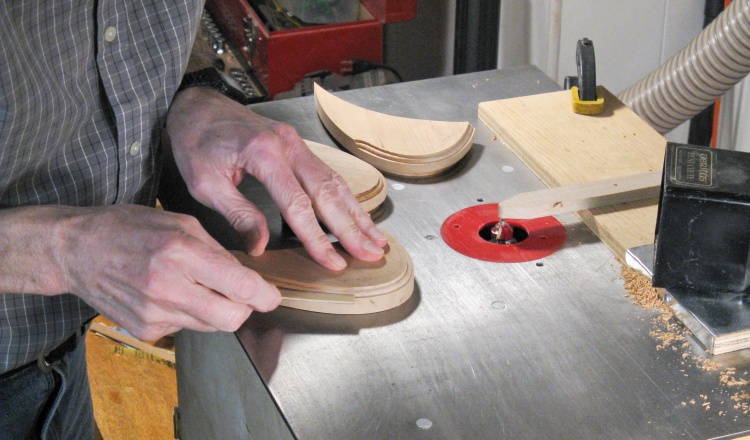
Trying out some edging techniques on scraps
I managed to shape the edge of the round base on the lathe but of course the elliptical shape of the top precluded doing that. My only real option for the top (other than developing deep skills at hand-shaping - Ha!) was to use the router.
Unfortunately the router can make a mess of edges if it needs to cut into the grain and on a curved piece like this, that happens on about half of it. There are some tricks to use (climb cutting, routing from another plane etc.) so I made some test pieces from the base cut-off (used up that snipe-reducing scrap!) and tried out some techniques. Here I'm sanding one of the edges I just cut on a test piece to see if it's going to look OK. Some other attempts sit in the background.
Unfortunately the router can make a mess of edges if it needs to cut into the grain and on a curved piece like this, that happens on about half of it. There are some tricks to use (climb cutting, routing from another plane etc.) so I made some test pieces from the base cut-off (used up that snipe-reducing scrap!) and tried out some techniques. Here I'm sanding one of the edges I just cut on a test piece to see if it's going to look OK. Some other attempts sit in the background.
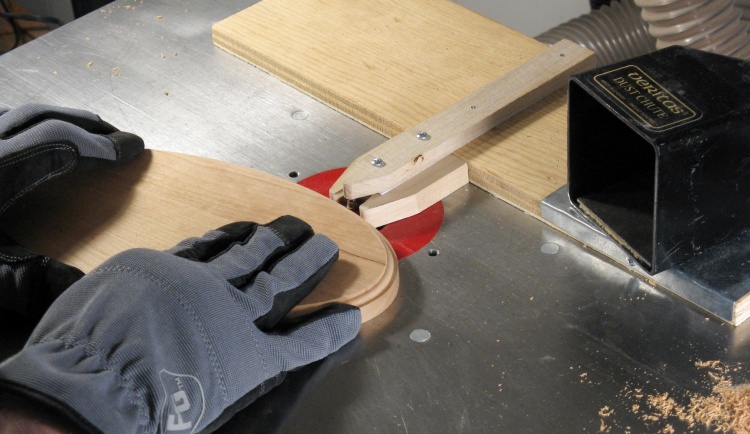
Edging the actual top
I eventually managed to get decent edges by routing in the normal direction but taking very small amounts off each time (so about 4 cuts to get to the final depth) followed by sanding of the edges and rounded portions.
In this photo the top side edges have already been shaped, here I'm doing the bottom-side edges.
In this photo the top side edges have already been shaped, here I'm doing the bottom-side edges.
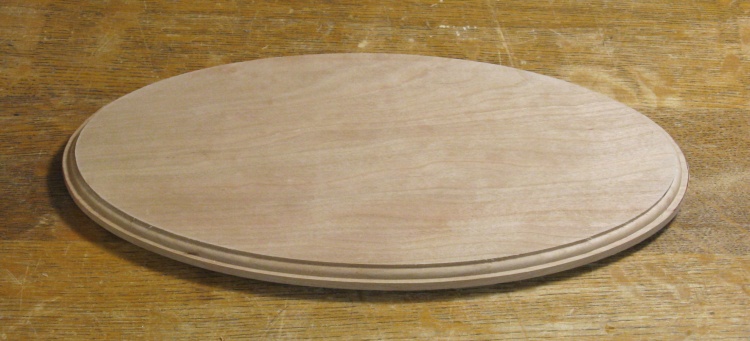
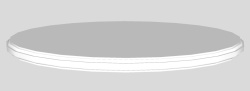
Top shaping completed
The completed top.
Assembly
Gluing plinth to base
So all the pieces were fabricated and it was just a matter of putting them all together.
I started at the bottom and glued the plinth to the base, held here with my deepest clamp.
A metal rod that I used to help center the pieces sticks up out of the plinth so I added a hollow dowel to press down around that rod for this clamping operation.
I started at the bottom and glued the plinth to the base, held here with my deepest clamp.
A metal rod that I used to help center the pieces sticks up out of the plinth so I added a hollow dowel to press down around that rod for this clamping operation.
Drilling bottom assembly to accept spindle
I had purposely left the faceplate on the base so after the glue dried I was able to put the assembly back on the lathe so I could drill a nicely-centered hole. The 1-1/4" hole, used to mount the spindle, went through the plinth and into the base a bit.
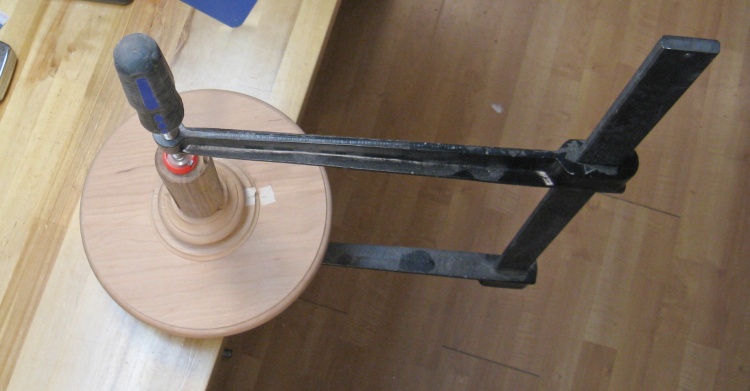
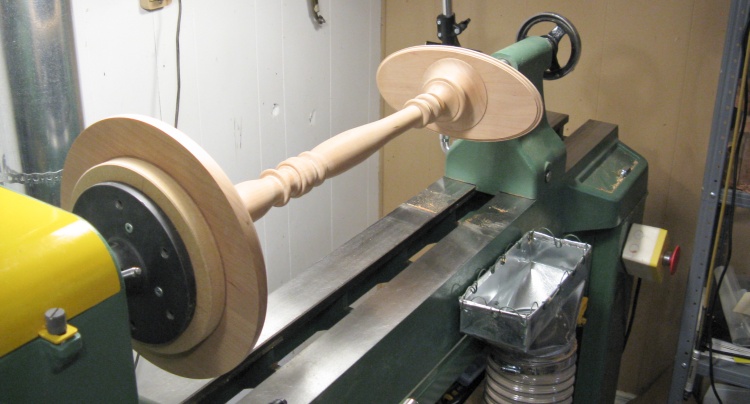
Gluing in spindle using the lathe as a big clamp
Then the spindle was glued into the bottom assembly. I used the lathe as a big clamp since it held everything centered and straight.
Mating top and crown pieces
Then like was done with the bottom, the crown was glued to the top.
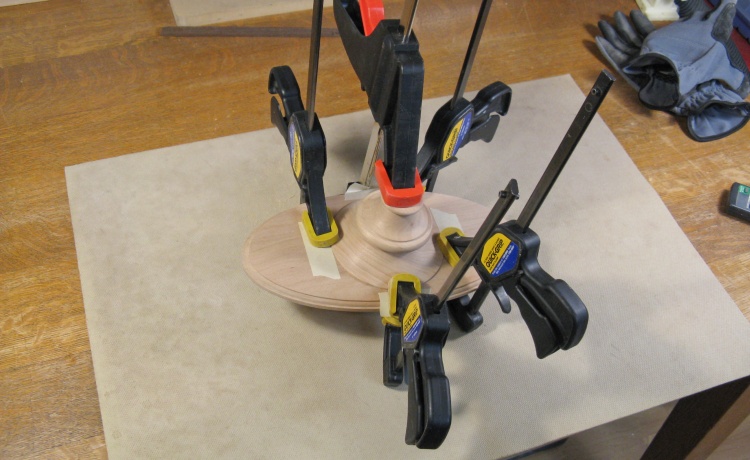
Top assembly being glued to the rest
And finally the top assembly was glued to the rest of the table. I just left everything on the lathe to do this final gluing.

Some post-assembly touch-up of sanding imperfections
I pulled the table off the lathe, detached the taped-on faceplate from the bottom and put the recessed circle for my initials on the bottom.
Then with the table in it's regular orientation I looked it over and worked on my humility by fixing up the many rough spots that had not been sanded adequately. I used files and sandpaper to clean up those areas.
Then with the table in it's regular orientation I looked it over and worked on my humility by fixing up the many rough spots that had not been sanded adequately. I used files and sandpaper to clean up those areas.
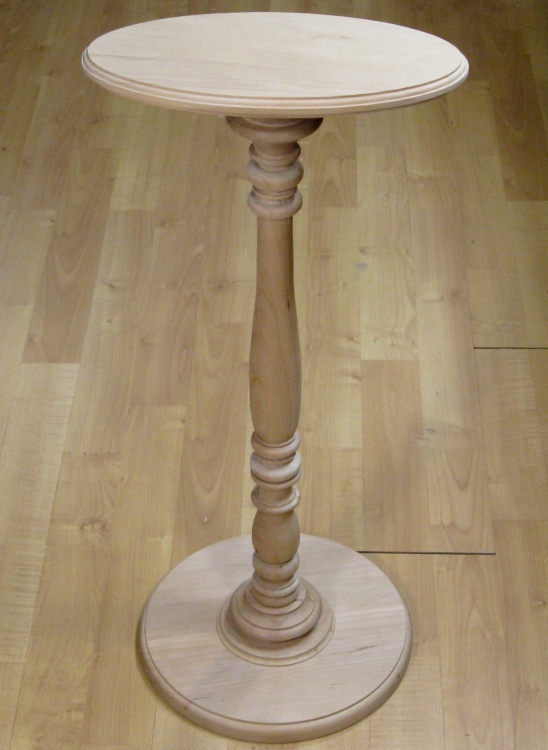
Woodworking is complete
And that completed the woodworking. This photo shows the completed table before finishing.
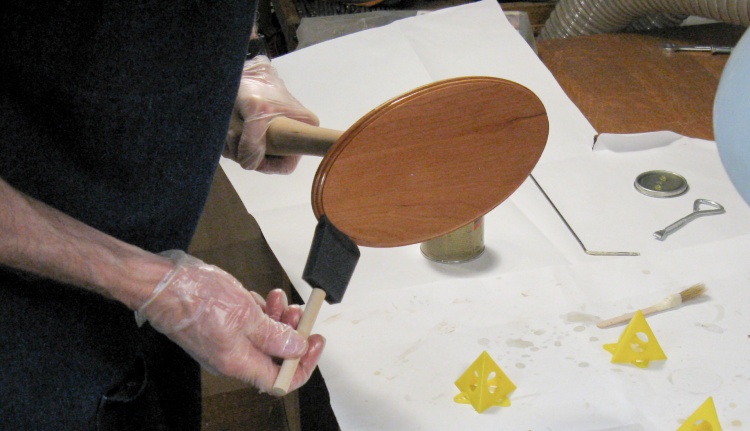
Starting to apply varnish
I used my usual Fast-Dry varnish for the finish. Here I'm applying the first coat using a sponge brush for the larger areas. There's also a little bristle brush in the background used to get finish into the finer crevices.
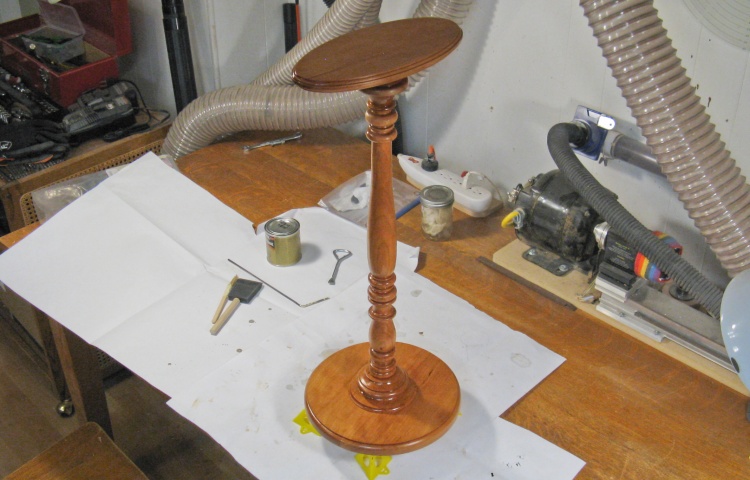
The first coat of varnish applied
This photo shows the table with the first coat of varnish applied. In the end it received three coats for most of it and a fourth on the top for a bit better durability.
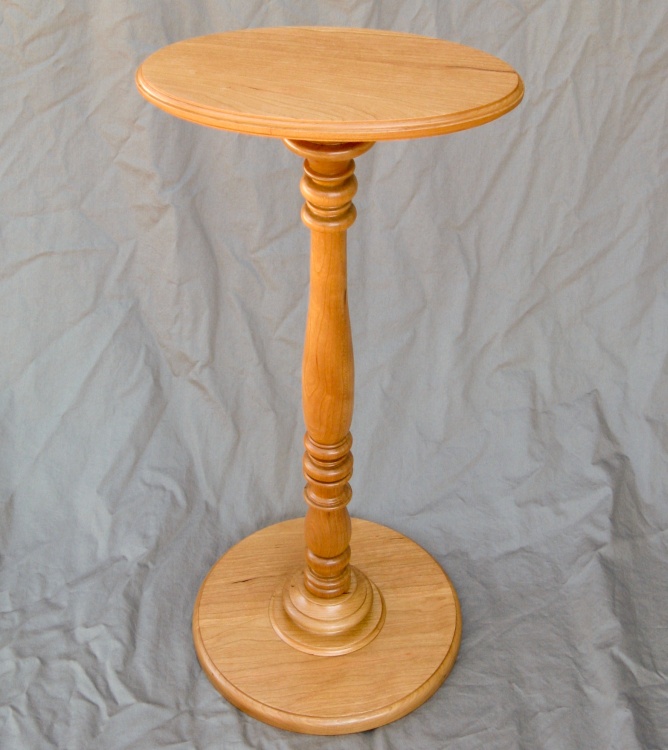
Done


