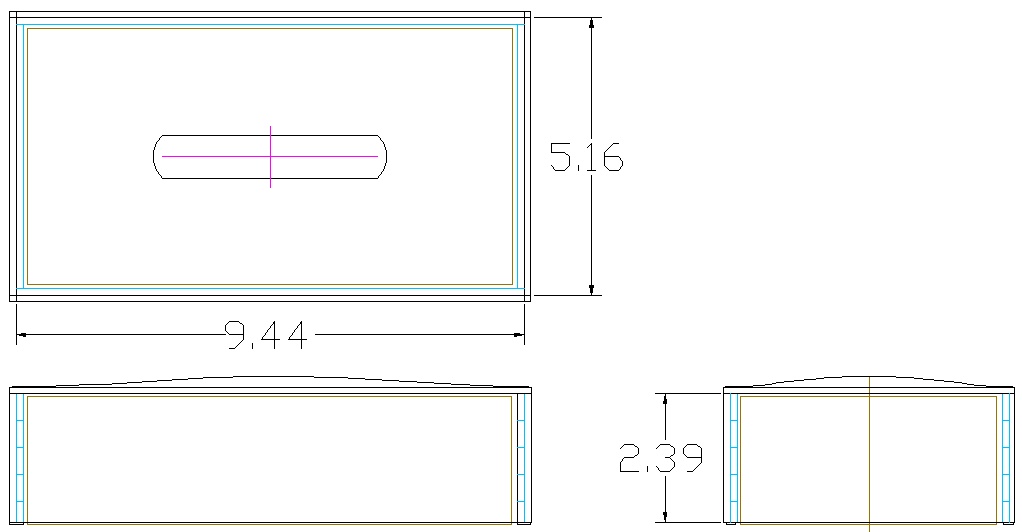
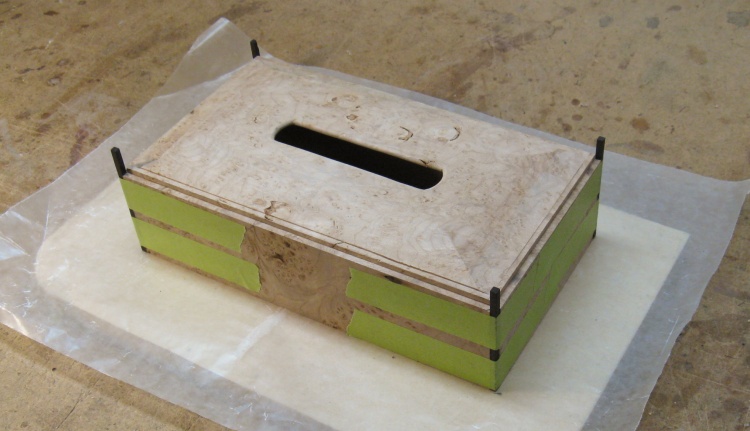
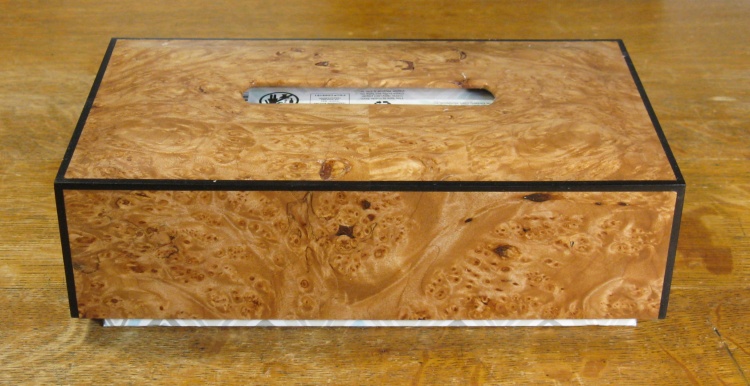
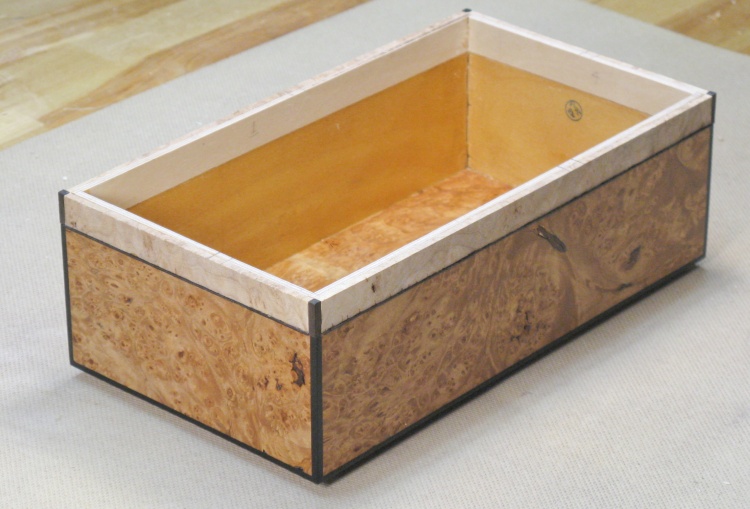
This tissue box is pretty simple since it's just four flat sides and a slightly domed top. However I was concerned about warpage of the relatively thin wood so I decided to laminate the sides with stiff 1/8" plywood, which made the construction a bit more involved. The maple burl is therefore essentially a veneer, albeit as thick as the underlying substrate. African blackwood trim was used on the corners to add a bit of contrast.
The plan
1/8" Finnish birch plywood
I started by making the inside plywood box.
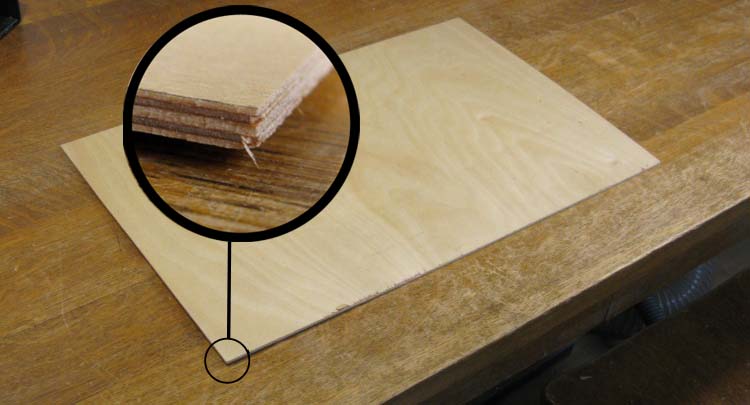
I dug out this small sheet of 1/8" Finnish Birch plywood to be used for the walls. It has five thin plys of birch, which makes for a nice stiff sheet.
I dug out this small sheet of 1/8" Finnish Birch plywood to be used for the walls. It has five thin plys of birch, which makes for a nice stiff sheet.
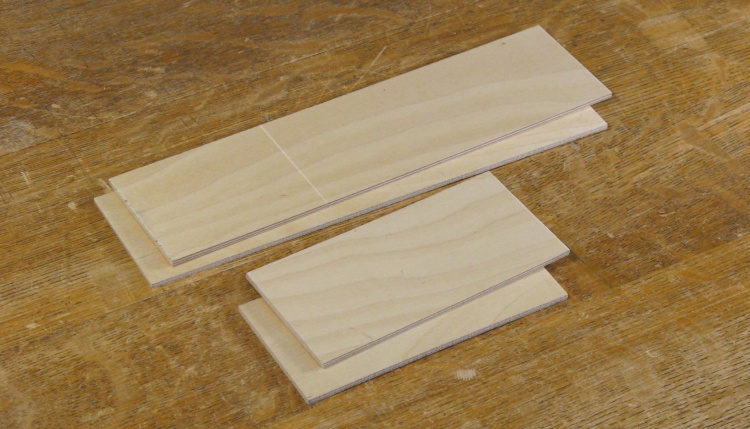
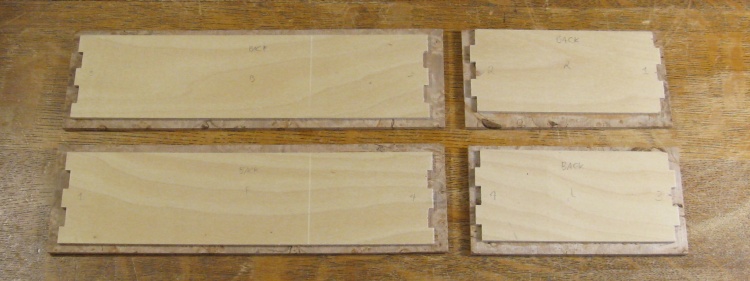
Four sides cut out
A bit of work with the bandsaw produced the four sides of the box. It will be just a bit larger and taller inside than a standard-sized short tissue box (Kleenex brand anyway).
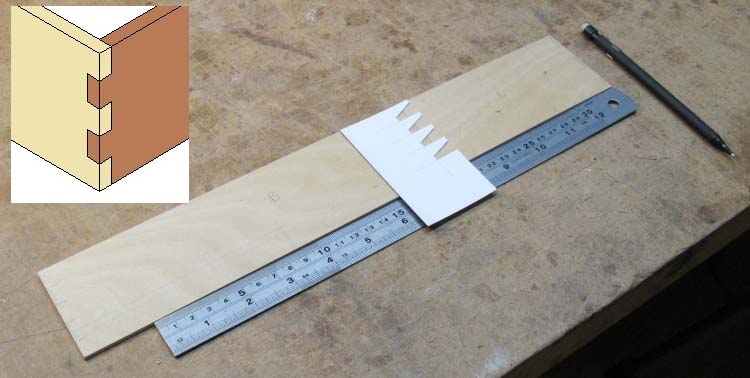
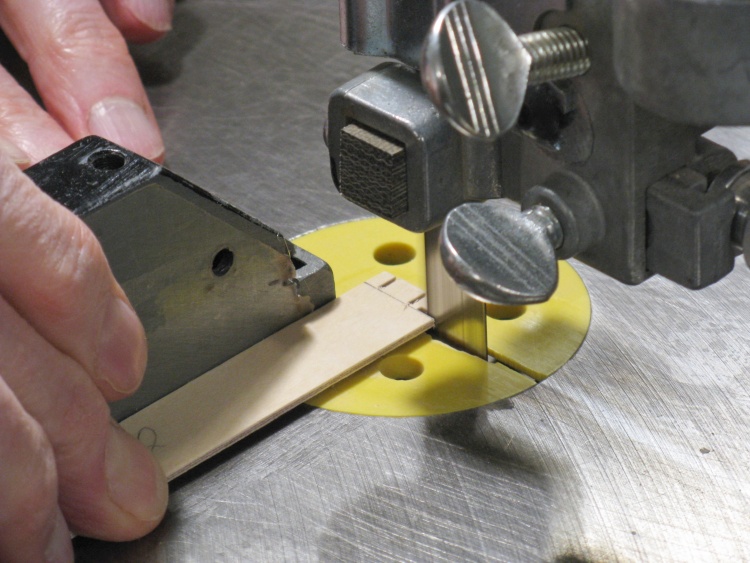
Marking the joint fingers
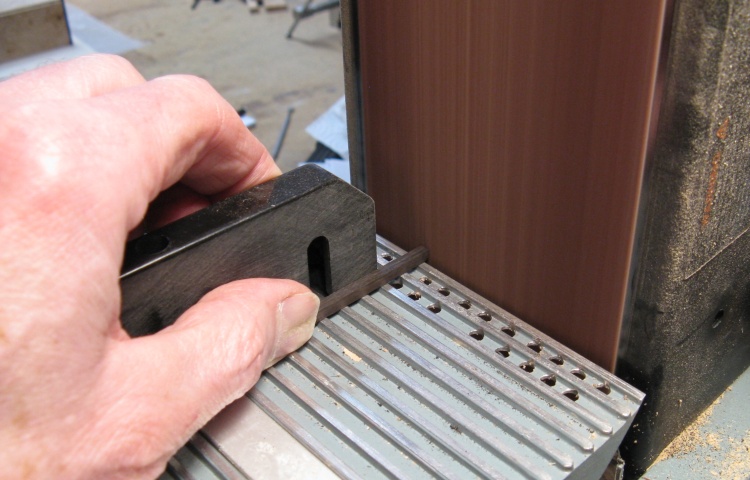
The plywood is pretty thin, so I planned on some simple jointery to increase the corner strength a bit. I used a box joint which had three rather fat fingers on the long sides and two on the ends.
To get consistent finger widths, I made a little business-card template and marked both sides of a corner at once using a pencil.
To get consistent finger widths, I made a little business-card template and marked both sides of a corner at once using a pencil.
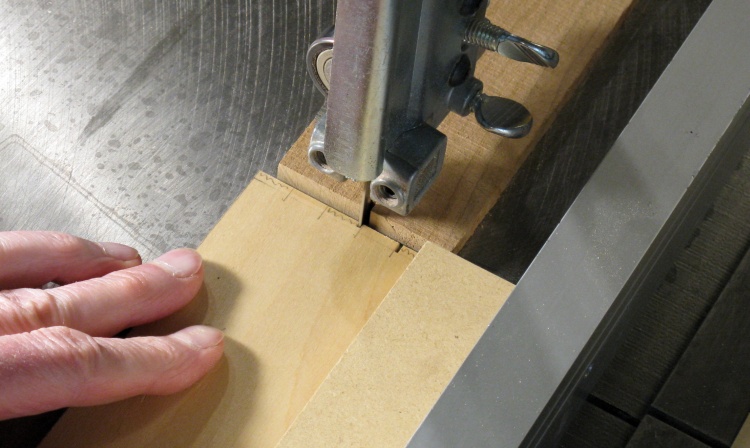
Cutting the (rather fat and short) fingers on the bandsaw
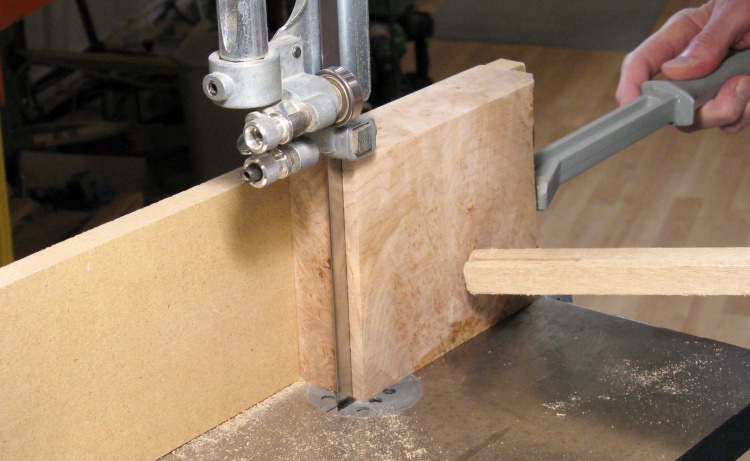
The conventional way to cut finger joints is to use a router, but I did a test run and found that it tended to shred the plywood layers. That wasn't gonna fly, so a different method was needed.
I ended up using a bandsaw to cut the fingers. I added a wooden stop behind the blade to set the depth of cut, then set the fence the correct distance for each finger. A sequence of side-by-side cuts (moving the fence slightly between cuts) was used to remove the wood between each finger.
I ended up using a bandsaw to cut the fingers. I added a wooden stop behind the blade to set the depth of cut, then set the fence the correct distance for each finger. A sequence of side-by-side cuts (moving the fence slightly between cuts) was used to remove the wood between each finger.
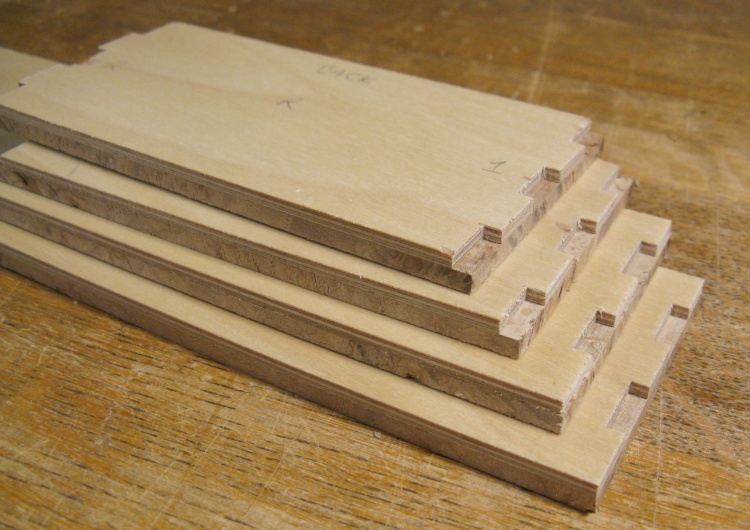
The four sides assembled to test the fit
The joints didn't need to be perfect since they would be hidden under the maple. So in fairly short order, all the sides were cut and tweaked to fit where necessary. This photo shows a test fit of the sides.
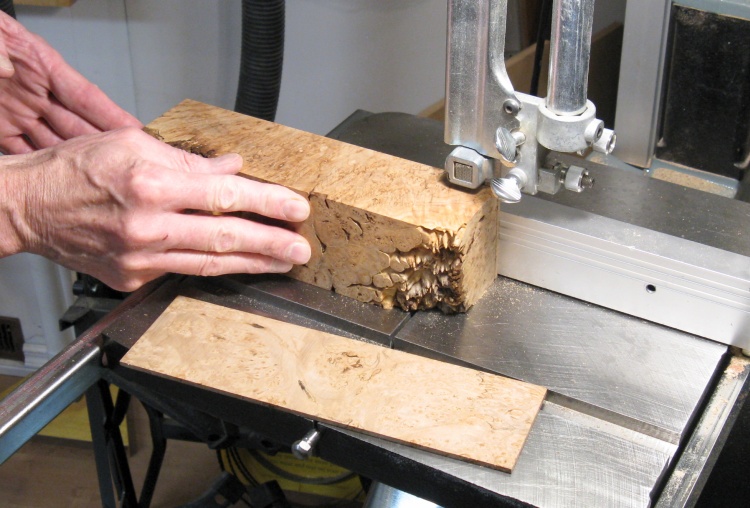
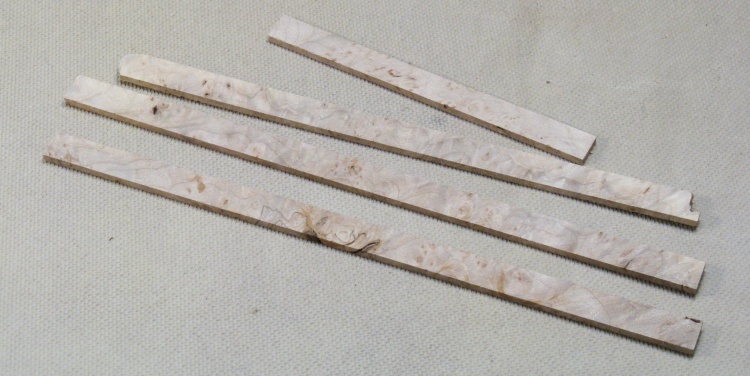
A nice piece of maple burl being sliced into thin pieces for the sides
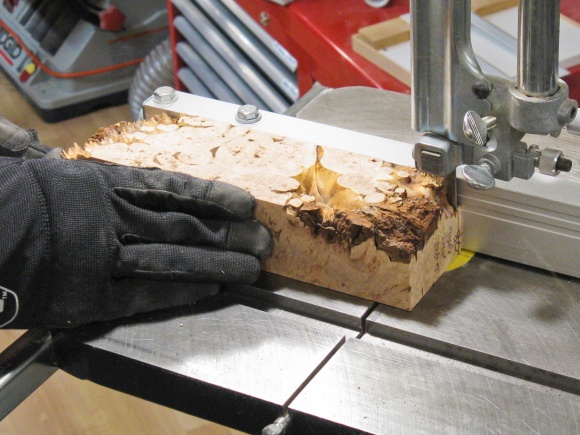
The next step was to cut the thin maple slabs for the sides. I used a piece of maple that was long enough for the longest sides, and cut off a slab for each side. They were a bit over 1/8" thick - maybe 0.140".
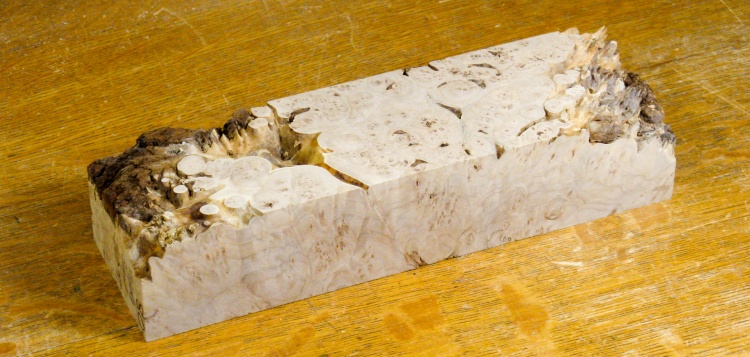
I had a bit of maple burl (bought more than 20 years ago and used for a few minor projects) but it wasn't going to be enough for the tissue box without tiling it out of smaller pieces. I also wasn't able to find any maple burl locally but a fellow on eBay (in Canada!) had a nicely-presented selection of Big-Leaf maple burl, and I was able to order a few pieces from him.
I had a bit of maple burl (bought more than 20 years ago and used for a few minor projects) but it wasn't going to be enough for the tissue box without tiling it out of smaller pieces. I also wasn't able to find any maple burl locally but a fellow on eBay (in Canada!) had a nicely-presented selection of Big-Leaf maple burl, and I was able to order a few pieces from him.
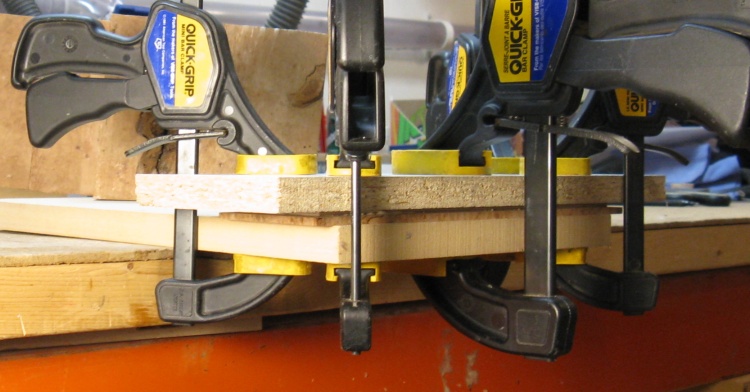
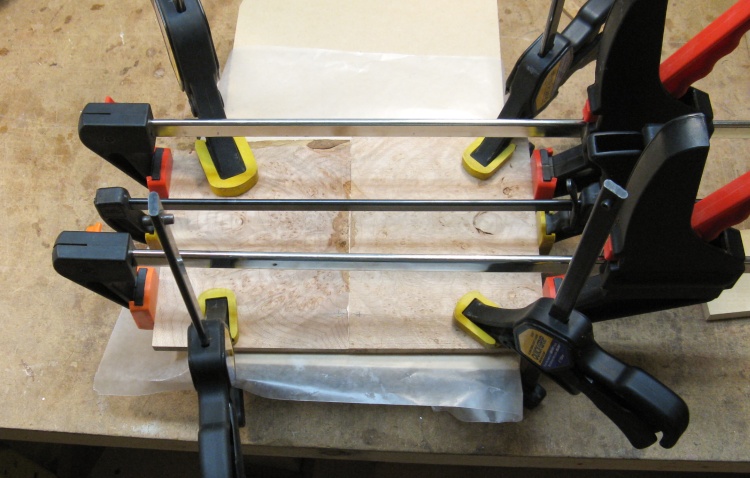
Gluing a slab of maple burl to one of the sides
The maple slabs were glued to the sides and clamped between flat boards as shown here.
I hoped this would keep the laminated sides flat, but they all had a bit of curve to them when unclamped. I suspected this was moisture from the glue affecting the maple, and that was likely the case since they flattened out after several days and they were fine when I was ready to assemble them.
I hoped this would keep the laminated sides flat, but they all had a bit of curve to them when unclamped. I suspected this was moisture from the glue affecting the maple, and that was likely the case since they flattened out after several days and they were fine when I was ready to assemble them.
Here's all four sides with oversize maple slabs attached
The maple needed to be pretty much exactly the same size as the plywood backing, so instead of attempting to cut and glue them perfectly, I made the maple oversized with the intent of trimming them to fit.

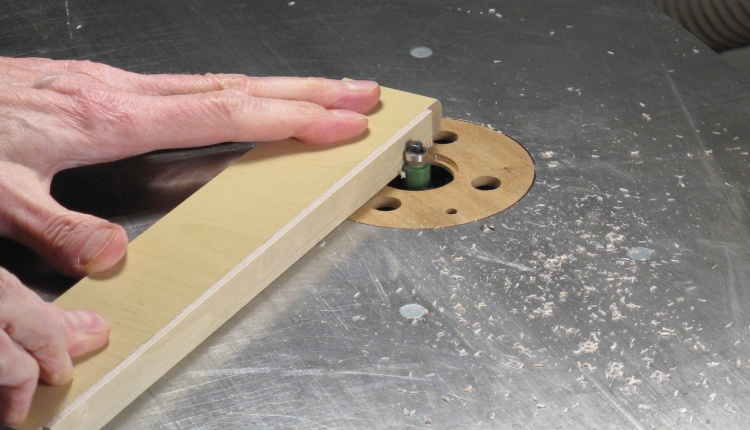
This piece has a square-corner jig taped on for routing
The strategy for trimming was to make a nice square pattern that would be taped to the plywood with one corner aligned. I would then route away the maple on two sides against the pattern with a trimming bit. Then the pattern would be moved to align with the diagonally opposite corner and the other two sides routed flush.
This photo shows one of the sides with the pattern piece taped to it with the near corner aligned.
This photo shows one of the sides with the pattern piece taped to it with the near corner aligned.
The sides with maple trimmed to size
Here the four sides all have the maple trimmed flush to the plywood. I had been careful when laminating the sides to avoid getting any glue in the finger areas since that would prevent a tight joint when it became time to assemble the box.
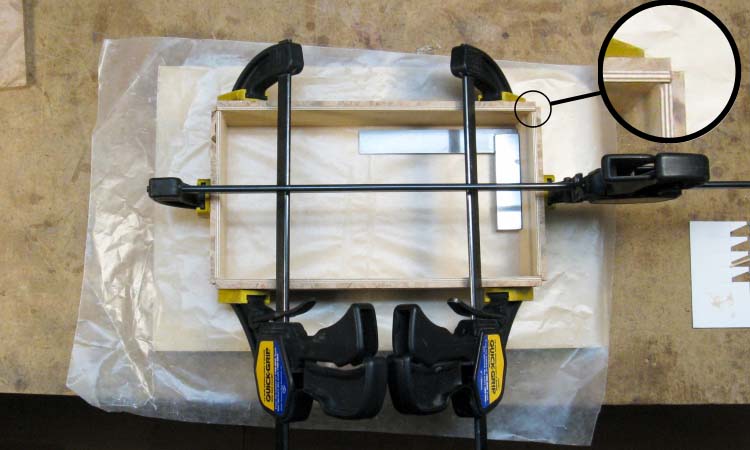
The box sides get glued together
And then...it was time to assemble the box. Here the sides are being clamped until the glue sets.
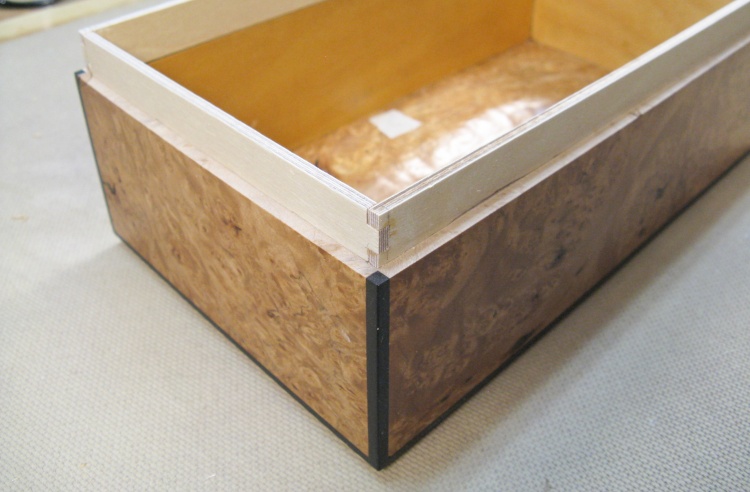
The maple slabs on the sides only extend as far as the end of the plywood. The result is a square notch in the corners that will accept the blackwood trim.
The maple slabs on the sides only extend as far as the end of the plywood. The result is a square notch in the corners that will accept the blackwood trim.
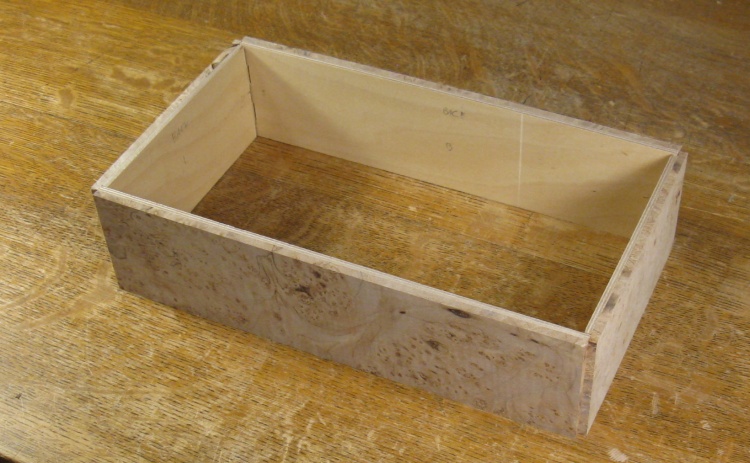
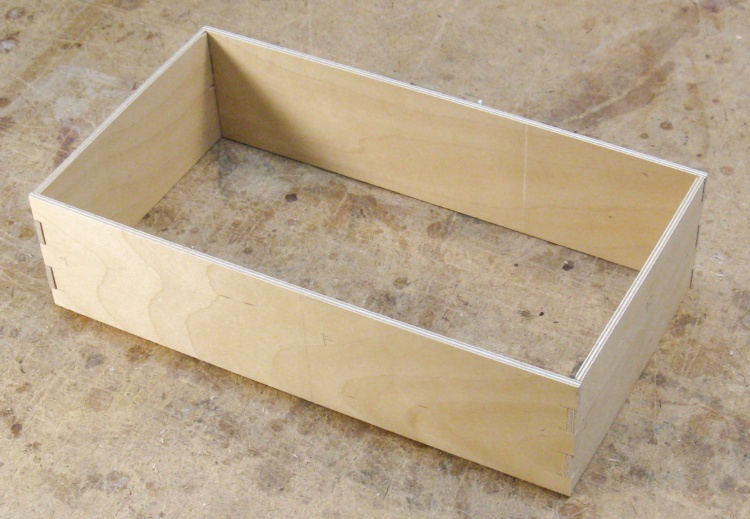
The box so far
That's pretty much it for the body of the box. The next step is to make the cover to go on top.
Cutting another piece of maple for the top
I didn't have a piece of maple burl large and thick enough to make the top, so the plan was to join two smaller pieces together. In this shot the first of two slices are being taken from a maple blank that is a bit more than half the size needed.
Gluing together the book-matched top pieces
Once those were cut, the edges were glued together with the recently-cut faces on the top. This produced a book-matched grain pattern on the top, although as you can see from the next photo that it isn't very obvious due to the somewhat random look of the grain.

The top marked and ready for trimming
This is the oversized top with the corners and tissue opening marked. I located the opening to span a couple knots in the wood so it would look a bit more balanced.
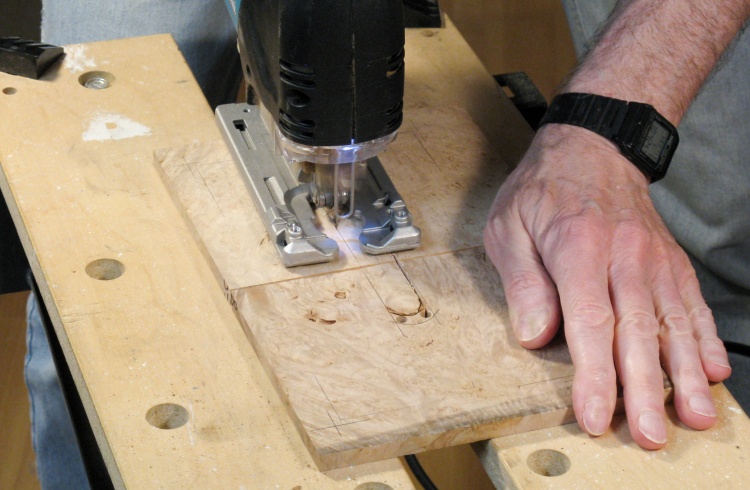
Cutting out the tissue opening
After drilling some corner holes for saw-blade access, the opening was cut out with a jigsaw. The hole was a bit undersized to leave room to clean it up later after the wood was thinned.
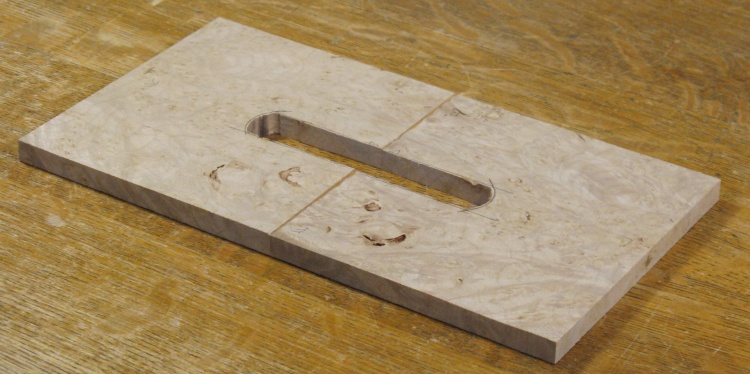
The top cut to size
Here the top has been cut so it was exacly the size to fit over the plywood sides of the box, but doesn't extend to cover the maple.
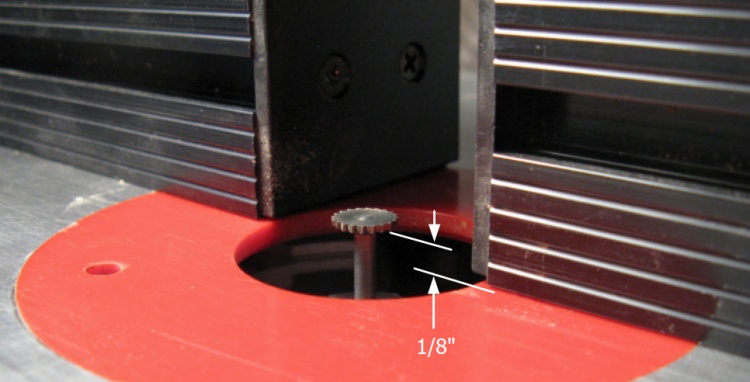
The edges of the cover needed to be 1/8" thickness for my corner trim arrangement to work, so I needed to figure out how to thin the edges consistently.
The edges of the cover needed to be 1/8" thickness for my corner trim arrangement to work, so I needed to figure out how to thin the edges consistently.
Mini buzz-saw bit, set up on router table
I ended up using this funky little "buzz-saw" Dremel attachment (or more boringly "199 High Speed Cutter") that when mounted in the router table would make a cut at a consistent height around the edge of the cover. The slot it cut would guide my sanding efforts.
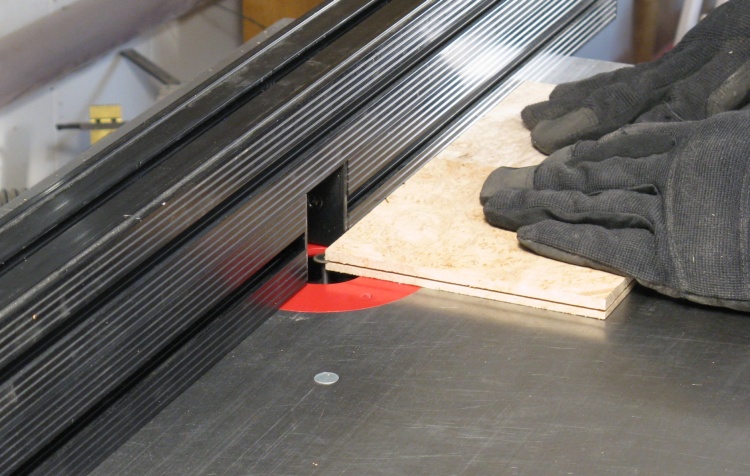
Cutting the edges of the top to accurately set the edge thickness
Here is the little saw in action. As shown above, it was set to the correct height to make a cut just over 1/8" from the bottom of the cover.
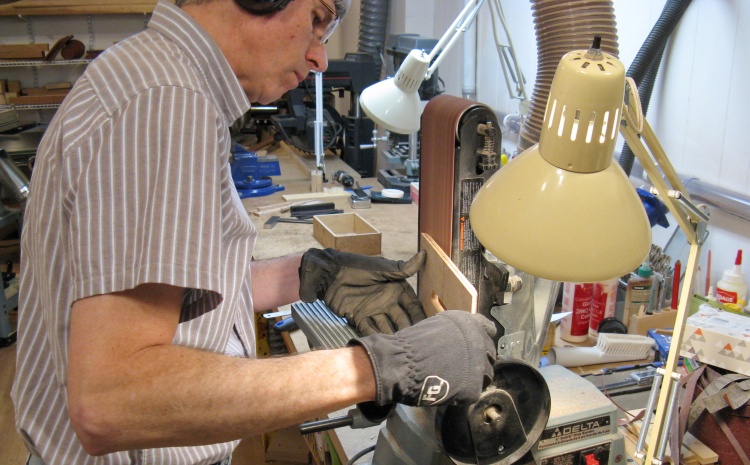
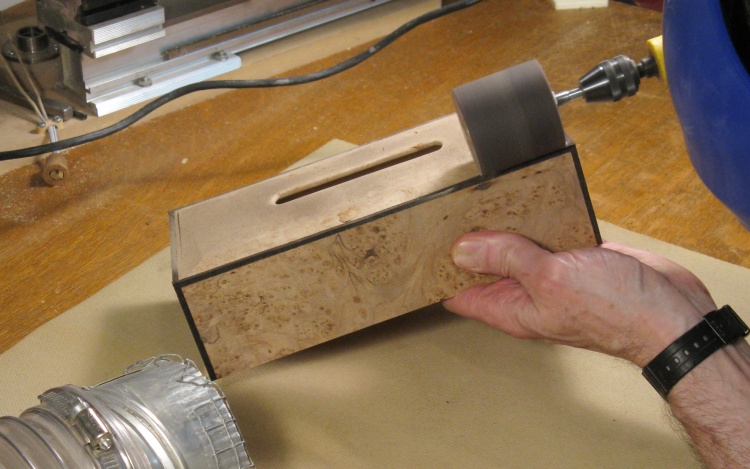
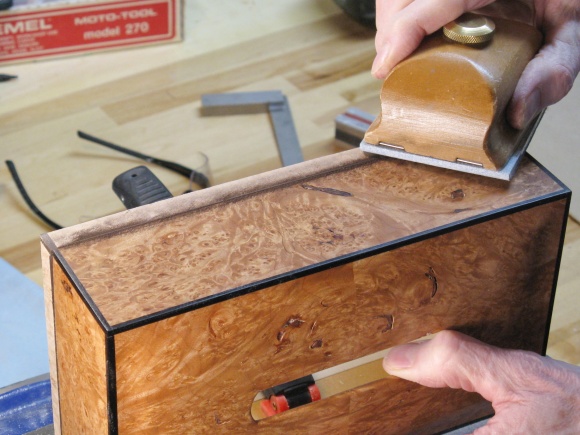
Shaping the top on the belt sander
The belt sander was used to shape the top. I used the round top of the belt to thin the edges and in this photo I'm doing a bit of shaping of the center part with the flat section of the belt.
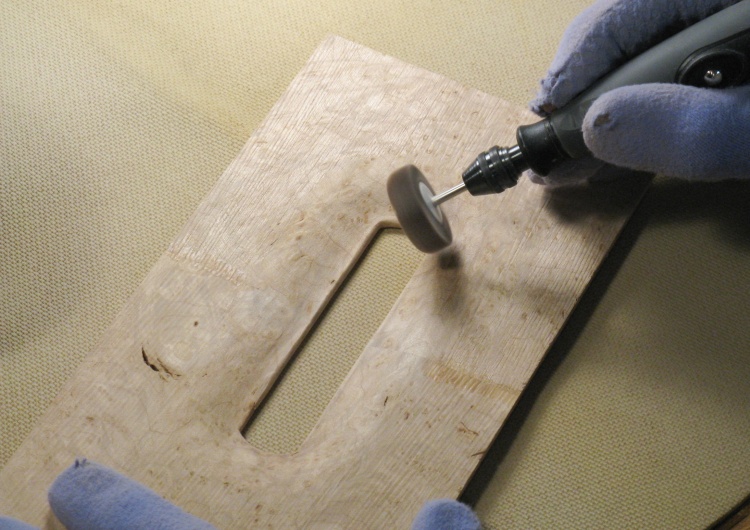
Using the Dremel to thin the center section
I wanted a thinner section visible where the tissues came out, so I needed to remove wood around the hole on the underside of the cover.
In the previous tissue box cover I made (for the record, the poetically named "Tissue Box Cover 2"), it was tough to thin the cover with the sides in place so I made sure to do this one before assembly.
Here I'm using a Dremel tool with a flex shaft and an aggressive abrasive bit to thin the wood. The bit is the little brother of the larger tungsten carbide one I have used previously for vessel shaping.
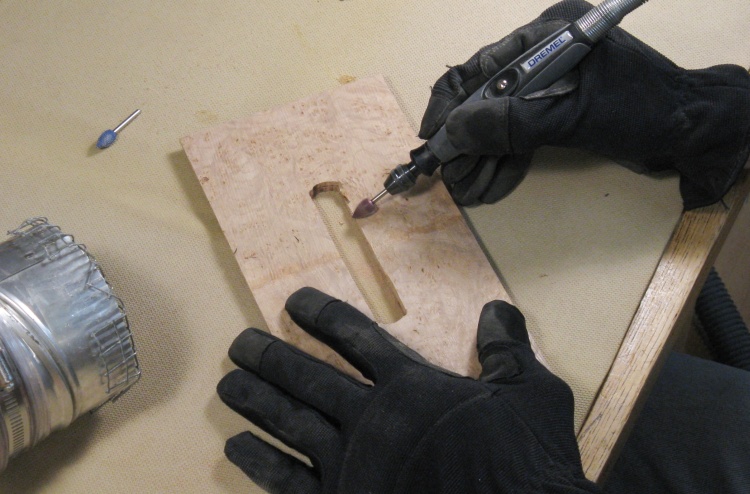
Smoothing out the opening with files
Once the wood around the opening had been thinned (to the thickness of, yes, 1/8"), it was easier to smooth out the walls of the opening using files.
Smoothing the underside of the top
The last pre-assembly step on the top was to smooth off the nasty gouges left by the abrasive bit. Here a flap-wheel sander is used for that purpose.

Gluing on the top using "gravity clamp"
This photo shows the top being glued to the sides of the box. I just used a heavy vise to apply pressure while the glue dried, although after this shot, I also taped the corners down to make sure there were no gaps.
Removing any glue squeeze-out from where the trim will sit
As with the vertical corners, there is a 1/8" square gap to receive the trim. I made sure to scrape off any glue squeeze-out before it dried so it wouldn't prevent the trim from sitting tight in the corner.
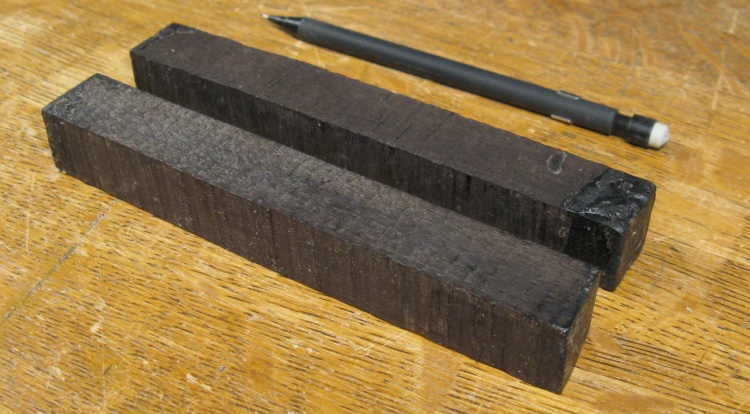
A couple of miniature pieces of African blackwood "lumber" for the trim
I wasn't able to find much African blackwood locally, but Lee Valley Tools had some small pen blanks so I snapped up a couple of those. Fortunately, I didn't need much and one of these pieces was more than enough.
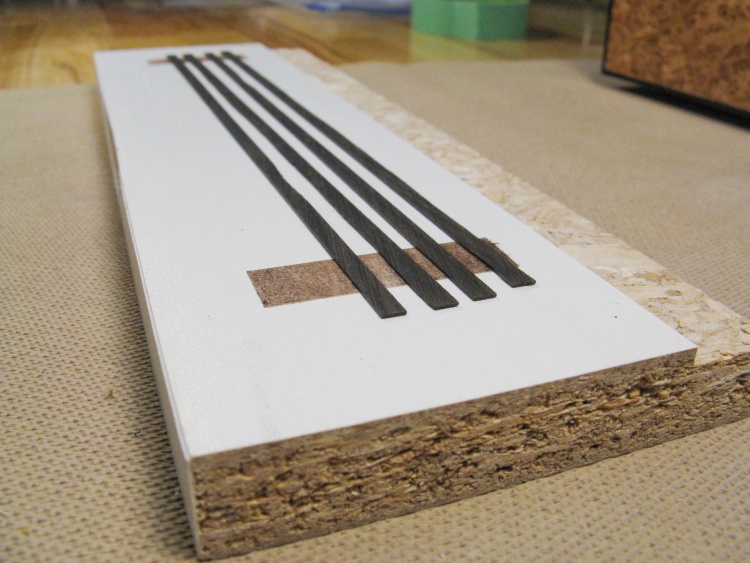
Changing bandsaw blades for the trim
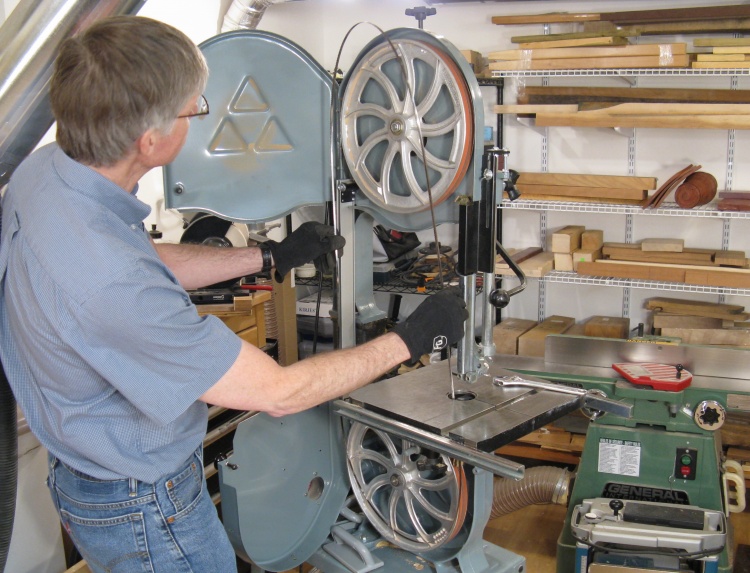
African blackwood has the unfortunate tendency to dull any blades used on it. My brilliant solution was to use an already-dull bandsaw blade, and here I'm changing over to an old blade kept for just this purpose.
The keen of eye may notice the well-ordered shelving in the background, which I recently added to replace my...well...nothing; I used to just have a big pile of wood. I can't actually say it makes finding a piece of wood any easier, but at least it looks much more organized.
The keen of eye may notice the well-ordered shelving in the background, which I recently added to replace my...well...nothing; I used to just have a big pile of wood. I can't actually say it makes finding a piece of wood any easier, but at least it looks much more organized.
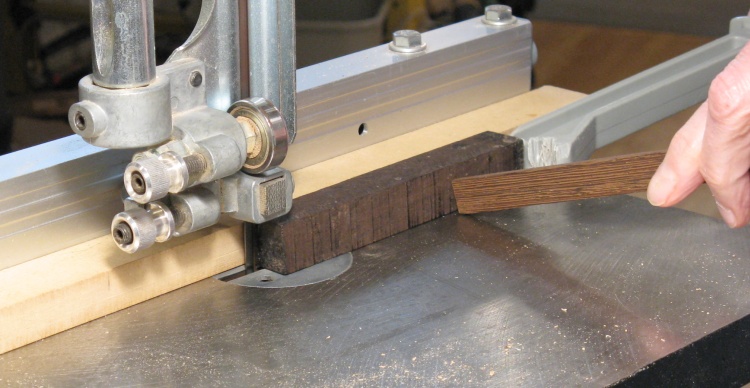
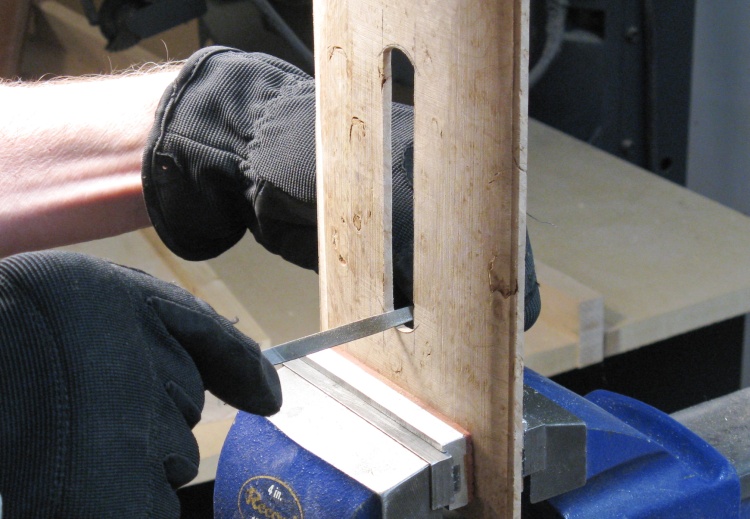
Cutting a little plank from the blackwood...
As previously alluded to, the cover needed 1/8"-square pieces of blackwood for the trim. I started by cutting off a 1/8"-thick slice of one of the pen blanks.
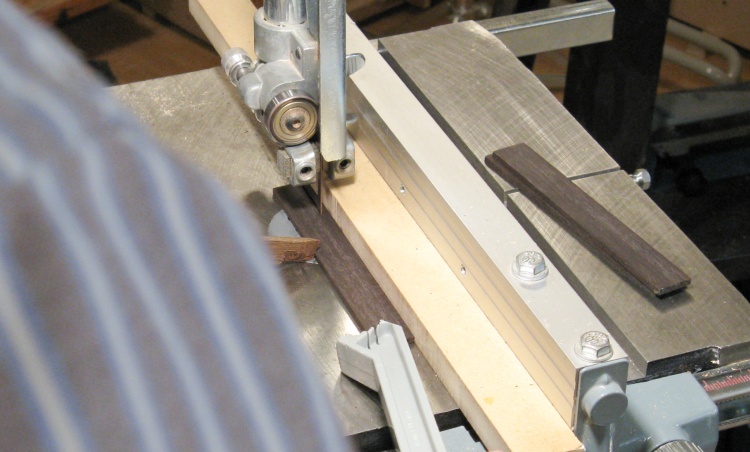
...which was then cut into small square-sectioned rods
...which was then sawn into a few 1/8"-wide sections for the trim.
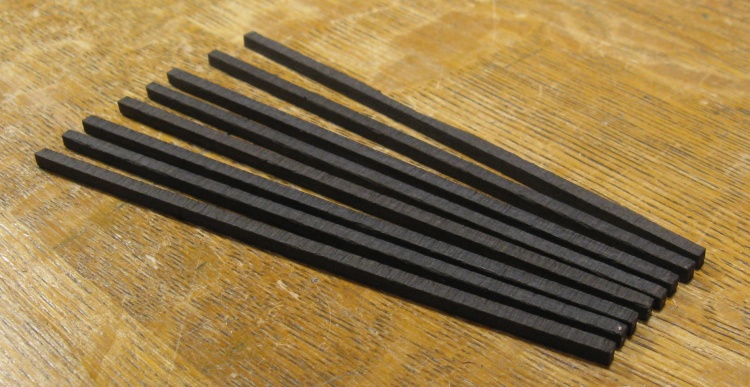
Enough trim pieces for the box
This little group of trim pieces provides just enough to do the cover. The rough just-sawn faces are up but the other three faces are smooth to fit cleanly into their notches in the cover.
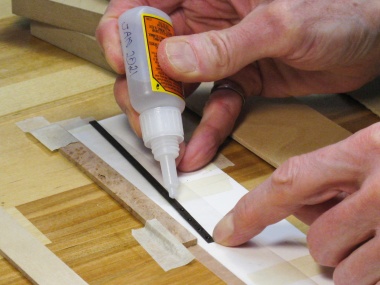
The (overlength) corner trim pieces are tape-clamped while glue dries
Two of the trim pieces were cut in half and the resulting four pieces were slotted into the corners to be glued. The masking tape is stretched as it is applied, and it provides pressure to hold the trim in place until the glue sets.
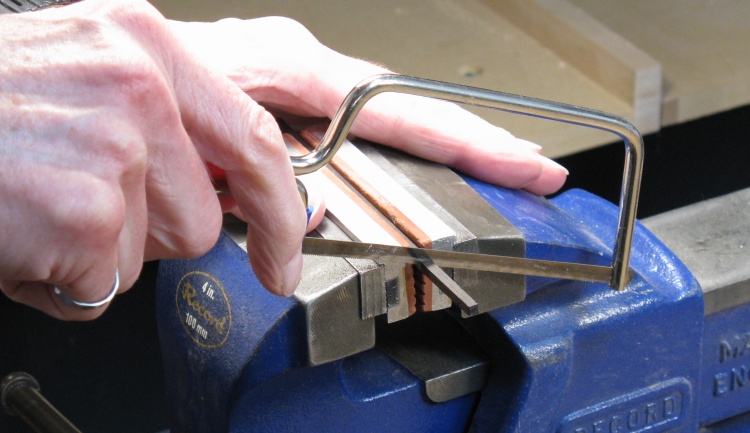
Shortening trim piece with hacksaw
The length of the long sides of the cover required that two pieces be used. Here I'm cutting one to length using a small hacksaw.
In this photo is visible my Engineering ring, which I've worn since graduation in 1981. It is made from (very hard) stainless steel so it was virtually unmarked when I retired this spring, 37 years later. It's not uncommon to lose one or two over the years but mine was the original. However about a week after retirement, the ring went missing. Coincidence? You decide.
At any rate the local "Kipling Camp" (don't ask) was highly efficient at providing a new one (thanks Denard!) and in less than a week I had a replacement. Unfortunately, the new one felt like it had just been cut from a pipe; it had sharp square corners on the inside edge making it painful to get on or off. However, a half-hour or so with a grinder on the Dremel (the hard thing again) followed by smoothing with sandpaper strips got it to a comfortable contoured inside shape. But I digress...
Squaring up the end and tweaking the trim length
The ends of the trim were squared up using the belt sander. This was also used to adjust the length so that two of them fit end-to-end exactly along the side.

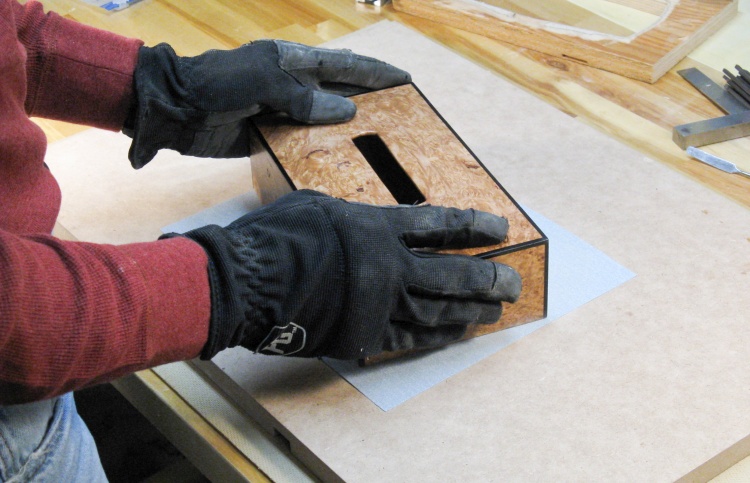
Here's the box with everything in place - just needs sanding
This photo shows the cover with all the trim in place. Now it just needs the faces and trim sanded so that they are all flush and smooth.
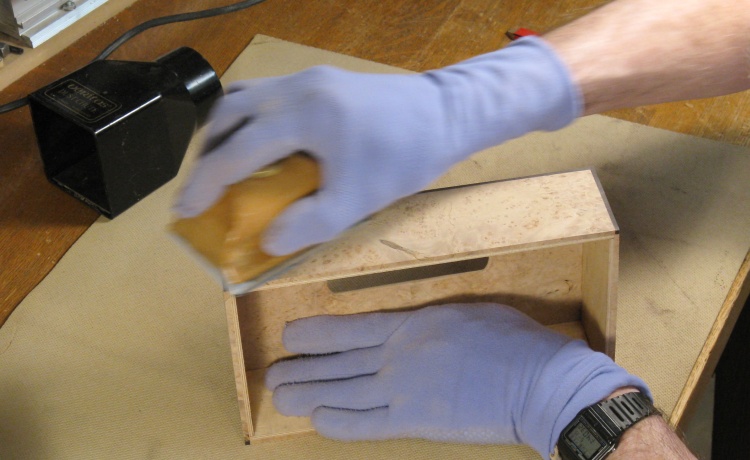
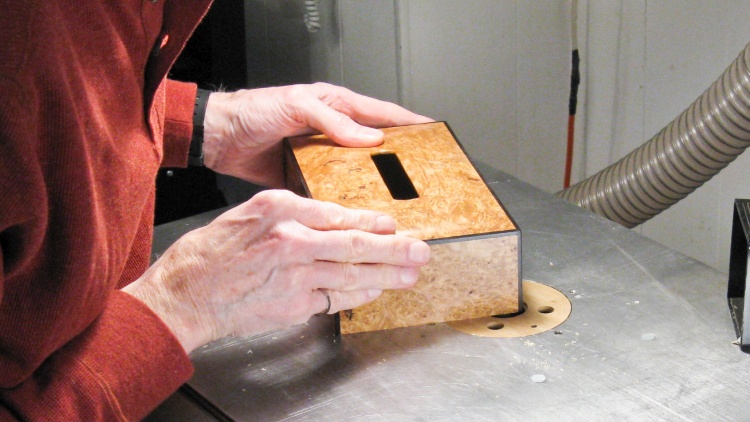
Blending the top into the trim
A drum sander on a flex shaft driven by a small lathe was used to finish the top of the cover. This blended in the curved top to the trim around the top edge.
And of course the obligatory hand-sanding
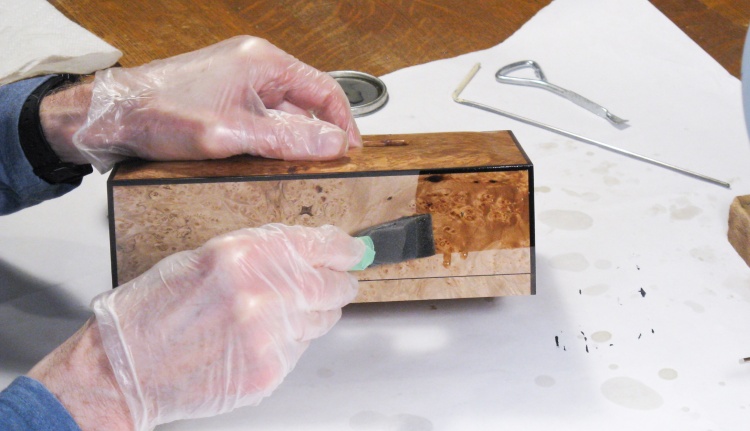
I used the belt sander on the sides first to remove the saw marks and even-up the maple and the trim. And then of course, there was the obligatory hand-sanding as shown here. Sanding marks on the maple burl were not too obvious, but I went up to 320 grit on the sides and top.
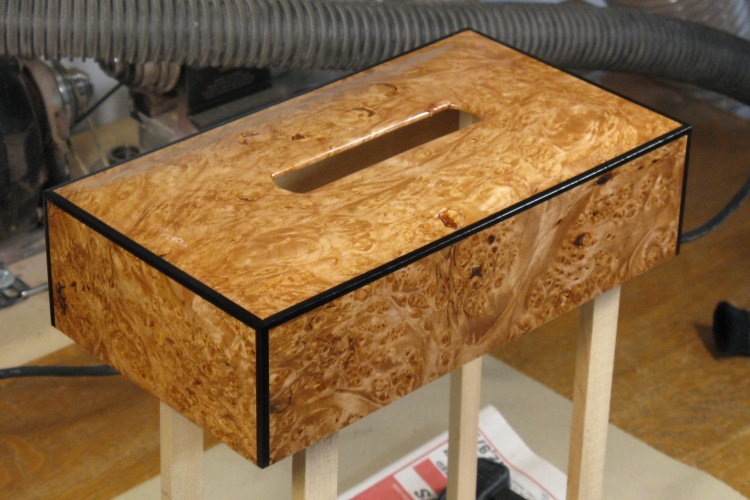
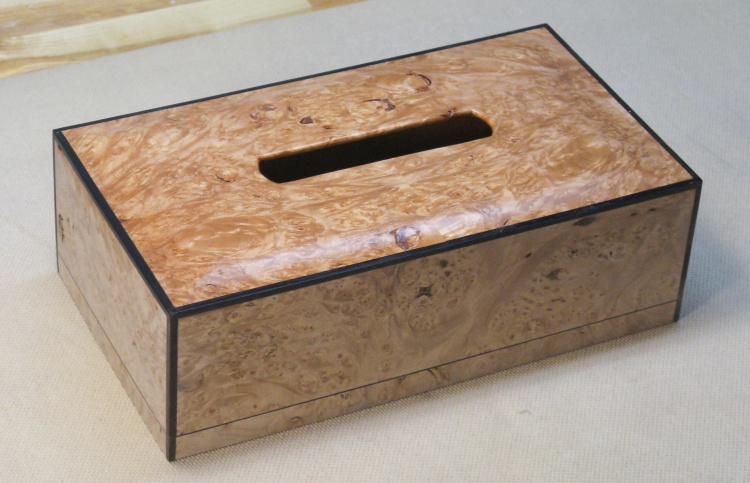
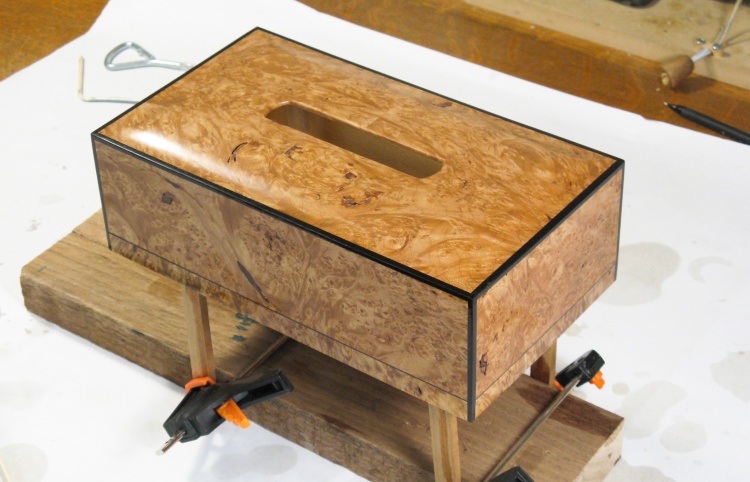
Woodworking done
In this photo, the cover is complete and just needs finishing.
The grain is a bit more noticable when varnished
This shot shows the first coat of varnish and boy, did that make the grain pop out.
Steel-wooling the dry finish
I used my normal Fast-Drying Polyurethane varnish, applying three coats with steel wool sanding between the coats.
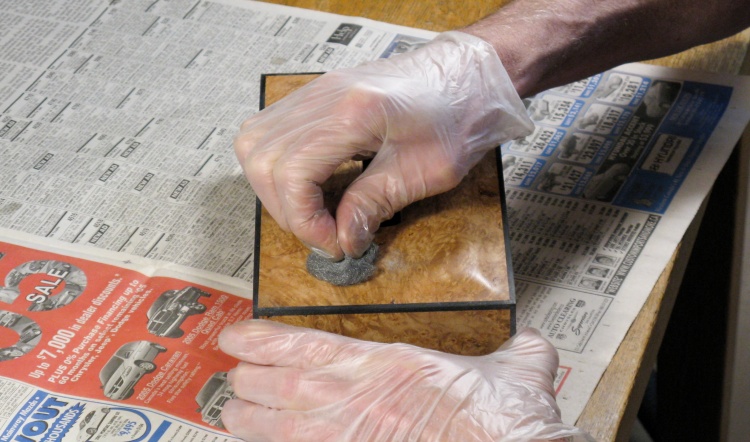
Varnish does not stick well to a coat of dry varnish unless it has been roughed up to help adhesion (or so goes the accepted wisdom, not to mention the instructions on the can). So after the previous coat had dried, here I'm rouging up the surface with extra-fine steel wool (000 or 0000 rating) prior to adding the next coat.
Varnish does not stick well to a coat of dry varnish unless it has been roughed up to help adhesion (or so goes the accepted wisdom, not to mention the instructions on the can). So after the previous coat had dried, here I'm rouging up the surface with extra-fine steel wool (000 or 0000 rating) prior to adding the next coat.
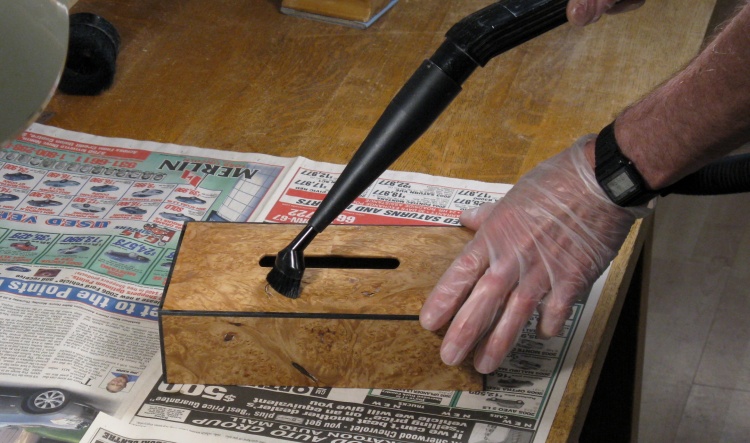
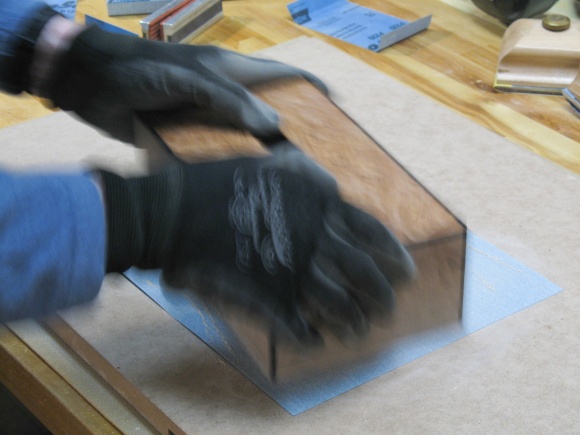
Vacuuming off the dust
The dust was vacuumed off using a small nozzle. This helps get the dust out of crevices like the small voids in the maple burl.
And of course the working surfaces and my gloves need to be vacuumed as well to prevent transferring dust or steel wool particles.
And of course the working surfaces and my gloves need to be vacuumed as well to prevent transferring dust or steel wool particles.
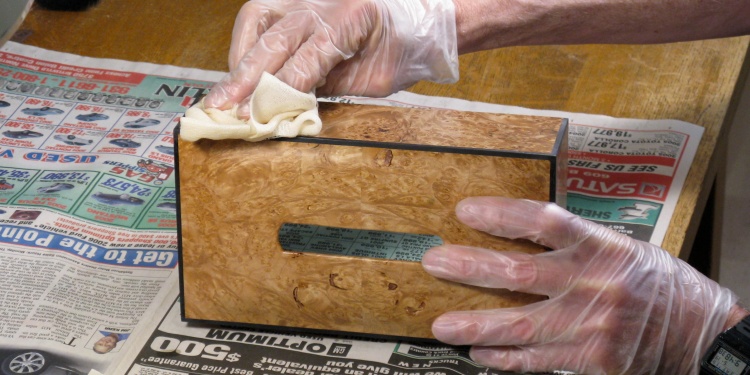
Using a tack cloth to get any remaining dust
The last bits of dust were removed by wiping with a tack cloth. This is probably overkill in my always-dusty shop, but easy enough to do.
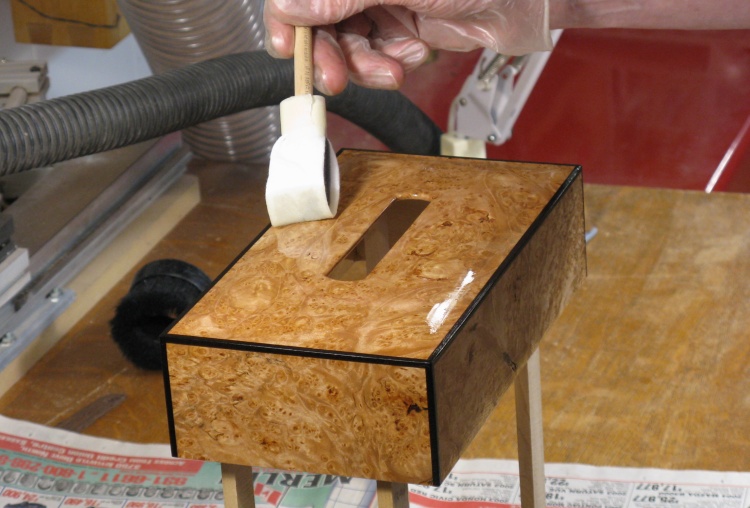
Adding the final coat of varnish
I used a little clamped-together stand to support the cover from inside. The inside was varnished first, and then I applied it to the outside as shown here. Wiping with a cloth gives a better finish than using a brush and I usually tape a piece of cloth to a foam brush to make it easier to handle.
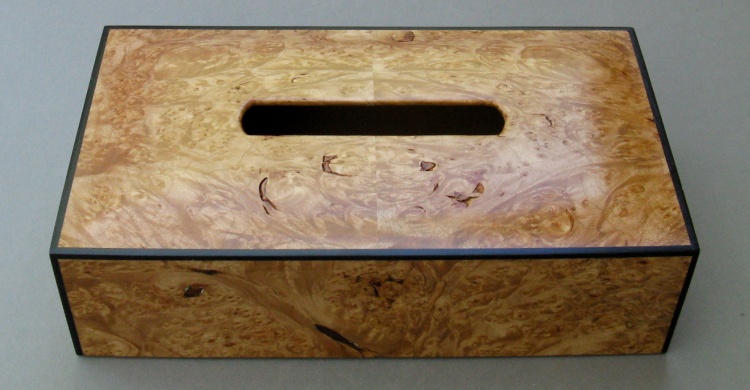
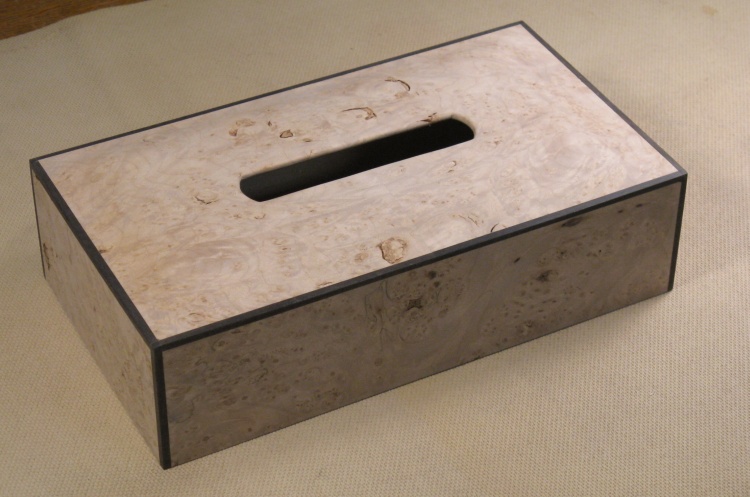
Done
Complete
2021
This tissue box cover and another laminated version I had made in 2018 were sized for the shortest Kleenex-brand box. However just a few months after I finished these covers, the box size they were made to fit became increasingly hard to find until it disappeared completely. The smallest box was then about 1/2" taller, rendering the covers I had made undersized. I had just finished a couple other covers that fit the larger-sized box so I thought I'd go back and modify the original two for the taller box size as well.
The box had a growth spurt...
This is the look with the new larger tissue box in place. It was going to need some work...
The perfect piece of maple burl!
This is actually the same piece of burl that was used for the original cover (37 photos North of here) which I still had available.
I didn't need too much wood - a single slice would be enough to make four short walls. So I cut off a slightly-thicker-than-I-needed piece and ran it through the drum sander to get the thickness down to the 1/8" I would need. The drum sander was used rather than the planer since the planer often tears up wood that doesn't have all the grain running in the correct direction. And "doesn't have all the grain running in the same direction" is pretty much the definition of "burl".
Cutting a slice off
Smoothing on the drum sander
Sliced up into pieces for the four sides
That one little slab was sliced up into four 1/2"-tall sections that would be used for the four sides.
Blackwood trim pieces sanded down to 0.025" thickness
I wasn't sure I'd like the look of the cover with a wood grain change between the new and old sections, so I decided to add some trim between the sections to make the addition look more intentional than the result of error (or corporate-incompetence-induced rework).
I had cut extra African blackwood pieces when building the original box (and needless to say I kept them around). They were 1/8"-square and I put them through the drum sander on a nice flat scrap of melamine to render them down to about 0.025" thick as shown here.
I had cut extra African blackwood pieces when building the original box (and needless to say I kept them around). They were 1/8"-square and I put them through the drum sander on a nice flat scrap of melamine to render them down to about 0.025" thick as shown here.
Flattening the bottom
Then it was time to prep the cover;
The plan was to use the same structure as the original cover:
- 1/8" plywood frame
- finger joints between frame sides
- burl glued onto outside of frame
- square-profile corner pieces
And to join the frame to the cover, I would use half-lap joints between frame and cover plywood layers.
I started by flattening the bottom as seen in this photo.
Routing a half-lap section on the inside
The cover plywood was to have a 1/16"-deep notch to mate with the new frame. I set up a straight router bit with an undersized bearing to make a 1/16" deep cut.
Here I'm running the inside of the cover walls past the bit on the router table.
Here I'm running the inside of the cover walls past the bit on the router table.
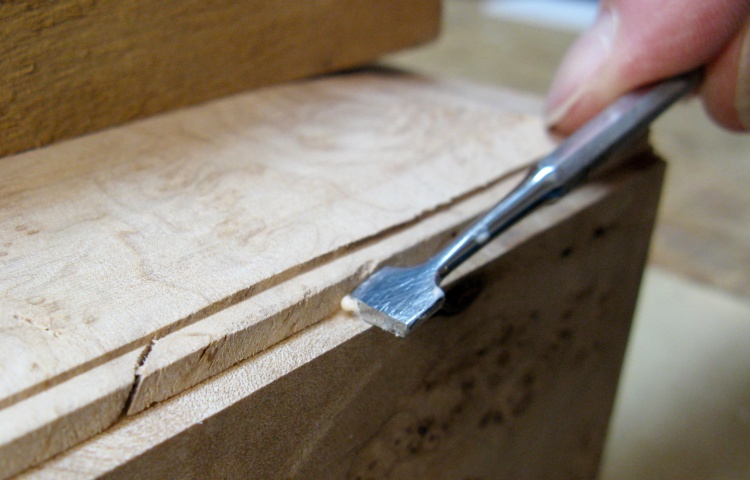
Squaring up the corner with a chisel
The round router bit couldn't get into the corners of course, so they were touched up with a chisel.
Cutting a half-lap into plywood frame
This is one of the side plywood frame pieces (made off-camera) which has been taped to a wood scrap for easier handling. It's being run by the same bit to thin the bottom section down.
Cutting a finger joint
The frame pieces get minimalist finger joints at the ends. This is one of the pieces getting a finger formed on the bandsaw.
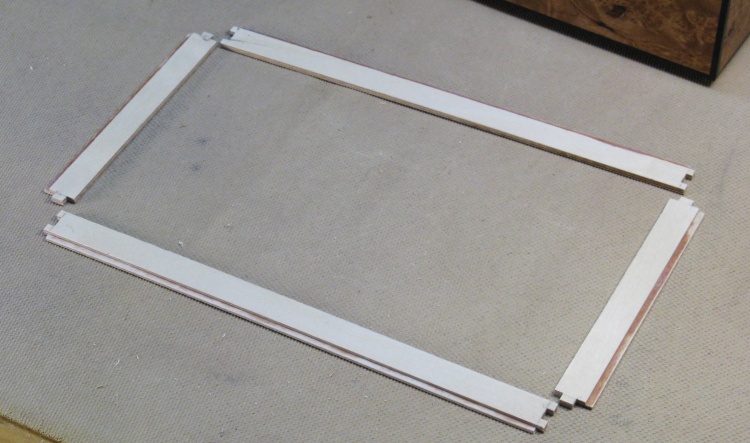
The plywood frame pieces
Here the set of four frame pieces has been posed in appropriate relative positions on the soft mat. The lengths were trimmed individually to fit exactly into the cover.
The thin parts of the frame will hang over the inside of the cover and mate with the thinned section on its inside edge.
The thin parts of the frame will hang over the inside of the cover and mate with the thinned section on its inside edge.
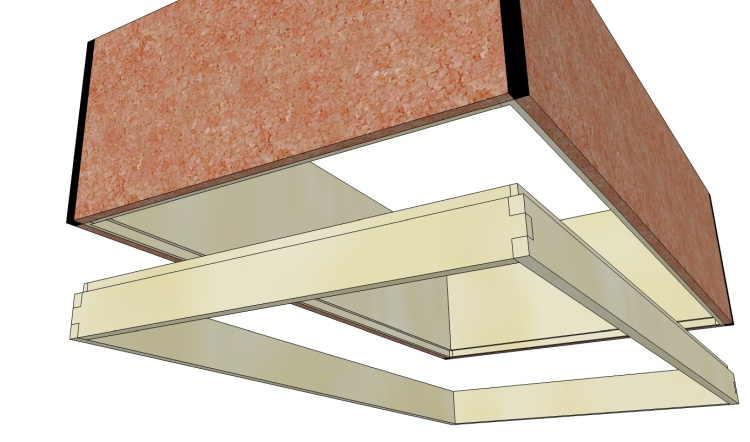
Frame piece fit
This is the worth-1000-words diagram showing how the plywood frame fits into the cover (1021 counting all these too).

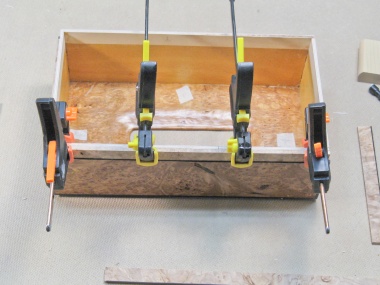
Gluing on the plywood frame
The four frame pieces are being glued onto the bottom of the cover in this bird's-eye view of the upside-down assembly.
I clamped on waxed-paper-isolated wood scraps to the center of each side to ensure the frame is vertical and flush with the cover walls as the glue dries.
I clamped on waxed-paper-isolated wood scraps to the center of each side to ensure the frame is vertical and flush with the cover walls as the glue dries.
Frame in place
Here's a bit closer view of one of the frame corners after the glue was dry.
Then it was time for the facia. That would consist of the 1/8"-thick burl pieces with the thin strips of African blackwood attached to the top edges. Step one was to glue the strip to the edge of the burl, and then that assembly was glued onto the cover, one at a time.
Super-gluing trim to burl

Regular glue to hold burl to frame
Clamping first piece of burl

Cyanoacrylate again for the corner trim
As with the frame, the individual burl/trim pieces had been sanded to the precise length to fit each side of the cover, leaving a square cavity at each corner.
The last assembly step was to glue in the corner blackwood pieces as shown here.
The last assembly step was to glue in the corner blackwood pieces as shown here.
All the pieces are together here
Another upside-down shot with all the pieces in place.
The new pieces had all been made a bit oversized so they could be sanded flush with the original cover sides. This was done mostly by hand as shown in these shots. The varnish on the sides was sanded off as well to give a consistent look after it was re-varnished.
Sanding the sides flush
Flattening the new bottom (Action shot!)
Ready to head to the finishing facility
Here the woodworking is done - just the finishing left.
Starting on the varnishing
I used the same type of varnish as on the original, adding three coats to the sides. The top had been left untouched and didn't need any new finish.
First coat of varnish applied
Here's the new look, with the cover still perched on the drying rack.
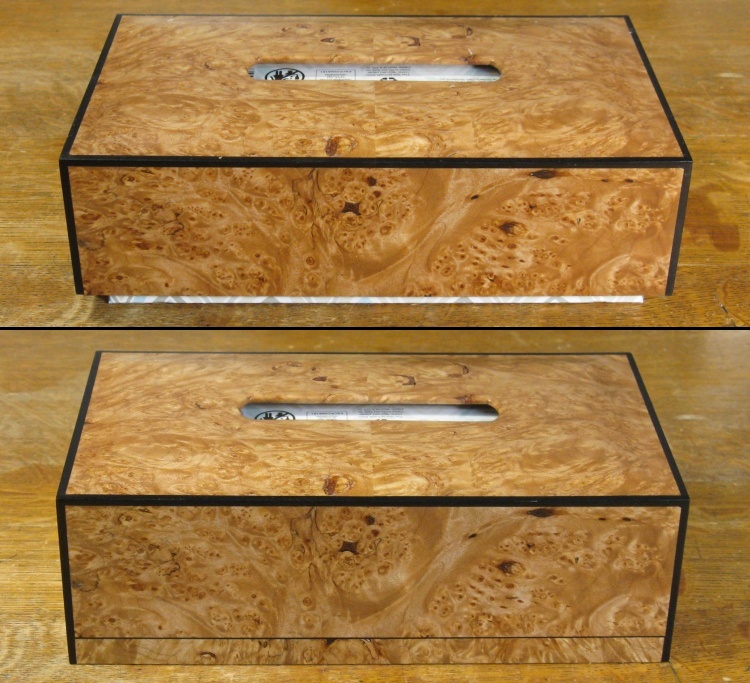
The old and the new
The height addition isn't particularly subtle, but it beats having a gap.


