I had recently updated the web site format to increase photo size a bit and indicate availability, which meant redoing all the web pages and many of the photos. When I updated the toast tong page, I thought it might be a good idea to have a few spares around in case other people could use them. I also wasn't quite ready to jump into my next project since I was still figuring out exactly how to do it. Making some toast tongs would therefore give me a convenient rationalization for procrastination.
I had in the back of my mind to make two or three sets but then I started picking different woods and looking at different construction options and so the quantity gradually increased until I had ten of them on the go.
I had in the back of my mind to make two or three sets but then I started picking different woods and looking at different construction options and so the quantity gradually increased until I had ten of them on the go.
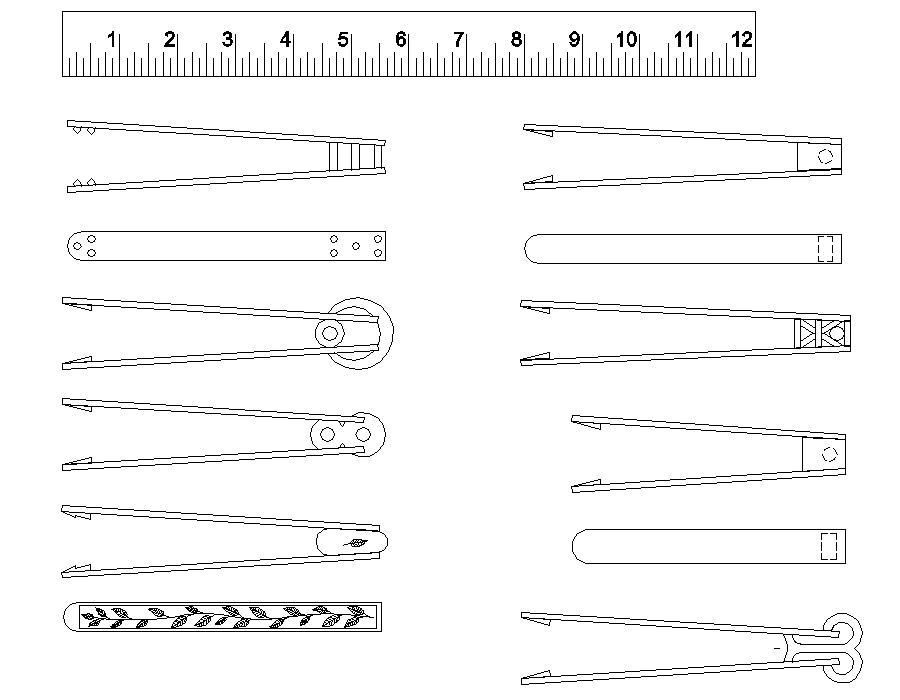
A nice variety of not-very-detailed plans
Random Construction Views
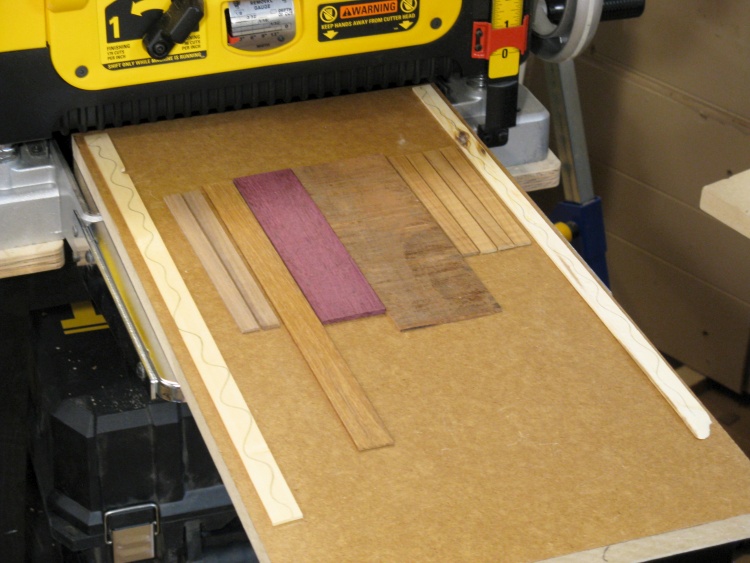
Planing down a variety of woods
Choosing wood for the toast tongs was a bit dangerous since the arms are just thin strips of wood and it's pretty easy to make a big pile of those. Making them into tongs takes a bit more effort.
Here I've got first five types of wood, and they're being run through the planer on my anti-snipe sled to thin them down to a suitable thickness.
Here I've got first five types of wood, and they're being run through the planer on my anti-snipe sled to thin them down to a suitable thickness.

A selection of arms for the tongs
A bit later the group of wood types had grown to what is shown here. This wasn't quite the final selection either - I would delete one and add a couple more before things stabilized.
I had also started out by making the arms all the same thickness but since are woods were much stiffer than others, I ultimately ended up varying the species-to-species thickness to get the force required to squeeze them together into a more-consistent range. The thicknesses ended up in the range of 0.085" to 0.1".
I had also started out by making the arms all the same thickness but since are woods were much stiffer than others, I ultimately ended up varying the species-to-species thickness to get the force required to squeeze them together into a more-consistent range. The thicknesses ended up in the range of 0.085" to 0.1".
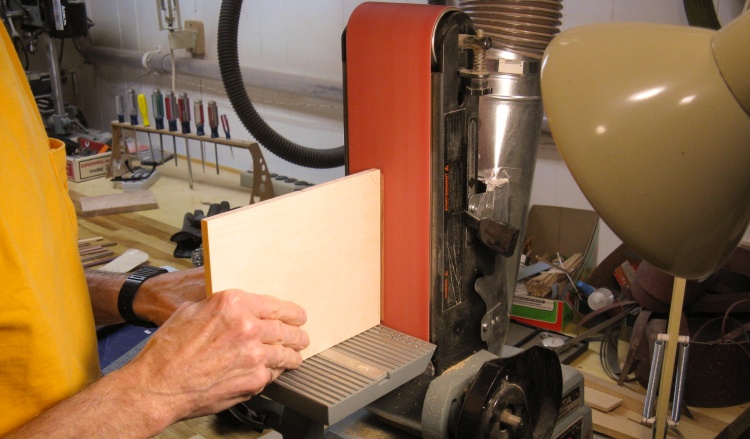
Smoothing an arm using a right-angle jig
I used the planer as seen in the earlier photo to thin the first arms, but that's rather labour-intensive so I switched to cutting out the approximate thickness on the bandsaw and then thinning and smoothing using the belt sander with the arm taped to a square piece of plywood.
Gluing together the Box Elder Burl tongs
This photo shows the first set of tongs going together. I have already added little hooks to the ends of the arms to grab the toasty tidbit. After the glue is dry I'll smooth off the center piece of wood and shape the end.
Also off-camera was the addition of a 1/4"-diameter rod magnet to the center piece. This is positioned close to the sides so it has enough magnetic force to hold the tongs to a 'fridge and prevent them sliding down.
Also off-camera was the addition of a 1/4"-diameter rod magnet to the center piece. This is positioned close to the sides so it has enough magnetic force to hold the tongs to a 'fridge and prevent them sliding down.
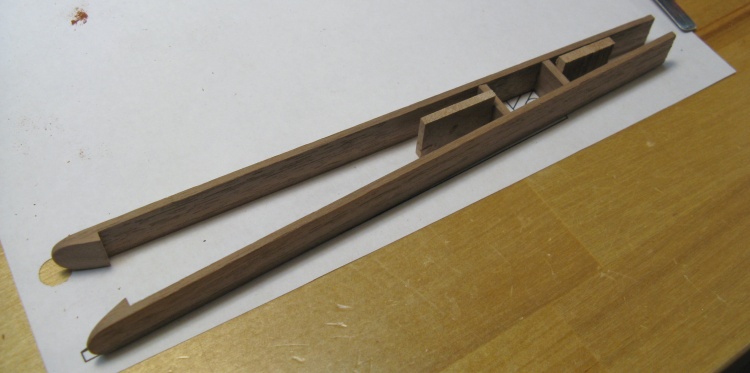
Starting to glue pieces into the Walnut tongs

Here's another set in mid-assembly. These Walnut tongs have little struts connecting them rather than a solid center section. A magnet will just slide into place between some structural members. The two taller center pieces are just there to hold the arm-to-arm pieces vertical while the glue dries.
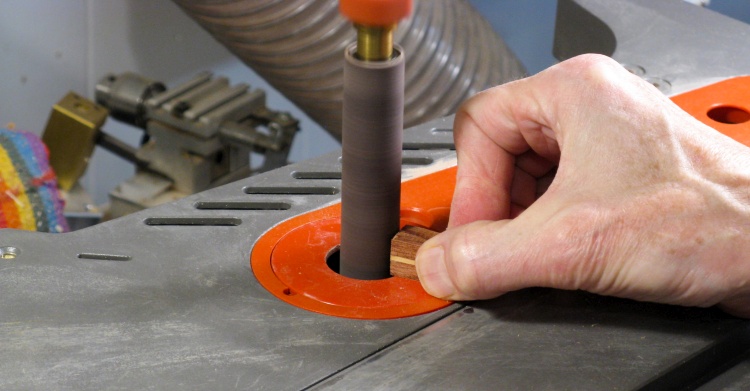
A bit of sanding on Bubinga center section
The drum sander got into the act as well. Here I'm sanding a round curve into the inside of the center section of the Bubinga tongs. This piece has already been cut apart and reassembled with a magnet inserted, with the cut line being accented with a thin piece of Yellowheart.
Gluing the Bubinga tongs
And here the Bubinga tongs (with little triangular toast grippies) are being glued together.
Adding cedar plugs to Roasted Curly Maple center section
This is another essentially random assembly shot; in this case, I'm adding little Yellow Cedar plugs to the Roasted Curly Maple center section.
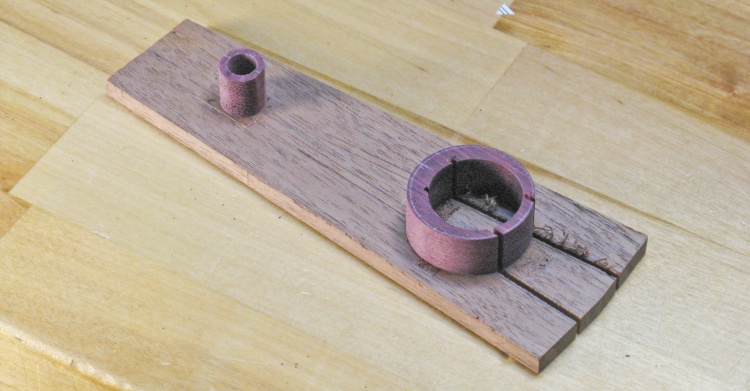
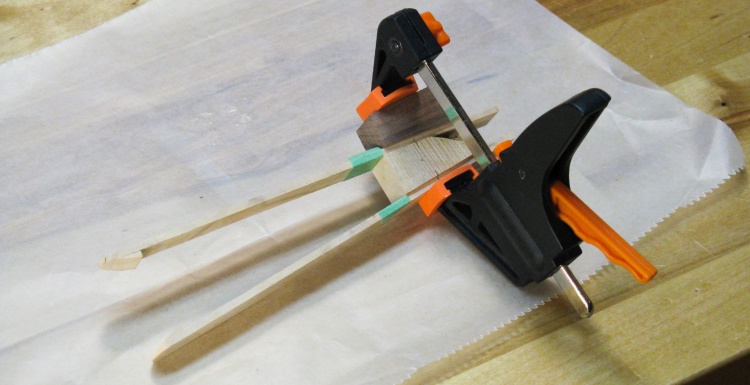
Purpleheart end section after cutting on jig
And a final random shot: This shows the Purpleheart center section taped to a jig used to cut it at the appropriate angle.
The smaller hollow cylinder taped down to the left is the second part of the two-piece center section, only placed there since it is the right height to support the jig when it needed to get flipped upside-down for one of the cuts.
The smaller hollow cylinder taped down to the left is the second part of the two-piece center section, only placed there since it is the right height to support the jig when it needed to get flipped upside-down for one of the cuts.
Cedar Tongs
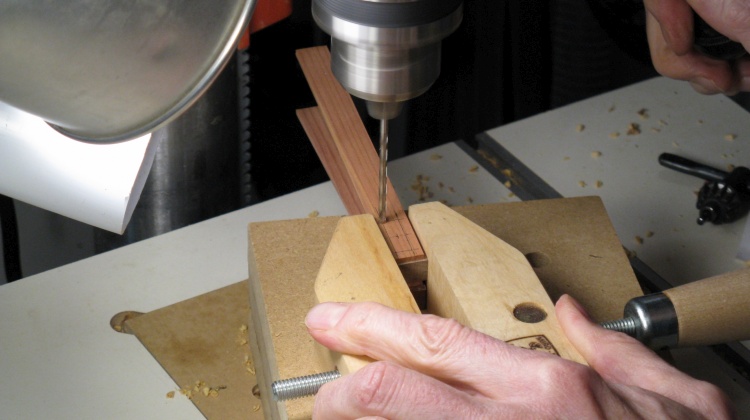
Drilling for suppport rods

The Cedar tongs have an arrangement of small rods spacing them at the top instead of a solid piece of wood, and also used pointed rods to grip the toast.
Here the ends are being drilled for 1/8" diameter holes.
Here the ends are being drilled for 1/8" diameter holes.
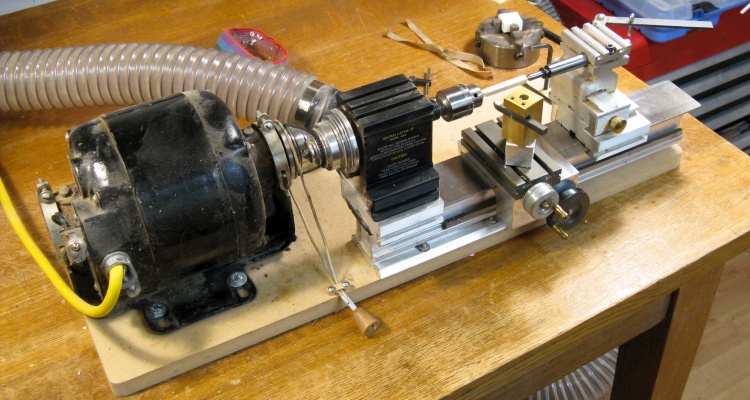
The little Taig lathe ready to turn a cedar rod
I needed to make 1/8"-diameter rods so I pulled out the small metal-working lathe. In this shot it already has one of the rod blanks that were cut from Yellow Cedar in place.
The photo grouping below shows the turning of the rods. I kept them to around 2" long so the diameter could be cut consistently with little flexing.
Rod blank in place
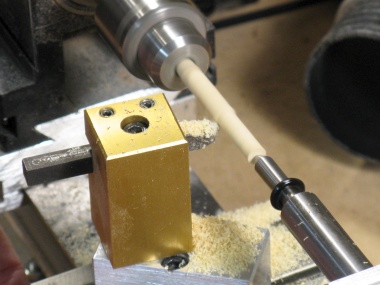
Cutting down to size
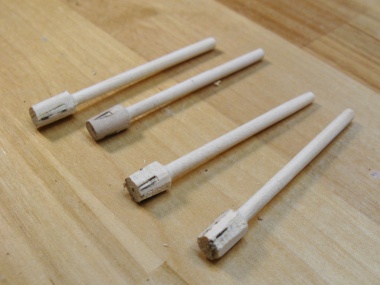
The completed Yellow Cedar rods
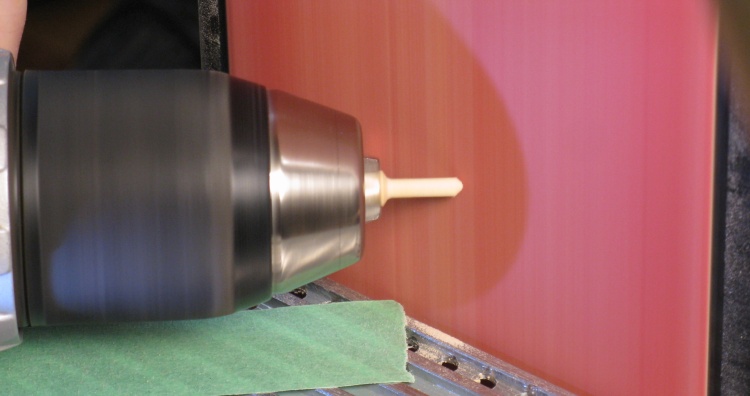
Pointing a rod for the business end
The rods for the top end were just cut flat and glued into place but the gripper rods needed to be pointed first.
Here the rod is chucked into a cordless drill to point the end by spinning it against the belt sander at about 45°.
Here the rod is chucked into a cordless drill to point the end by spinning it against the belt sander at about 45°.
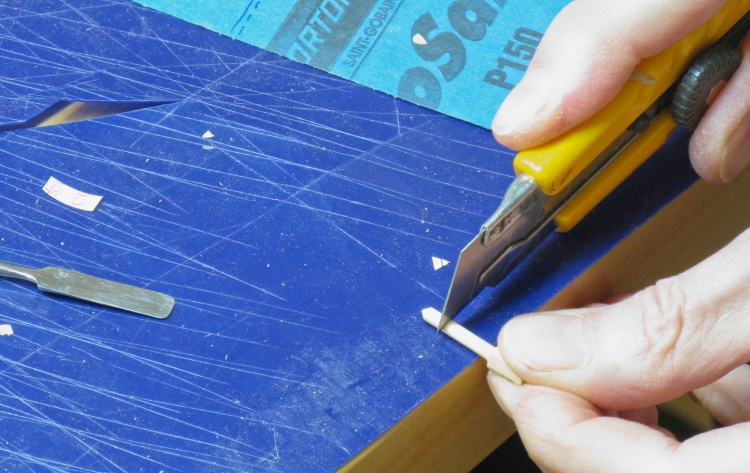
Cutting off the end of the rod
The rod end was then just cut off by rolling a knife around the rod a few times.
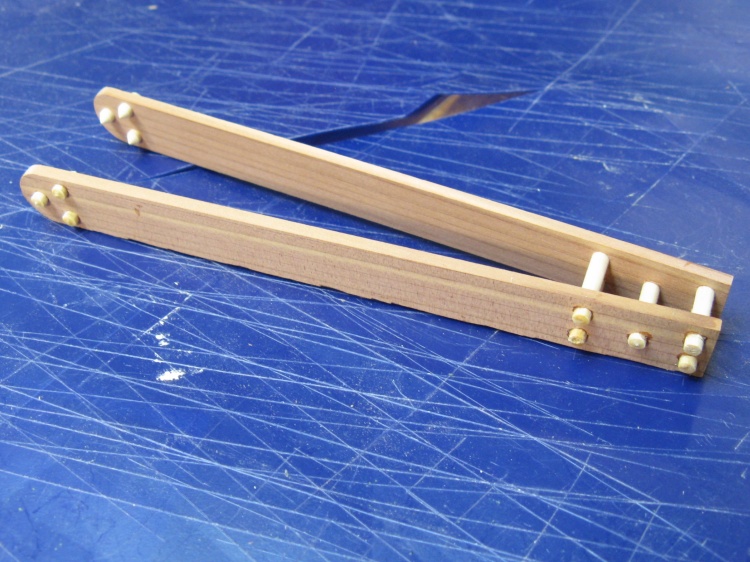
Tongs with all rods glued in
This shows the tongs with all the rods glued in place. After this, the sides were sanded to bring the rod ends flush with the arms.
I used cyanoacrylate glue on this one due to the small gluing surfaces.
I used cyanoacrylate glue on this one due to the small gluing surfaces.
Curly Maple Tongs
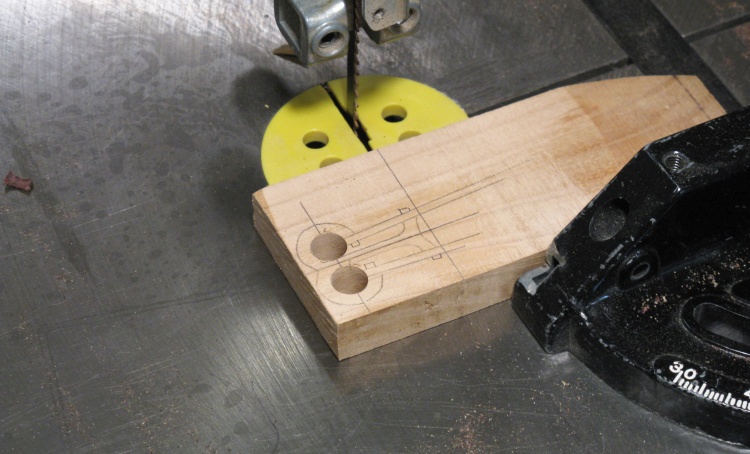
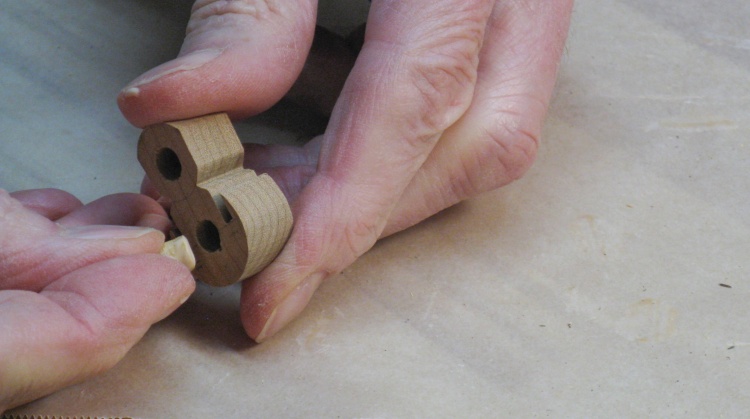
Cutting out the pre-drilled blank for the top
The Curly Maple tongs just had a funky top. In this shot the pattern of the top has been traced onto a suitable piece of wood and I've already drilled the two holes for the "ram's horns" shape.

End piece rather crudely cut out
Here is the (slightly out-of-focus) result of cutting the top out on the bandsaw. Could use a bit of cleanup.

Finish sanding of end piece
Here that clean-up has happened, mostly courtesy of needle files and the belt sander. In this photo I'm using a finer grit of sandpaper to sand out the scratches left by the belt sander.
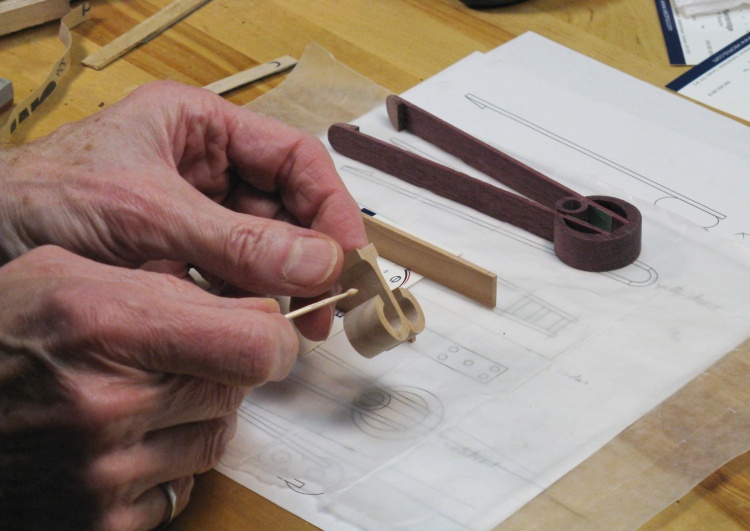
Applying glue before assembly
Most of the tongs used conventional wood glue to hold them together, including this one. Here I'm using a toothpick to dab a bit onto the gluing surfaces.
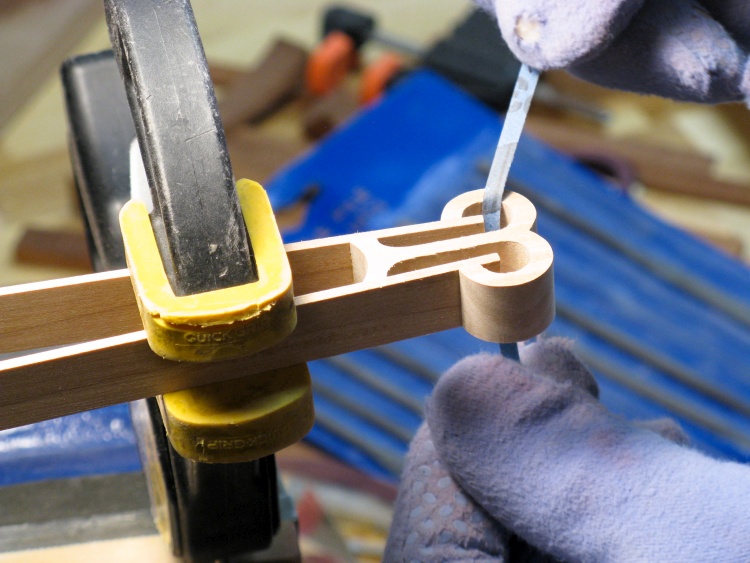
Finish sanding
Once the glue was dry the tongs got an overall sanding to smooth the faces and break the sharp corners. Here the round sections are getting the attention of a narrow 320-grit sandpaper strip.
Yellowheart Tongs With Kolrosing
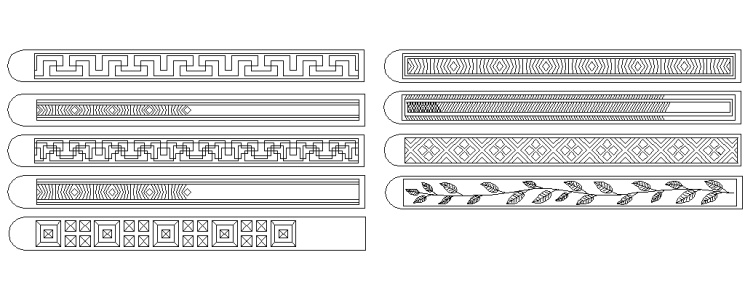
Some possible kolrosing patterns
Kolrosing (�coal-rose-ing�) is a technique of incising a design into the surface of wood and rubbing in a substance to increase the contrast. No wood is removed so the designs are essentially line drawings. It is most commonly used to put a pattern - a basket weave is popular - onto a wooden spoon handle.
I wanted to avoid the weave so I looked at various other patterns, mostly nice regular geometric shapes. However, upon consultation with my better half, the leaf pattern seemed to get the nod.
I wanted to avoid the weave so I looked at various other patterns, mostly nice regular geometric shapes. However, upon consultation with my better half, the leaf pattern seemed to get the nod.
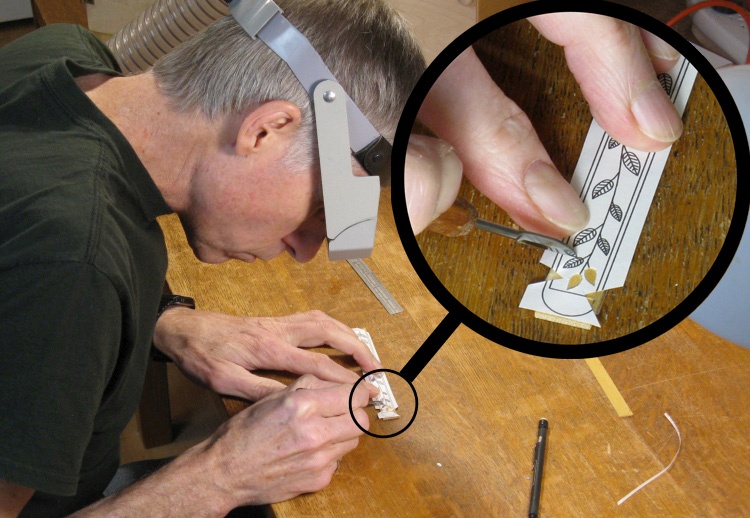
Starting to cut the leaf pattern into the one of the arms
Some experimentation showed that varnishing the wood first helped keep the design clean; the dark substance that gets rubbed in is less likely to get lodged in the wood pores and add "noise" to the pattern.
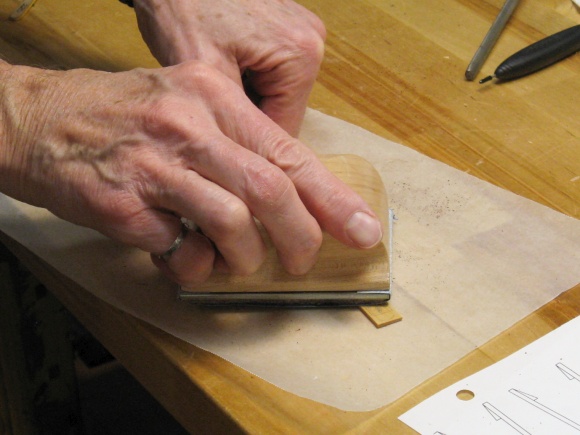
I taped the full-sized pattern to the varnished wood just at the edges and proceeded to outline the leaves with the point of a sharp knife, and then did the stems.
I taped the full-sized pattern to the varnished wood just at the edges and proceeded to outline the leaves with the point of a sharp knife, and then did the stems.
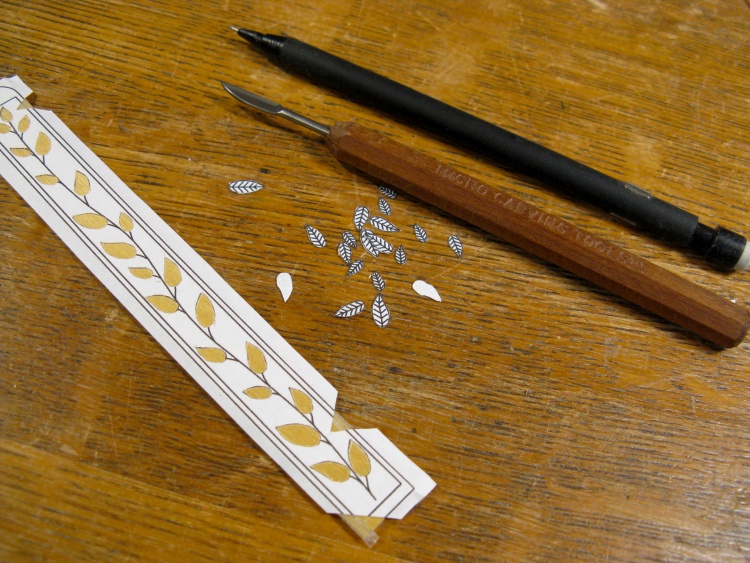
Leaf and stem lines cut
That of course cut out all the little tiny paper leaves, so I couldn't resist taking a photo.
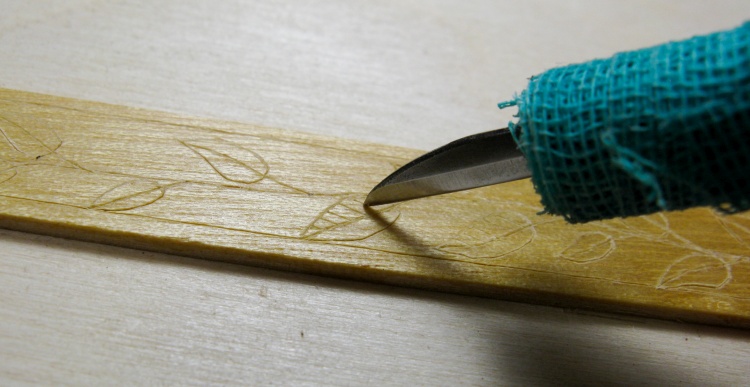
Adding the leaf veins
The pattern came off at this point and I cut the leaf veins freehand.
The "netting" on the knife is a latex-coated tape that I wrapped on to provide a bit of cushion and to let me hold the knife closer to the point.
The "netting" on the knife is a latex-coated tape that I wrapped on to provide a bit of cushion and to let me hold the knife closer to the point.
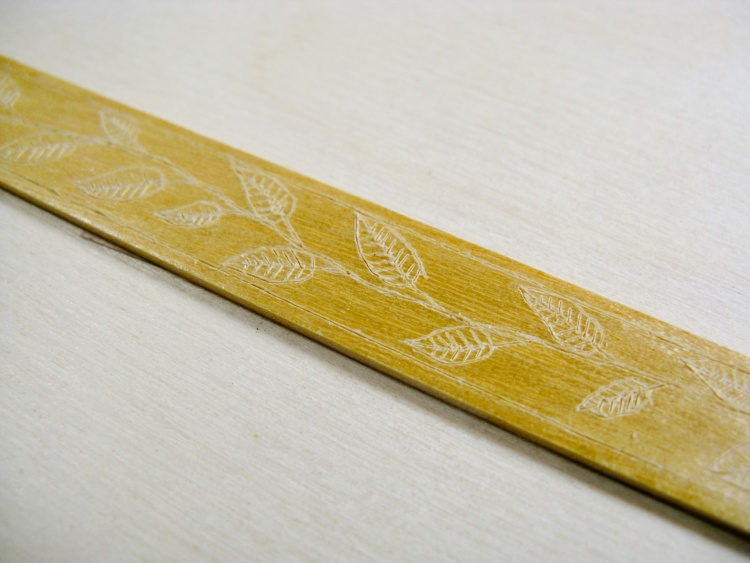
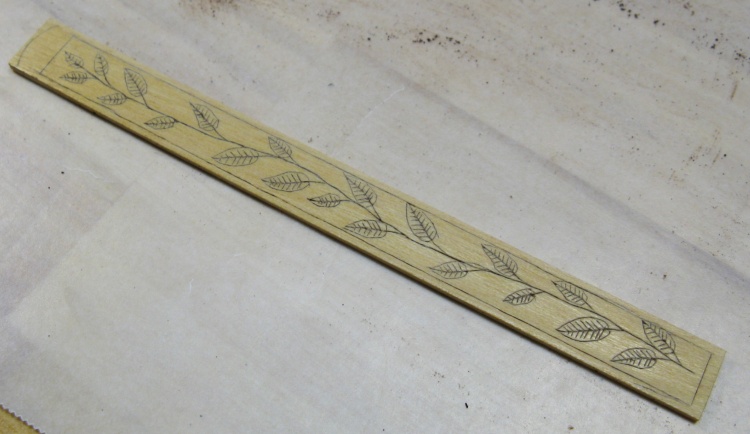
Inscribed pattern complete
This shows the completed pattern on one of the arms.
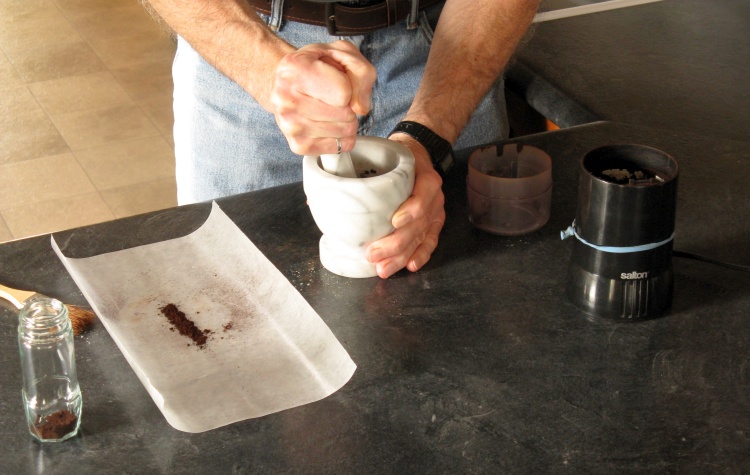
Grinding coffee
The kolrosing technique works by increasing the contrast of the incised lines through having a darker substance rubbed into them.
Coal dust used to be popular but these days a more commonly-used substance is finely-ground coffee.
After grinding the coffee beans as finely as possible with the grinder, I used the mortar & pestle to go a bit further. I didn't need much but it was easy to make extra.
Coal dust used to be popular but these days a more commonly-used substance is finely-ground coffee.
After grinding the coffee beans as finely as possible with the grinder, I used the mortar & pestle to go a bit further. I didn't need much but it was easy to make extra.
So next was the kolrosing "magic" which consists of rubbing in the contrasting powder;
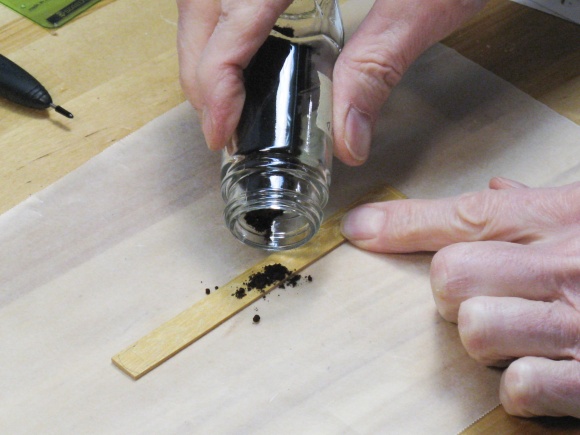
Adding some finely-ground coffee
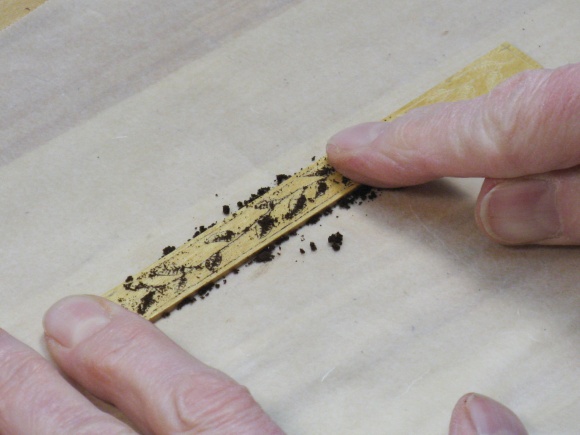
Rubbing it in with the traditional "finger" tool
Once the coffee was rubbed in, the cut lines were closed to trap the particles with a burnisher which is pretty much any hard thing. In my case I had an official burnisher for card scrapers, so used that.
Coffee-d arm
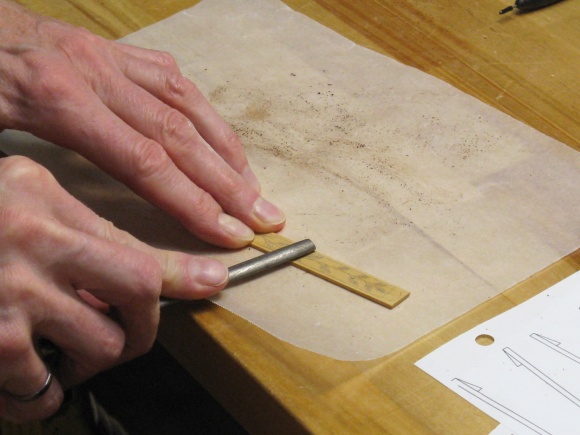
Burnishing to flatten cuts
I then sanded the surface with 320 grit to remove any protruding wood fibers and finally used an eraser to remove the pencilled-on guide lines I had used for the outline.
Sanding to smooth surface

using eraser to remove pencil guide lines
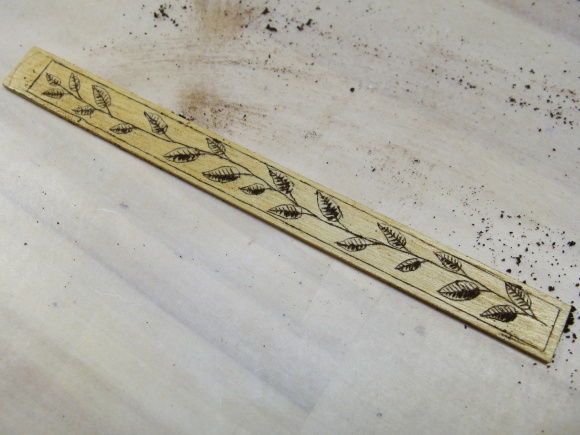
One of the arms completed
This shows one of the arms with the kolrosing completed. The arm will still need to have the end rounded and the end grippers added before final assembly.

Arms varnished to protect pattern during assembly
Since the arms were going to be handled a bit before assembly, I added a coat of varnish to the patterned side for protection. I was pleased to see that the varnish enhanced the contrast.
Assembling the Yellowheart tongs
I fashioned some two-claw grippers for the arms with the aid of a knife and chisel, glued them on and then rounded the ends. Once that was done the arms were glued to the oval center section as shown here.

Inscribing the center bits
The final step was to add a leaf figure to each side of the center piece. So after smoothing the center to be flush with the arms, it was varnished and then inscribed as shown here.
Finishing
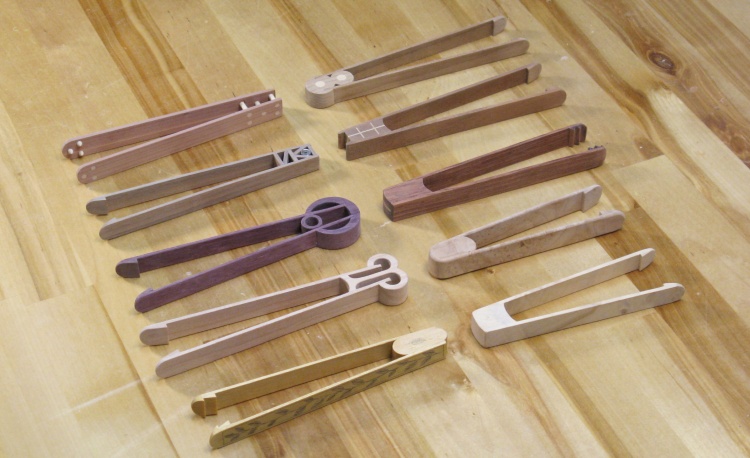
All ten ready for finishing
The original tongs I'd made 20 years ago had just been waxed but I thought that a varnish finish would give a bit more protection and prevent any discolouration from moisture or heat.
This photo shows all ten tongs, five of them with magnets and five without.
This photo shows all ten tongs, five of them with magnets and five without.
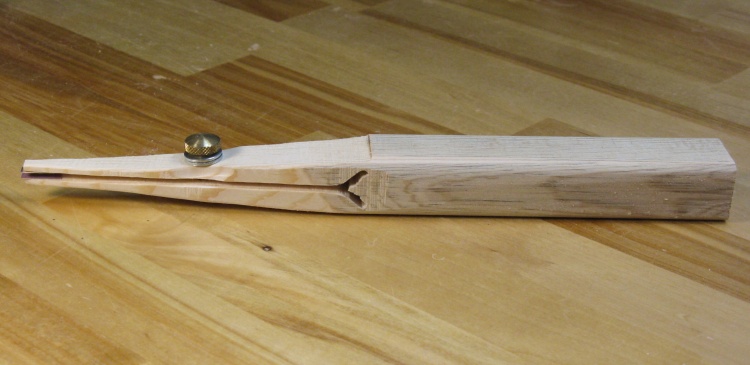
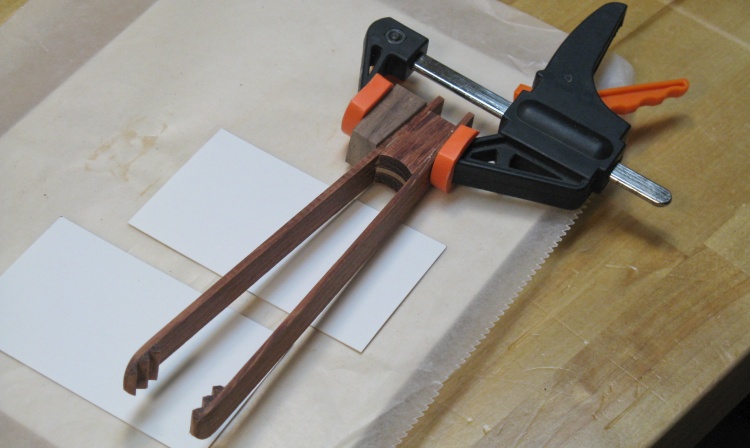
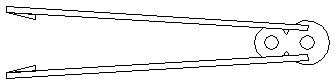
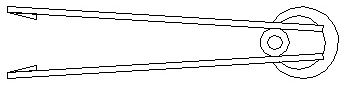
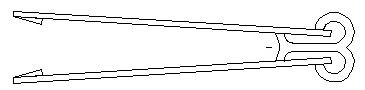
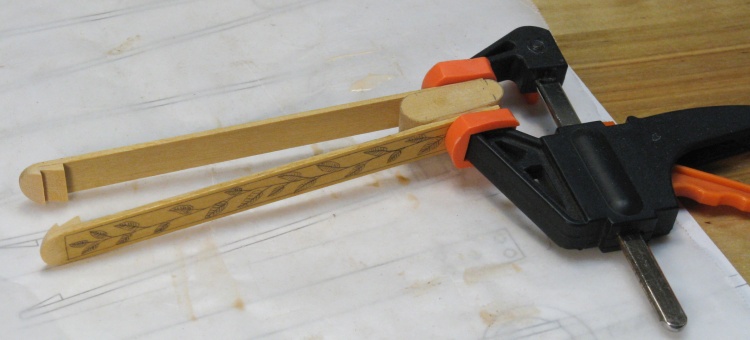
Tong tongs
I decided I needed a tool that would make it easier to hold the tongs for finishing, so I made this rather crudely-fashioned item (which in retrospect could have used some eyes and teeth drawn in).
The thunbscrew lets the tips squeeze the arm of the tongs to hold them, with small pieces of fine sandpaper taped to the tips to provide grip.
The thunbscrew lets the tips squeeze the arm of the tongs to hold them, with small pieces of fine sandpaper taped to the tips to provide grip.
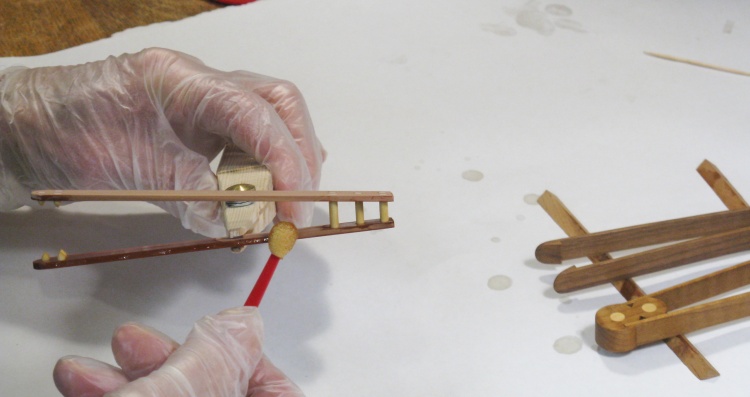
Varnishing the Cedar tongs
I used my favorite Fast-Dry Polyurethane varnish for the finish. It was mostly applied with these little foam brushes of unknown provenance (but I suspect some Dollar-Store origin many years in the past).
However, they worked well for these small items, assisted with a small brush, a thin strip of cloth and a small length of string, the latter items for hard-to-reach places.
However, they worked well for these small items, assisted with a small brush, a thin strip of cloth and a small length of string, the latter items for hard-to-reach places.
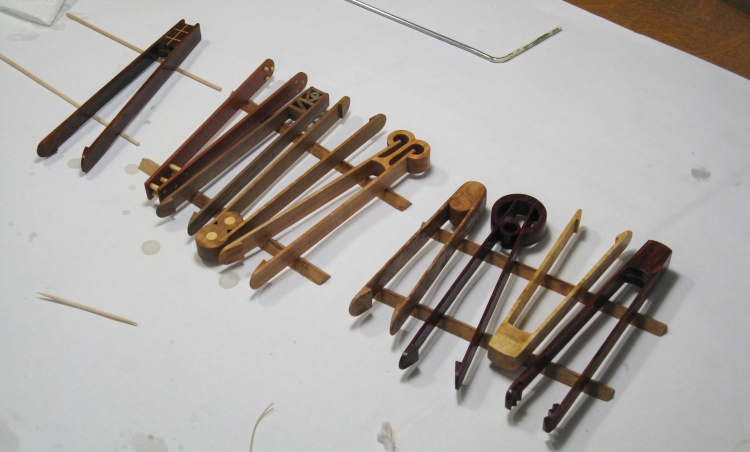
First coat of varnish on all the tongs
This is the traditional first-coat-of-varnish shot, with all but the Yellowheart tongs done here.
They received three coats in all, with sanding between coats for adhesion. I avoided using steel wool since it may have been difficult to remove steel wool residue from the tongs with the magnets.
They received three coats in all, with sanding between coats for adhesion. I avoided using steel wool since it may have been difficult to remove steel wool residue from the tongs with the magnets.
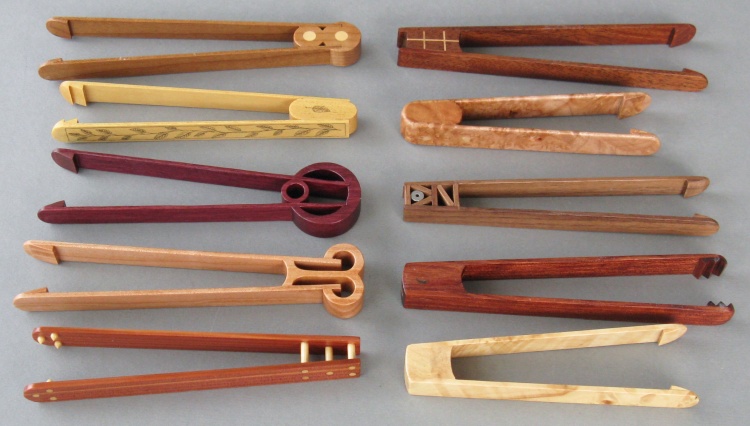
All done
Done.


