So obviously to make this trivet look decent, the pieces need to be made with high accuracy. This is kind of an odd coincidence since I had seen a photo of my Grade 9 niece's woodworking project a few months ago which was a laminated cutting board in a checker-board sort of pattern. I replied that it was nicely done but that I avoid those kinds of things since I would have trouble making the pieces all the same size. And then I decided to make this design. Turns out I was probably right in avoiding them. I wouldn't be too impressed with the accuracy of this one if I was viewing it as someone else's work and took a close look but for something that mostly resides in the cupboard and then gets covered by a pot, I suppose it isn't too critical.
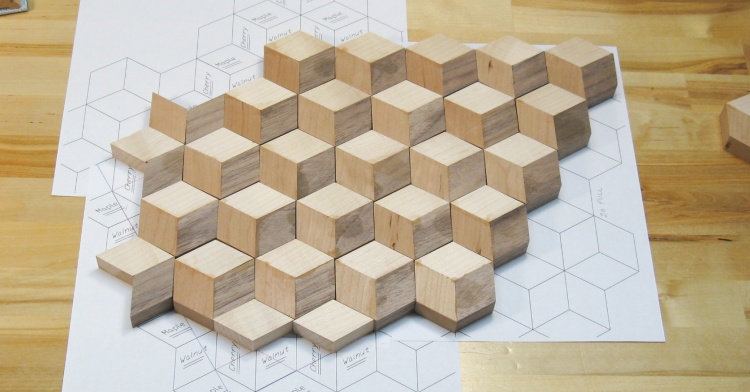
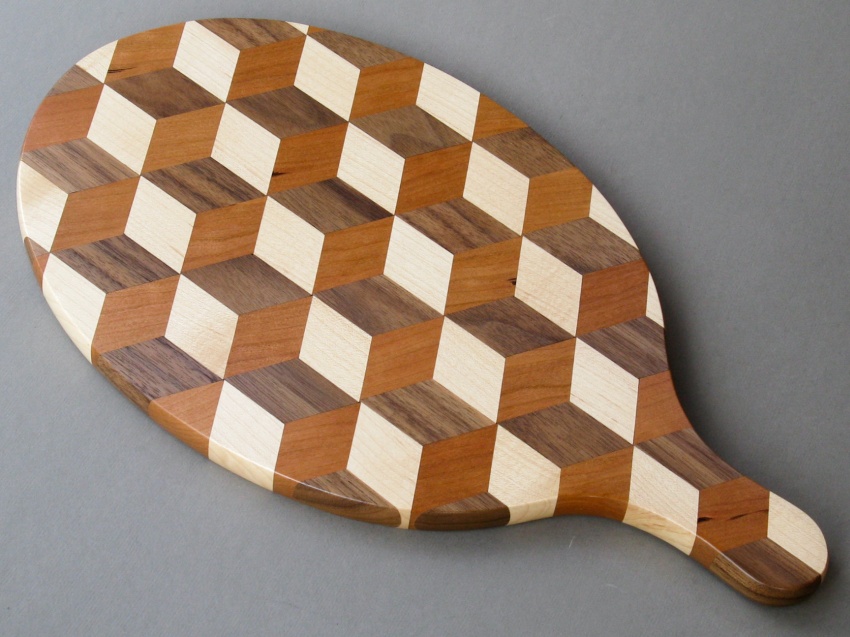
For choice of wood, I used the classic combination of maple, cherry and walnut, arranging the grain directions to enhance the 3D illusion of cubes.
For choice of wood, I used the classic combination of maple, cherry and walnut, arranging the grain directions to enhance the 3D illusion of cubes.

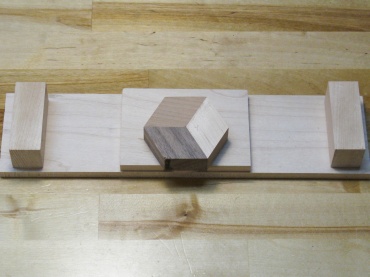
The plan of many pieces
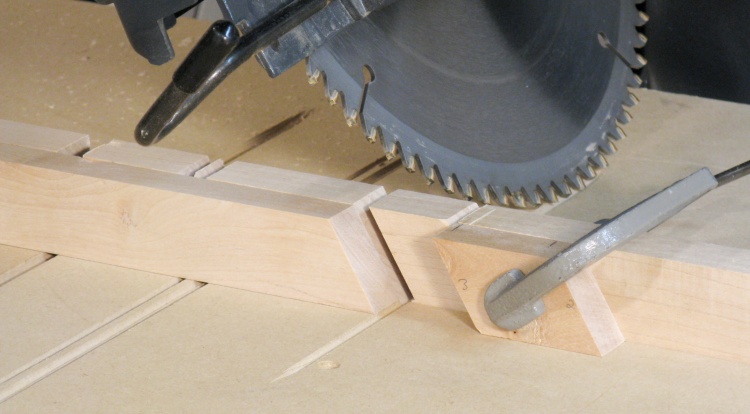
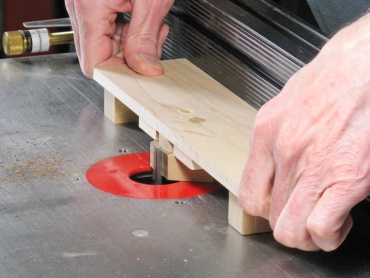
Setting up the radial arm saw
To get straight and consistent cuts, really only a rotary saw is suitable so I turned to my venerable radial arm saw (Provenance: gifted from a friend in 2014 who had inherited it years earlier from his father).
I made up a blank with suitable dimensions and then went on to set up the saw for appropriate angle, depth and length settings.
I made up a blank with suitable dimensions and then went on to set up the saw for appropriate angle, depth and length settings.
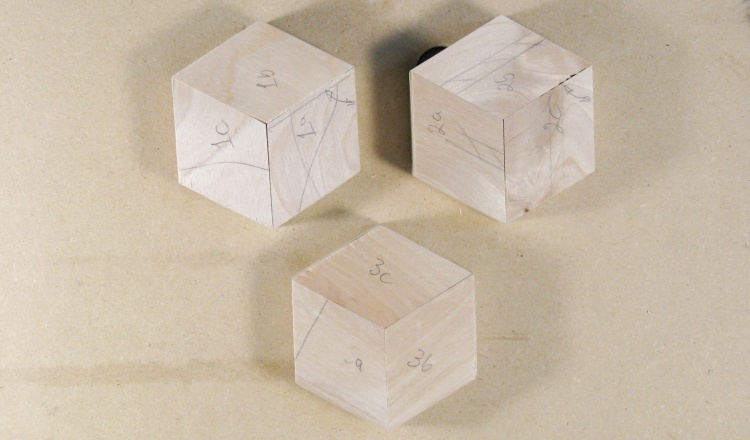
Three tries to get the angles right
I cut three pieces and then checked to see how they fit together: not great. So then I tweaked saw settings and repeated a couple more times until on the third iteration they looked like they were as good as I was going to get.
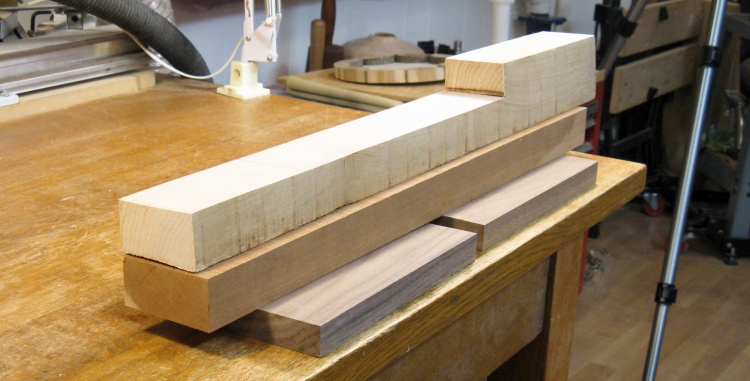
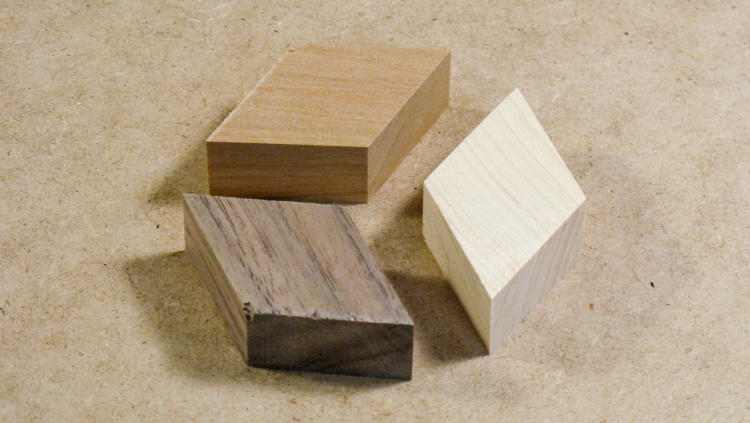
The raw materials
The trivet didn't need any particularly thick or wide pieces of wood so a few randomly-shaped boards from my storage shelves would be adequate.
From the top down, these are of course the maple, cherry and walnut.
From the top down, these are of course the maple, cherry and walnut.
The first step was to make blanks from which the angled pieces would be cut. They needed to be 3/4"-thick and 1-1/8"-wide and were sized using the normal jointer-bandsaw-planer sequence. The maple and cherry pieces were long enough that I could discard any sniped ends from the planer but the walnut was too short to throw away 6" of length so they got anti-snipe rails taped on to go through the planer, as shown below.
Cutting the blanks to size
Planing the blanks
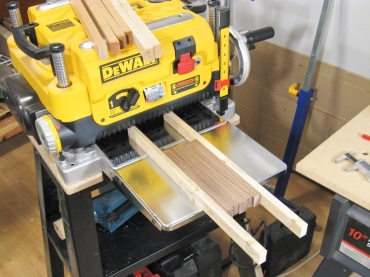
Planing the shorter walnut pieces
Enough blanks to do the trivet
The result of the above exercise was this group of variously-lengthed blanks, all theoretically the same cross-sectional dimensions.
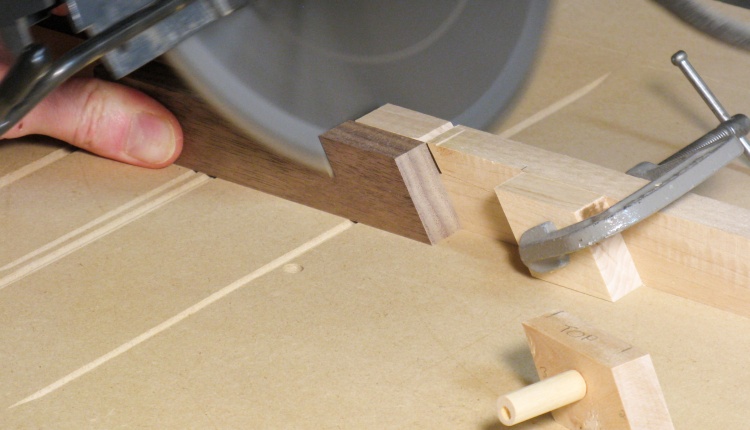
Making a walnut piece
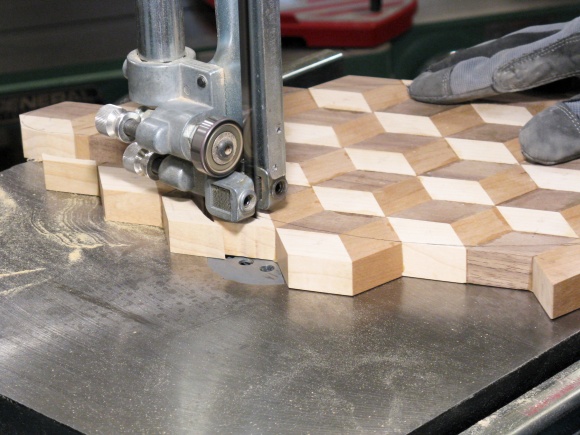
The next step was to cut the individual pieces.
In operation the little handled spacer was set beside the clamped-on block and the blank moved up to contact it. Then the spacer was removed and the section of blank cut off.
Having the blank directly against a stop resulted in a sloppier cut since the cut-off piece rested on the still-turning blade as it was moved back to the start position. This was avoided by using a spacer since this left a gap to the right and the cut-off piece tended to get blown clear by the blade-generated wind and remain untouched by the blade on the return stroke.
The first complete set
This is the first set of pieces I cut, and I'm going to make sure they go together OK before cutting the rest.
This walnut piece has a poor edge, but in future cuts that was improved by adding a sacrificial backstop behind the blank to make a cleaner cut.
Interestingly, the three woods cut differently, with varying edge and side qualities. I suspect that effect contributed to a bit of non-identicalness.
This walnut piece has a poor edge, but in future cuts that was improved by adding a sacrificial backstop behind the blank to make a cleaner cut.
Interestingly, the three woods cut differently, with varying edge and side qualities. I suspect that effect contributed to a bit of non-identicalness.
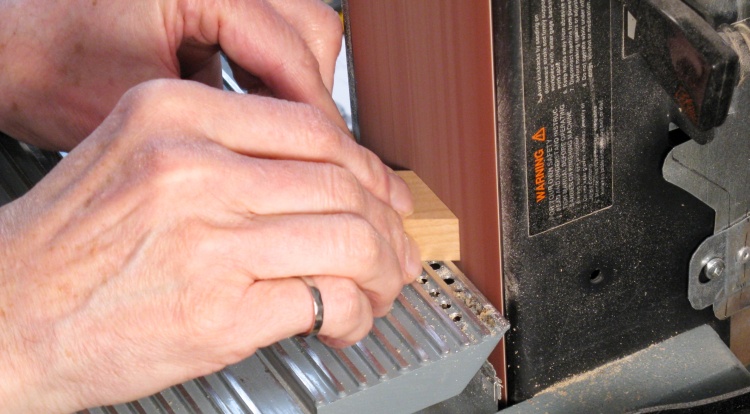
Some size/angle tweaking using the belt sander
To get a good fit, sometimes one or more pieces needed to be tweaked for flatness or angle, for which I used the belt sander.
Technically these are a rhombus shape or an equilateral quadrilateral for those of a more verbose nature.
Technically these are a rhombus shape or an equilateral quadrilateral for those of a more verbose nature.
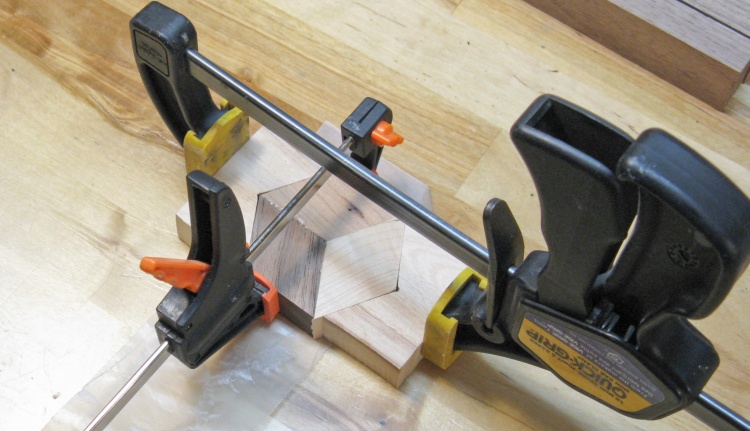
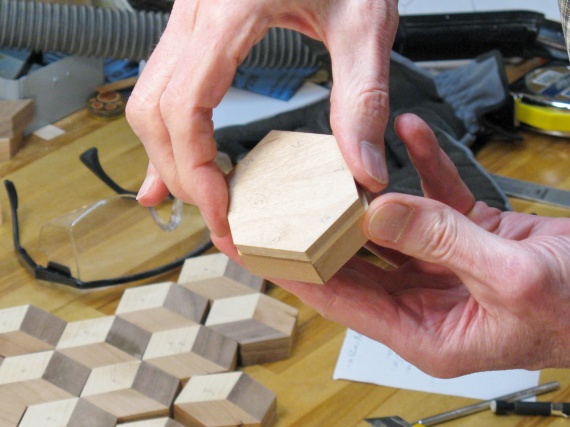
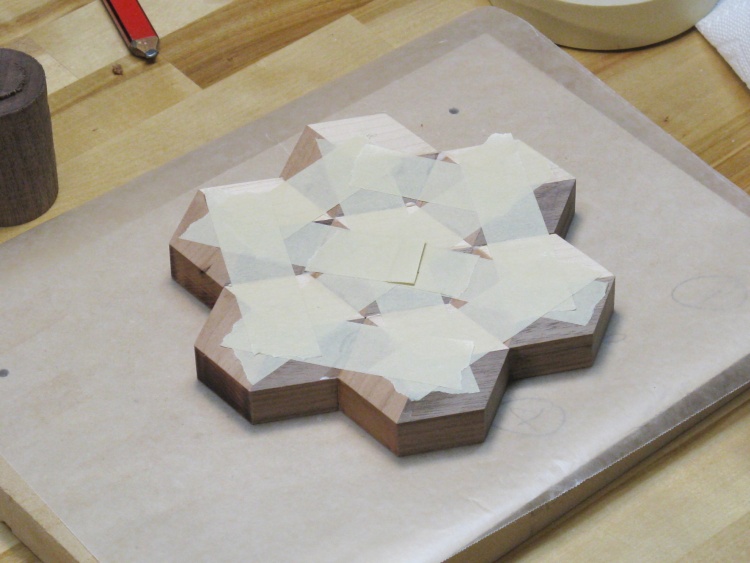
Gluing the first hexagon
I rather crudely cut some wood pieces to conform to the 120° angle for clamping. Here they're being used to transform the first three rhombi into a hexagon.
The hexagon was made with a specific relative grain direction between the pieces which helps with the 3D cube illusion, and all of them were made the same. OK, except the one that I made wrong. But I made spares because this isn't my first rodeo.
The hexagon was made with a specific relative grain direction between the pieces which helps with the 3D cube illusion, and all of them were made the same. OK, except the one that I made wrong. But I made spares because this isn't my first rodeo.
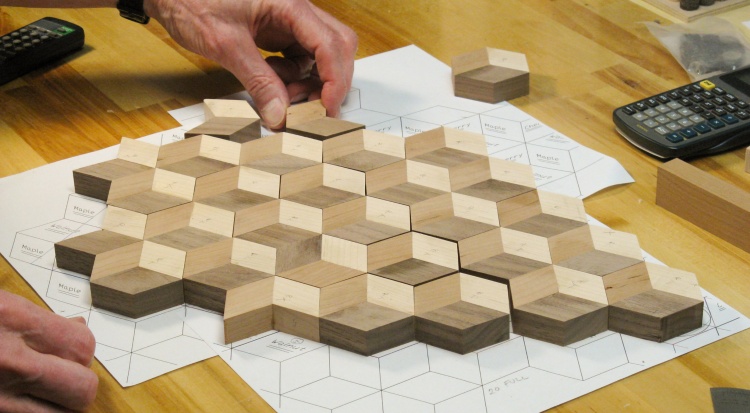
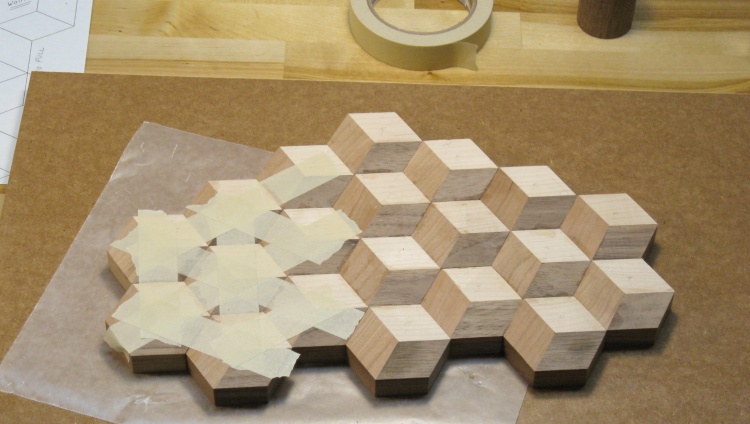
A bit later...all the hexagons done
The initial assembly went fine so then it was a matter of doing 20 or so more, which brings us up to this photo with the hexagons sitting on the full-sized plan. I also made a few 2-rhombi pieces for some of the edges that didn't require a full hexagon.
Unfortunately the hexagons were not all perfect. Or perhaps it would be more accurate to say that all the hexagons were not perfect. Anyway, those imperfections prevented nesting them together with nice gap-free joints.
After some thinking I decided to make a jig that would hold the hexagons a specific distance from a fence at an accurate angle, and I could route each side for consistency.
The shots below show the jig being made from maple. The hexagon to be modified gets taped to the disc, and that combination sits on a center pivot. An index pin goes into one of the evenly-spaced disc holes to set the angle for routing each of the six sides.
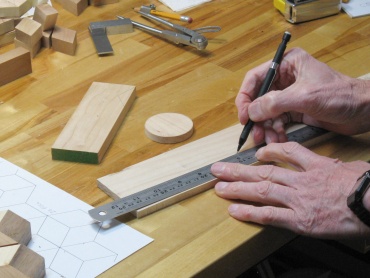
Marking wood for a jig
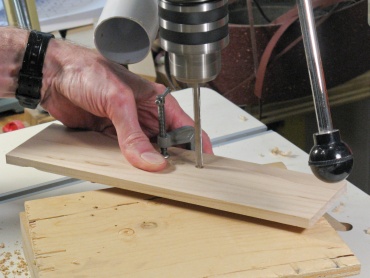
Drilling jig
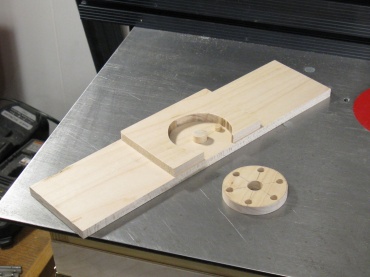
The completed routing jig
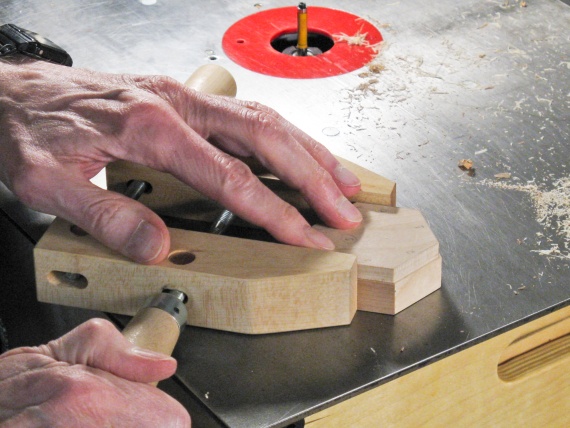
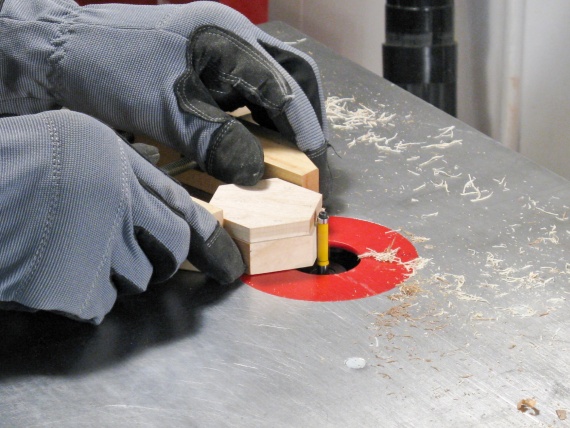
The next photos show the jig in action with the captions pretty much saying it all.
What the captions don't say is that it didn't really help that much - there was still too much inaccuracy in the hexagon shapes. Maybe it was imperfect rotations between sides or imperfectly centered haxagons - not sure but regardless, I needed a new plan.
What the captions don't say is that it didn't really help that much - there was still too much inaccuracy in the hexagon shapes. Maybe it was imperfect rotations between sides or imperfectly centered haxagons - not sure but regardless, I needed a new plan.

1: Tape circle to hexagon
2: Insert into jig
3: Route the side, rotate & repeat
So plan B or C or whatever is to make an as-near-to-perfect hexagon pattern as I can and then route the hexagons to that pattern.
The first one was pretty pathetic and so was the second so I pulled out my old drafting set for more-accurate circles and was very careful in marking the edges and corners. I set up the router table as a horizontal jointer to be able to take tiny amounts of wood off to creep up on the marked lines; still crappy.
The first one was pretty pathetic and so was the second so I pulled out my old drafting set for more-accurate circles and was very careful in marking the edges and corners. I set up the router table as a horizontal jointer to be able to take tiny amounts of wood off to creep up on the marked lines; still crappy.
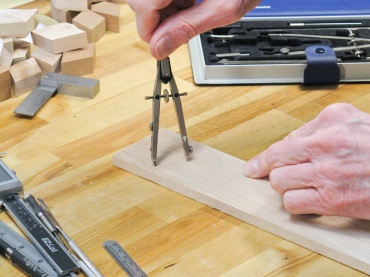
Finer instrument for pattern
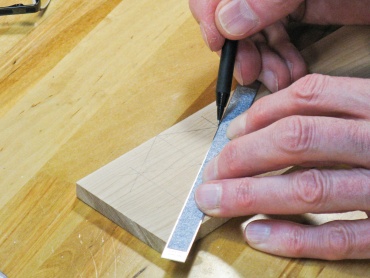
Carefully drawing pattern
Trimming pattern to size
A decent hexagonal pattern
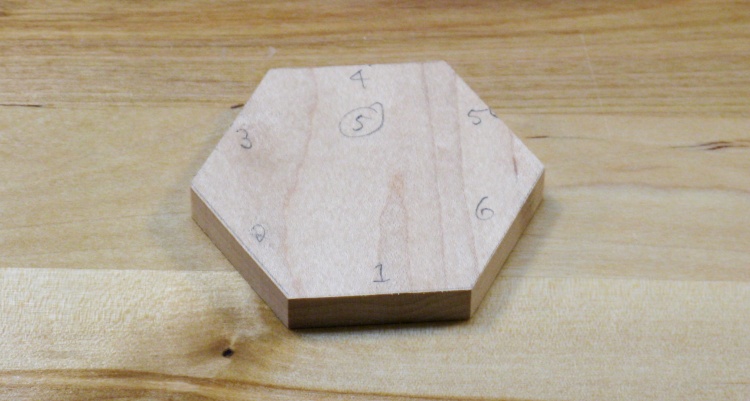
I eventually came up with a technique that didn't rely much on marking and after a few iterations the #5 try was finally decent.
1. Cut oversized hexagon.
2. Joint side #1 flat.
3. Joint side #2 at exactly 120° angle to #1.
4. The trickiest step: Joint side #6 at exactly 120° to side #1 and make side #1 the correct length.
5. Then set a fence the proper distance from a regular router bit and trim the remaining three sides with sides 1, 2 and 6 against the fence.
"Decent" meant all six corner angles within about 0.3°, sides parallel to about 0.001", cross-hexagon distances to maybe 0.002" and side lengths within 0.005".
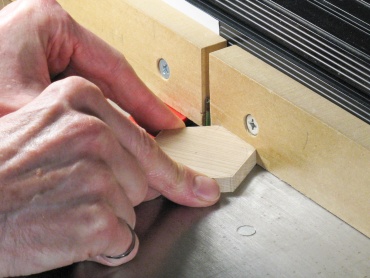
The next photos show the pattern in use. The pattern corners were aligned with joints in the hexagon as they were taped together. I used a wooden screw clamp for a good grip on the hexagon and then ran each side and corner past the pattern bit on the router. That bit has a bearing at the top that rides against the pattern and the cutter below cuts the wood flush with the pattern.
1: tape pattern to hexagon
2: Clamp piece for secure handling
Route piece to pattern
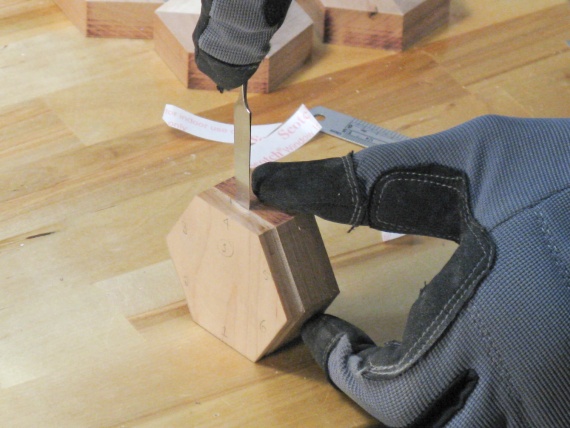
Pry the pattern off
Arranging more-accurate pieces
So the pieces weren't perfect, but they were many steps closer; close enough that I could get decent joints by swapping pieces and adjusting only a minority of them.
That then brought up the question of how to glue and possibly clamp the multi-piece trivet. I couldn't see doing it all at once so I decided to start with a core and work outwards.
That then brought up the question of how to glue and possibly clamp the multi-piece trivet. I couldn't see doing it all at once so I decided to start with a core and work outwards.
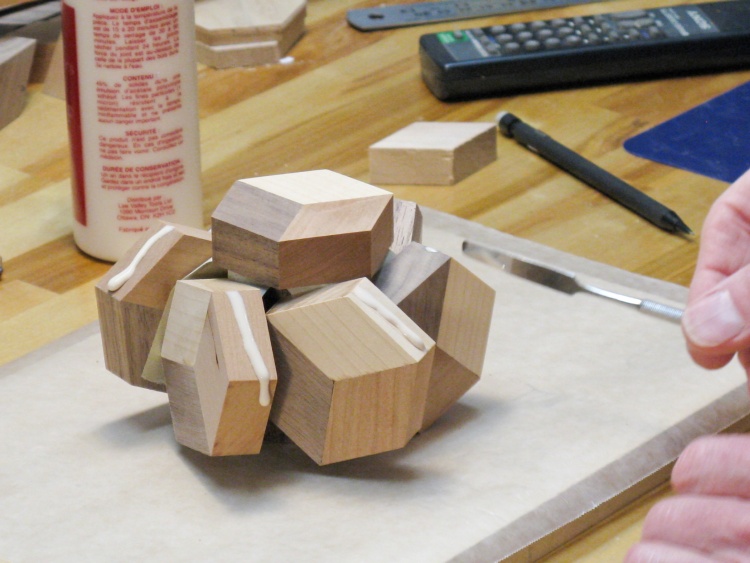
A group of pieces having glue added
I began with a center piece and the six surrounding pieces. I started by taping them together on the top using masking tape, stretching it to provide some joint-squeezing pressure.
In this photo the group of seven hexagons has been flipped over so they would "open" and I could apply glue to the appropriate edges.
In this photo the group of seven hexagons has been flipped over so they would "open" and I could apply glue to the appropriate edges.
Network of masking tape for clamping
Then the group was flipped back right-side-up and I added more tape so each was pulled toward all of its neighbours. It was then clamped from the top to ensure there was minimal warp.
The tape obviously isn't as effective as a big beefy metal clamp, but it's enough to make sure the joints were decently tight.
The tape obviously isn't as effective as a big beefy metal clamp, but it's enough to make sure the joints were decently tight.
Progressively building it up
When the glue on first group was dry, I removed the tape, fitted another small group of hexagons and repeated the taping/gluing with those.
Including the group being glued, it's about 80% done in this shot.
Including the group being glued, it's about 80% done in this shot.
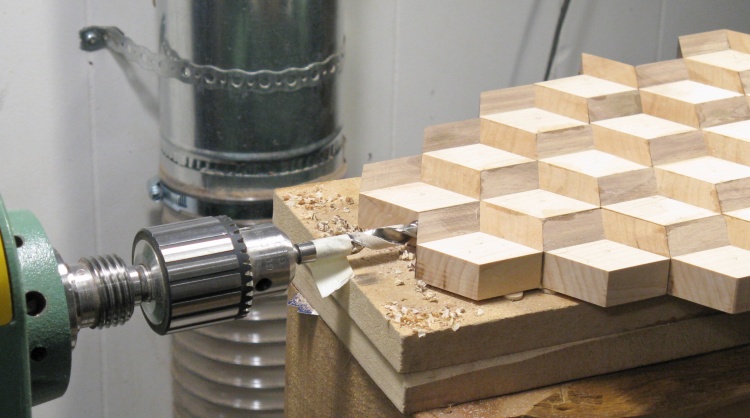
Drilling for handle reinforcement
The trivet has a handle at one end and I was worried about the strength of that relatively thin neck of wood. To help strengthen the neck I inserted about 5" of wooden dowel. This shot shows the main body being drilled for the dowel on a jury-rigged setup on the lathe, used to make sure the hole was exactly horizontal in the trivet.

Clamping handle end
I drilled the end hexagon on the drill press, inserted the dowel with a heaping helping of glue and clamped things together - a real clamp this time.
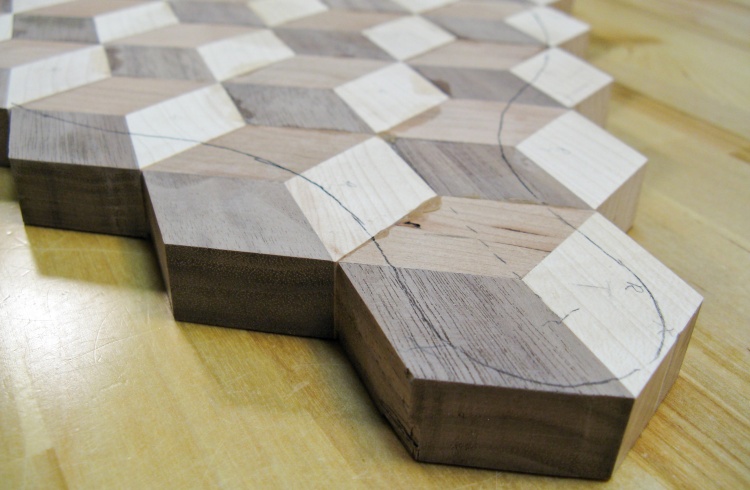
Assembled pieces marked with final shape
And with all the pieces in place, I traced on the overall outline using carbon paper.
The hexagons had gotten a bit smaller due to my reshaping so I had to rescale the plan and reprint it to fit the new overall size.
The hexagons had gotten a bit smaller due to my reshaping so I had to rescale the plan and reprint it to fit the new overall size.
Cutting outline to shape
Smoothing off the edges
Trivet outline shaped
Then as shown in the above photos, the outline was cut out on the bandsaw and the edges smoothed off on the horizontal belt sander.
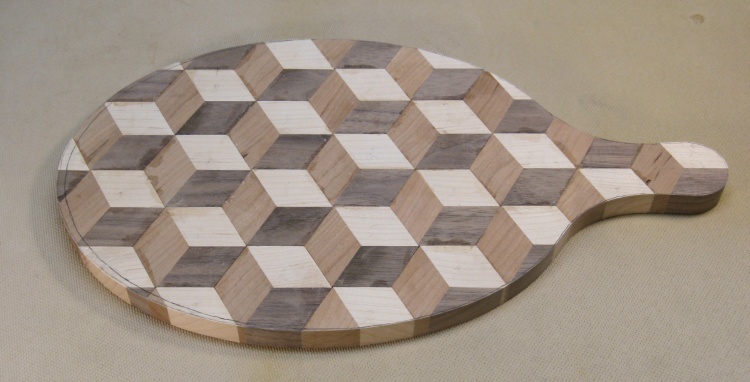
That brings us to this point where the trivet has its final shape.
That brings us to this point where the trivet has its final shape.
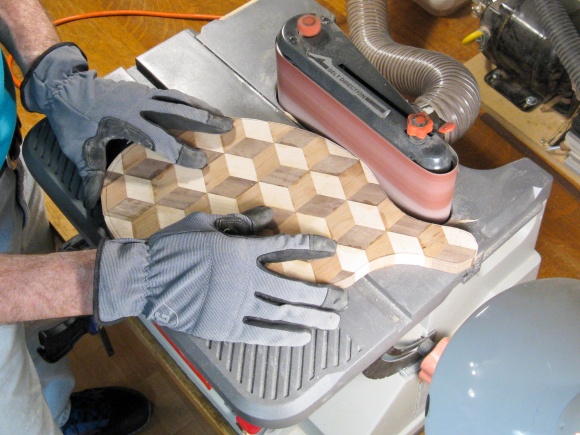
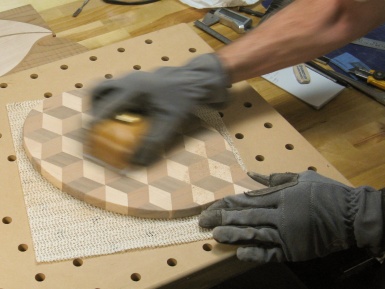
Sanding to remove glue residue
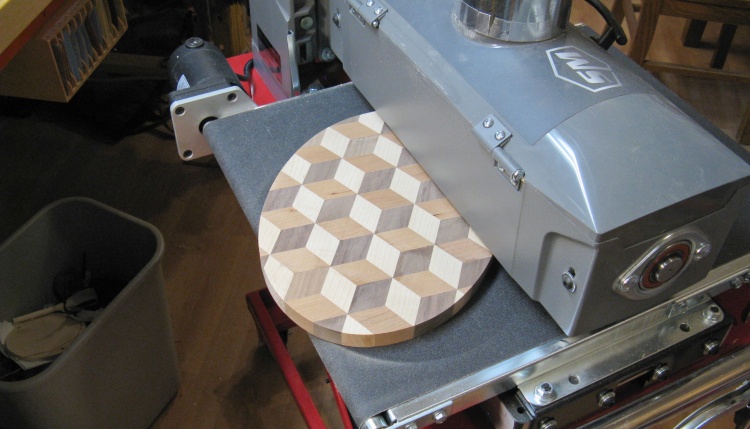
There was still some glue residue on the surface so I ran it through the drum sander a few times until the faces were cleaned up. I used 220 grit for the last passes but there were still fairly visible scratches that would need to be cleaned up later.
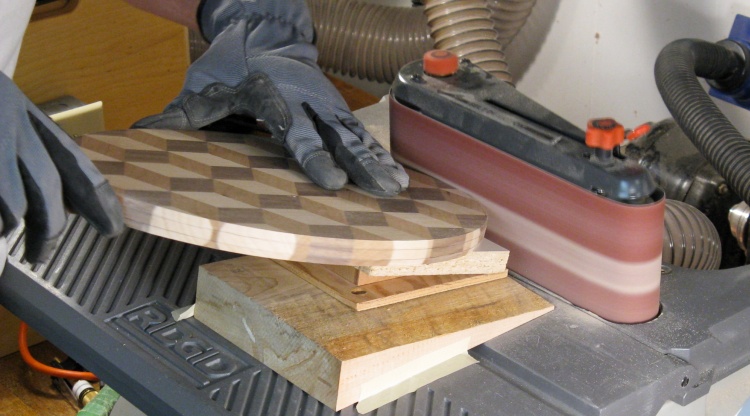
Sanding the edges as first step to rounding
The plan was to have rounded edges on the trivet but using the router to shape them seemed a bit risky due to all the different wood grain directions around the piece. So instead I took the safer route of sanding them round.
The first step was to sand the top and bottom edges at a specific angle, controlled by this precision pile-of-scraps jig shown in the photo.
The first step was to sand the top and bottom edges at a specific angle, controlled by this precision pile-of-scraps jig shown in the photo.
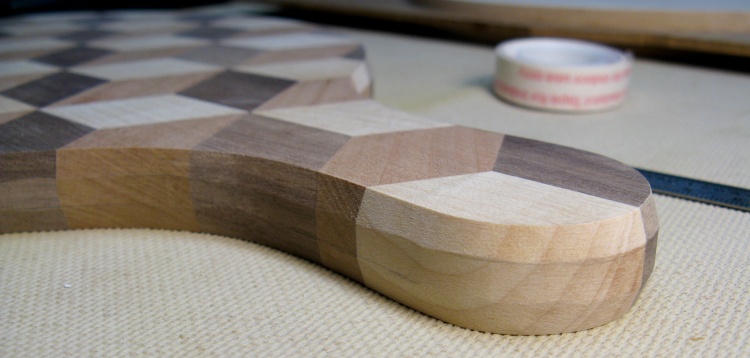
The faceted edge
That produced this nice faceted edge which then just needed the corners rounded off.
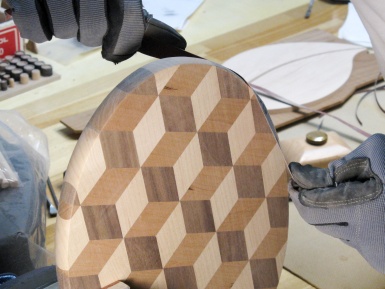
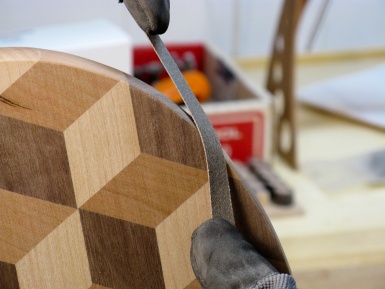
This little montage shows the final sanding stages; rounding edges, rounding corners and finally sanding the surface up to 400 grit to remove any previous sanding marks.
Rounding edge with sandpaper strips
Rounding the corners
Finish-sanding the surfaces
Woodworking completed
I did a bit of gap filling on the bottom using sawdust and varnish in a couple of the more-visible joints and that was it for the woodworking. Here it is sitting on some newsprint ready for the varnish.
Like my last project the maple breadboard, this one didn't get the initials I customarily put on the items I make since there was no hidden area.
Like my last project the maple breadboard, this one didn't get the initials I customarily put on the items I make since there was no hidden area.
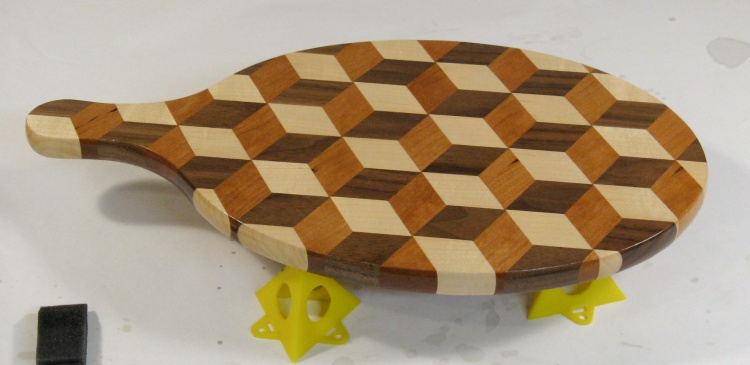
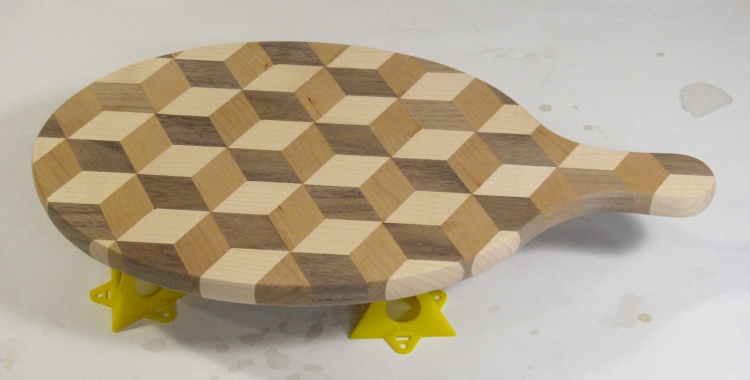
First coat of varnish on
I applied my favorite Miniwax varnish and this shows the trivet with the first coat, still wet.
Completed


