I thought I would try a simple turning of a green piece of wood. As mentioned, there was a pile of small logs to choose from, and I tried to pick the largest-diameter and the least cracked or rotten. I was told "take as many as you want", which I did, and which turned out to be one (since I was a bit skeptical it could be shaped OK). I used a vessel shape that I had in mind for a future project, which was based on an antique Chinese vase.
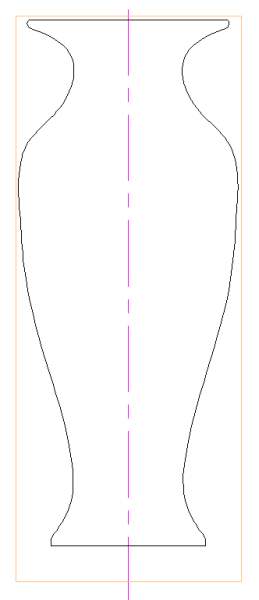
Pretty much the extent of my planning
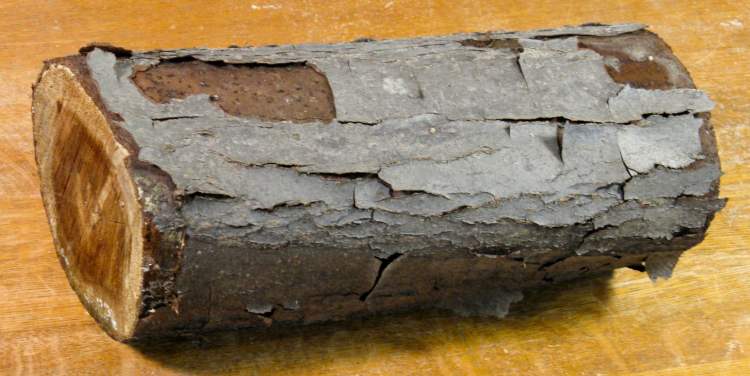
The original log
And here is the back yard specimen. It was fairly roundish with only some minor cracks and no major knots. What remained of the bark was pretty loose and it kept shedding pieces around the shop.
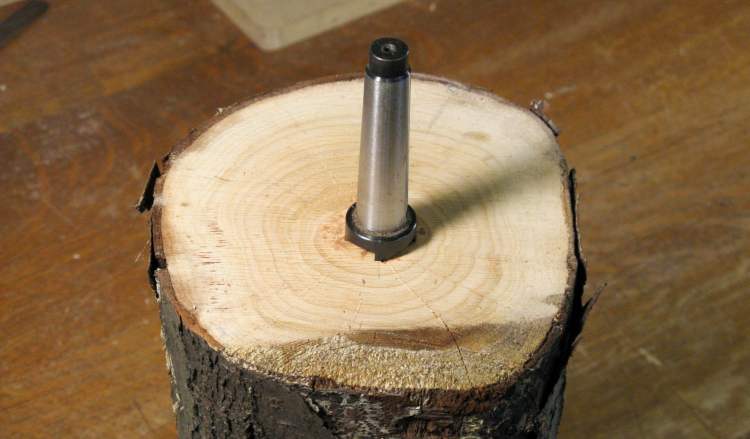
Drive spur mounted in one end
Both ends were cut on a bit of an angle (what was the guy cutting down the tree thinking?). So I cut the ends a bit squarer to make it easier to mount to the lathe.
I aligned the mounting point exactly through the core and hammered the drive spur in so it was solidly engaged with the wood.
I aligned the mounting point exactly through the core and hammered the drive spur in so it was solidly engaged with the wood.
Rounding started
Here I've started doing the rounding with a roughing gouge. This wood was very nice to cut since it was pretty soft and whether from the moisture or just the particular characteristics, the shavings came off cleanly in long pieces with no chipping or sawdust.
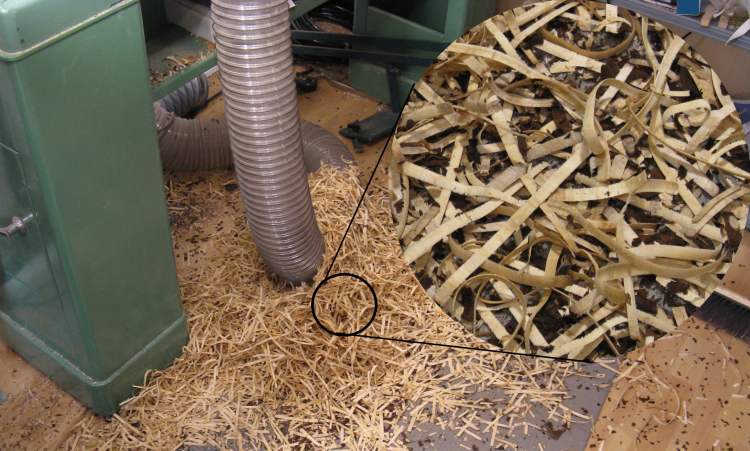
Pile 'o shavings
Yah. Like that.
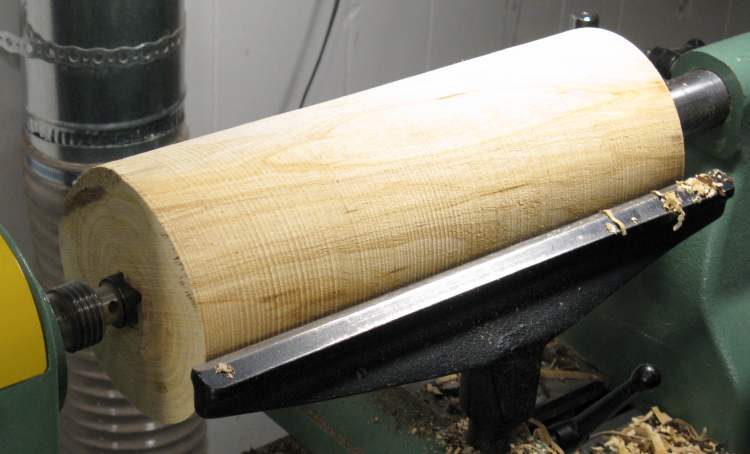
Roundness achieved
I got to this point and hadn't really decided what the shape was going to be, but knowing the length and diameter I had to work with, I retreated to the computer to try out some shapes.
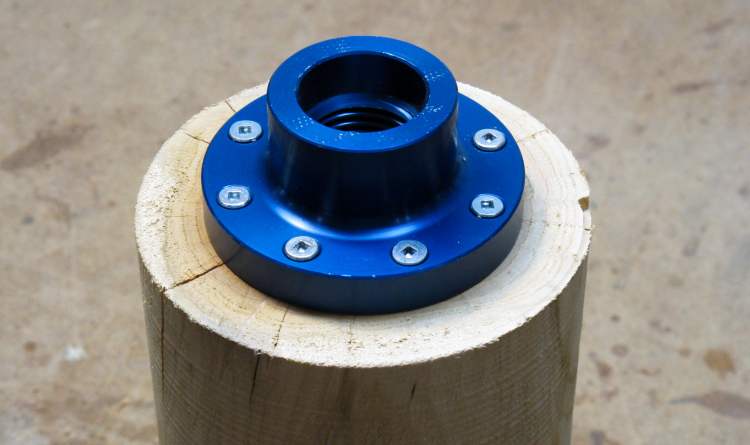
The little blue faceplate
So while my shape ideas bubbled away and the lighter ones evaporated off and the heavier ones sank to the bottom, like...like...OK forget it. Bad simile. Anyway meanwhile I mounted a small aluminum faceplate to one end.
I had trued up the end of the wood while it was on the lathe so it would mount to the faceplate exactly straight and there would be no wobble.
The wood was pretty soft and I didn't want to use a lot of length for the screws, so I used eight screws to get decent holding power.
I had trued up the end of the wood while it was on the lathe so it would mount to the faceplate exactly straight and there would be no wobble.
The wood was pretty soft and I didn't want to use a lot of length for the screws, so I used eight screws to get decent holding power.
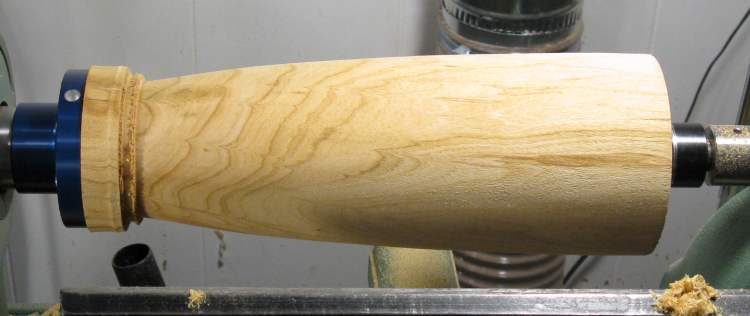
A bit of shaping done
I started doing a bit of shaping before the desgn was finalized, but I didn't want to do too much until I figured that out.
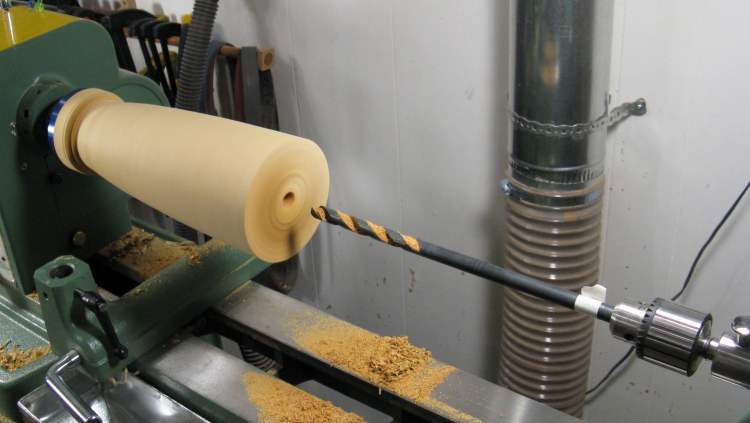
Drilling the guide hole
It was a pretty safe bet that the vessel was going to be hollow so I went ahead and made the pilot hole using the rather authoritative-looking drill bit shown here.
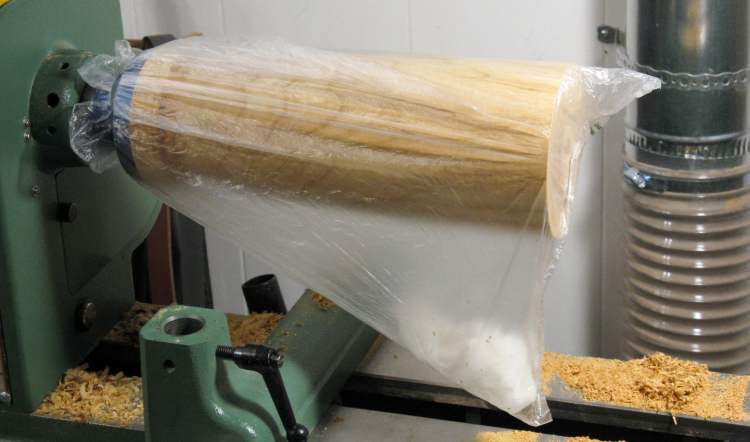
Anti-dry-out plastic bag
The wood was a bit cracked already so whenever it wasn't being worked on, I enclosed it in a bag with a damp paper towel to make sure it didn't dry out (and crack) any more.
My thought was to let it dry when it was done and then see if I could fill any cracks. They would be visible, but at least they would be solid.
My thought was to let it dry when it was done and then see if I could fill any cracks. They would be visible, but at least they would be solid.

Marked for cutting depth guide slots
After I decided on the shape, I marked out the wood so that I could cut depth-guide slots.
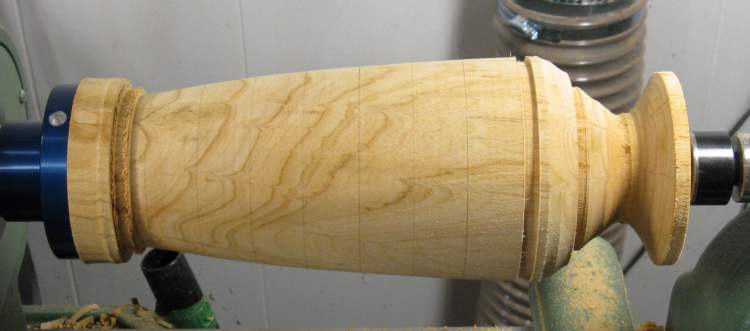
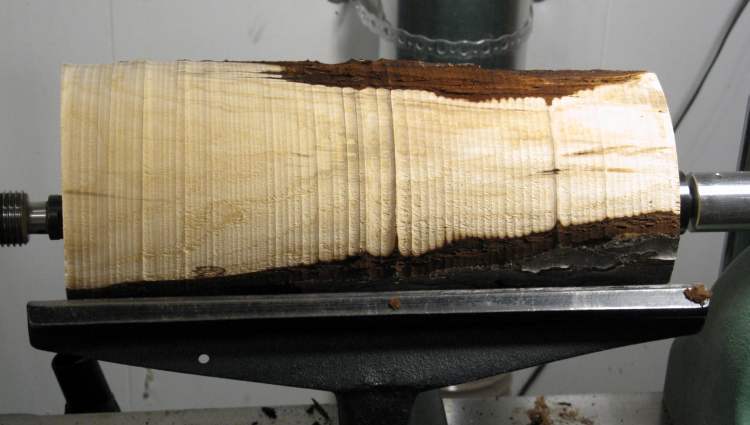
This sequence of photos shows the progression of the outside shape as I first cut the depth slots and then removed the excess material.
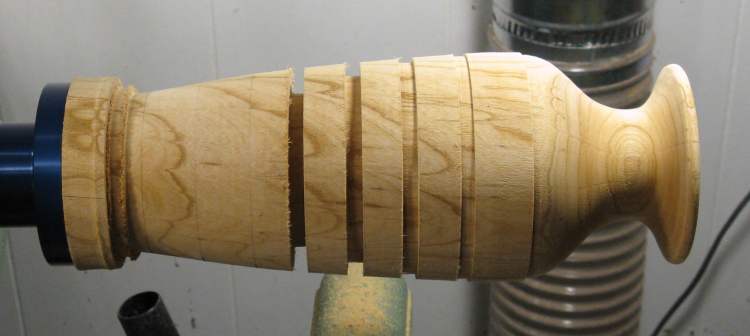
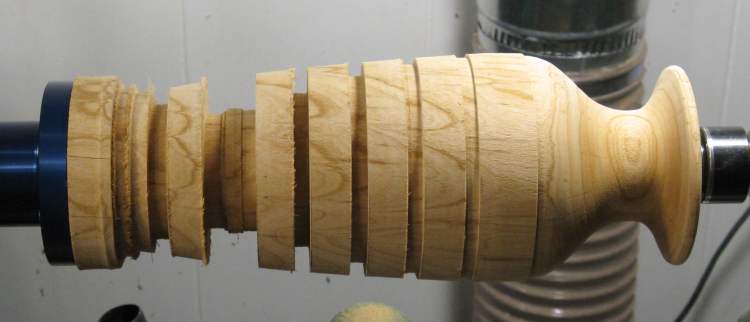
Progression of turning
Here the outside is essentially complete. I had left a larger-diameter flat area for the steady-rest wheels to bear on as described below.
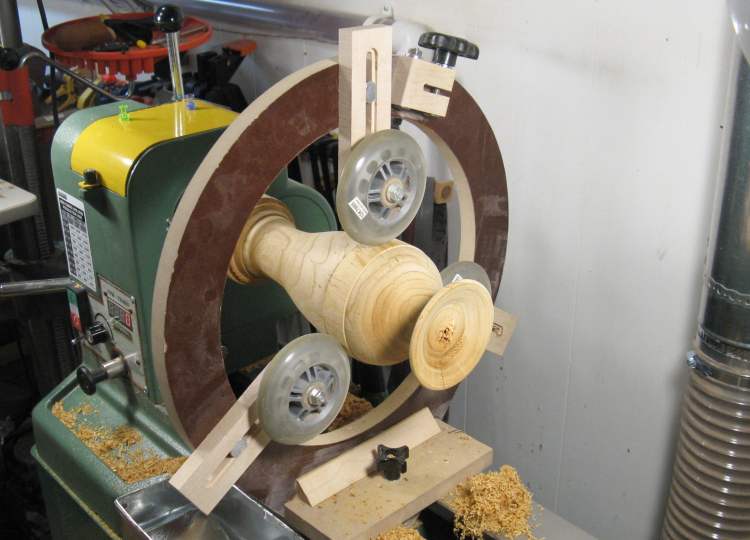
Steady-rest in place for hollowin
For hollowing, the live center supporting the right end of the wood has to move out of the way so it is best to provide alternate support. I usually use a 3-wheel steady-rest like this one for that purpose.
I've found that the force of the wheels can compress the wood so for this vessel I left a thicker section where the wheels would run, and which I planned to remove when done.
I've found that the force of the wheels can compress the wood so for this vessel I left a thicker section where the wheels would run, and which I planned to remove when done.
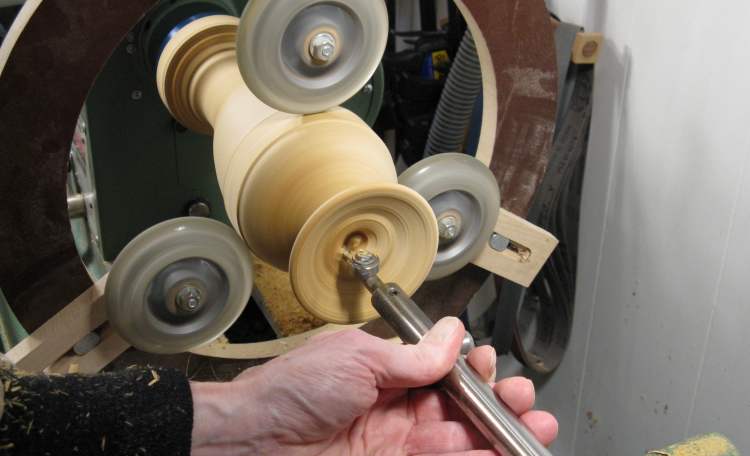
Starting the hollowing
Here I'm starting to cut away from the center hole using the captured hollowing jig with a small carbide bit. Click here for a few more details on the jig.
A couple inches in
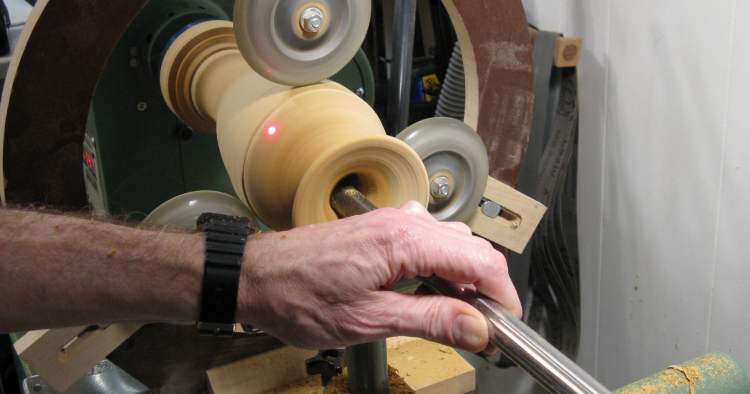
The hollowing has progressed to a couple inches inside as can be seen by position of the laser dot, here set to mark the end of the cutter.
About halfway done the hollowing
...and a bit further along here. I fully hollowed the vessel as I progressed further in, cutting out to the approriate wall thickness as I went.
Narrowed shoulder
As a last step before removing the steady rest, I trimmed down the width of the shoulder.
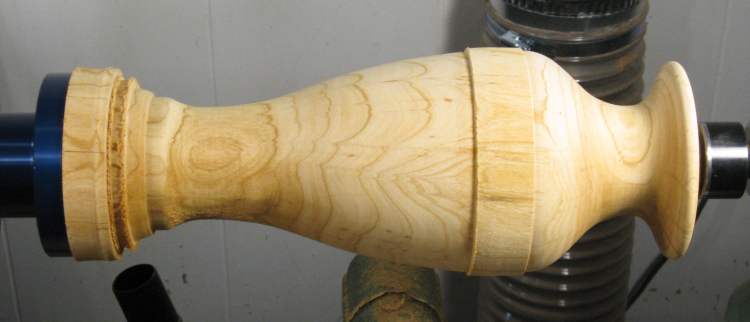
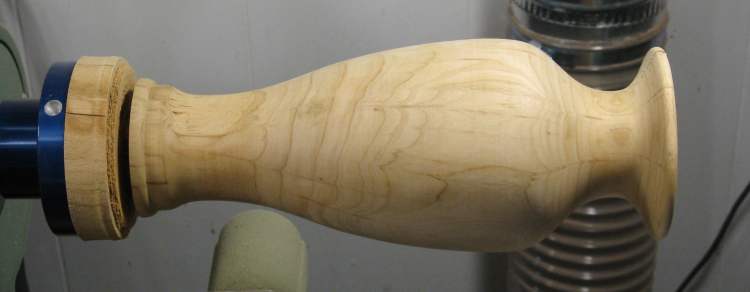
Outside shape is done
Trying to turn a long piece held only at one end causes vibrations and uneven cuts, so after removing the steady rest, I moved the tailstock back into place with a tapered piece of wood on it that fit neatly into the neck to provide support.
Then I was able to remove the rest of the shoulder.
Then I was able to remove the rest of the shoulder.
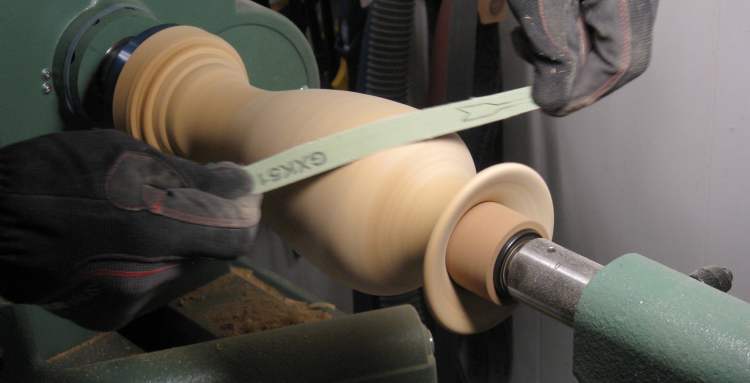
Sanding the outside
While it was still on the lathe, I sanded the outside using a progression of grits.
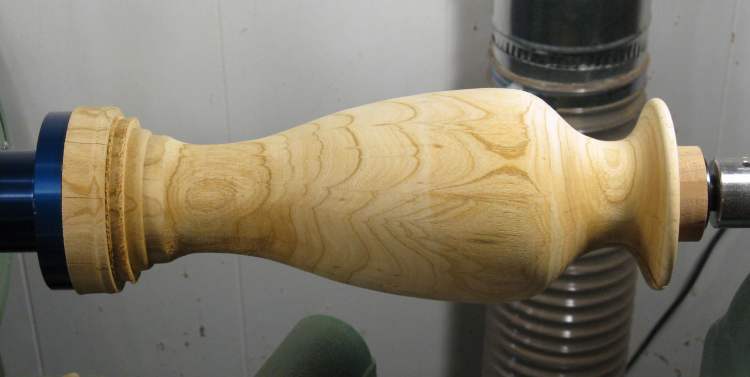
Outside sanded
After sanding with the vessel rotating, I stopped it and sanded with the grain to remove the inevitable scratch marks you get from sanding while it is rotating. Here the outside is done.
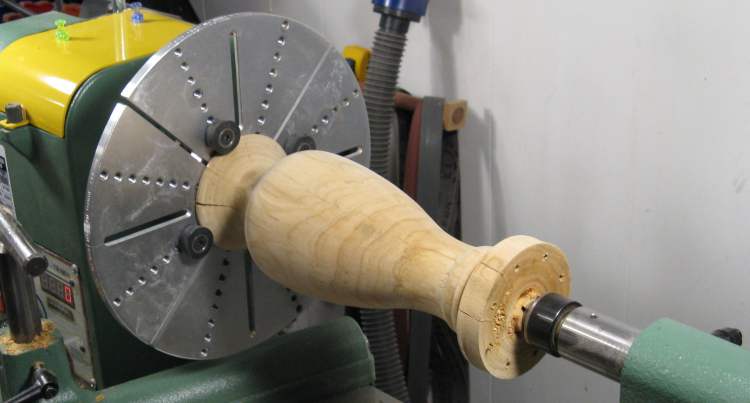
Flipped to remove bottom piece
Finally, I pulled it off the lathe and removed the faceplate. Then it was flipped around and held as shown to take off the big piece of wood that held the screws through the faceplate.
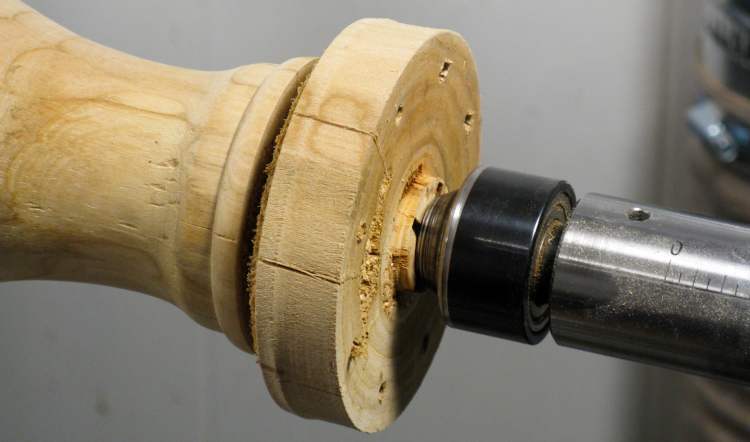
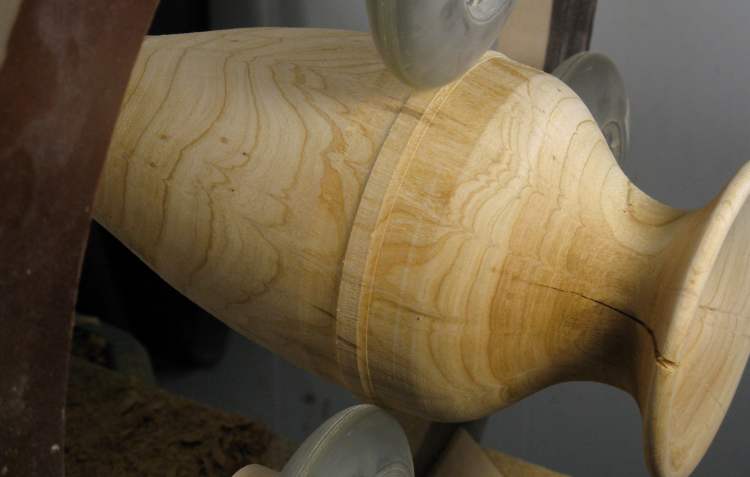
Bottom ready for removal
This is a closeup of the bottom before I cut it away. The bottom has a few cracks, but they don't extend into the vessel itself.

Bottom removed, violently
So the good news was the the bottom was removed. The bad news is that it happened because the gouge I was using must have caught a crack, which caused the vessel to explode into pieces and fly about the room.
But there was a compensating dose of good news in that there were exactly three cleanly-broken pieces that actually could be fit back together well.
But there was a compensating dose of good news in that there were exactly three cleanly-broken pieces that actually could be fit back together well.
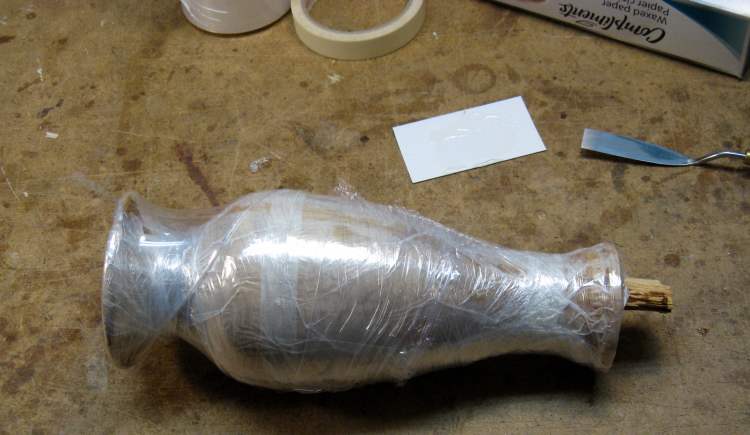
Reassembled and bound together
So I got out the epoxy and glued the three pieces back together. It was wrapped in stretchy plastic to hold them tight with an even pressure while the glue dried.
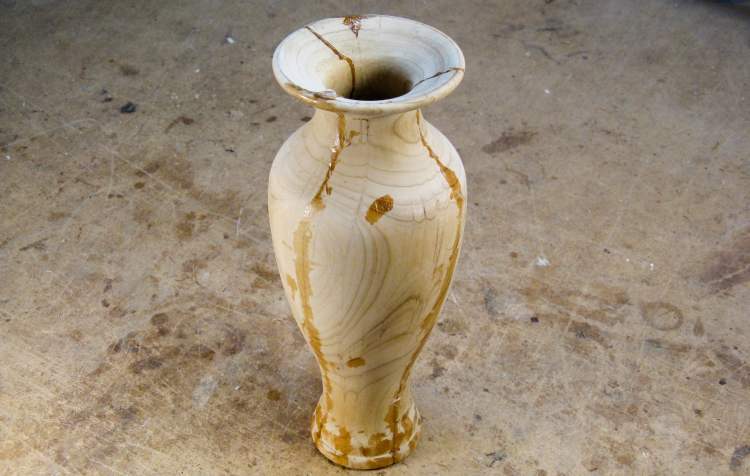
Good as new!
And there it is in the recovery room. It appears that the operation was a success, although a bit of cosmetic surgery is indicated.
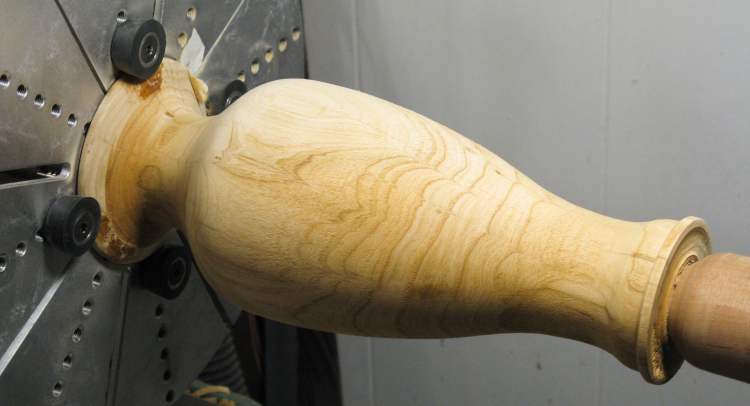
Undergoing the dermabrasion procedure
Here it is back on the lathe and most of the vessel has already had the outer 1/32" or so of wood removed. This evened up any slight misalignments between the pieces and removed the excess glue.
You'll notice that the bottom is being held with the same shaped piece of wood I had previously used in the neck of the vessel, and it is sticking through the bottom. This is because there is a 1"-diameter hole in the bottom from the center being broken out.
You'll notice that the bottom is being held with the same shaped piece of wood I had previously used in the neck of the vessel, and it is sticking through the bottom. This is because there is a 1"-diameter hole in the bottom from the center being broken out.
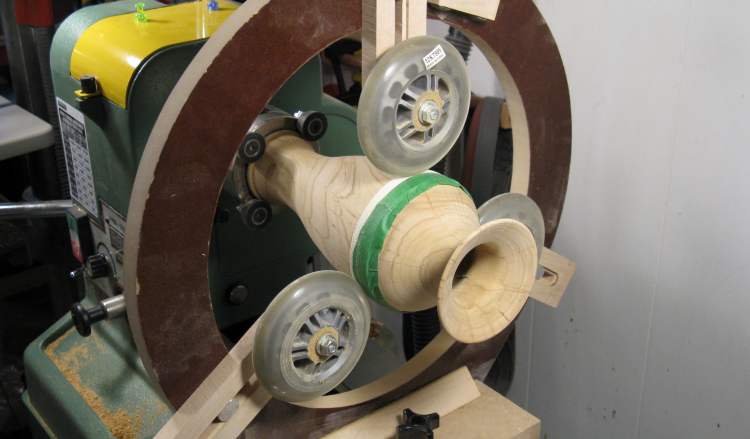
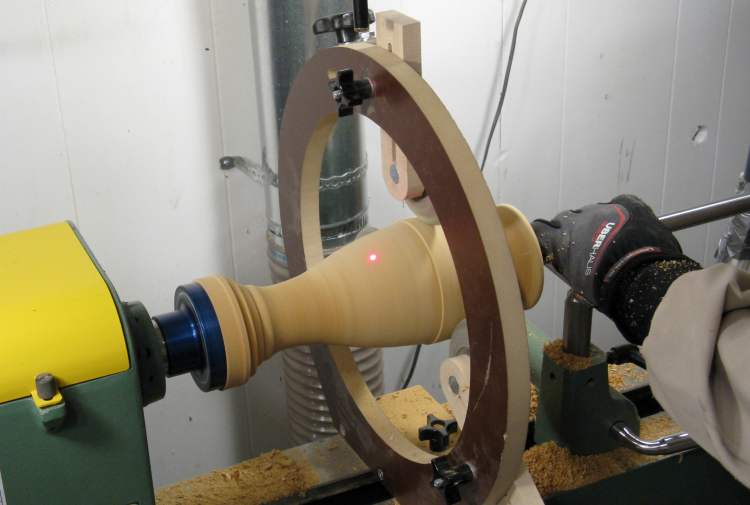
Flipped to do the top
To clean up the top, I needed to flip it around and deploy the steady rest again. I had previously removed the protective ring of wood from the vessel, so I taped a stiff strip of plastic around it to protect the wood from the wheels. At the point this shot was taken, the top had been cleaned up.
Plugging the bottom hole
As mentioned above there was a hole in the bottom, so I made a matching roundish plug to fill it. I used one of the pieces that broke off the bottom so the grain would be somewhat similar.
The plug has been glued and tapped into place with a small hammer, just hard enough to fit tightly, but not hard enough to crack the bottom.
The plug has been glued and tapped into place with a small hammer, just hard enough to fit tightly, but not hard enough to crack the bottom.
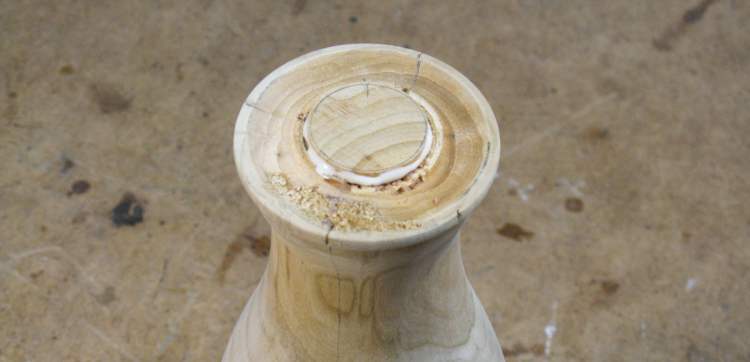
Circle template glued on
After the glue hardened, I sanded off the excess length of the plug so it was flush with the rest of the bottom.
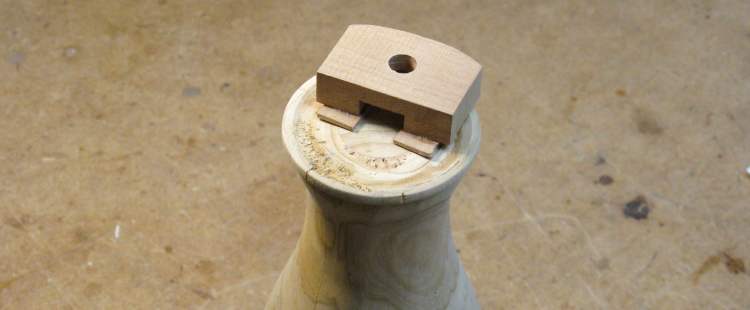
The last thing to do was to make the small signature circle. This shows the bottom of the vessel with a template I use for the circle glued on with a temporary latex adhesive.
The last thing to do was to make the small signature circle. This shows the bottom of the vessel with a template I use for the circle glued on with a temporary latex adhesive.
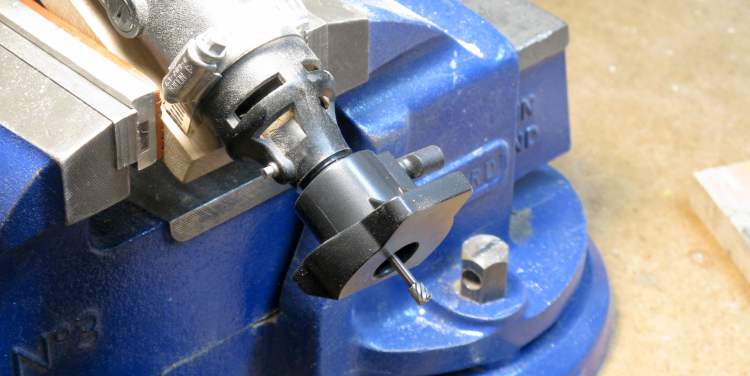
Dremel configured for circle cutting
My usual technique for small projects is to mount the Dremel in the vise and configure it with a high-speed cutter bit and a router-style faceplate that can be set for a specific depth of cut. I normally use a depth of exactly 2 business cards (0.02") into the wood.
This is an older Dremel that I've hose-clamped to a rectangular piece of wood. That makes it easy to hold in the vise for operations just like this one.
This is an older Dremel that I've hose-clamped to a rectangular piece of wood. That makes it easy to hold in the vise for operations just like this one.
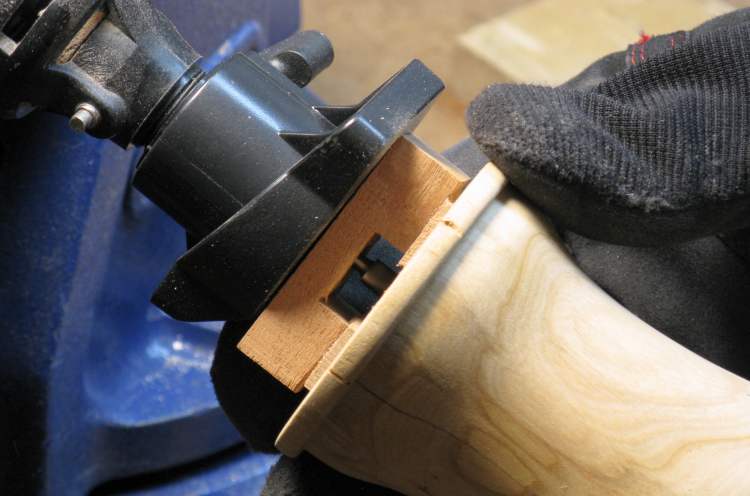
Cutting the bottom
To make the circle, the jig is held against the dremel faceplate and moved around to the limits of the hole in the jig to cut a shallow circular area.
When done, the jig is just pulled or pried off and the glue comes off cleanly.
When done, the jig is just pulled or pried off and the glue comes off cleanly.
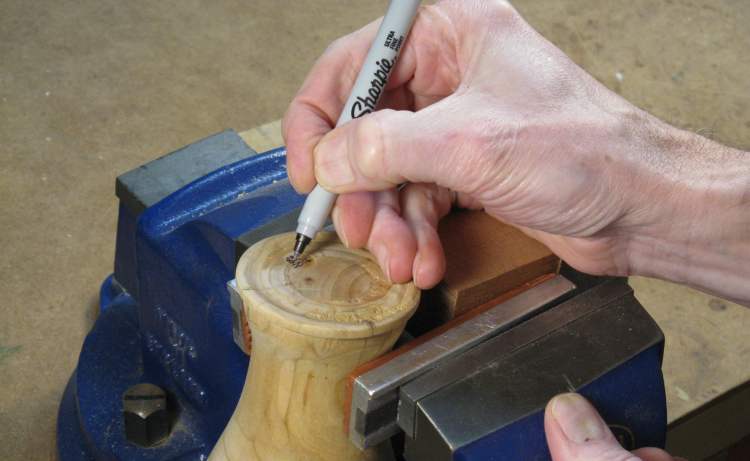
Initialing
I usually use a felt pen to get a good contrast on light woods.
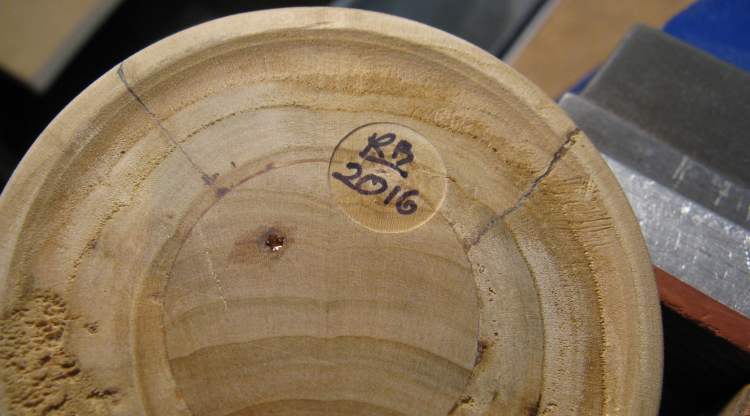
Official mark - accept no substitutes!
...and it looks like that.
The bottom of this vessel is pretty grim. In addition to the obvious plug and the cracks, there is some punky wood with big pores and a small hole plugged with epoxy. This is definately a item made to stand right-side-up.
The bottom of this vessel is pretty grim. In addition to the obvious plug and the cracks, there is some punky wood with big pores and a small hole plugged with epoxy. This is definately a item made to stand right-side-up.
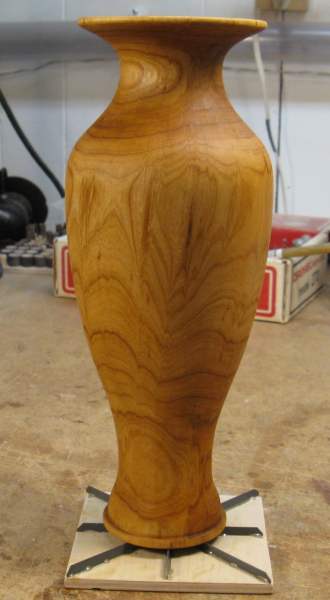
First coat of finish applied
And this is the traditional "it looks way better now" shot after the first coat of finish has been applied.
I used my go-to finish of a wipe-on polyurethane, using a cloth to apply it (and a cloth with a stick for the inside). I followed my standard regimen of giving it three coats and sanding with #0000 steel wool between the coats.
I used my go-to finish of a wipe-on polyurethane, using a cloth to apply it (and a cloth with a stick for the inside). I followed my standard regimen of giving it three coats and sanding with #0000 steel wool between the coats.
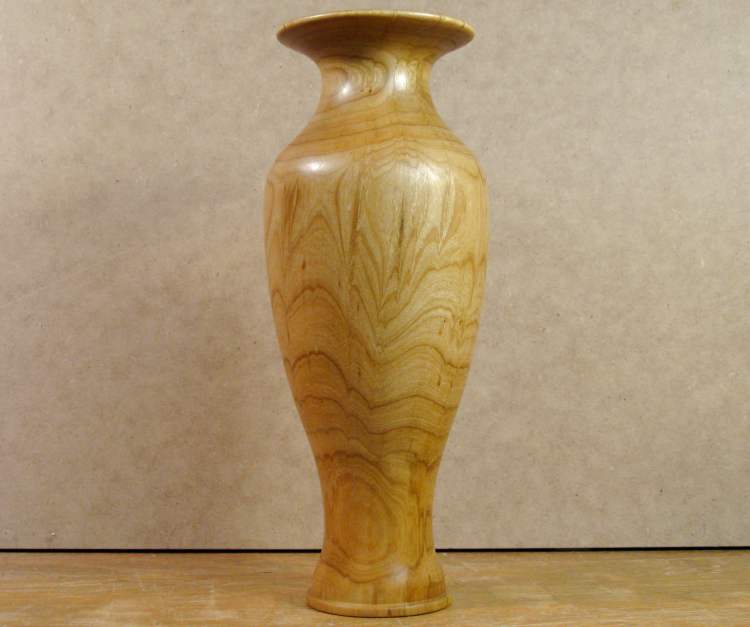
Complete
After the three coats, I declared it complete.


