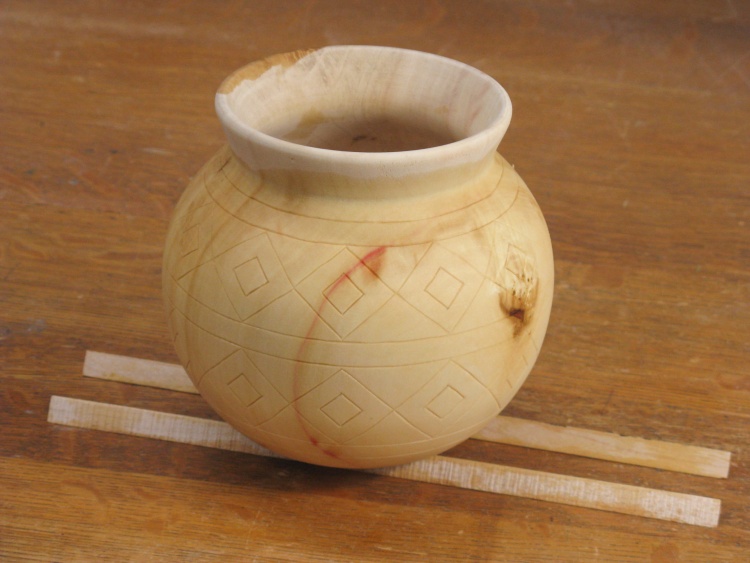
I liked the classic shape of the original clay pot and thought it might make a decent model for a wooden version. With that target in my sights I then had to decide how to make it.
I considered a "conventional" segmented approach where appropriately-shaped pieces of contrasting wood species are stacked together to form the pattern in the turning blank. However the pattern of diamond and triangular faces combined with sharp curves would require irregular polyhedron pieces with specific angles on all edges. Theoretically achievable, but the wood grain couldn't be made continuous and it would probably be mostly of interest only to other woodworkers, not to mention rife with possibility for tiny angular imperfections causing gaps in the finished product.
However I had recently used dye stains on a couple of wood-repair projects (too minor to rate web pages here) and thought that I should get a dye selection for similar projects. With that in mind, using dye for the pattern seemed like a better approach since it essentially replicated the original's creation. Plus I was less likely to screw it up.
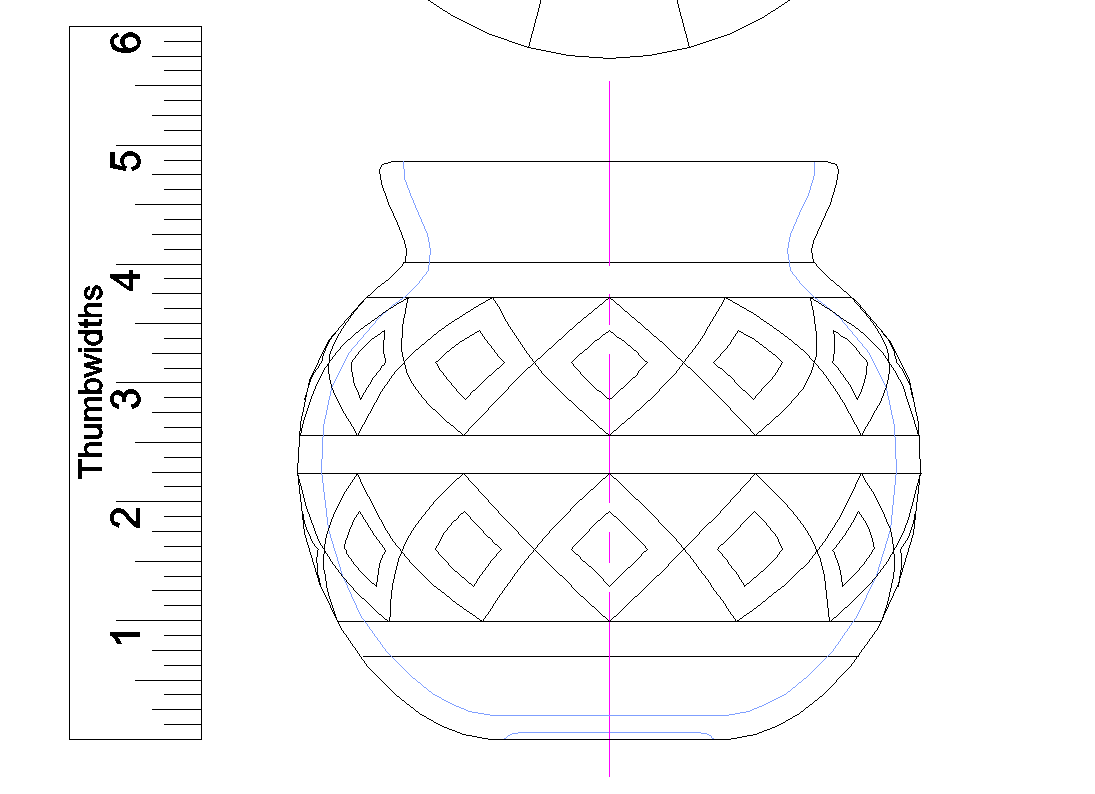
The plan, less colourization
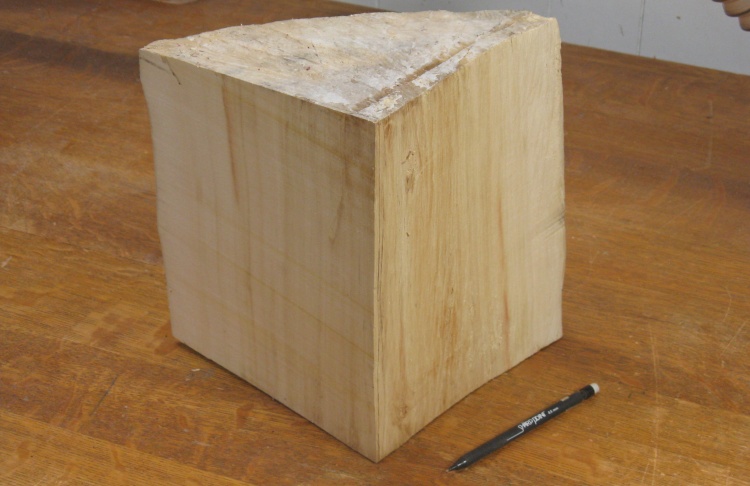
The origin quarter-log
This vessel was going to need a large piece of light-coloured wood and fortunately I had just the ticket in the form of a Manitoba Maple log.
Half the log remains out in the shed while a quarter had been used for a previous turning, leaving this quarter on the floor of my shop twiddling its metaphorical thumbs waiting for an assignment.
Half the log remains out in the shed while a quarter had been used for a previous turning, leaving this quarter on the floor of my shop twiddling its metaphorical thumbs waiting for an assignment.
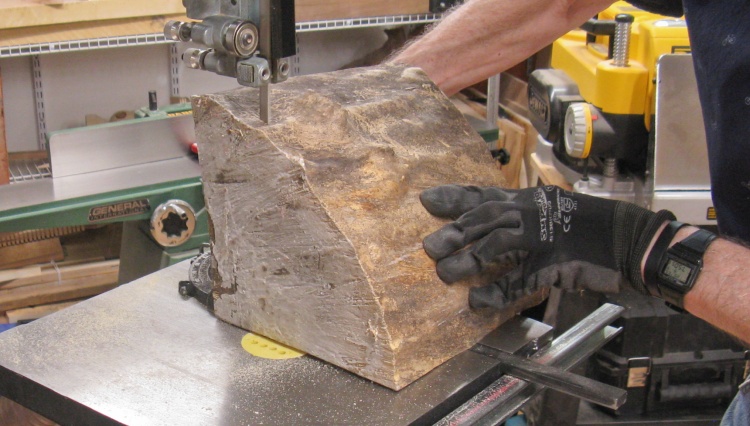
Squaring up the ends
The ends were a bit angled so I started by cutting them closer to square using the band saw.
The facing side has a white cast due to being coated with wax when stored about three years ago to slow the drying process and reduce cracking.
I recently equipped my saw with a carbide-tipped blade and now it cuts this thickness of wood with absolutely no problem.
The facing side has a white cast due to being coated with wax when stored about three years ago to slow the drying process and reduce cracking.
I recently equipped my saw with a carbide-tipped blade and now it cuts this thickness of wood with absolutely no problem.

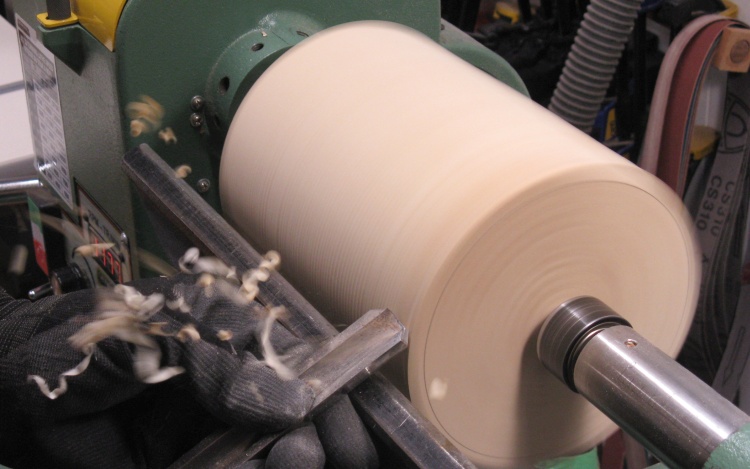
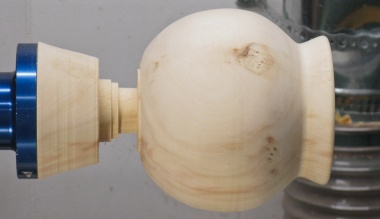
Rendered octagonalish and mounted to the lathe
A bit more band saw action got the pie-shaped log piece to a reasonable facsimile of an octagon (with one particularly lumpy side).
I would need a faceplate attached for doing most of the turning but that needs a flat face. Unfortunately the ends were neither exactly square nor flat so the first step was to flatten the end, which I planned to do by turning it using the spur drive visible here.
I would need a faceplate attached for doing most of the turning but that needs a flat face. Unfortunately the ends were neither exactly square nor flat so the first step was to flatten the end, which I planned to do by turning it using the spur drive visible here.
Trimming off the more egregious lumps
I first trimmed off the big lump at one end to help with the balance and then I flattened the drive spur end so it could mate to a faceplate without any rocking.
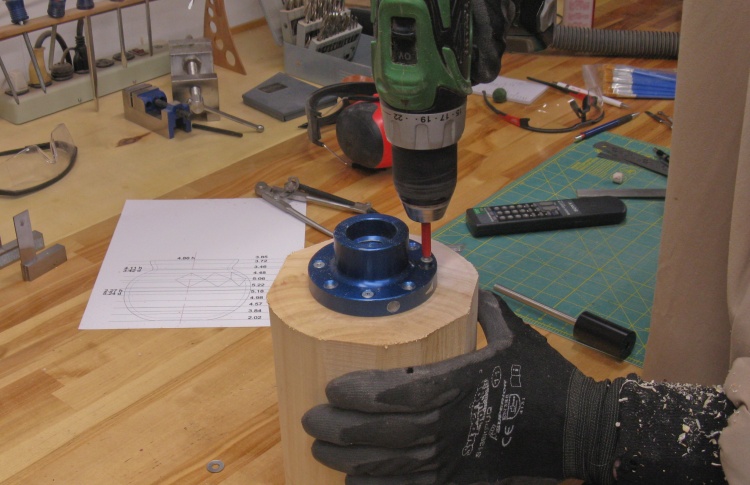
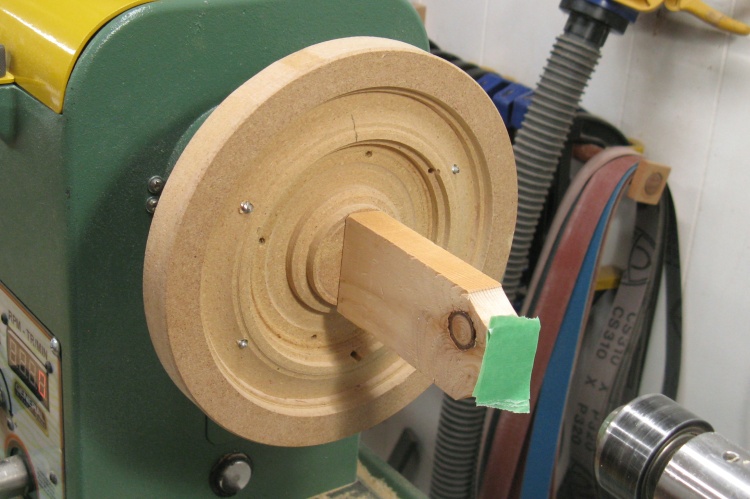
Adding the faceplate
My 4" aluminum faceplate was carefully centered and then screwed on.
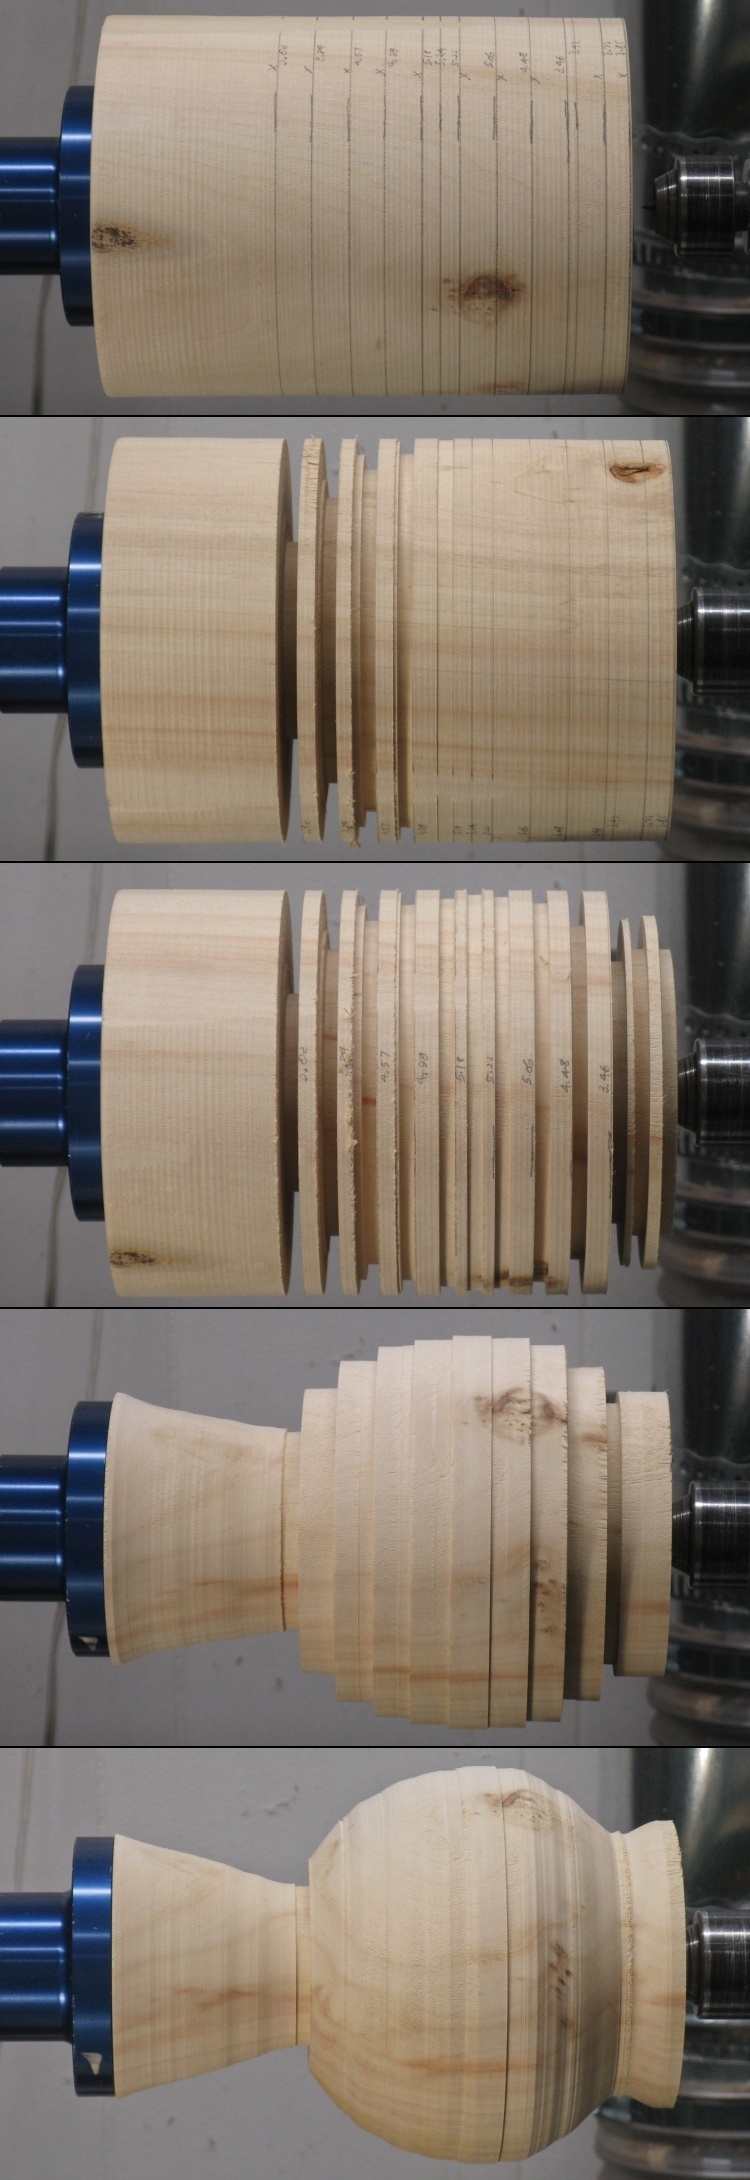
The turning composite
I (digitally) glued together the photos of the turning progress here.
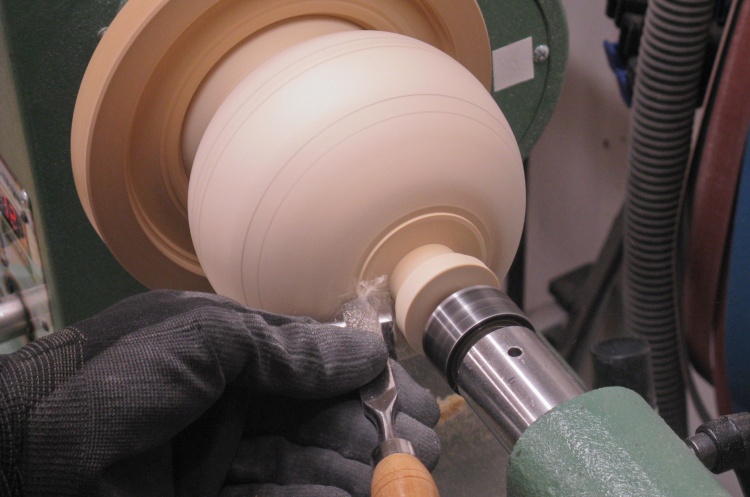
I employed my usual technique of cutting slots to defined depths and then removing the excess wood and smoothing the resulting piece.
I employed my usual technique of cutting slots to defined depths and then removing the excess wood and smoothing the resulting piece.
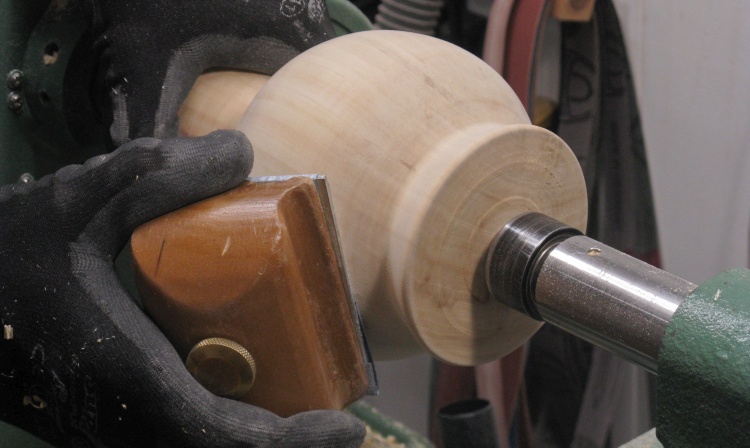
Hand-sanding the outside
Coulda used one more photo there...
Anyway, the lumpy shape of the last photo was evened out using scrapers and then I did some sanding to smooth off the surface.
Anyway, the lumpy shape of the last photo was evened out using scrapers and then I did some sanding to smooth off the surface.
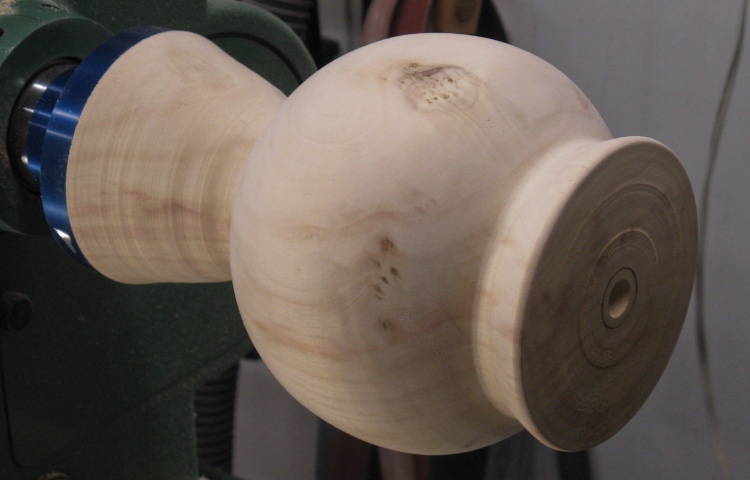
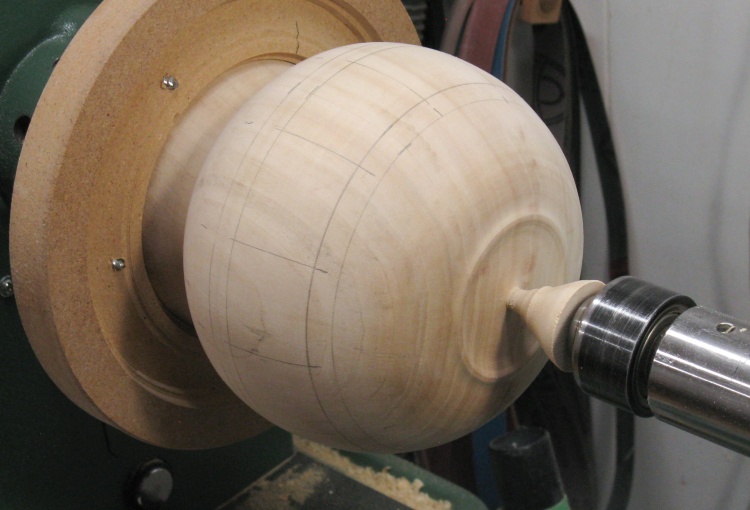
Outside shape now satisfactory
That's the outside shape done.

A nice hollowing action shot
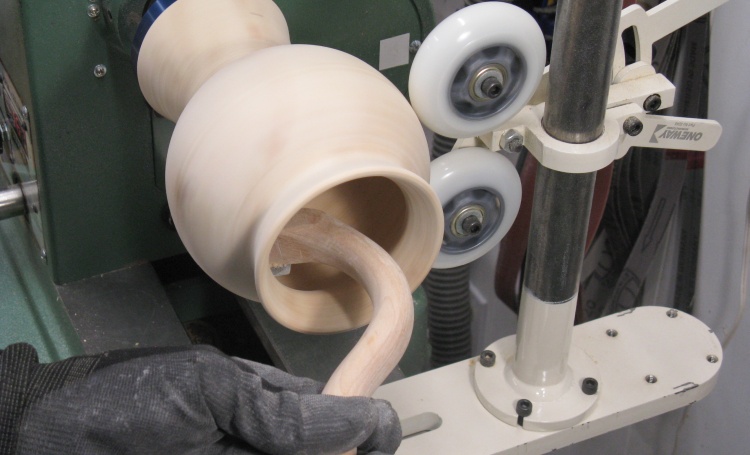
Then it was on to the hollowing.
I used my usual captured hollowing jig along with my new 2-wheel steady rest. Here I'm getting some good shavings off the inside at maybe one-third of the way into the vessel.
I used my usual captured hollowing jig along with my new 2-wheel steady rest. Here I'm getting some good shavings off the inside at maybe one-third of the way into the vessel.
Curvey jig used to help sand the interior
I pronounced the hollowing complete when the walls were about 1/4" thick. Then the sandpaper came out to clean up the inside surface.
Here I'm using a previously-made jig to reach inside the vessel for sanding.
Here I'm using a previously-made jig to reach inside the vessel for sanding.
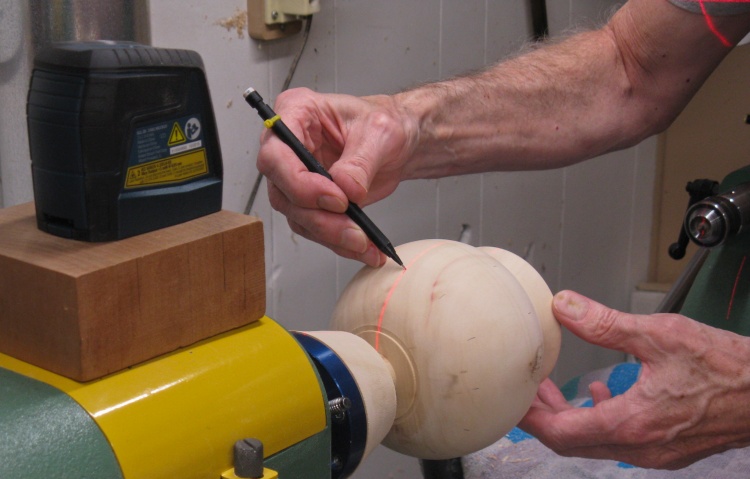
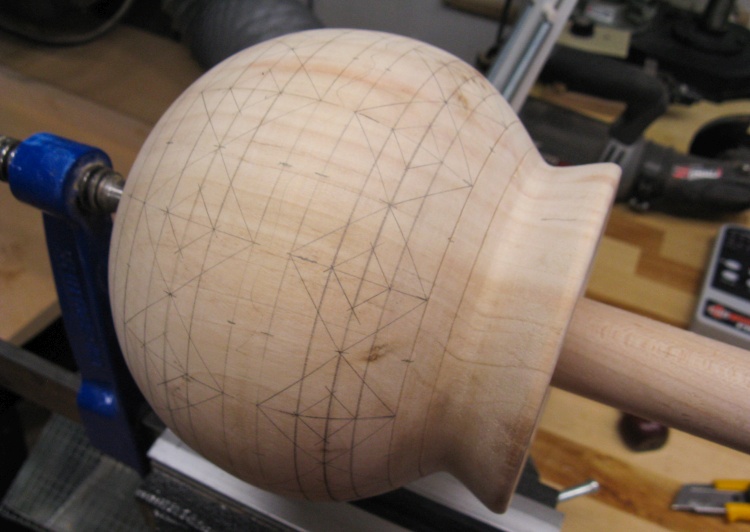
Marking on 12 equal sectors with the help of the levelling laser
I took the opportunity while the wood was still on the lathe to mark twelve sectors on the outside. The lathe has fixed stops that makes this convenient and the levelling laser helps ensure the lines run right through the center line of the vessel.
Time Out for Testing
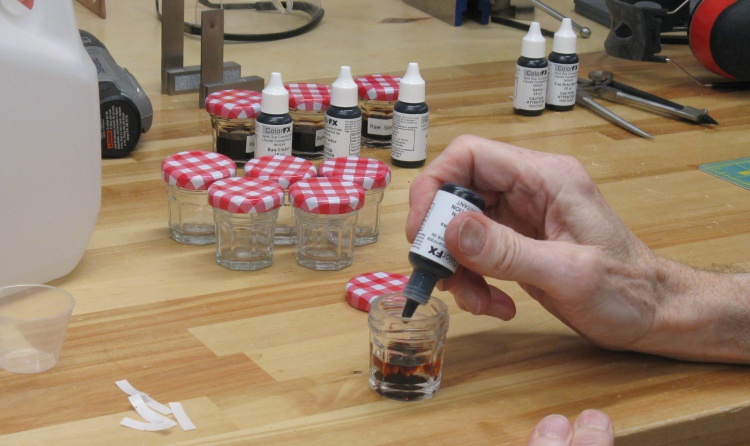
Mixing up a tiny amount of dye stain
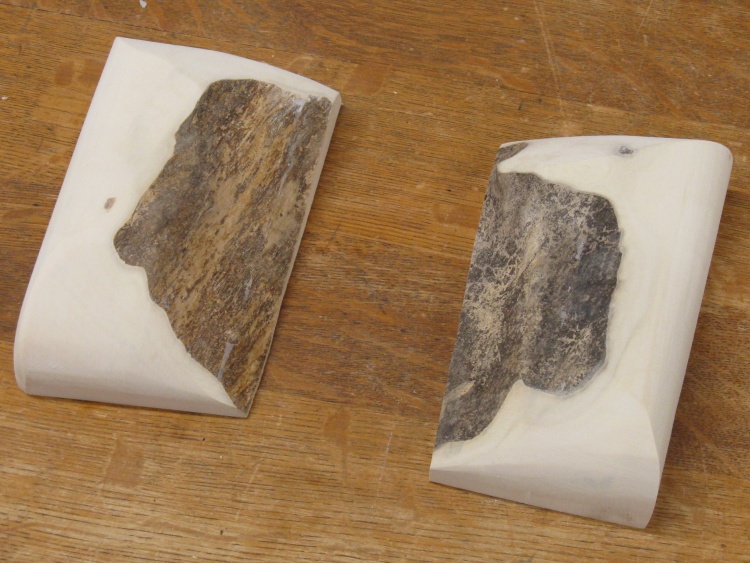
A couple scraps sanded round for testing
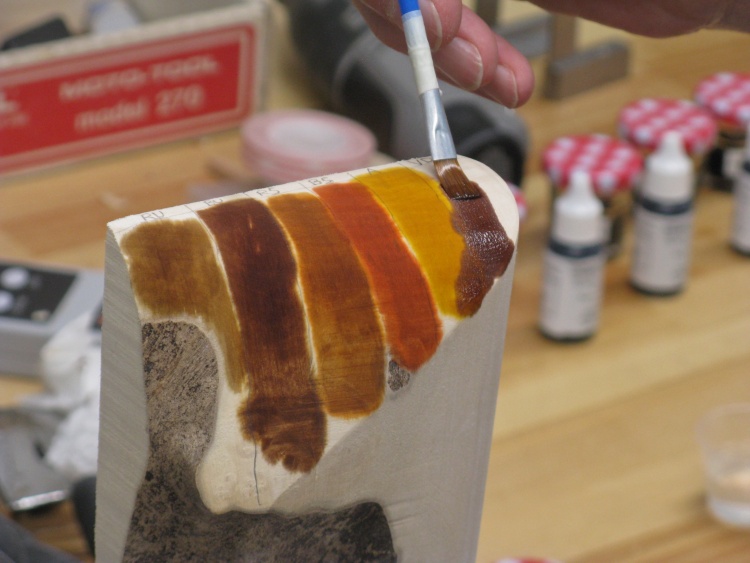
Checking out the stain colours on the maple
A test carving of the diamond pattern
There were a few things I wanted to check before committing my nicely sanded vessel to carving and staining.
Mixing up a tiny amount of dye stain
One of those things was the dyes. They came in little 15 ml bottles that get diluted 30-to-1. I managed to find some tiny glass jars at the Dollar Store (with lovely gingham-pattern lids) and whipped up 6 ml of each dye using distilled water.
These ColorFX Liquid Dyes are "concentrated metal complex acid dyestuff dissolved in glycol ether solvents". Which...must be good?
These ColorFX Liquid Dyes are "concentrated metal complex acid dyestuff dissolved in glycol ether solvents". Which...must be good?
A couple scraps sanded round for testing
I was going to need a suitable pallet for my tests so I rounded off and sanded a couple of the scraps cut off the original pie-shaped piece.
Checking out the stain colours on the maple
The dye color names include Raw Umber, Burnt Umber, Raw Sienna, Burnt Sienna, Amber and Van Dyke Brown.
OK, I know red, green and blue but I was going to have to check those new ones. So the first test was just to try a patch of each dye.
These are listed as wood tone colors, and they actually look like a pretty good selection to match the original earth-tone pot colors.
OK, I know red, green and blue but I was going to have to check those new ones. So the first test was just to try a patch of each dye.
These are listed as wood tone colors, and they actually look like a pretty good selection to match the original earth-tone pot colors.
A test carving of the diamond pattern
I also wanted to check out how to carve the pattern so I puttered around a bit with a small section. I ended up settling on a small V-tool to cut the grooves.
OK, back to the real thing;
A (well-used) jam chuck with support for base
We were here...
The bottom still needed to have its shaping completed. My SOP is to use a jam chuck into which the top of the vessel friction-fits to expose the bottom for turning. I employed this well-used disc of MDF, cutting a slot to exactly fit the vessel top. The tailstock pushes the vessel from the bottom to hold it to the jam chuck so I usually add a precise-length* center piece to support the bottom to prevent cracking from tailstock pressure.
Starting to shape the vessel bottom
*Yes, the first word that springs to mind about that rough, tape-equipped piece of scrap is probably not "precise", but the actual (tape-equipped) length is indeed just right to support the bottom of the vessel while the top still contacts the jam chuck.
Then with most of the extra bottom wood cut off and the vessel flipped around and spinning, it looked like this. Here I'm just starting to shape the bottom.
Then with most of the extra bottom wood cut off and the vessel flipped around and spinning, it looked like this. Here I'm just starting to shape the bottom.
Shaping done
A little foot has been formed and the bottom is done except for removing the central nub of wood.
The sides of the vessel are already marked for the twelve sectors and the three circumferential bands.
The sides of the vessel are already marked for the twelve sectors and the three circumferential bands.
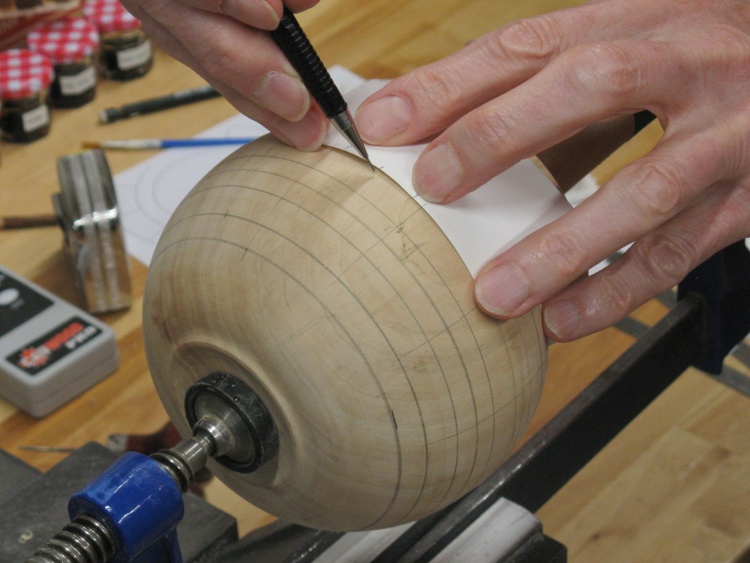
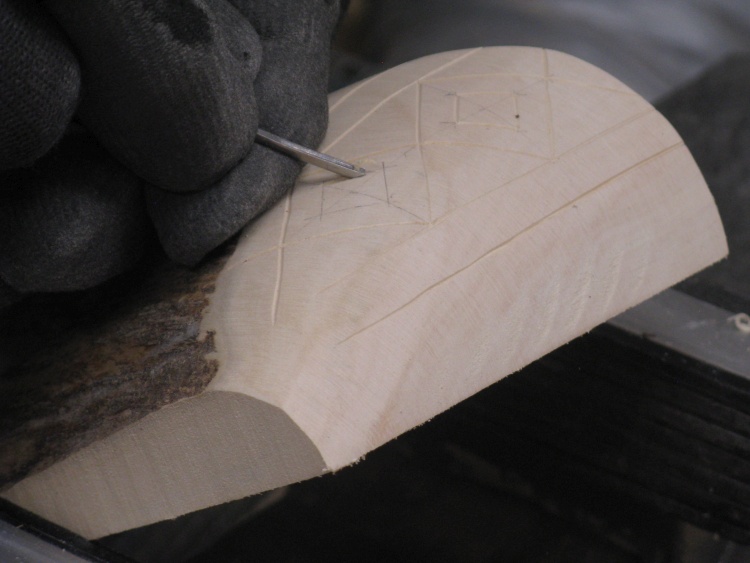
Marking the diamond centre locations
Next stop was into a clamp held in the bench vise. I used my usual dowel-inside-to-clamp-the-bottom technique so the body of the vessel remains unstressed by the clamping force.
In this shot I'm adding marks to guide the drawing of the diamond shapes.
In this shot I'm adding marks to guide the drawing of the diamond shapes.
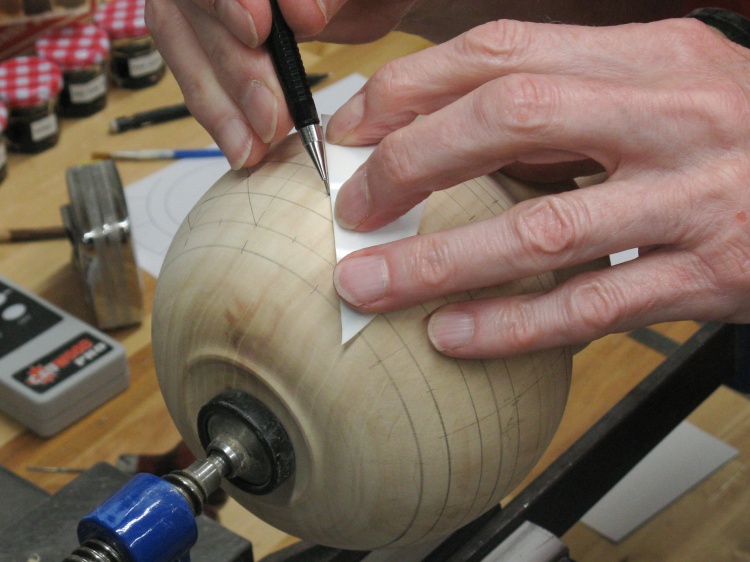
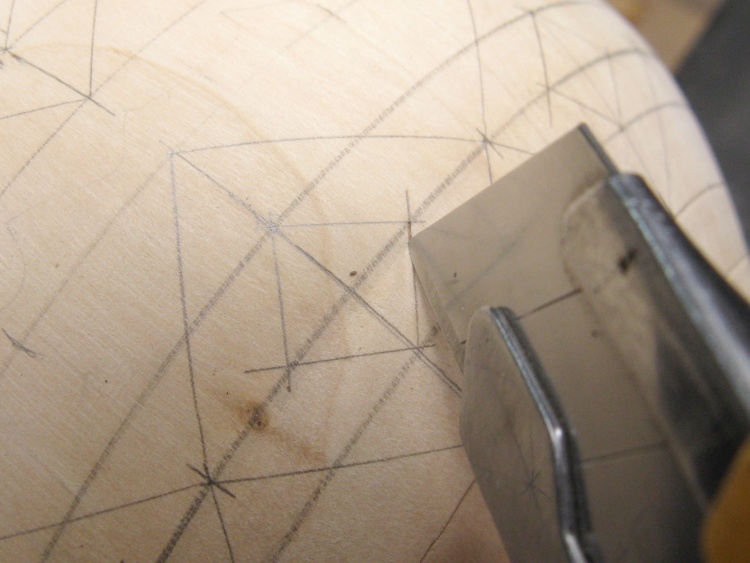
Drawing in the diamond edges
The diamonds were drawn with the aid of a flexible straightedge (a piece cut from an old yogurt container lid).
The complete pattern on the vessel
A bit more pencil work and the full design was drawn onto the vessel.
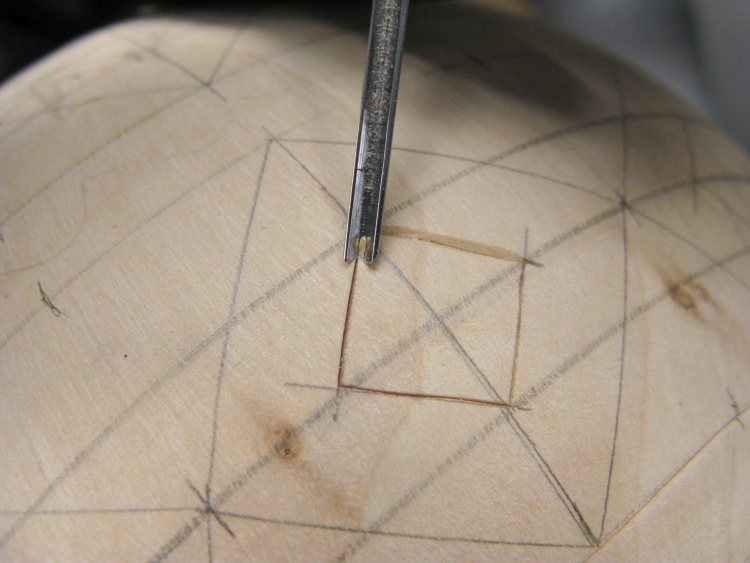
Pre-slicing the lines
Initially the lines were pre-cut with a knife to help guide the V-tool. My thoughts were that the slicing would guide the chisel to cut straighter and maybe also help prevent dye wicking across the slot.
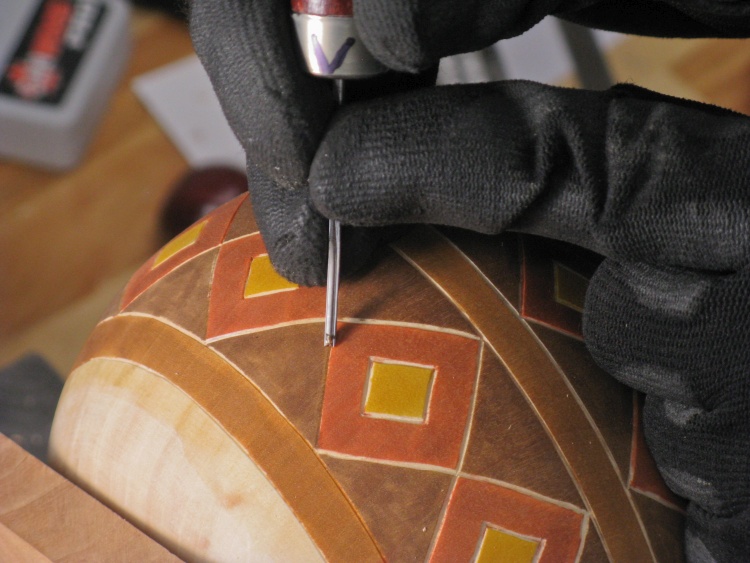
Adding a V-groove
Then the V-tool chisel was used to cut the "proper" grooves in the pattern.
It turned out that the knife cuts didn't really help with either straightness or dye wicking (which adding dye to my test pattern helped determine). So I soon abandoned the knife stage and just carved to the pencilled lines with the chisel.
It turned out that the knife cuts didn't really help with either straightness or dye wicking (which adding dye to my test pattern helped determine). So I soon abandoned the knife stage and just carved to the pencilled lines with the chisel.
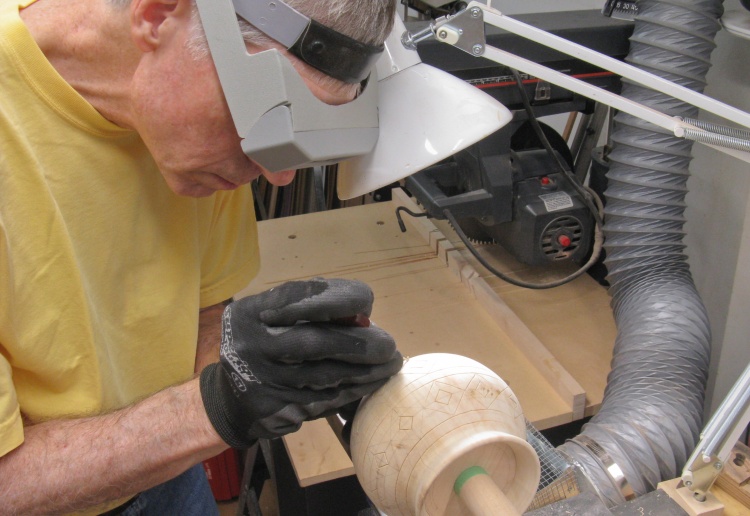
I used magnifying glasses to help with accuracy
In this shot the carving process is almost done.
I used the magnifying glasses to get a more-detailed view of what was being carved.
I used the magnifying glasses to get a more-detailed view of what was being carved.
Vessel wet to raise the grain prior to staining
The dye that was going to be used was water-based and usually its application will raise the grain and leave a rough surface which isn't practical to sand post-dye.
The standard remedy is to wet the surface beforehand, let it dry and then sand the not-yet-dyed surface. The next water application then has little grain-raising effect.
So this is the vessel after wetting of the to-be-dyed areas, just waiting to dry.
The standard remedy is to wet the surface beforehand, let it dry and then sand the not-yet-dyed surface. The next water application then has little grain-raising effect.
So this is the vessel after wetting of the to-be-dyed areas, just waiting to dry.
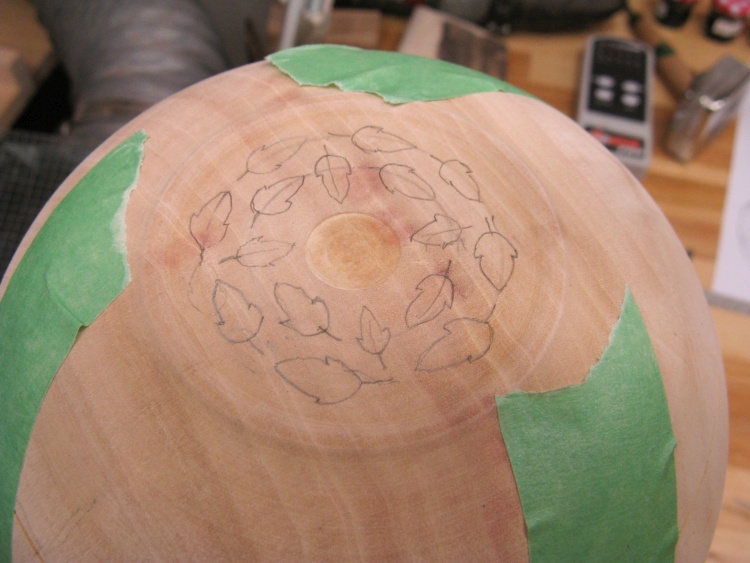
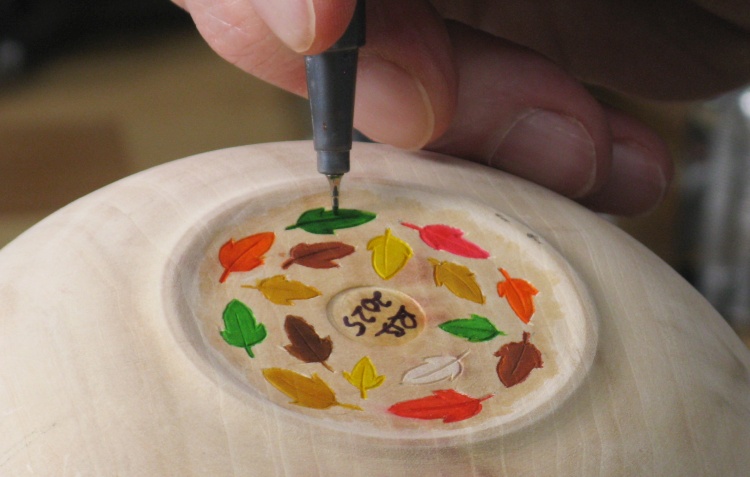
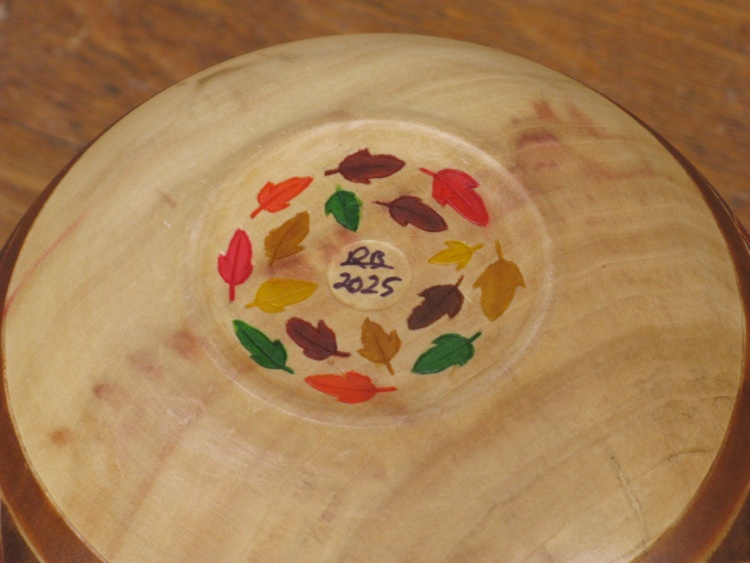
A pattern of maple leaves added to the bottom
I like to add some pizazz to my otherwise-boring vessel bottoms. On this one I chose little carved leaves shaped like those on the Manitoba Maple from which this wood originated.
I got outside and snipped off a few leaves for guidance, the one below being a typical shape for the tree.
I got outside and snipped off a few leaves for guidance, the one below being a typical shape for the tree.
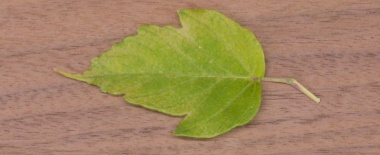
A leaf off the maple tree
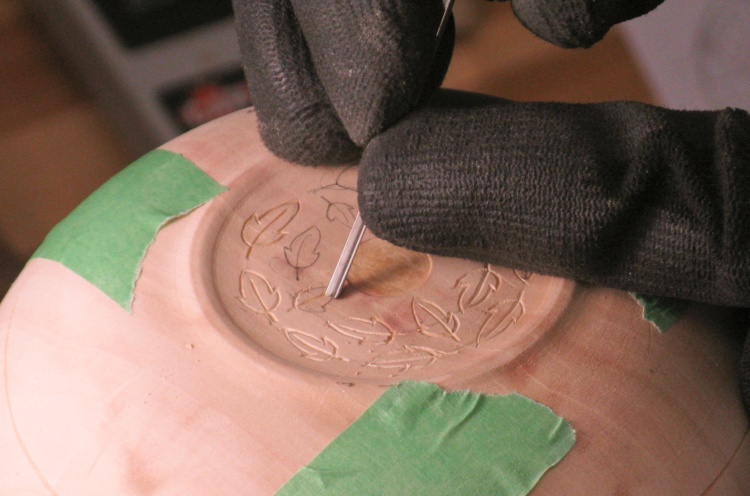
Carving the tiny little leaves
After sketching in an arrangement of leaves I used the same small V-chisel to carve the outlines and center stem.
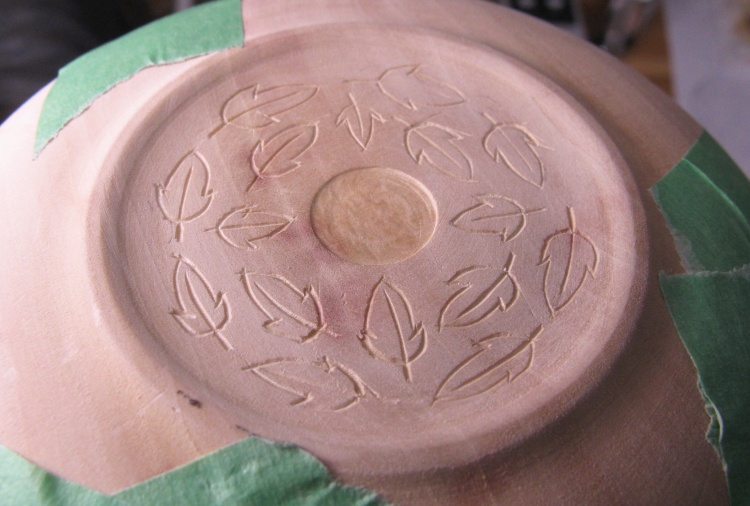
Bottom carving done
That's the completed bottom carving. The center circle is of course where the initials and year will go.
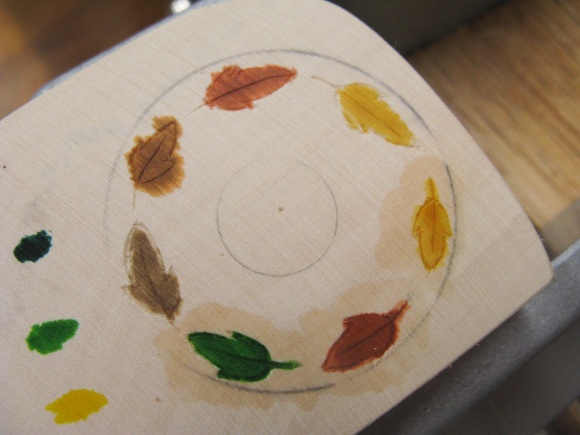
A Smidge More Testing
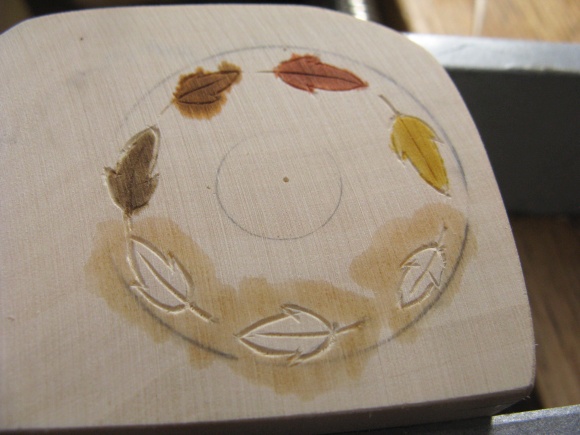
A second try at staining
The bottom 3 are better
The little leaf shapes looked a bit bare but I was thinking that since I was going to stain the vessel, maybe they could also be stained to brighten them up. I wasn't sure how that was going to look so I put on my white coat and grabbed my clipboard and made my way into the laboratory.
A second try at staining
One of my test boards had been cut flat to get the same end grain as the bottom of the vessel. I had already tried out the leaf outline carving and that seemed to work fine so I had gone on to carve the vessel bottom as previous photos show.
Then I tried some staining on the test carvings. The top four were the first attempt and things were a bit...wicky.
To keep the dye inside the lines I used a tiny brush to apply varnish up to the outside edges of the bottom three carved leaves.
Then I tried some staining on the test carvings. The top four were the first attempt and things were a bit...wicky.
To keep the dye inside the lines I used a tiny brush to apply varnish up to the outside edges of the bottom three carved leaves.
The bottom 3 are better
That mostly solved the dye wicking problem and those bottom three leaves look somewhat cleaner.
I also discovered that I could use fine felt markers to tint the leaves, giving me a larger pallet of colors.
I also discovered that I could use fine felt markers to tint the leaves, giving me a larger pallet of colors.
Then it was back to the workshop;
Adding guard varnish around leaves
And on to the real thing. I'd found that a conventional brush (however tiny) held too much finish and tended to let it flow into the carved groove, which I didn't want. So rather than that I just hammered the end of a toothpick flat for precise varnish application.
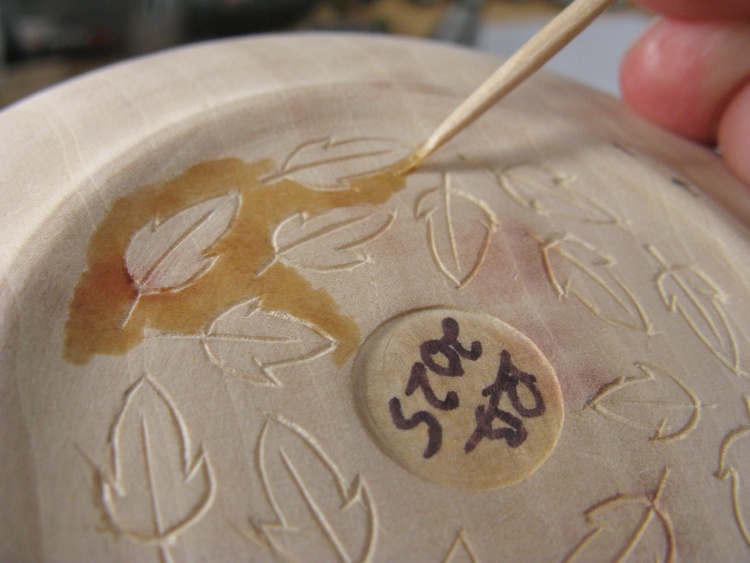
Coloring in the leaves
The dye was used for a few leaves and then fine felt markers for the others.
I'm not sure how stable the felt marker dyes will be but on the vessel bottom at least they should be safe from sunlight-caused fading.
I'm not sure how stable the felt marker dyes will be but on the vessel bottom at least they should be safe from sunlight-caused fading.
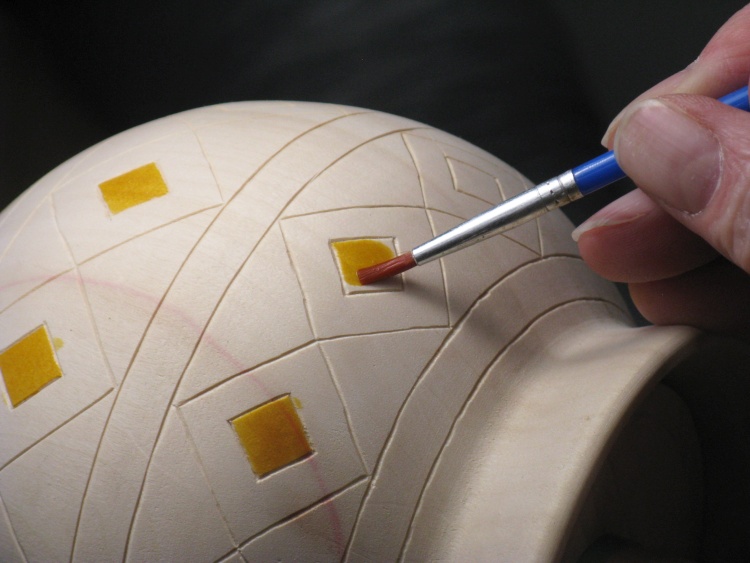
Starting the staining
Then it was on to the vessel body. I decided to work from the inside out for the staining so first up were the small diamond shapes. They received the lightest color; the amber.
Darker colors on surrounding areas will help hide my failures to color inside the lines.
Darker colors on surrounding areas will help hide my failures to color inside the lines.
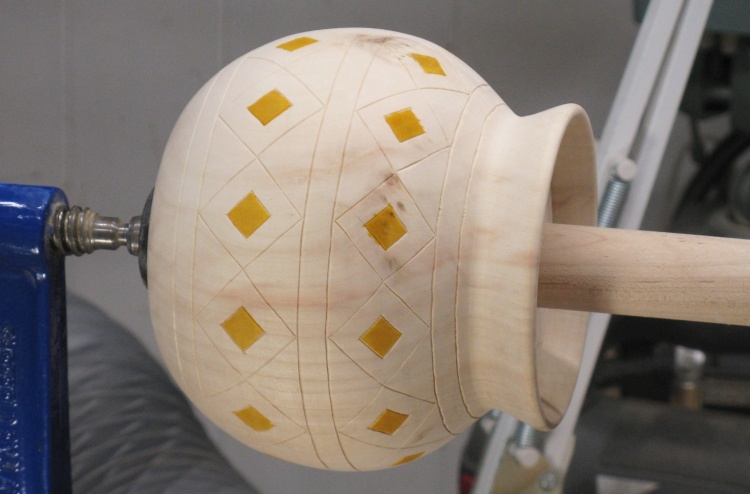
All small diamonds stained Amber
Here all the amber bits are done.
Larger diamonds are Burnt Sienna
Next was burnt sienna for the larger diamonds.
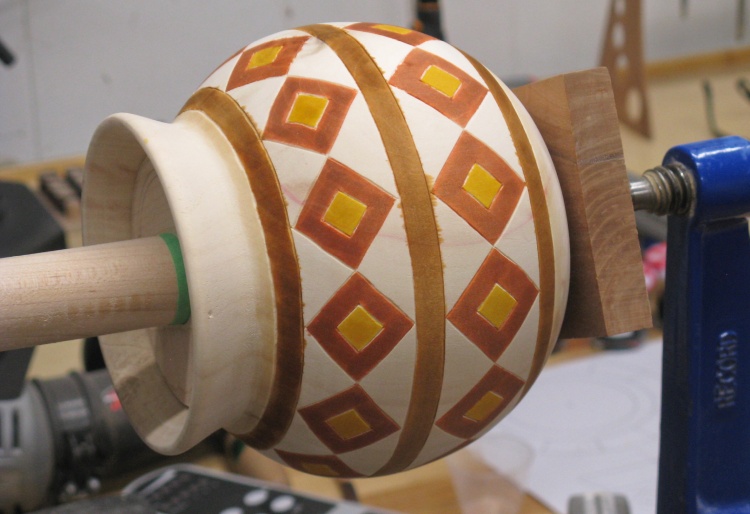
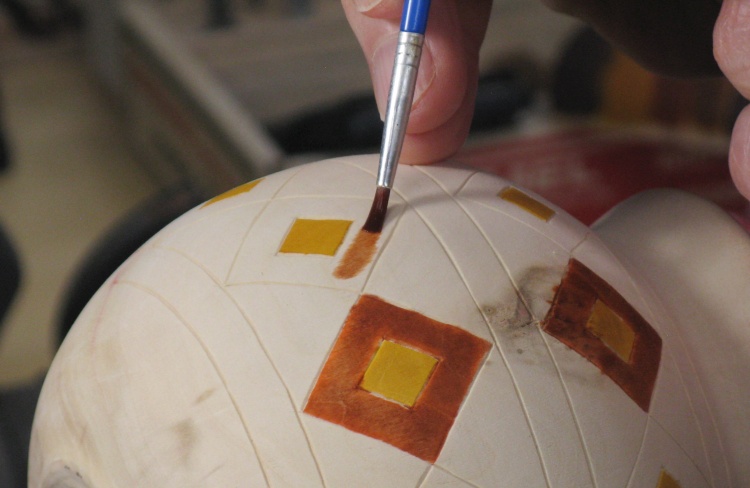
Diamonds and lines done
The circumferential bands were done in raw sienna.
Filling in the last bits
And finally the remaining triangles had burnt umber applied.
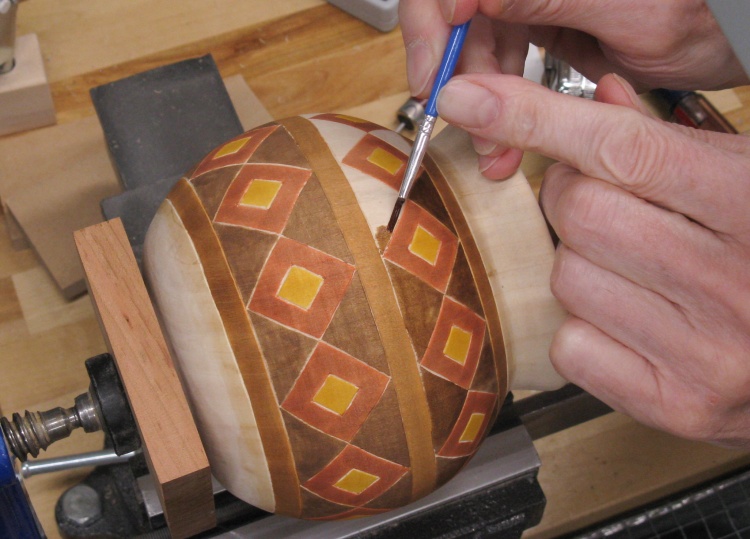
Re-cutting lines to clean them up
With the super-thin dye solution it wasn't unusual for it to run into the grooves. To keep a good definition between the colors, I re-cut the grooves to remove (or more usually just fade) the extra dye.
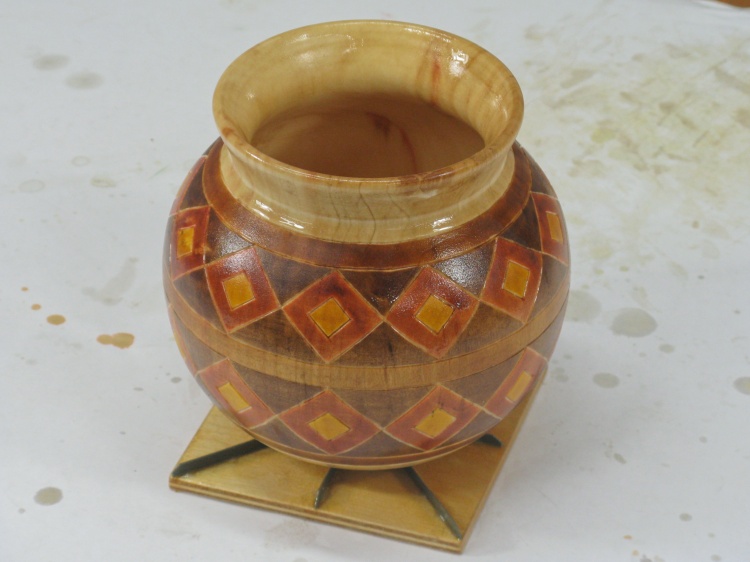
Woodworking done
And that was it for the woodworking*.
*Actually I had planned to cut grooves in the dyed triangular sections to match the original clay pot. This I managed to completely forget.
*Actually I had planned to cut grooves in the dyed triangular sections to match the original clay pot. This I managed to completely forget.
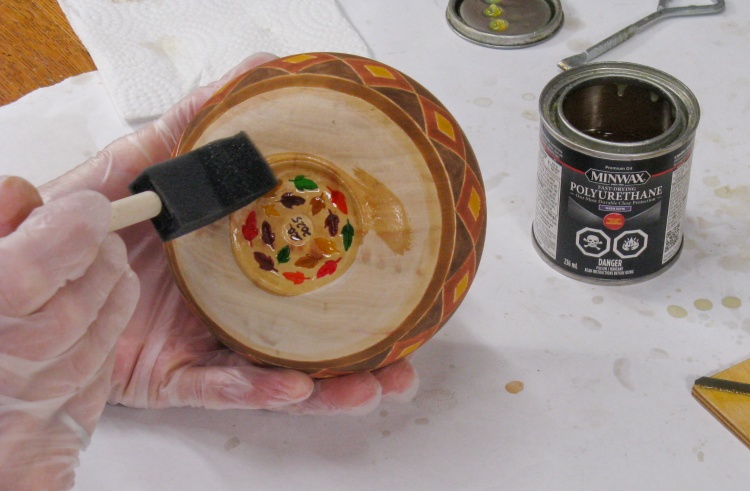
Starting with the varnish
Here the first coat of varnish is going on.
A rather ugly-looking first coat of varnish
My varnish was starting to thicken which may at least partially account for the poor-looking finish of this first coat (not yet dried). I switched to a better can of varnish for the following two coats and that ended up looking fine.
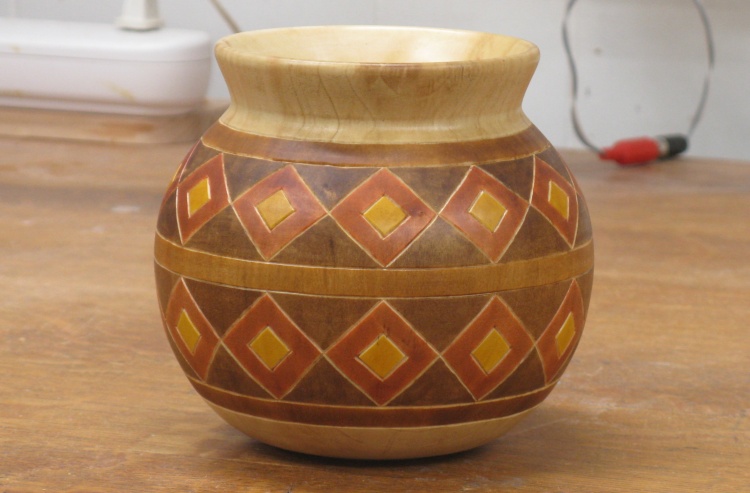
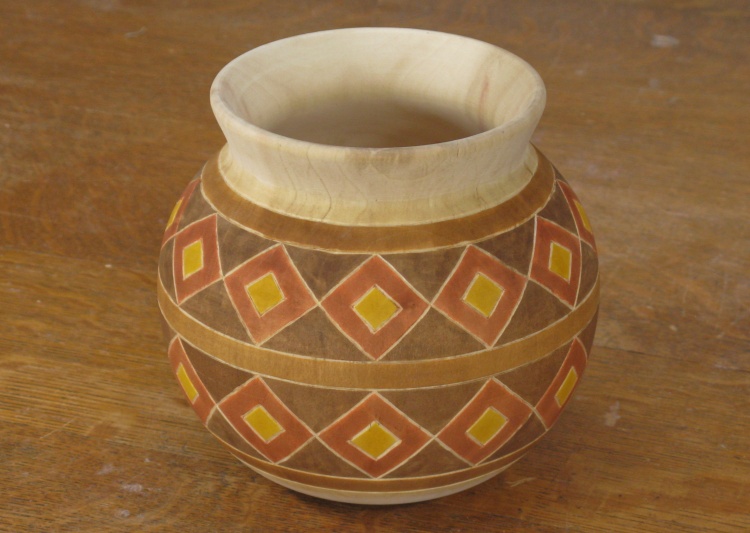
Varnishing complete
Done
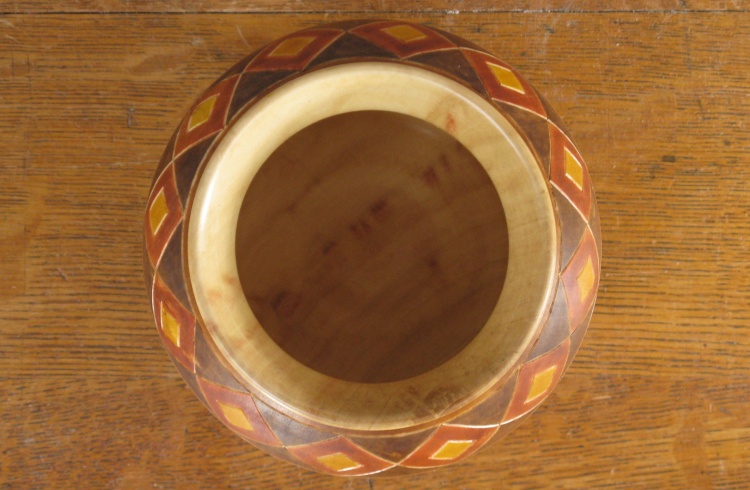
Top view
That's it. I'm outa words.
Bottom view


