This vessel uses the last bit of a couple old spruce logs I had picked up from someone through Kijiji in 2020 when I needed a largish piece of wood on which to check some carving techniques. It's been sitting around the shop and quietly muttering "you could make something out of me" every time I went by. I had originally planned to made a different style of vessel but some testing showed that the Spruce was going to be too soft for that one, so I was forced to "pivot" as they like to say these days. I had already turned and hollowed the vessel by this point so I "popped the stack" on vessel designs and used the next appropriate one; the donut vessel.
A few years ago I had seen a photo of a vessel using this linked-ring construction and admired the look. This donut design is my version of a similar concept.
A few years ago I had seen a photo of a vessel using this linked-ring construction and admired the look. This donut design is my version of a similar concept.
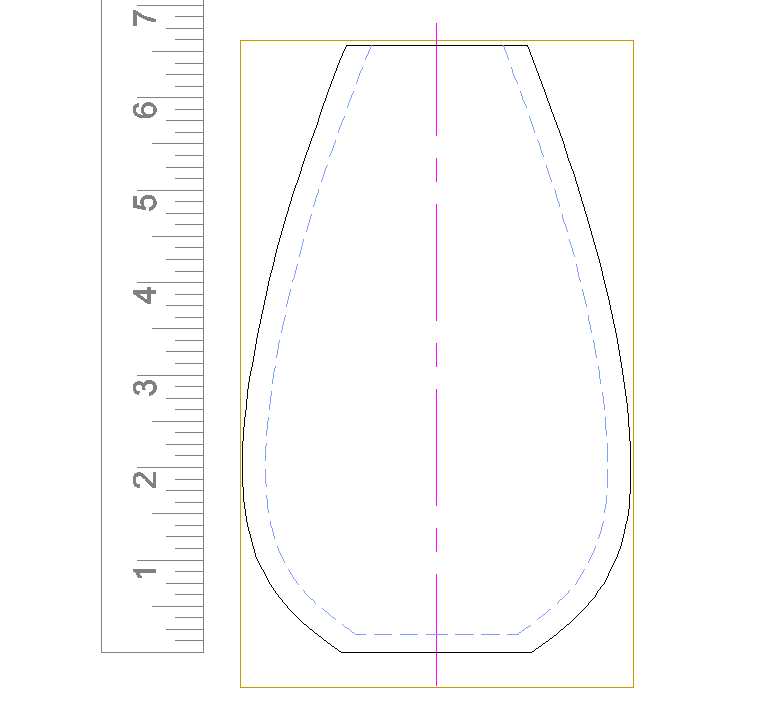
Plan, basic
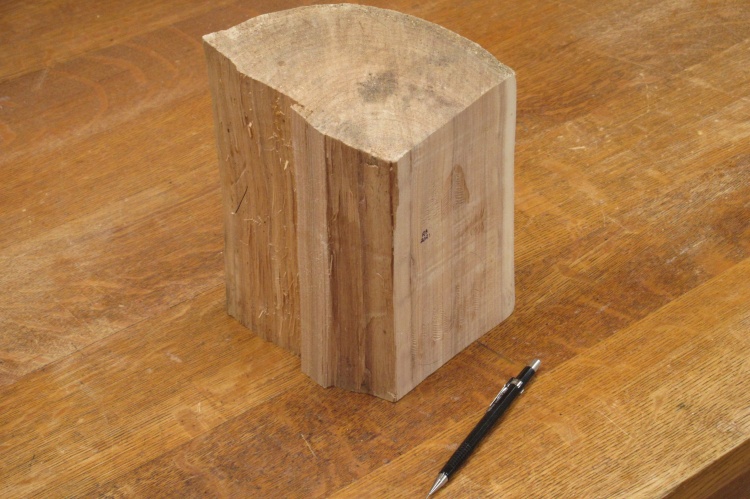
A fairly colourful piece of Spruce
This is the piece of spruce that I'll be using for the vessel (Spruce being my best guess as to the species). It has a couple spots where I had done some test carvings on one side but those will soon be rendered unto dust.

Adding a bit extra length
I planned to use almost the whole length for the vessel so after cutting the end square I glued on a disc to give enough extra length to accept the faceplate screws.
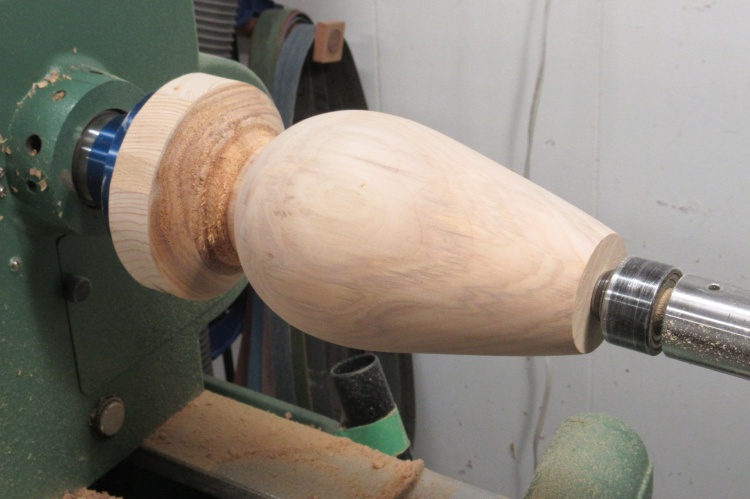
Basic shape turned
I chopped off the more egregious corners of the oddly-shaped block and then put it on the lathe and turned it in my usual manner to get to the shape shown here.

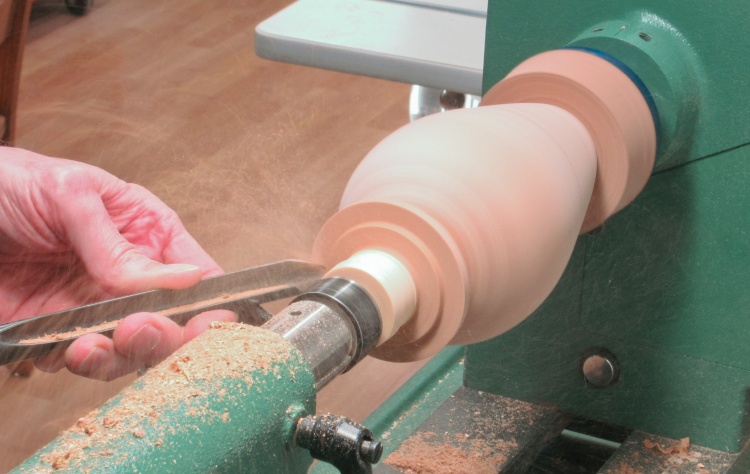
Starting the hollowing
The vessel was hollowed using my captured hollowing tool.
I had originally made the walls around half an inch thick as seen in this photo but after switching to the donut design I re-hollowed so they were closer to a quarter-inch thick.
I had originally made the walls around half an inch thick as seen in this photo but after switching to the donut design I re-hollowed so they were closer to a quarter-inch thick.
Flipped around to shape the bottom
After hollowing I flipped the vessel around and used a jam chuck and tailstock to hold it in place.
Then I removed the big mounting disc and formed a bottom ring to act as a foot.
Then I removed the big mounting disc and formed a bottom ring to act as a foot.
Drawing in the donut outlines
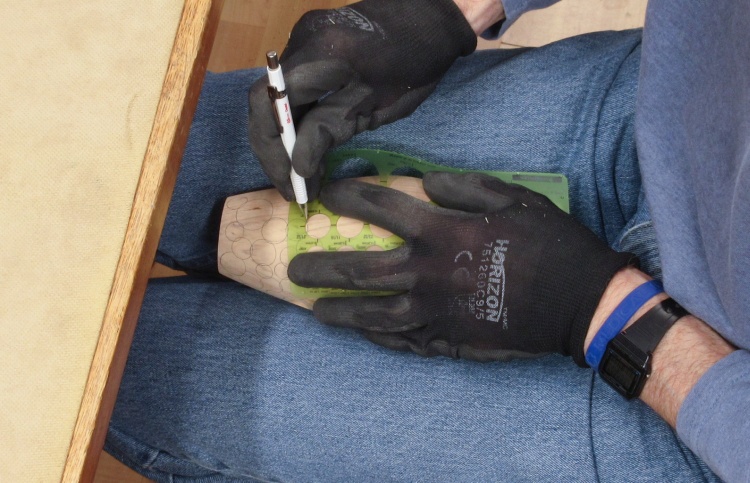
With the turning done, I started pencilling in the outlines of the donuts with the aid of a circle template.
I didn't have a good way to secure the vessel yet so I just held it in my lap for most of this operation.
I didn't have a good way to secure the vessel yet so I just held it in my lap for most of this operation.
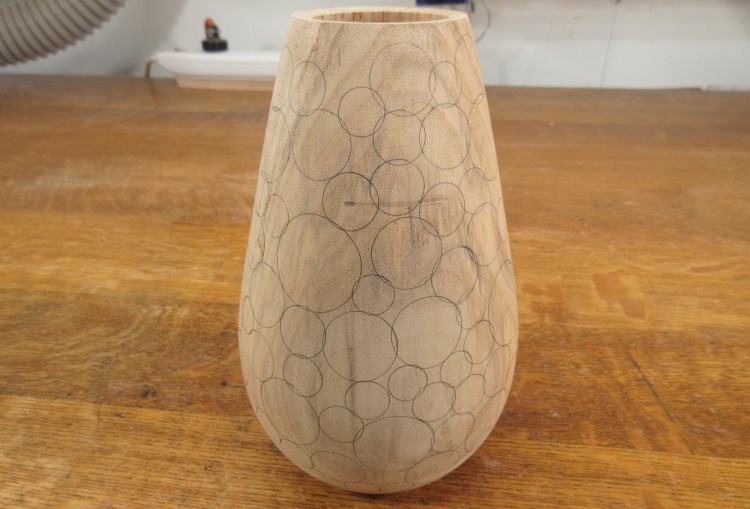
Outlines in place
Eventually all the outlines were in place.
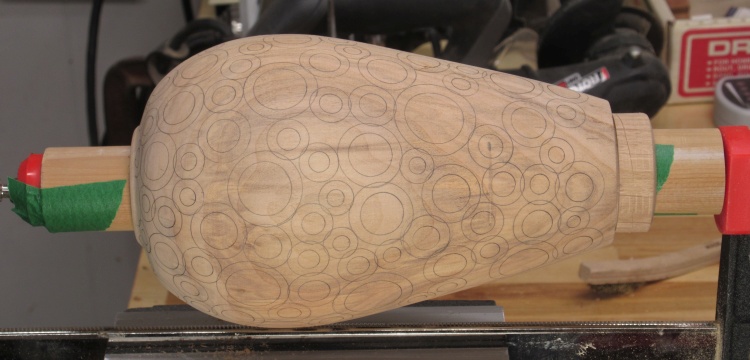
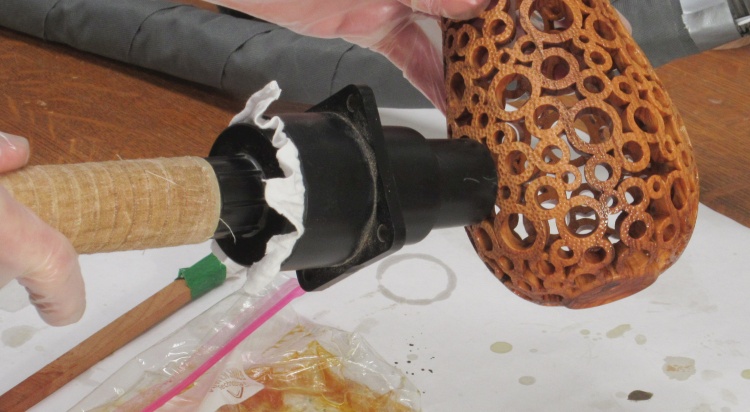
Donut holes and clamping jig added
To do the piercing, the vessel was going to need to be held securely. I used my normal technique of clamping the bottom via a pair of dowels. A wood ring sized to fit tightly into the mouth of the vessel slides over the long dowel to keep the vessel centered.
Here the inside rings of the donuts have also been drawn on.
Here the inside rings of the donuts have also been drawn on.
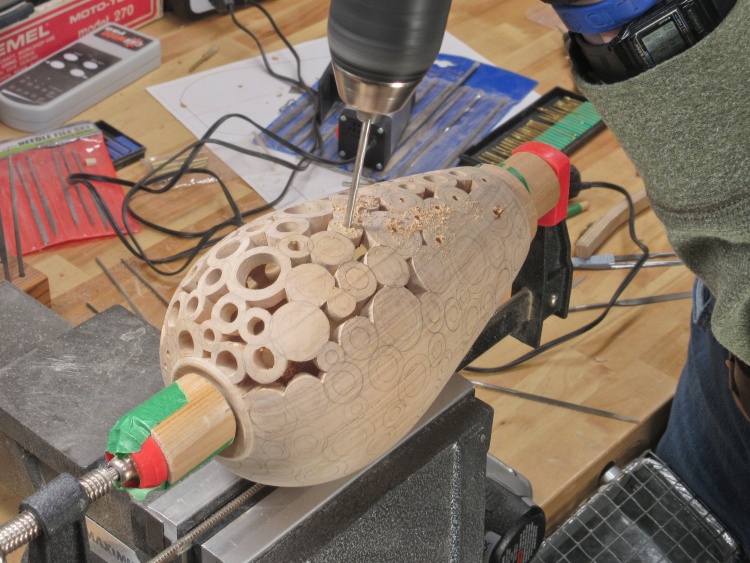
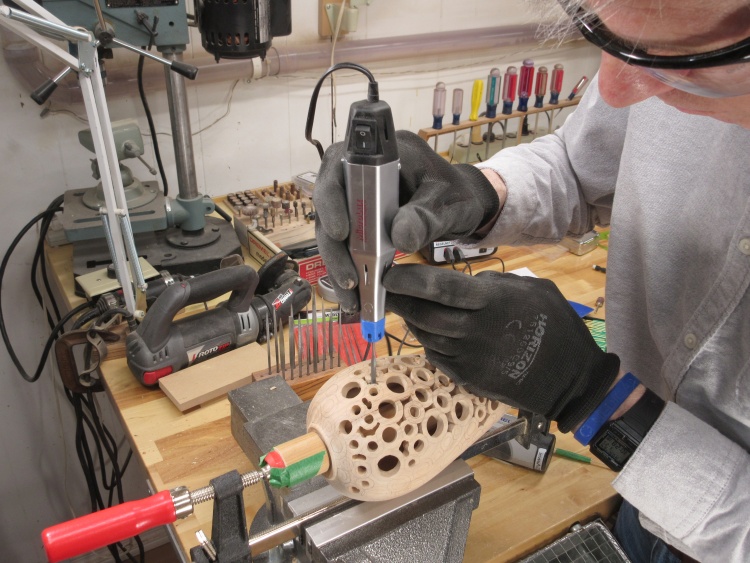
Drilling pilot holes
The first step was to drill a small pilot hole in each donut and between the donut bodies.
I worked in batches of holes and in this photo the vessel is already about a quarter pierced.
I worked in batches of holes and in this photo the vessel is already about a quarter pierced.
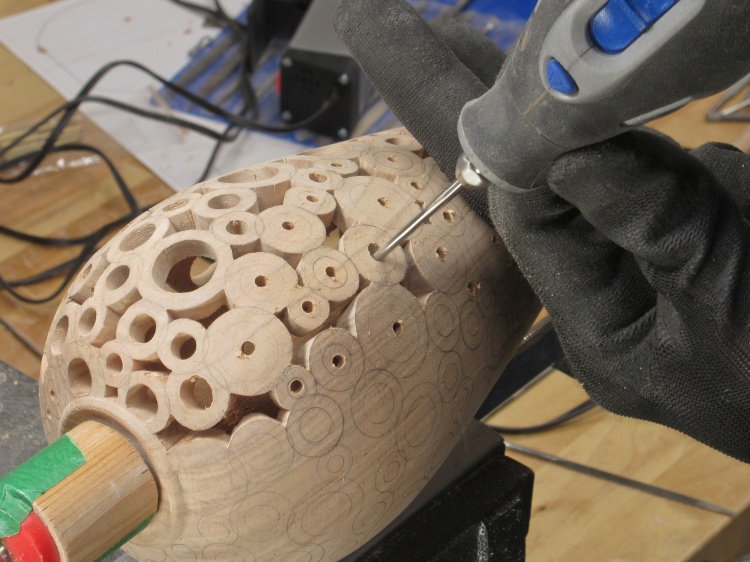
Enlarging the holes
The next step was to enlarge the donut holes until they were just a bit undersized. This was done with a spiral bit held in a Dremel rotary tool as seen here.
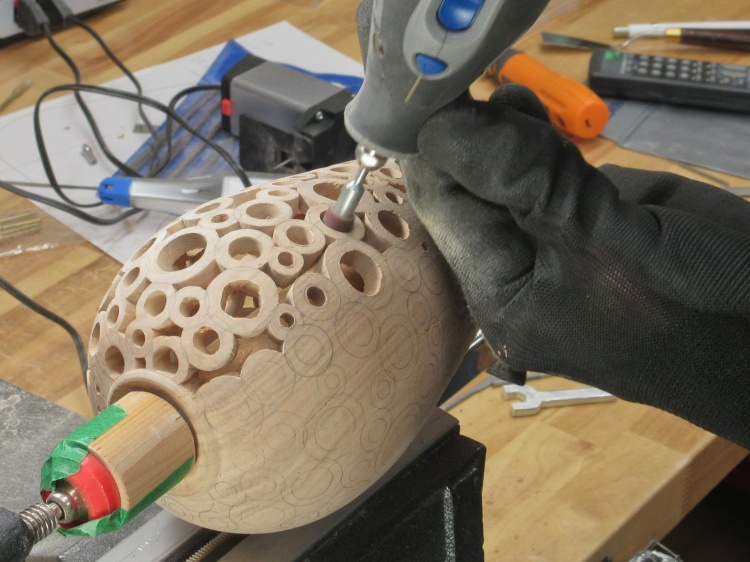
Rounding the donut holes
Finally the holes were rounded and enlarged to the finished size using abrasive drums of various sizes.
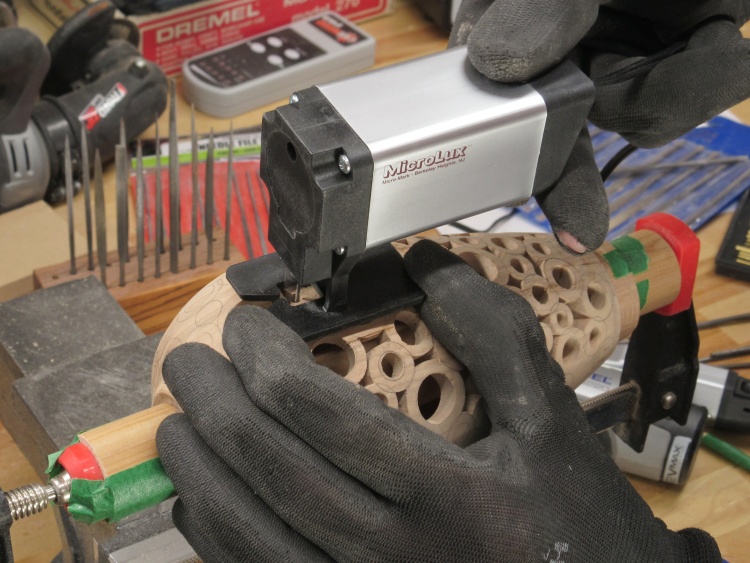
Tiny jigsaw used to cut out between the donuts
I found that the best way to pierce between the donuts was using a small jigsaw. The blade was inserted at the pilot hole and the outline was followed to cut out the shape (usually in several pieces).
An electric filer (used infrequently)
I left 1/32" to 1/16" of wood inside the lines and this needed to be removed. I mostly used hand-held files but for a few spots I used this electric filer which oscillated the file in and out maybe half a centimeter.
I don't think it was much faster than filing by hand but the thin files it handled sometimes fit better into tight openings than the larger hand-held tools.
I don't think it was much faster than filing by hand but the thin files it handled sometimes fit better into tight openings than the larger hand-held tools.

The bulk of the tool selection
This unrealistically orderly arrangement shows the bulk of the bits and tools I used to form the openings on the vessel.
For the donut holes, various sizes of rotary abrasive bits were used while the between-donut openings were smoothed using needle files from two or three different-sized sets, a couple sanding jigs and a small saw blade.
For the donut holes, various sizes of rotary abrasive bits were used while the between-donut openings were smoothed using needle files from two or three different-sized sets, a couple sanding jigs and a small saw blade.
These shots show some of the work on between-donut openings. The bulk of the wood had been removed using the jig saw and then the hand tools come into play.
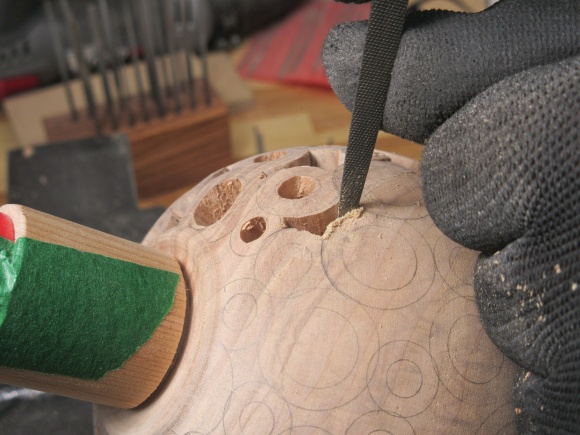
A coarse file for material removal
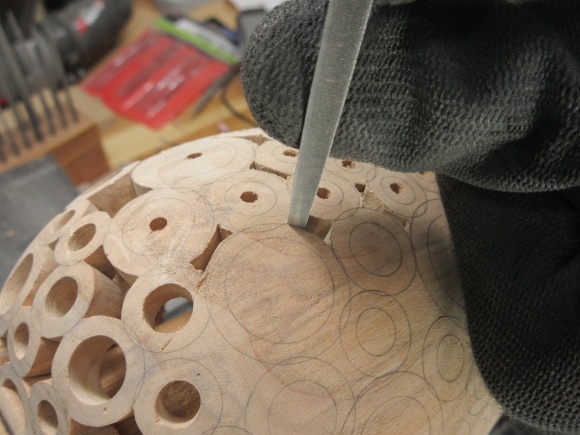
A tapered flat file for rounding edges
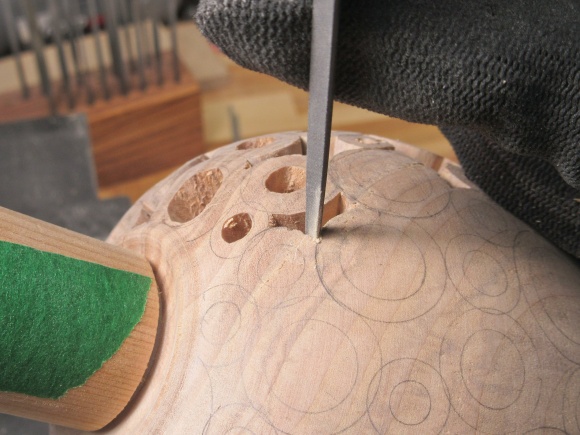
Triangular file for corners
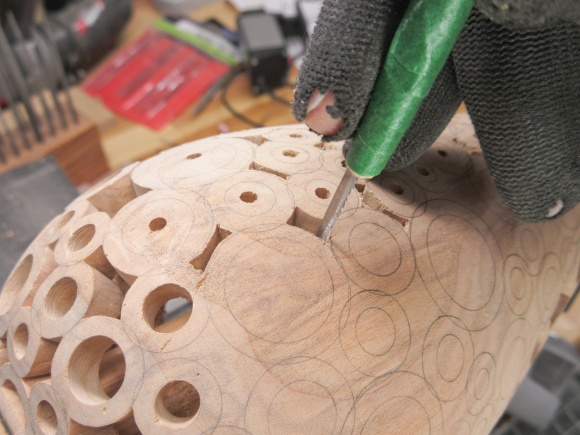
Tapered saw blade for sharpening small-angle corners

Cleaning up between donuts
When all the holes were formed, I decided that the between-donut areas were not as even as I liked so I began another round of filing. I was aiming for more-consistent wall angles and cleaner corners.
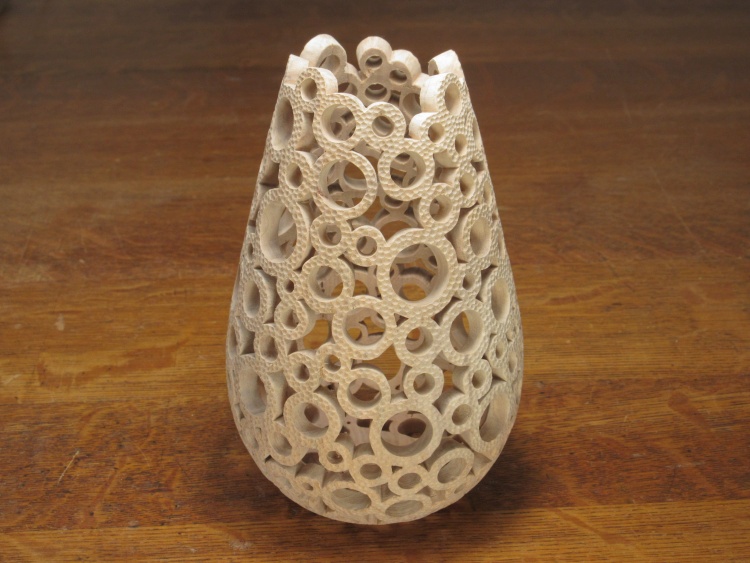
Shaping done except for top
This shows the vessel with all the donuts properly shaped.
My plan was to remove the solid area at the top as well but the neck made for a good stabilization aid when clamping the vessel so it would remain in place for the next process.
My plan was to remove the solid area at the top as well but the neck made for a good stabilization aid when clamping the vessel so it would remain in place for the next process.
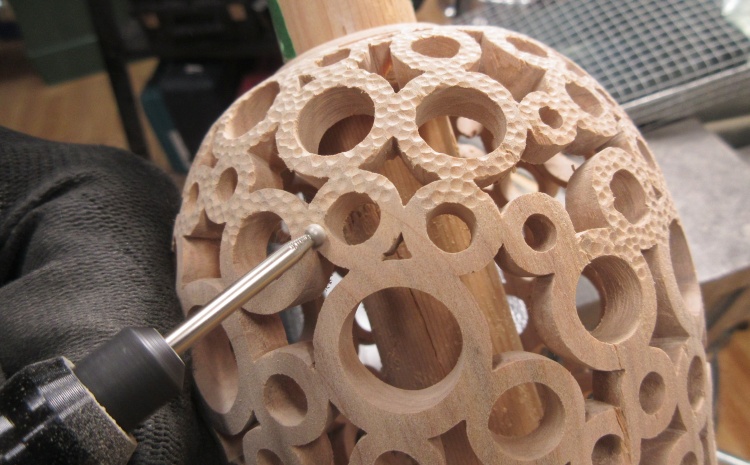
Adding some texture
...which was adding a texture. I thought the vessel looked a bit too plain as it was so I used a grinder to add texture to the outer surface.
At this point the texture is on everything but the top donuts of the vessel. I also wanted to de-burr and dull the sometimes-sharp corners in the pattern. For the between-donut areas, I used a narrow strip of sandpaper attached to the end of a thin bar while the hole insides were treated using a sandpaper-equipped dowel.
Sanding between donuts
...and inside donuts
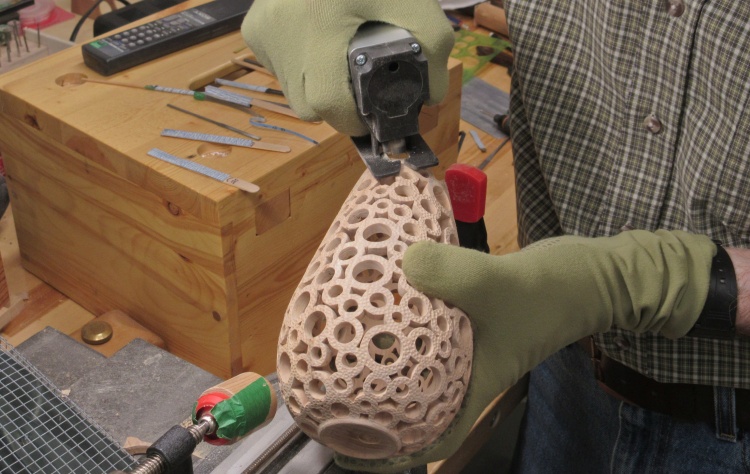
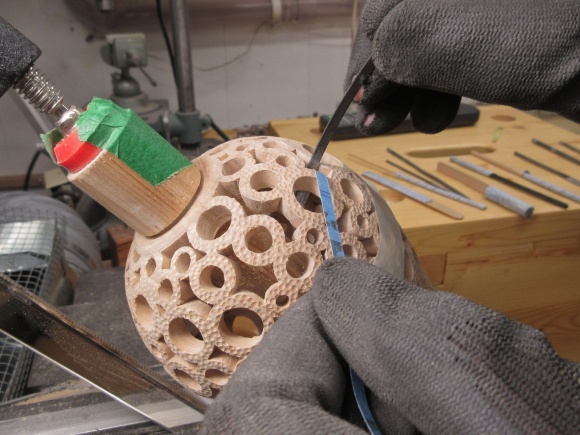
Finally contouring the top
That pretty much completed work on the body of the vessel so it was time to shape the top.
That was done using the same technique as the between-donut spaces by cutting out the bulk of the material with the mini-jig-saw.
I was suspecting that the black gloves I was wearing were potentially discolouring the wood (an effect I've seen before) so I switched over to these green fabric gloves for any further handling.
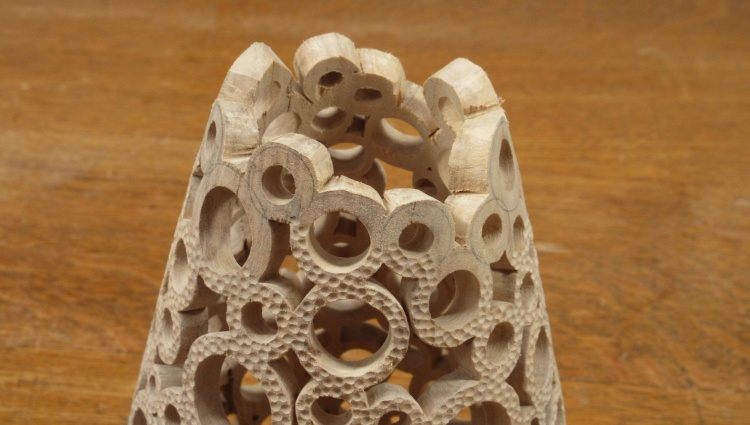
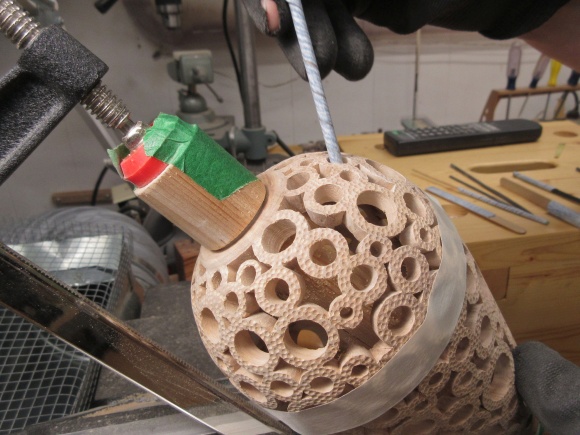
Still needs a bit of work
This shows the top after cutting. It could use a bit more attention.
I stuck with the same techniques to do the top; using files to trim to the lines and then adding the texture with the grinder and finally sanding edges with the sandpaper strip jig.
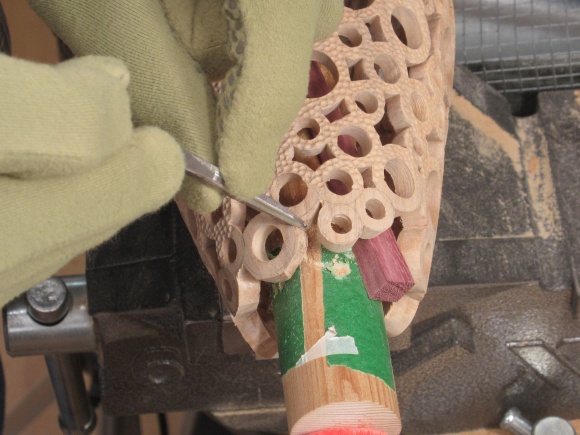
The normal shaping with a file
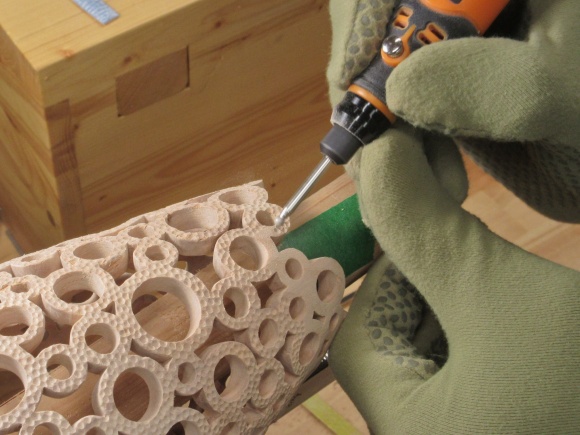
And finishing up the texture
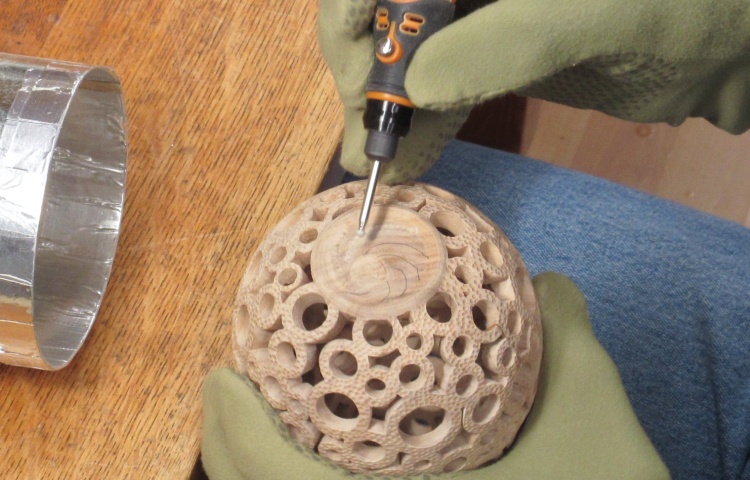
Putting a pattern on the bottom
I came up with a simple design as bottom decoration and drew it in using pencil. Then I used the same tool I'd used for making the texture to grind patterns in the bottom around the recessed initial circle.
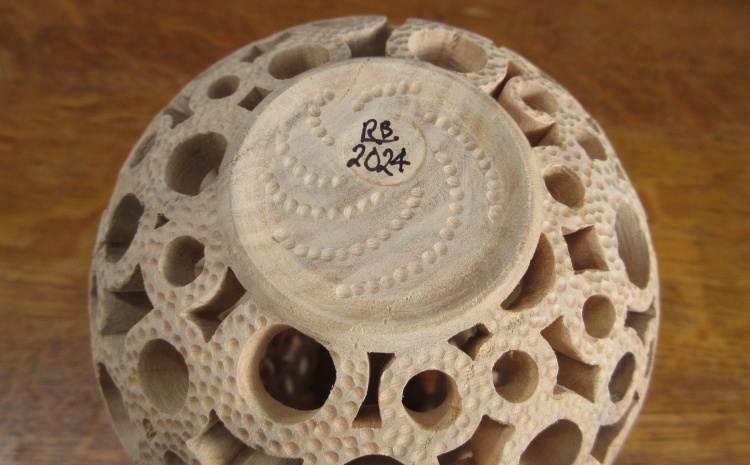
The completed bottom
This shot shows the finished bottom.
All the woodworking is done
And that was it for the woodworking.

Getting ready to add the finish
The vessel had enough* holes that I didn't want to have to apply finish to each one so I opted for a Danish Oil finish.
That would let me immerse the vessel in finish for complete coverage and it also wouldn't need sanding between coats.
* 171 donuts and 101 areas between donuts, assuming I counted correctly.
That would let me immerse the vessel in finish for complete coverage and it also wouldn't need sanding between coats.
* 171 donuts and 101 areas between donuts, assuming I counted correctly.
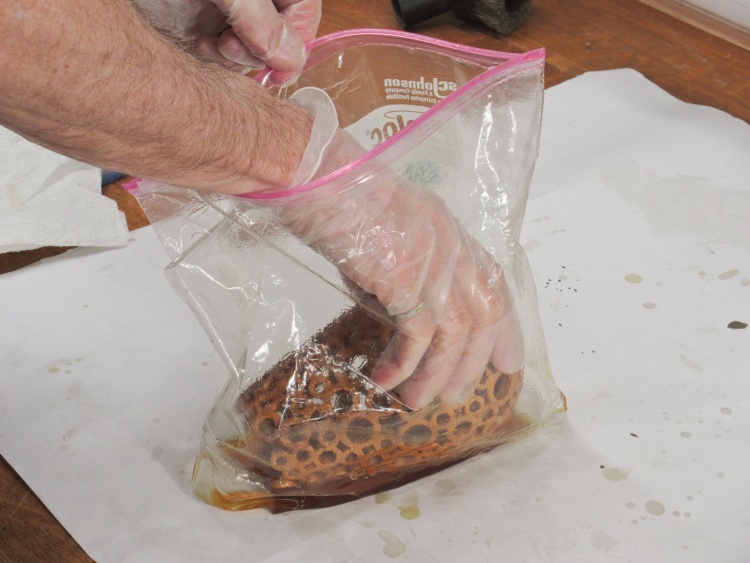
Dunking the vessel to get complete coverage
The vessel was just sloshed around in the Ziploc bag to ensure all parts were covered in finish.
I did this three times over 30 minutes and then wiped off the remaining finish with a cloth, inside and out.
The next two coats were applied in a similar manner except last coat involved only a single dunk.
I did this three times over 30 minutes and then wiped off the remaining finish with a cloth, inside and out.
The next two coats were applied in a similar manner except last coat involved only a single dunk.
Vacuuming off any excess finish
It wasn't really practical to wipe out each sharp-cornered hole so I used the central vac with a cloth filter to pull out any excess finish from the openings.
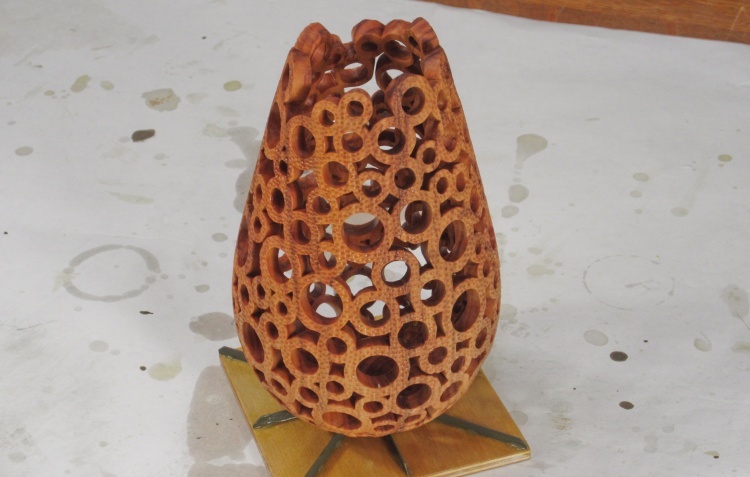
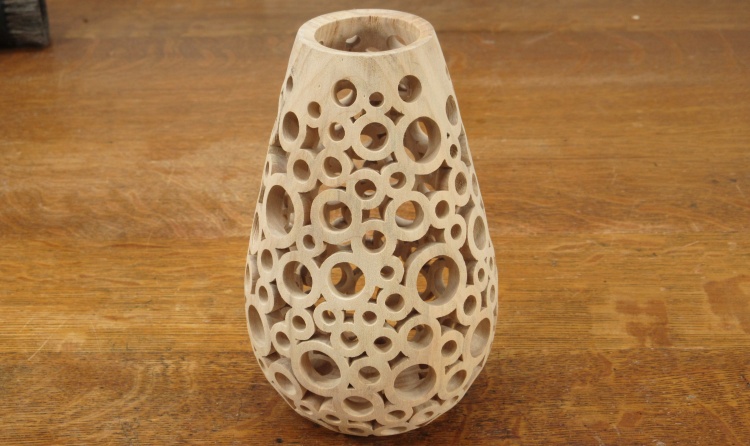
It darkened up significantly with the first coat of finish
This photo shows the vessel after the first coat of finish was applied.

Done
Complete.
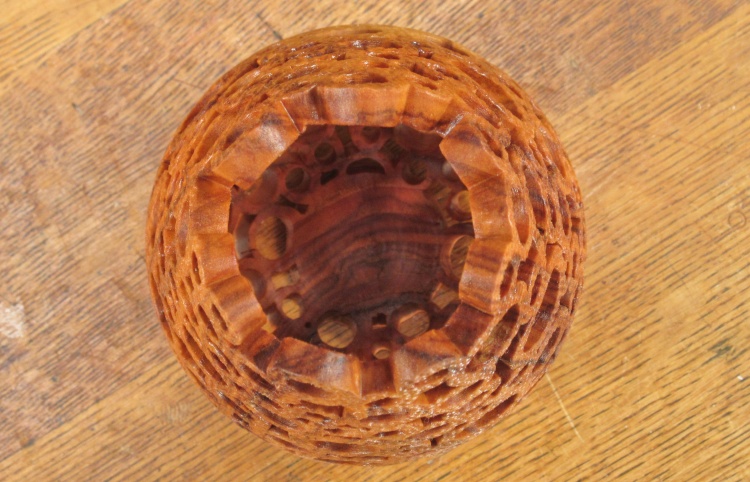
The top view


