After I determined what a yarn bowl was used for and got a feel for size - typically 6" dia x 3" high - I took a look at existing designs. Rather than go with the simple approach of a smooth bowl with slot, I thought something with a bit more character might be nice. My friend has a wide range of interests but I figured a cat-motif bowl would be something she could appreciate.
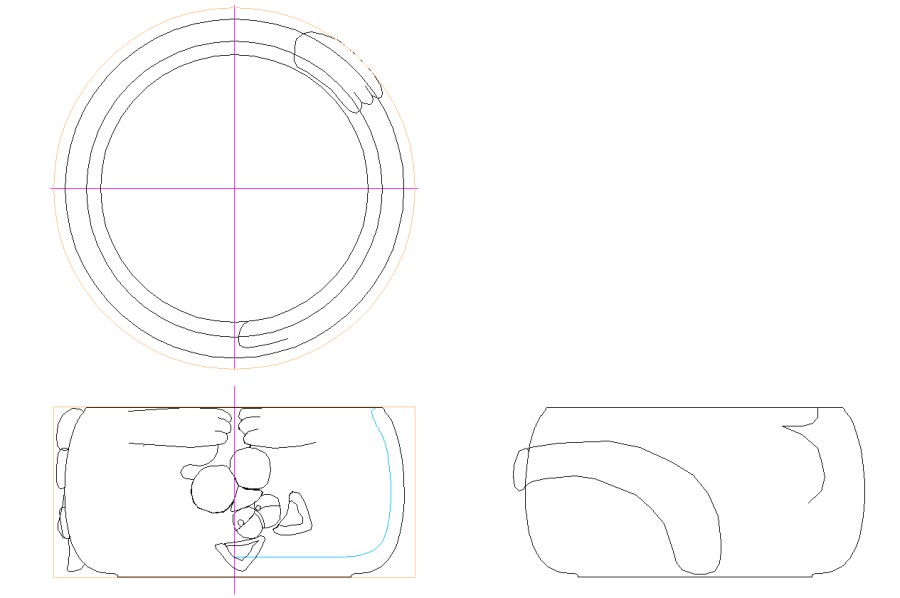
The rough plan

Ceramic yarn thingy
My skills don't stretch to drawing animals so I looked around for designs that I thought might be appropriate. I found a nice ceramic yarn "bell" with a comic cat that looked like it was trying to grab the yarn. I pretty much copied the face design directly but made a conventional bowl shape so that the cat was on its back.
The bowl blank
I happened to have a nice wood blank of sufficient size in my shop, acquired a few years ago for a different project I never managed to get around to. That's the piece of Figured Maple shown here and the outline marked on it is the size needed for the yarn bowl.
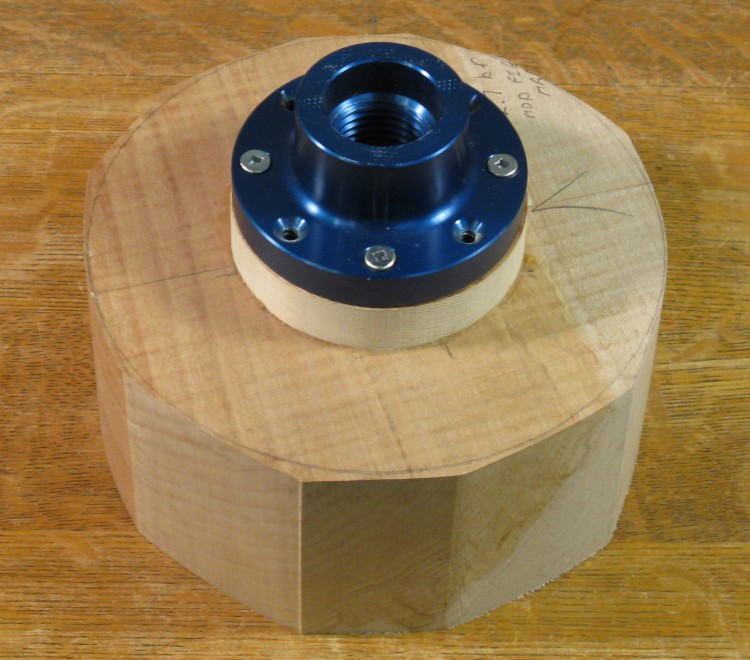
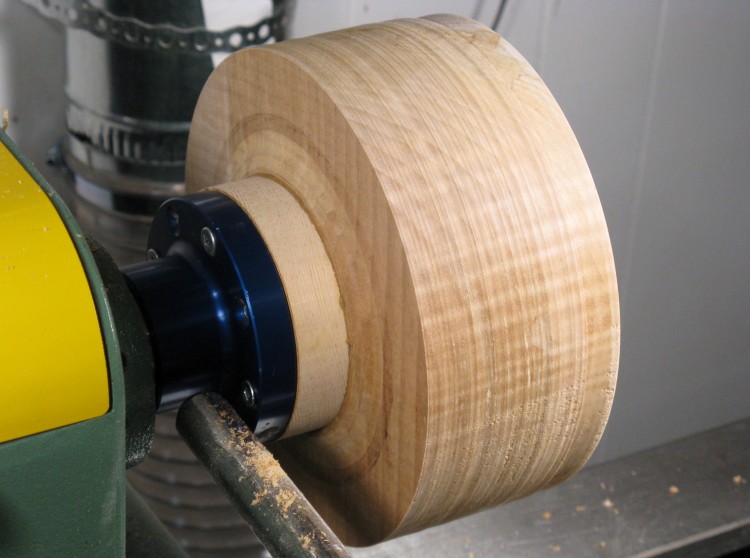
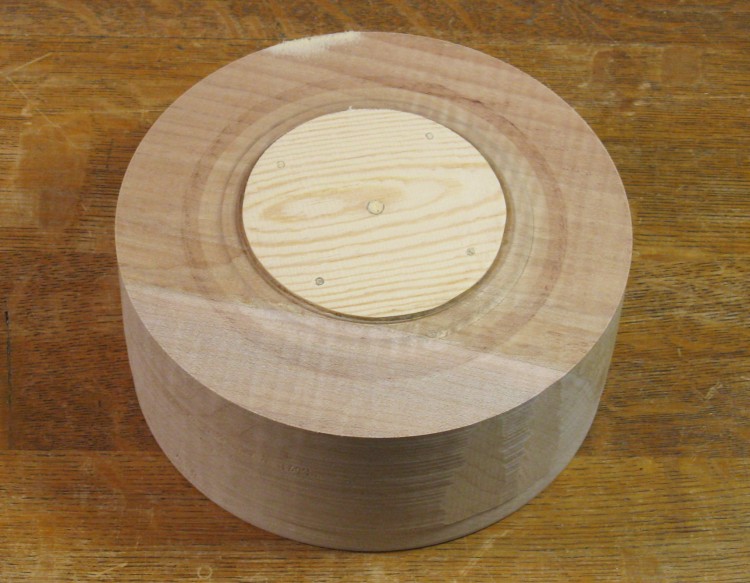
Faceplate installed
I cut the blank out (rather crudely since I had a wide blade on the bandsaw I didn't want to change for just this one cut). A round wooden mounting block was then glued to the blank and the blue faceplate screwed to the block.

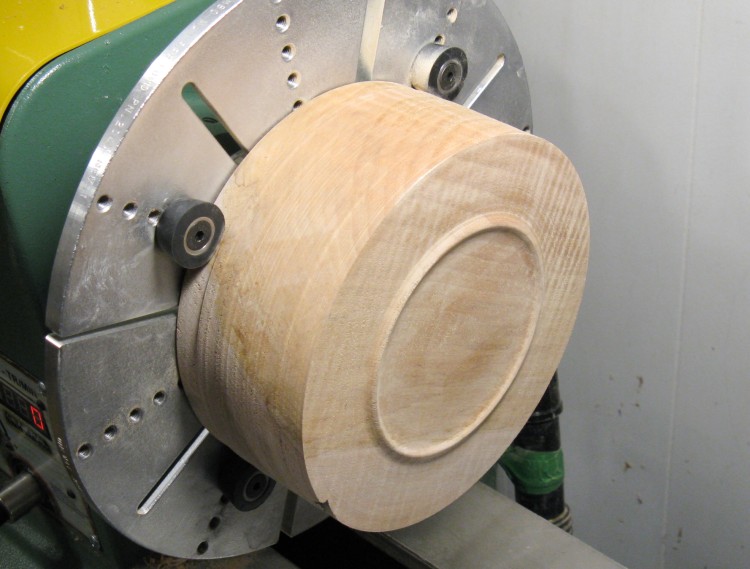
Rounded
Here the wood has been mounted to the lathe and all those funky outside corners have been removed to leave a nice round shape.
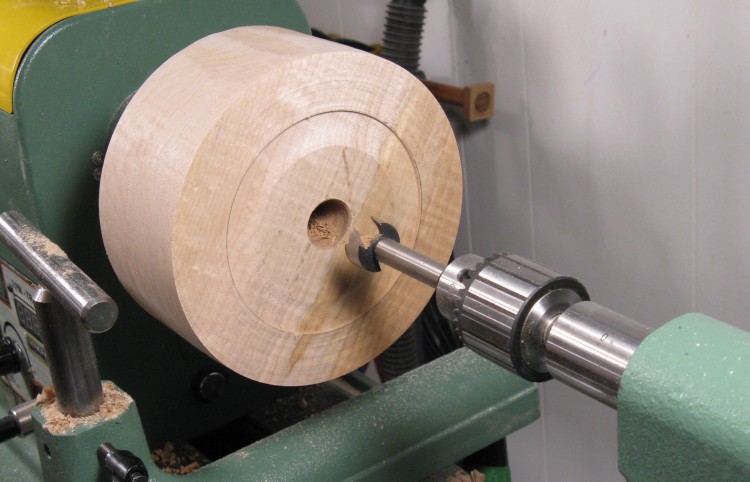
Drilling center out for easier turning
When hollowing a bowl, getting the wood out of the center part is often difficult since it is moving so slowly. Typically a hole is drilled to get rid of the wood in the middle as shown here.
I also used the depth of the hole to indicate the bottom of the bowl so it was easier to tell how far to hollow. In this shot you can also see where the size of the bowl opening has been marked.
I also used the depth of the hole to indicate the bottom of the bowl so it was easier to tell how far to hollow. In this shot you can also see where the size of the bowl opening has been marked.

Working on the inside
I mostly used a ring tool for hollowing the bowl. Here the blurry shavings are going to the right as the left edge of the bowl interior is cut.
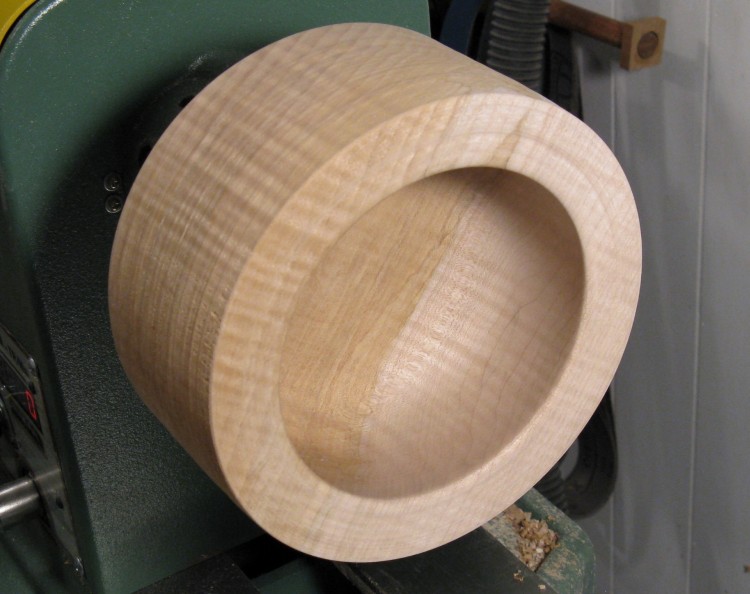
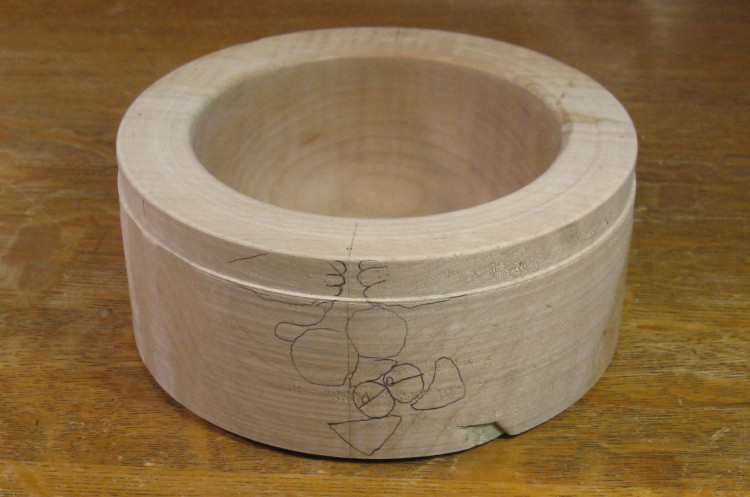
Inside done
At this stage, the inside of the bowl has been completed. Figured maple can be a difficult wood to work with due to odd grain orientations. I had a bit of tear-out in the interior where tiny bits of wood literally tear out and leave divots rather than producing a nice thin shaving. This took some attention in the form of scraping and sanding to eliminate, but in the end it looked fine.
The "figure" of the Figured Maple is evident in this photo. The grain direction is going from lower left to upper right which is most obvious where the wood changes colour in the interior. Then the alternating light and dark bands going from upper left to lower right are the result of the "figure". It give the wood a nice gleam and an apparent depth. It's more obvious with the light at certain angles. It's a bit more impressive on larger surfaces like this one.
The "figure" of the Figured Maple is evident in this photo. The grain direction is going from lower left to upper right which is most obvious where the wood changes colour in the interior. Then the alternating light and dark bands going from upper left to lower right are the result of the "figure". It give the wood a nice gleam and an apparent depth. It's more obvious with the light at certain angles. It's a bit more impressive on larger surfaces like this one.
Smoothed bottom
After the inside was done, I flattened the bottom as shown here before taking it off the lathe.
Mount cut off
After unscrewing the faceplate, the bandsaw was used to cut off most of the round mounting block. It could also have been cut away later on the lathe too but the mounting I planned to use wasn't super-secure so the less cutting on the lathe, the better.
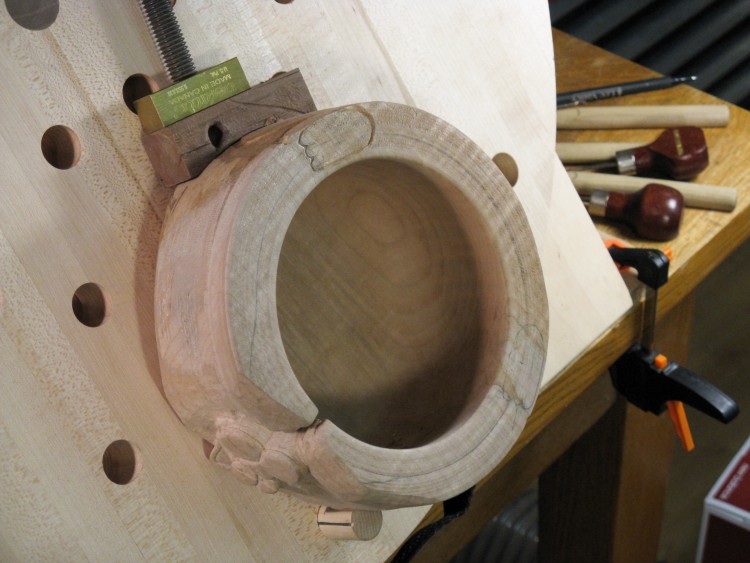
Back on lathe, now with finished bottom
I used this large set of jaws in an adjustable chuck to hold on to the top of the bowl with rubber "buttons" so I could work on the bottom. In this shot, the remnants of the mounting block have been cut away along with some of the center area in order to form a circular foot. The bottom has also been sanded and so is mostly complete.
The notch you can see on the lower left of the bowl is a consequence of having the wood come out of the jaws on the lathe. This happened due to a catch when clearing off the mounting block. Fortunately the notch was the only damage to the piece and it will be removed as the bowl is shaped.
The notch you can see on the lower left of the bowl is a consequence of having the wood come out of the jaws on the lathe. This happened due to a catch when clearing off the mounting block. Fortunately the notch was the only damage to the piece and it will be removed as the bowl is shaped.
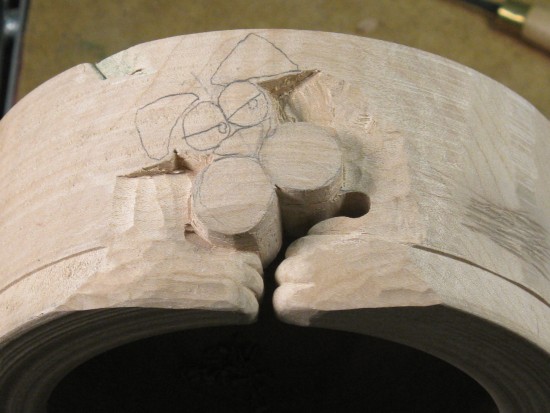
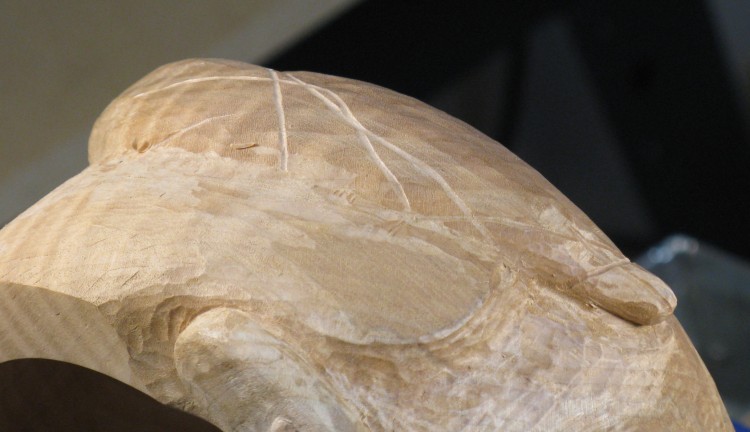
Face sketched on
The turning is finished at this point, so I started looking at moving on to the carving, beginning with the face. Here the outline has been transferred to the bowl.
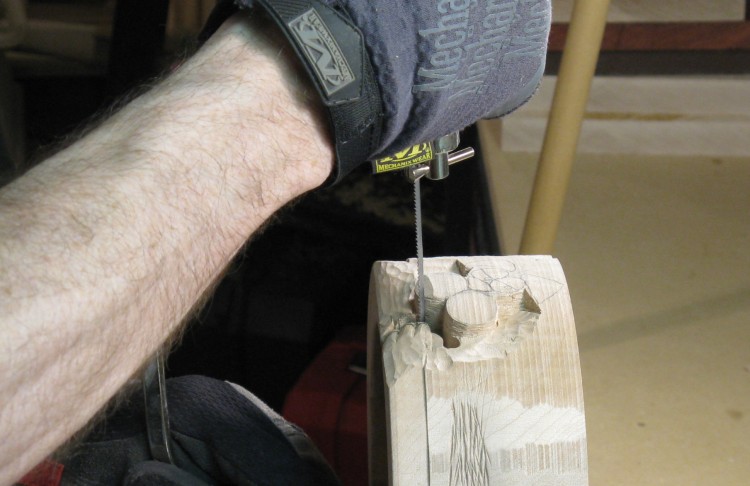
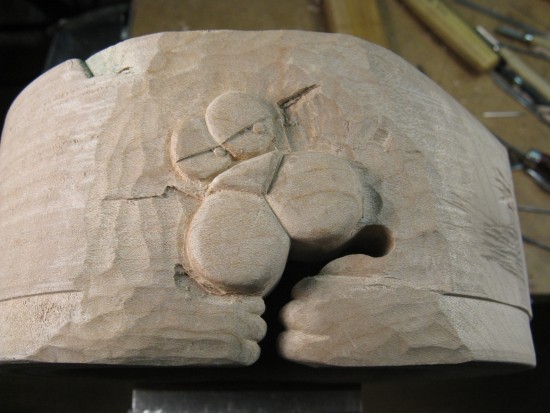
The sequence below is showing the start of the carving as the face, mouth and front paws get defined.
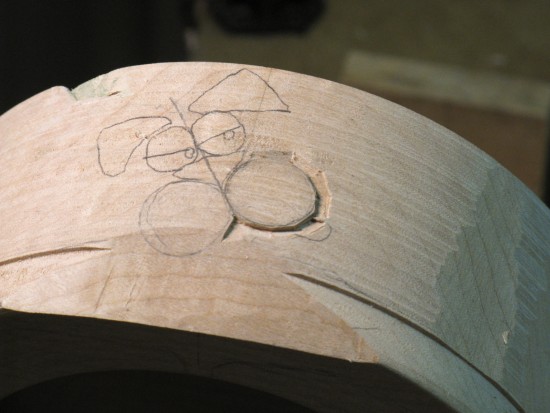
Just starting
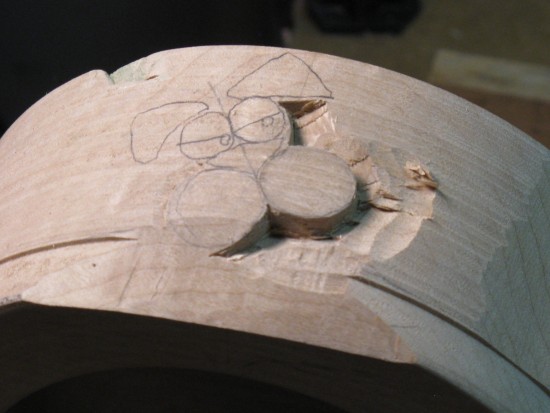
Going deeper
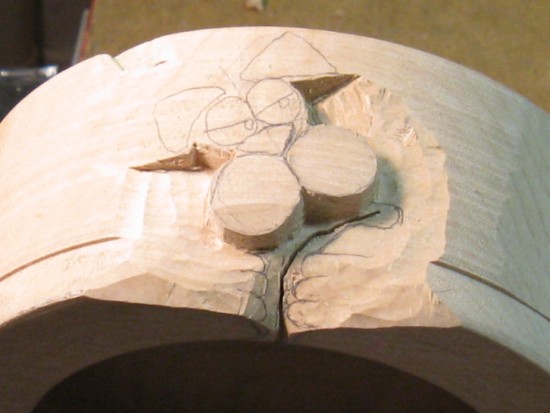
Mouth cut
Mouth enlarged
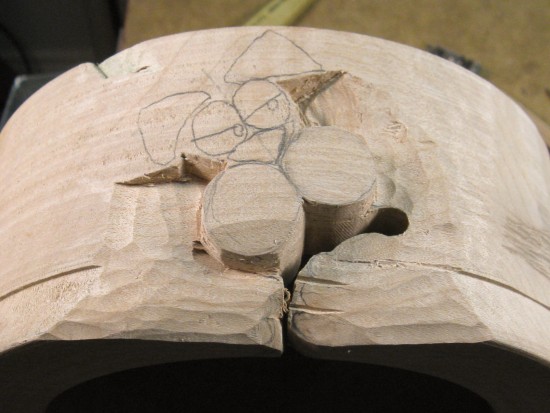
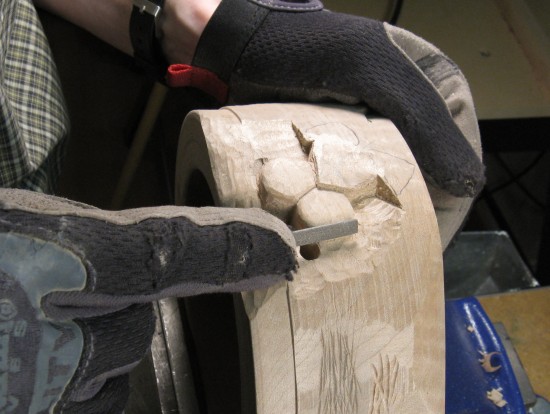
Cutting paws
A coping saw was used to help cut out the mouth and paws, but otherwise it was mostly work with small chisels.
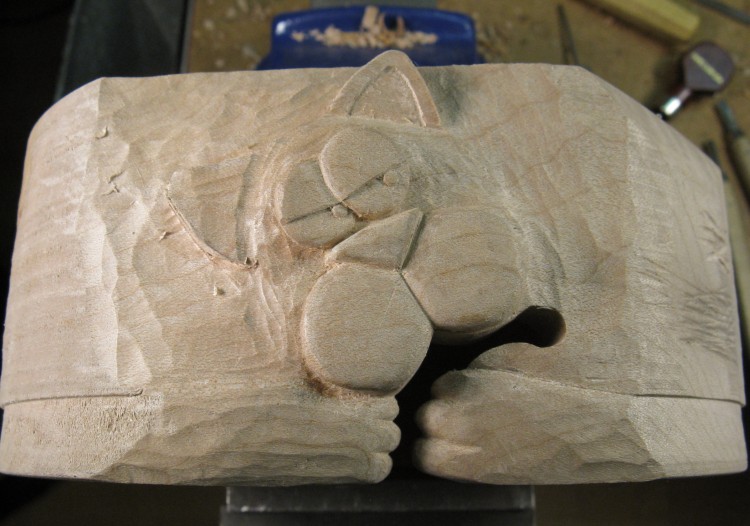
And another sequence as the face is further defined and shaped;
Paws shaped
Shaping cheeks
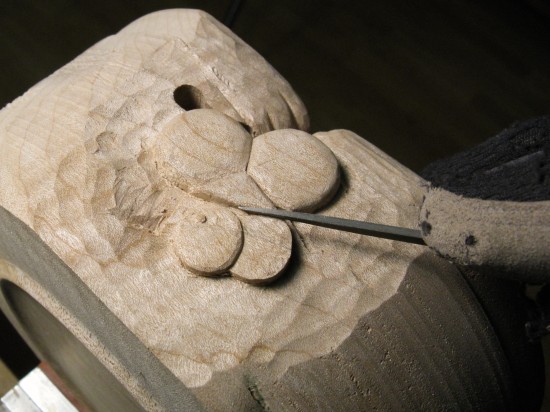
Defining nose and eyes
Face mostly done
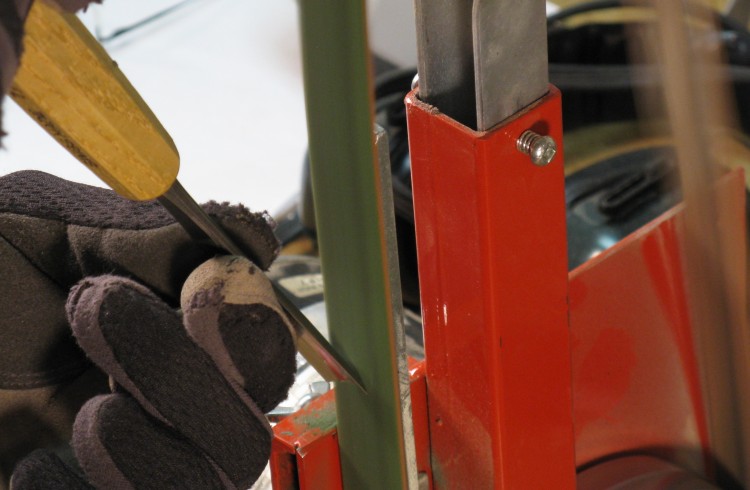
Sharpening chisel on leather belt
There was a whole bunch of this, where the chisels were re-honed on a motorized leather belt. After charging the belt with the green honing compound, it took only a couple seconds to re-hone the edge.
That was done after a few minutes of carving or when there was difficult grain to be carved.
That was done after a few minutes of carving or when there was difficult grain to be carved.
Working on the ears
In this shot, the face of "Woody the cat" is almost done. There is just the left ear and a few whisker holes left to finish.
I had early on contemplated whether the bowl should be painted to bring out the features, but decided it was better to leave it in the native wood. The details like eyelids and pupils are well enough defined that paint wasn't really needed.
I had early on contemplated whether the bowl should be painted to bring out the features, but decided it was better to leave it in the native wood. The details like eyelids and pupils are well enough defined that paint wasn't really needed.
Starting on the rear feet
Before starting on the body, I wanted to carve the back paws and work from there.
I moved the bowl over to a carving table to make it easier to work on the top edge. At this point, the bottom paw is barely visible as a pencil outline and the top paw has been its outline defined.
I moved the bowl over to a carving table to make it easier to work on the top edge. At this point, the bottom paw is barely visible as a pencil outline and the top paw has been its outline defined.
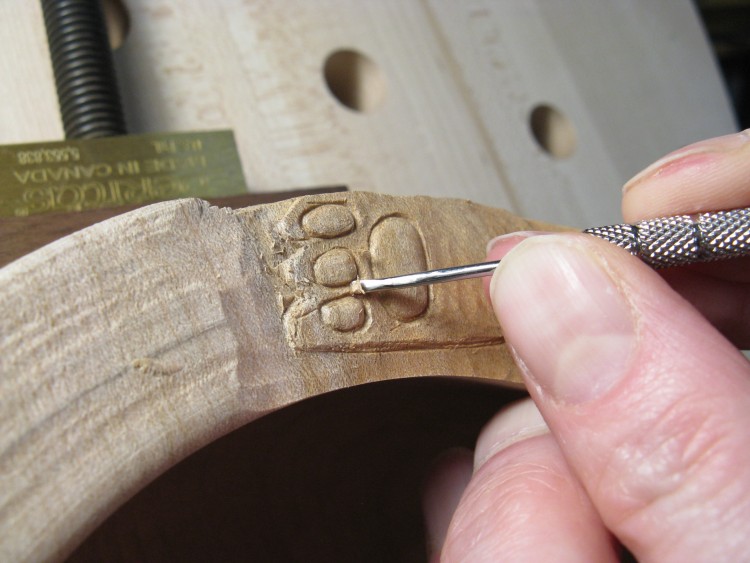
Giving him (her?) some paw pads
I decided to make the paws a bit more interesting by including foot pads. Here the base of the paw is being carved down with a tiny chisel to define a pad.
And yes, due to my extensive research, I know that cats have four, five or more "toes" on their hind paws, but of course the genus of Felis Cartoonus has only three.
And yes, due to my extensive research, I know that cats have four, five or more "toes" on their hind paws, but of course the genus of Felis Cartoonus has only three.
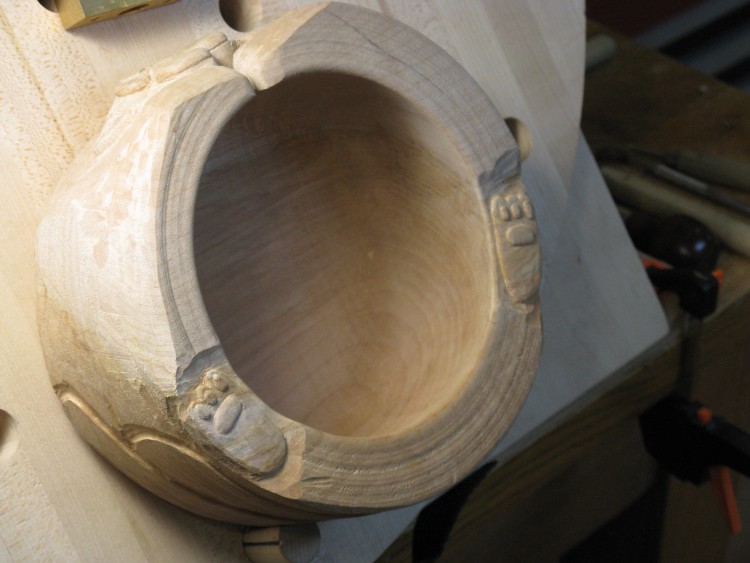
Rear feet mostly done
The bottoms of the paws are done here, so it is on to the body. You can also see a basic outline of the tail and one haunch on the lower part of the bowl.
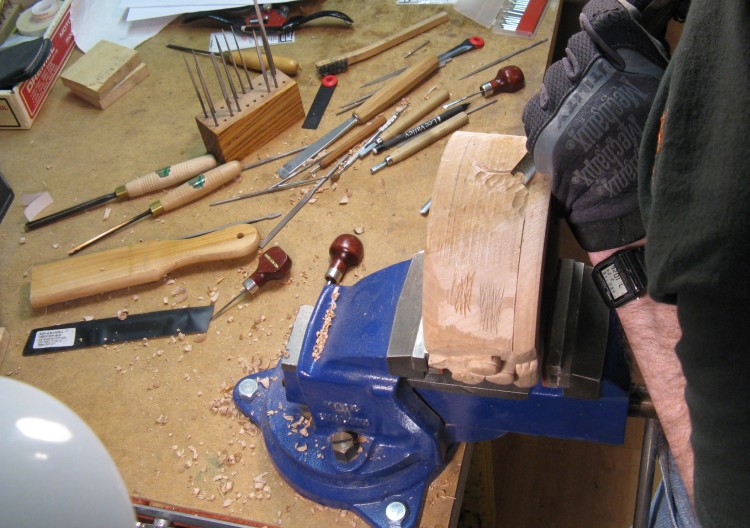
Cutting out around the tail
It was back to the bench vise to be able to work on the sides again and I'm starting to cut out around the tail.

Shaping the "body"
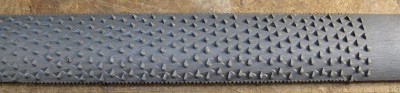
Figured maple is quite a hard wood so a hand-held chisel can remove only a tiny shaving. For the bulk material removal, I used a spokeshave to round the edges and microplane rasps like this one to shape the main part of the body.
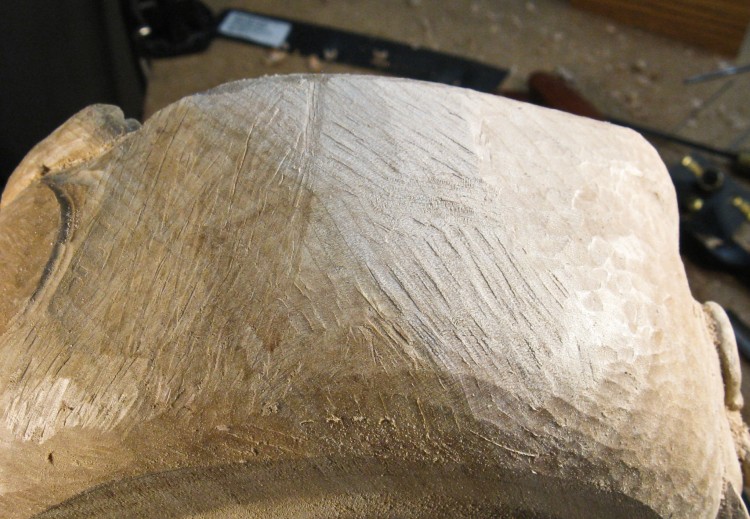
The surface left by the rasp
This is the surface left by the rasp - a series of small shallow gouges. This is actually a pretty good finish for this type of tool - there are no deep gouges as might occur with the "big spikey file" style of wood rasp.
Ouch!
Lee Valley Tools also sells the identical microplane rasp (less handle) as a kitchen grater for lemon zest, hard cheese, etc. We have one of those up in the kitchen too and I can confirm that it works as well for ginger as it does for figured maple.
Starting to add tail texture
I started with the tail which at this stage has been defined by lowering the surrounding wood and forming a round profile.
I wanted to differentiate the tail from the rest of the body, so I gave it a different quasi-fur texture, the first few cat hairs of which can be seen here.
I wanted to differentiate the tail from the rest of the body, so I gave it a different quasi-fur texture, the first few cat hairs of which can be seen here.

Tail texture done
...and the finished tail.
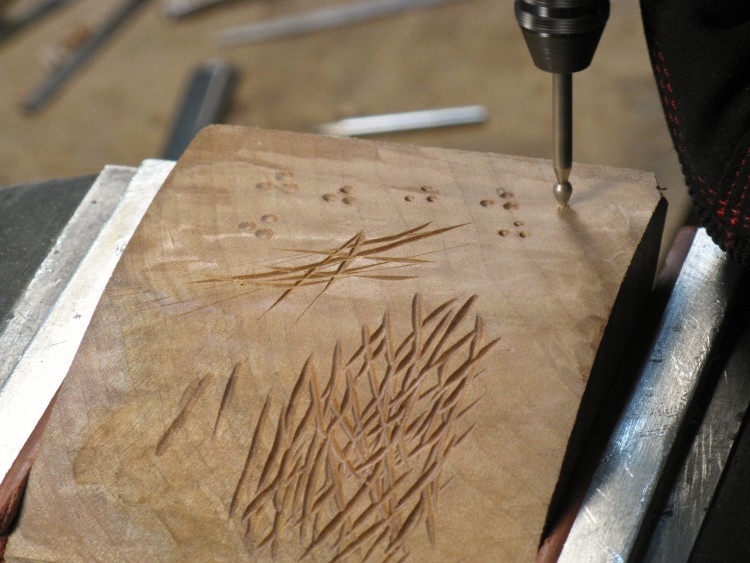
Diligently investigating the optimum whisker dimple shape
I still hadn't made the whisker dimples on the face. So here I'm checking out various grinders to find a good dimple-looking one. This is a piece of scap wood I used to check some other textures too.

Adding the body texture
The only thing left was to give the rest of the body the pseudo-fur texture, created by overlapping shallow cuts with largish curved chisel.
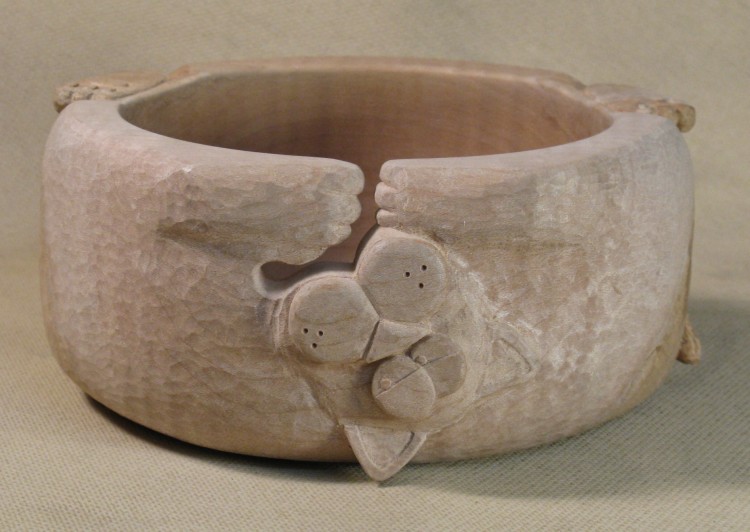
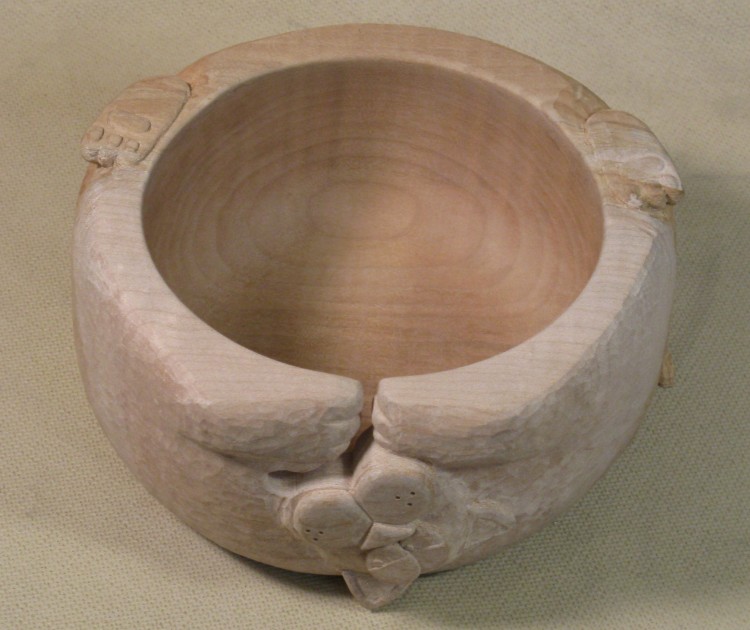
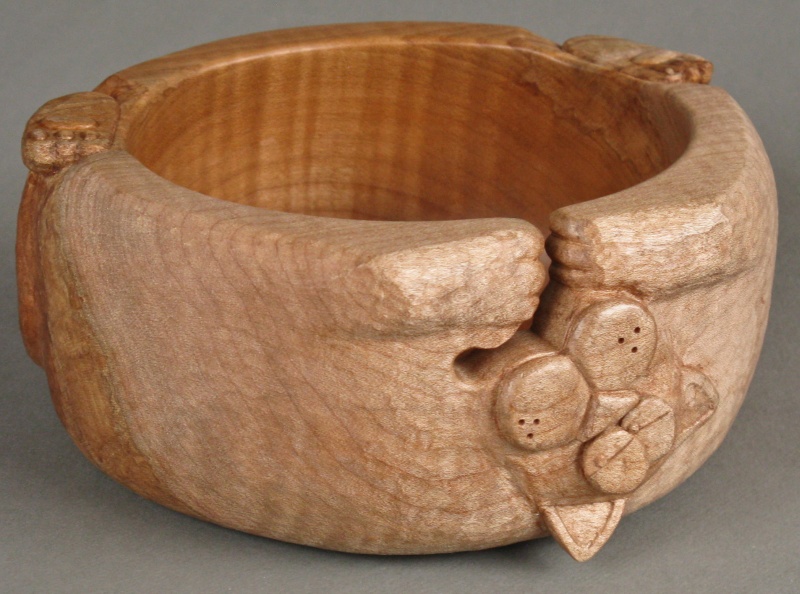
Carving all done, face view
And here follows a few shots of the completed bowl before the finish was applied.
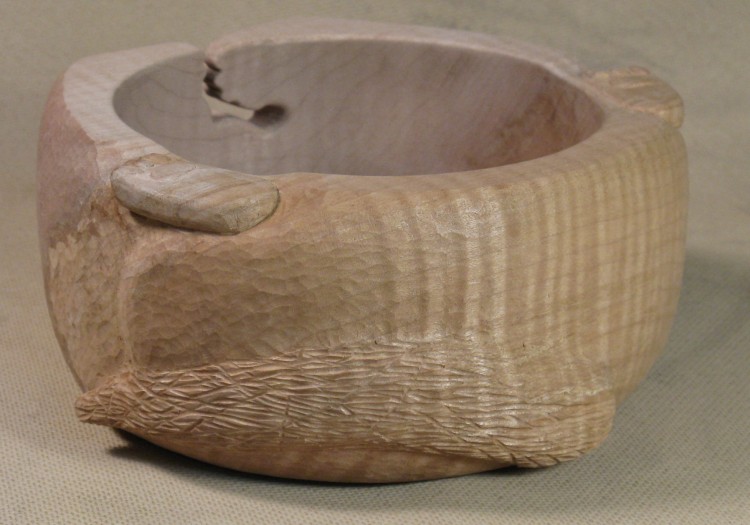
This is the "business end" where the yarn comes out.
This is the "business end" where the yarn comes out.
Top view
Top view
Tail view
Tail view
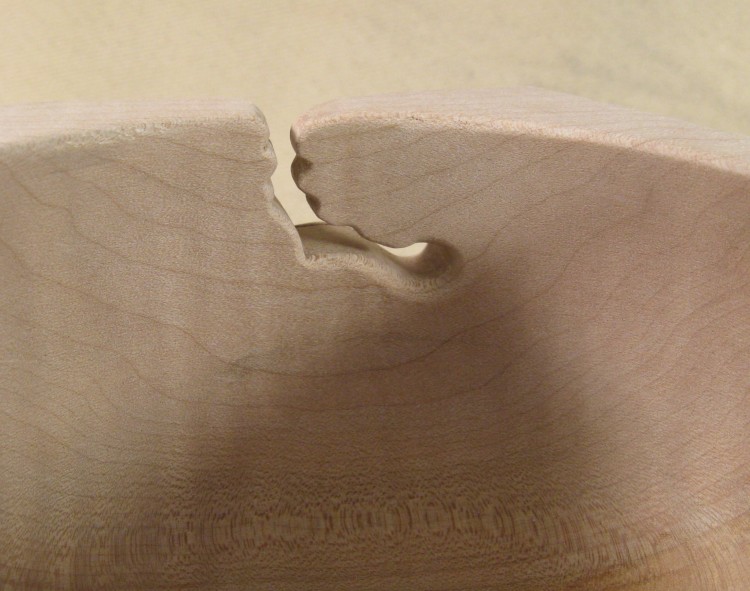
Yarn opening on inside
An inside shot showing the yarn channel.
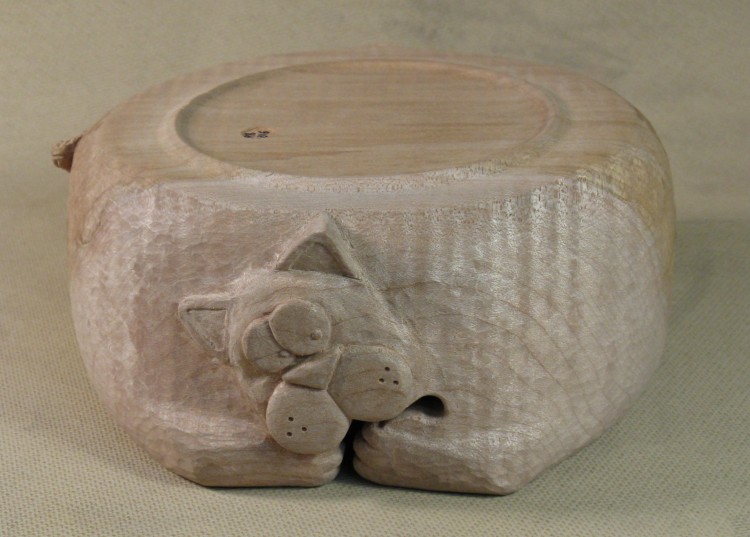
The upside-down view
The upside-down shot, looking a bit more cat-like.
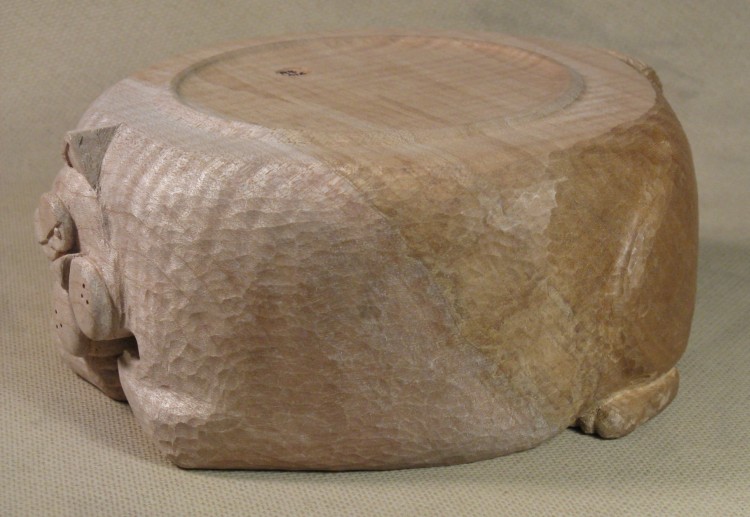
Rear haunch, upside-down
Side view
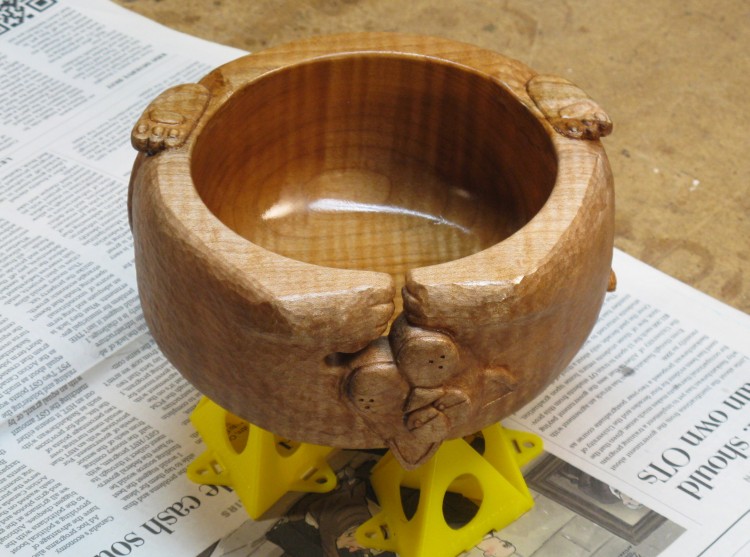
First coat of finish
And here the first coat of varnish has been applied. It ended up with my usual three coats of Wipe-on Poly.
Done


