Given that I just wanted something appropriate to display the autumn theme, the field was pretty open for what to use as a subject. Under consideration were a turned vessel, various designs of constructed or turned boxes, a cup, etc. I did some CAD sketches and even went so far as to make some wooden prototypes to see how things looked in real life. I did want to avoid something purely decorative (i.e. useless) and finally settled on a potpourri container. It is, to paraphrase Douglas Adams; something almost, but not quite, completely useless.
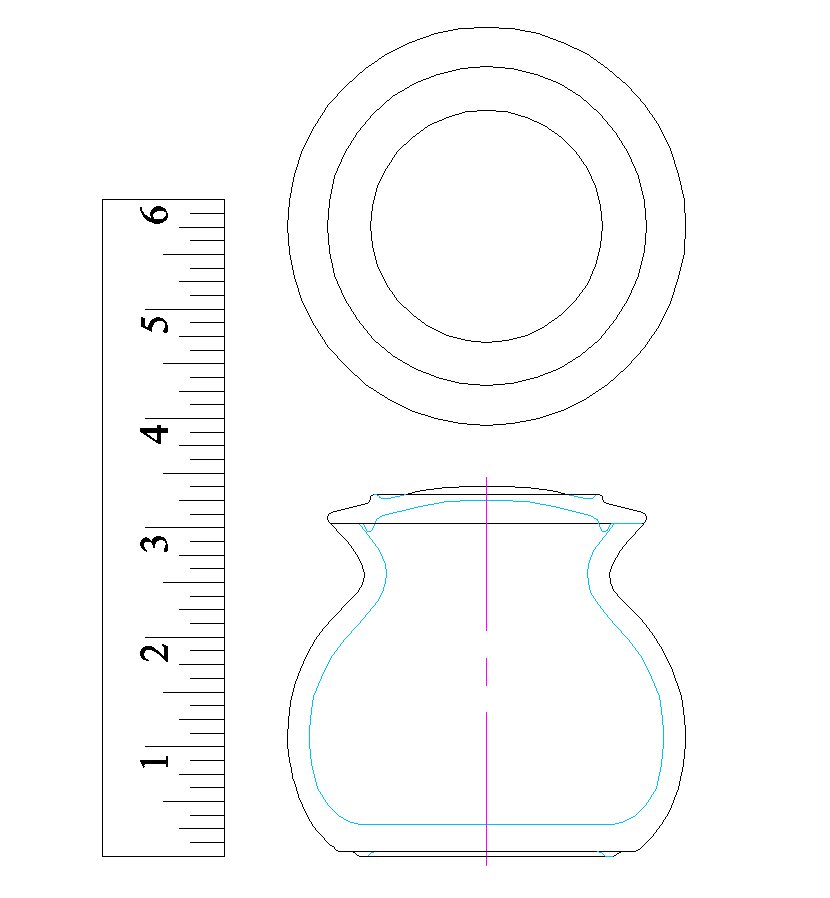
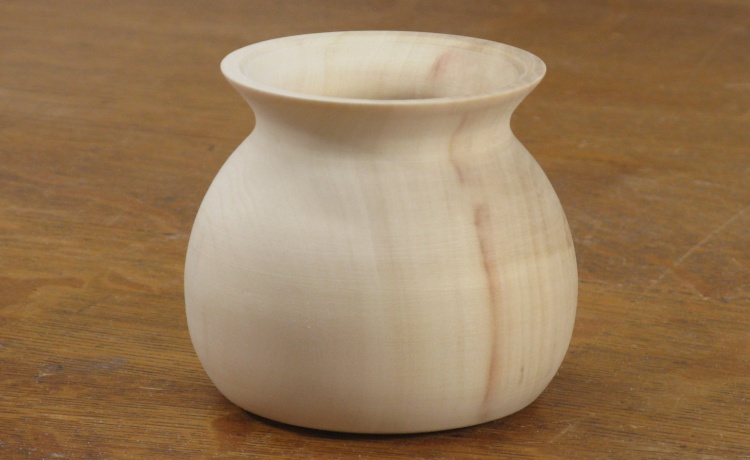
The unadorned container
Contents:
• Container Turning
• Lid Turning
• Time Out for Testing
• Bottom Decoration
• Cover Perforation
• Side Project (Pruner Handle)
• Container Decoration
Container Turning
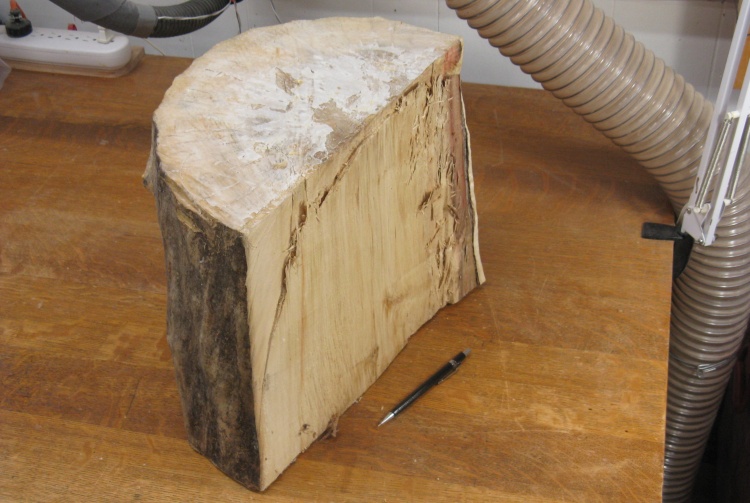
Half a log should be plenty
A trip the the shed produced this half-log of Manitoba Maple. The other half had already been used for a couple other turning projects.
The log had been seasoning in the shed for a bit over three years and now seemed to be nicely dry. I didn't detect any excess moisture when it was cut or turned.
The log had been seasoning in the shed for a bit over three years and now seemed to be nicely dry. I didn't detect any excess moisture when it was cut or turned.
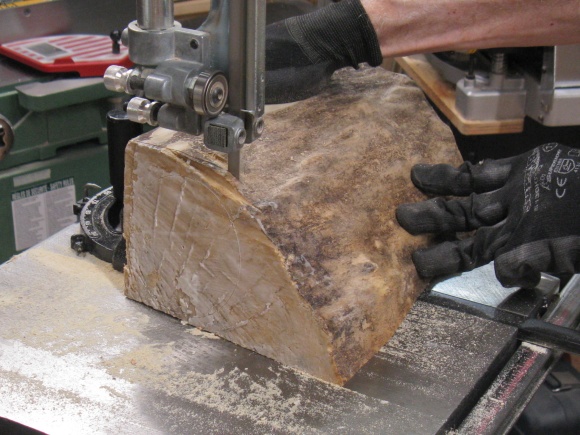
The log had originally been divided in half using a chain saw; hence the rather crudely cut face in the previous photo. Fortunately it was now small enough to go through the band saw where a few cuts produced an appropriately-sized piece for the turning.

Slicing off enough for the container
Squaring up the end
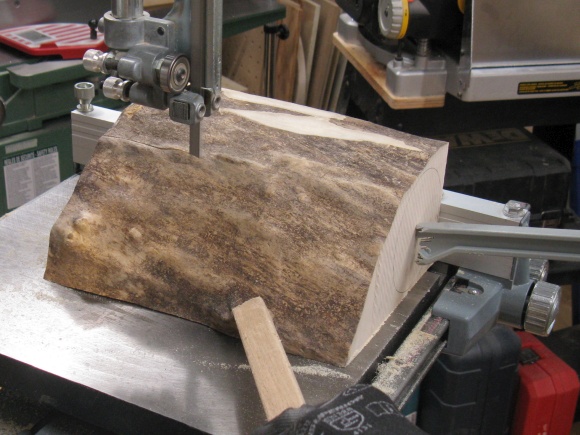
Cutting off the excess angley bit
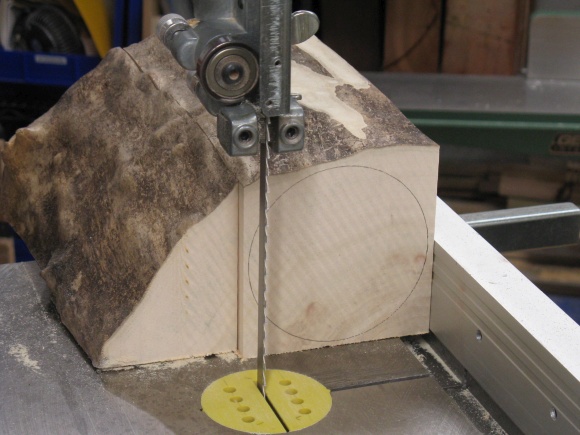
Square-ish piece ready to start on
The log-length piece was longer than was needed so I sliced off about 4 inches before adding the faceplate and mounting it to the lathe. The turning technique is similar to what I've used in the past;
- Round
- Cut reference-depth slots
- Remove excess wood between the slots
- Smooth and sand
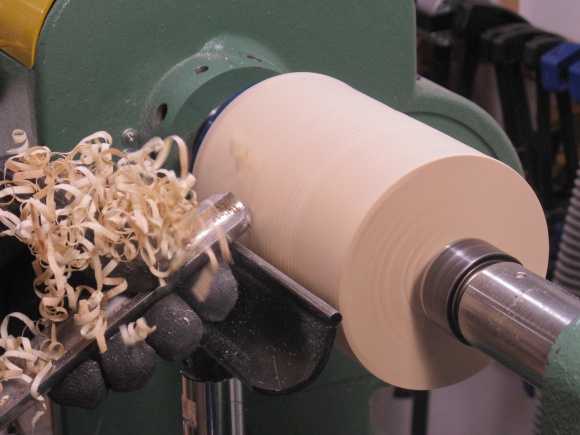
Finishing up the rounding
Cutting guide slots
Smoothing between the slots
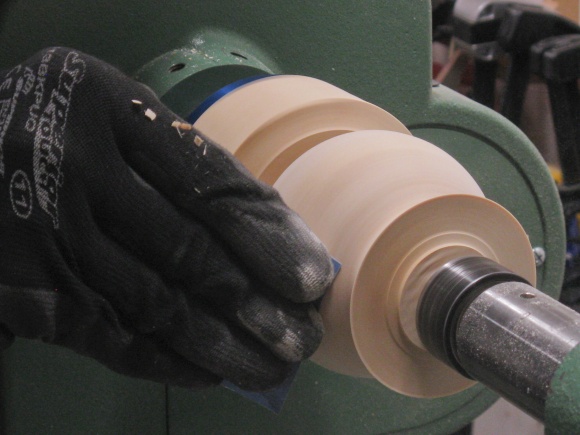
Sanding the surface
My usual practise for hollowing is to start by drilling a hole of the correct depth. In the left photo that depth is indicated by the position of the masking tape on the twist drill. I then switched to a larger Forstner bit to remove a bit more wood before breaking out the hollowing jig.
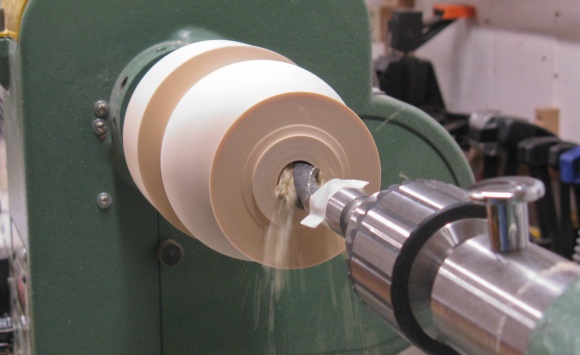
Starting with a twist drill
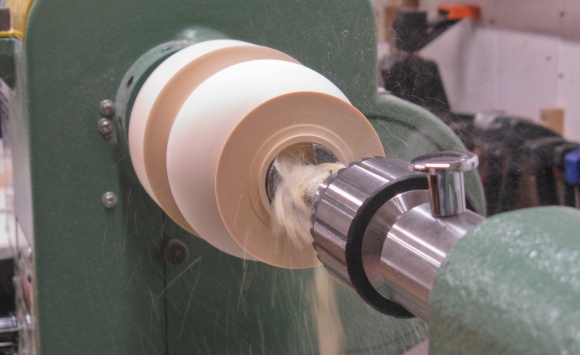
And then a larger Forstner
Hollowing underway
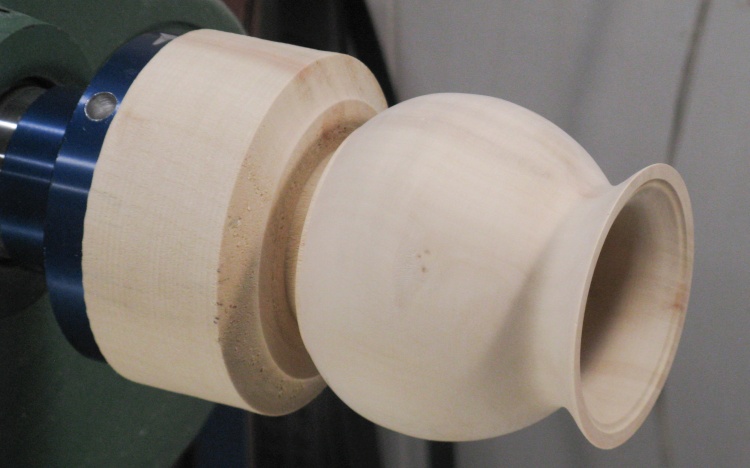
I employed my usual captured hollowing jig to clean out the inside. Here the vessel mouth is shaped and I'm working my way deeper into the body.
This was a pretty easy vessel to hollow since it had a fairly wide mouth and wasn't very deep. I didn't even crack it while hollowing, a statement I don't get to say as often as I'd hope.
This was a pretty easy vessel to hollow since it had a fairly wide mouth and wasn't very deep. I didn't even crack it while hollowing, a statement I don't get to say as often as I'd hope.

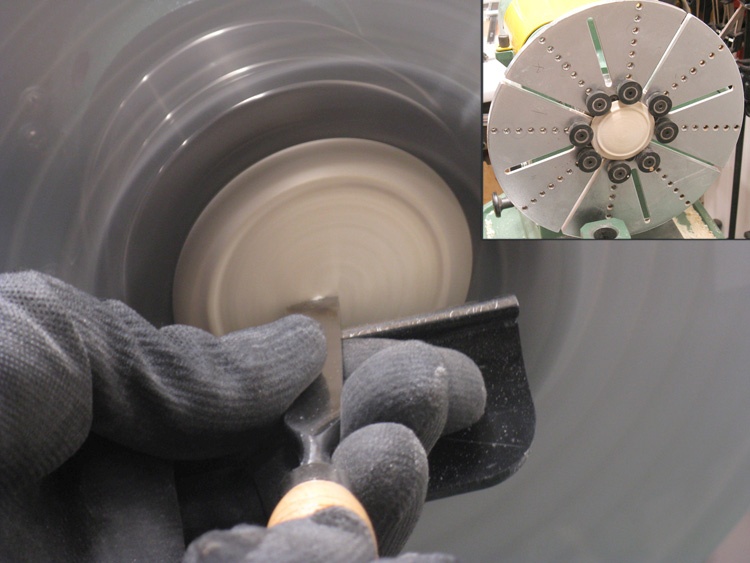
Sanding the inside using a "finger jig"
Once the inside was shaped, it was sanded to remove tool marks and irregularities. I started with sanding jigs but it was so shallow a vessel that I could reach all the way in with a finger so I taped sandpaper to my leather-gloved finger and did just that.
All done except the bottom
And except for the bottom, that's it for the turning.
I'll need to separate the body from the big disc of wood that is screwed to the blue faceplate and then shape the base.
I'll need to separate the body from the big disc of wood that is screwed to the blue faceplate and then shape the base.
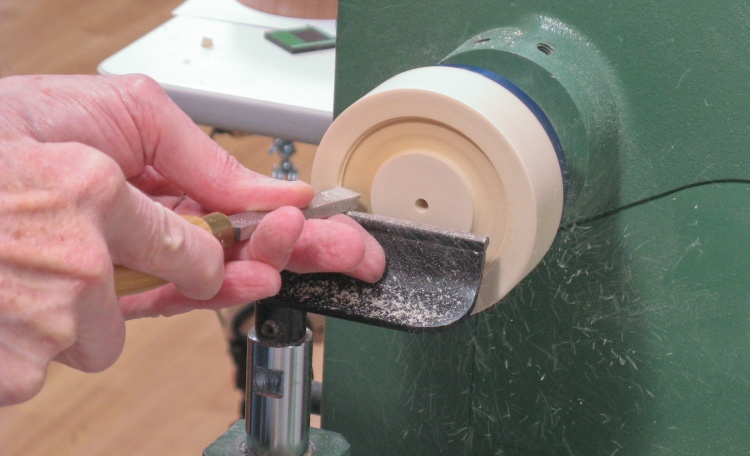
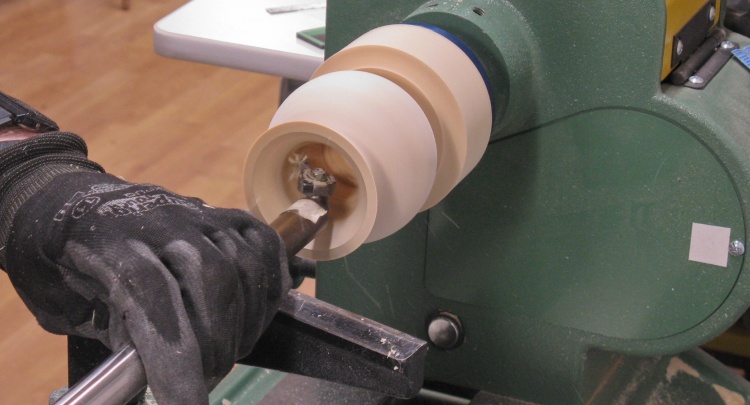
Cutting a jam chuck
The vessel was cut off the wood disc using the band saw.
I decided that the leftover disc would make a fine jam chuck so here I'm cutting a slot into it that fits the vessel top.
I decided that the leftover disc would make a fine jam chuck so here I'm cutting a slot into it that fits the vessel top.
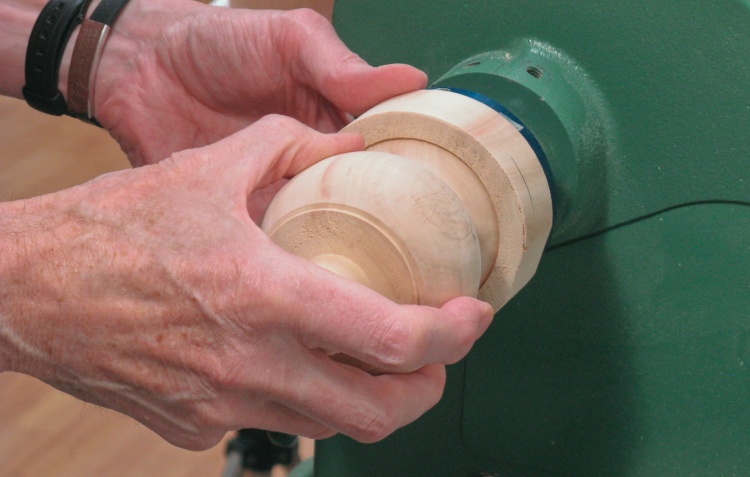
Checking the fit
As usual, I added a center brace to the jam chuck that supports the base of the vessel.
Here I'm checking the fit to make sure the top fits tightly while the brace inside just touches the bottom.
Here I'm checking the fit to make sure the top fits tightly while the brace inside just touches the bottom.

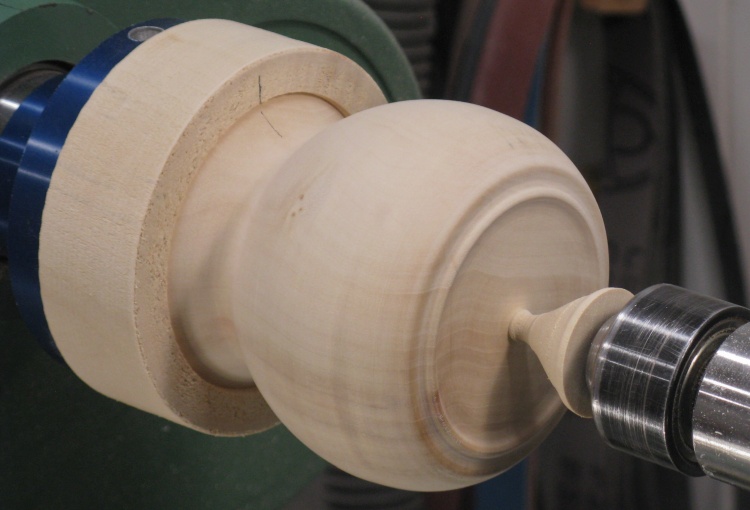
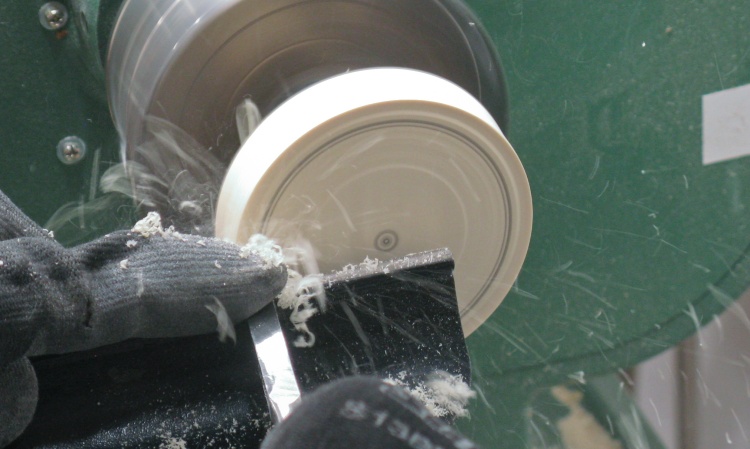
Making a round foot on the bottom
I left about an inch of extra wood on the bottom. That keeps the tailstock live center (the black spinny thing in this shot) far enough back that I can work on the bottom and get close to the middle.
I mostly used scrapers to form the round foot and remove excess wood in the middle section.
I mostly used scrapers to form the round foot and remove excess wood in the middle section.
Bottom done except for nub removal
That's the base shaping done. I left the bottom with about 1/4" depth of wood - a bit thicker than the walls which are closer to 0.2".
The container base turning is complete
The conical nub was cut off with a hand saw and then the remains were sanded flush using a rotary tool. And that finished off the container base turning.
Now on to the lid.
Now on to the lid.
Lid Turning
Another piece of Maple for the lid
I used one of the log cut-offs to make a blank for the lid (AKA cover). The grain was oriented to go across the width of the lid to give it decent strength.
A bit of work with the band saw got me to this octagon with an integral square shaft that could be held by a 4-jaw chuck in the lathe.
A bit of work with the band saw got me to this octagon with an integral square shaft that could be held by a 4-jaw chuck in the lathe.
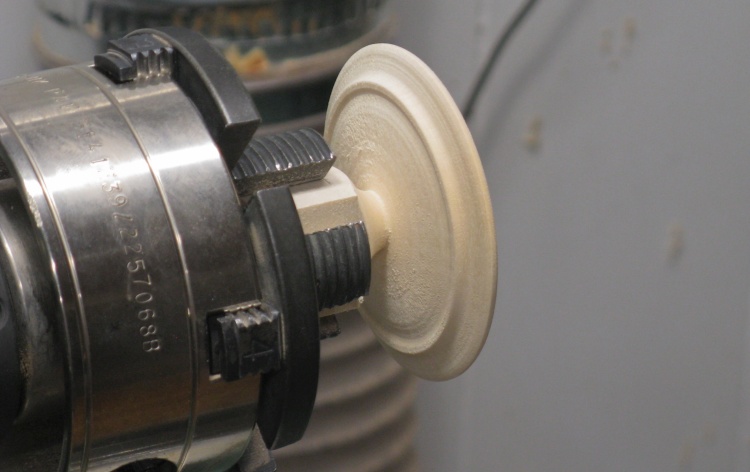
Lid blank in the 4-jaw chuck
All chucked up and ready to turn.
The wood shaft is attached to what will be the top of the lid so this exposed face is the underside.
The wood shaft is attached to what will be the top of the lid so this exposed face is the underside.
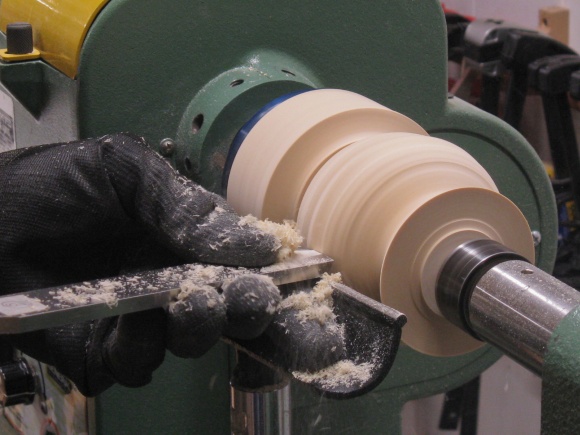
Rounded and now starting shaping
The first step was rounding the blank and getting it down to the correct lid diameter.
After the rounding, I continued by forming a shallow ring destined to fit into a matching groove in the top of the vessel base.
After the rounding, I continued by forming a shallow ring destined to fit into a matching groove in the top of the vessel base.
Top side mostly shaped
Once the underside of the lid was turned I started on the top side and here I've done about as much as I can while leaving it attached at the center.
Smoothing off the last part of the top side
As shown above, I was able to shape most of the top side except for a small bit in the center.
I then cut the lid free and used some large rubber-lined jaws to hold the periphery of the lid while I smoothed the surface with this scraper.
I then cut the lid free and used some large rubber-lined jaws to hold the periphery of the lid while I smoothed the surface with this scraper.
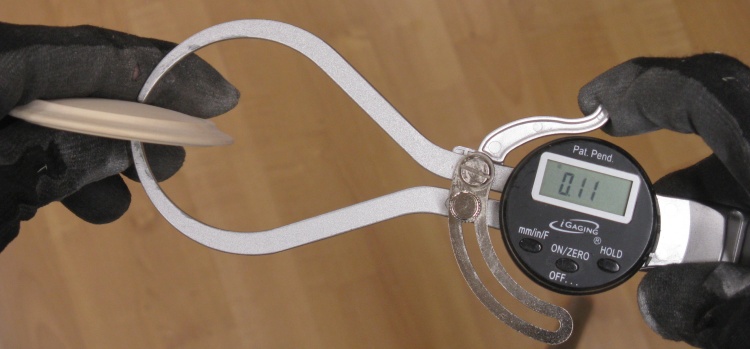
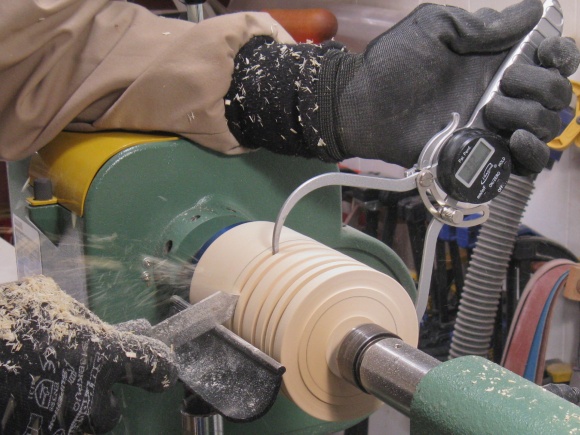
Checking thickness
I wanted the center of the top to be fairly thin since it will be perforated with the ventilation holes. I might have preferred closer to 0.08" but this 0.11" ended up looking fine, so I can't complain.
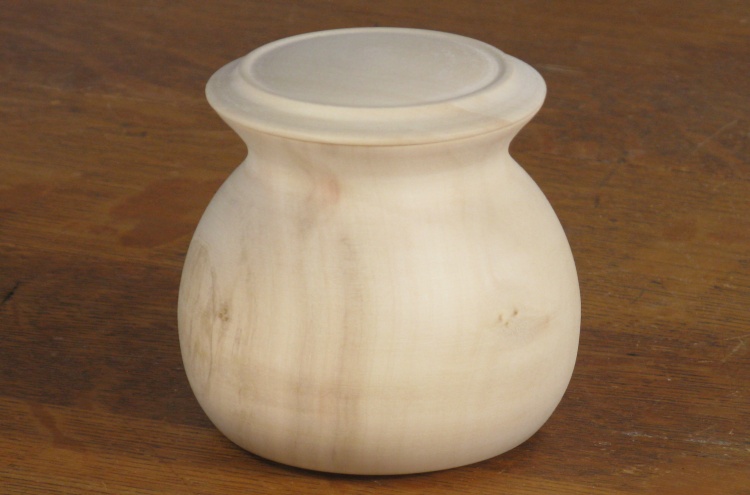
The unadorned container is ready for some adornment
This is the "lovers of the simple" version. However since the main purpose of this container is to hold up some decoration, the simple will be escorted out of the building.
Time Out for Testing
A selection of neighbourhood tree leaves
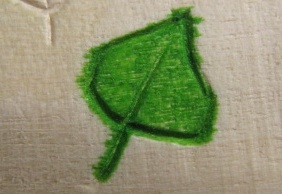
Checking methods to prevent color bleed
Yah - don't want that
Trying out a few vine designs for the bottom

A few tries
There were a few things I wanted to check before committing my nicely sanded vessel to carving and staining. On my previous vessel I had varnished between the leaves to help prevent dye wicking outside the leaf outlines. However that was a very painstaking procedure that I wanted to avoid so I grabbed a piece of the same wood to check couple alternatives.
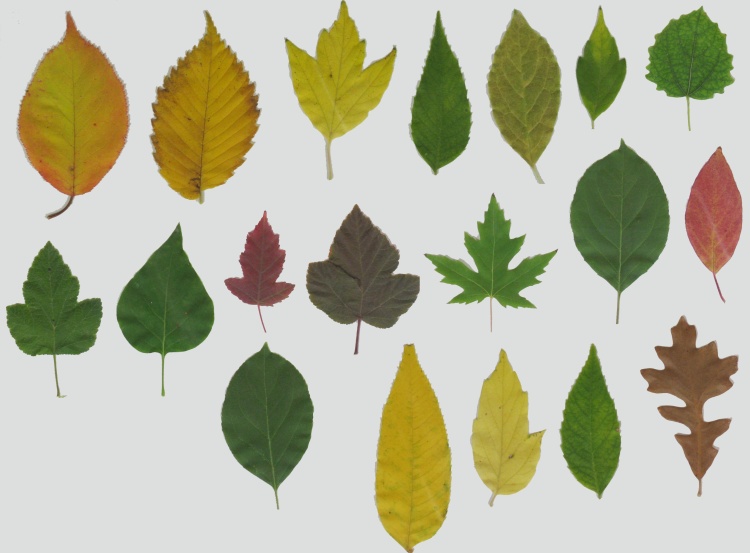
A selection of neighbourhood tree leaves
But first I thought I should round up a selection of leaf shapes to use as models. Of course carving 1/2"-long leaf outlines wasn't going to capture many of the fine details but at least I could have some realistic shapes.
This represents 5 minutes of walking around the yard and down the street a bit collecting different leaf shapes.
Gotta love that iconic Maple leaf.
This represents 5 minutes of walking around the yard and down the street a bit collecting different leaf shapes.
Gotta love that iconic Maple leaf.
Checking methods to prevent color bleed
Then the staining thing:
Yah - don't want that
First I did a no-protection case for reference (green leaf above) and then tried patches of Danish Oil and Wipe-On Poly as guard coats. In both cases the finish needed to be sanded off the leaf shapes before coloring; not great, but better than the original varnishing technique.
Both the finishes worked fine as guard coats but I'd planned to use the poly as the final finish anyway so I went with that.
Both the finishes worked fine as guard coats but I'd planned to use the poly as the final finish anyway so I went with that.
Trying out a few vine designs for the bottom
Next test was a design check; I like to have something of interest on the bottom and decided on some vines for this vessel.
To find out what looked best and was practical to do, I tried out a few designs on the end grain of some wood scraps so I could compare them.
To find out what looked best and was practical to do, I tried out a few designs on the end grain of some wood scraps so I could compare them.
A few tries
I ended up going with the leftmost example. After this shot I also tried out the varnishing and coloring on this one and it seemed to work fine.
So with those issues nailed down I got back to the potpourri container;
Bottom Decoration
As mentioned above, I try to have something interesting on the bottom of a turned vessel. I had decided on some little green vines for this one and finalized the design and technique with the test board. So then it was on to the real thing. The first step after adding the initial circle was to varnish the bottom as the guard coat (to prevent the pen dye from going outside the design). When that was dry, I drew on the vines and got carving.

Starting with the stems

Adding leaves
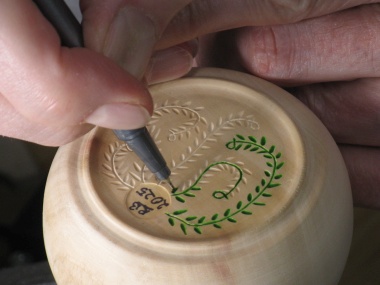
Colouring in the vine
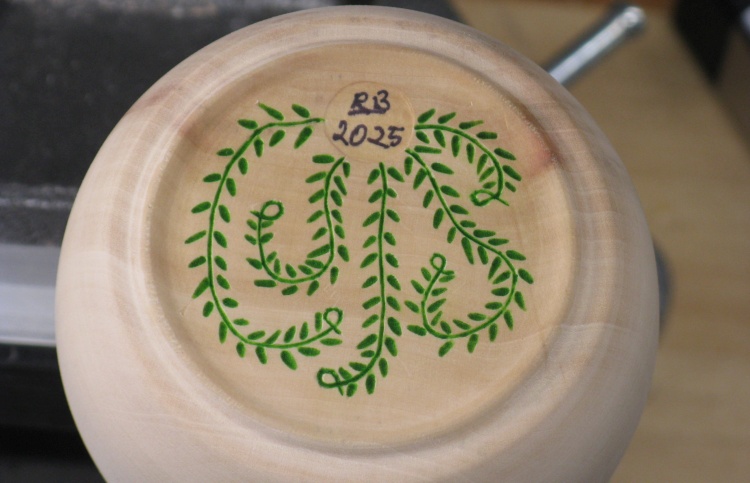
The completed bottom
OK, more of a summer motif than autumn, but maybe they change late?
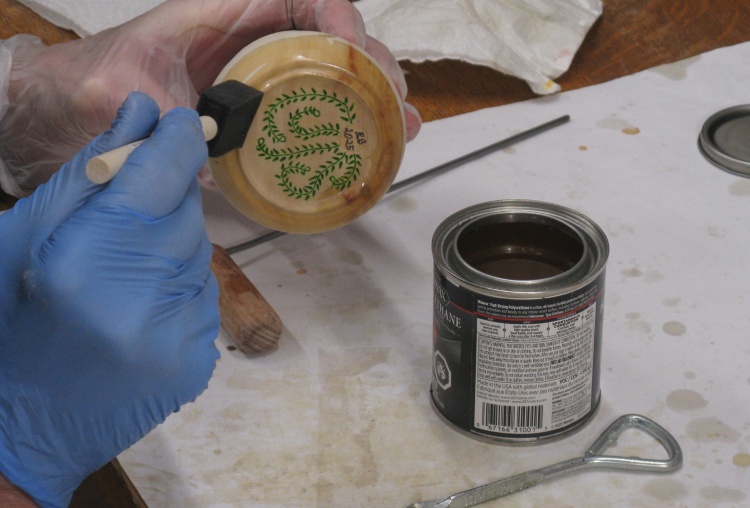
Adding a guard coat of varnish
The whole container was going to need the guard coat so once the bottom was done, both inside and outside got a coat of varnish.
Cover Perforation
The cover had not had any work done past the shaping on the lathe, so I thought I should catch it up to the container base while the latter's varnish dried.

Trying out different perforation patterns
Being a potpourri container, it was going to need a ventilated cover to let the aromas emanate from inside.
And obviously the perforations were going to be leaf-based - it was just a matter of figuring out the exact design. Armed with a selection of candidate leaf shapes, I tried out a few patterns on paper to see how they looked.
I ended up settling on the pattern at the top of the sheet I was working on in this shot.
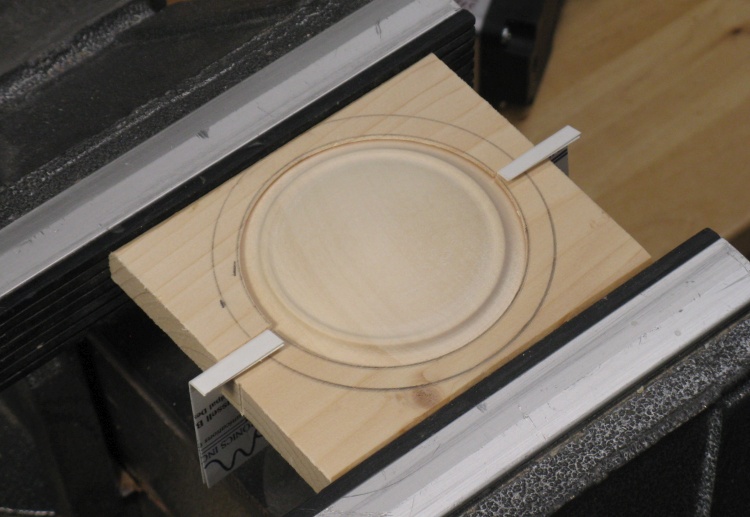
The cover in a custom holder
A thin disc isn't very clampable so I needed a way to hold it to expose the center section. To do that I turned a quickie grooved jig that let me mount it securely in the bench vise while leaving the center exposed. Those business card pieces help limit the amount of "squeeze" on the cover.

Starting to cut out the holes
The pattern was drawn on by hand and each perforation-to-be was drilled to provide blade access for the small jig saw. Then as seen here, the bulk of each leaf shape was cut out.
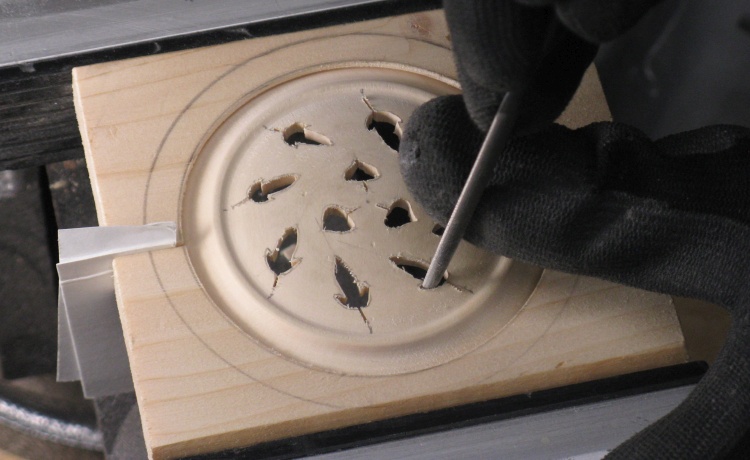
Smoothing out the rough sawing
The saw cuts were pretty coarse on the tiny scale of these leaves, so the perforation outlines were smoothed using needle files.
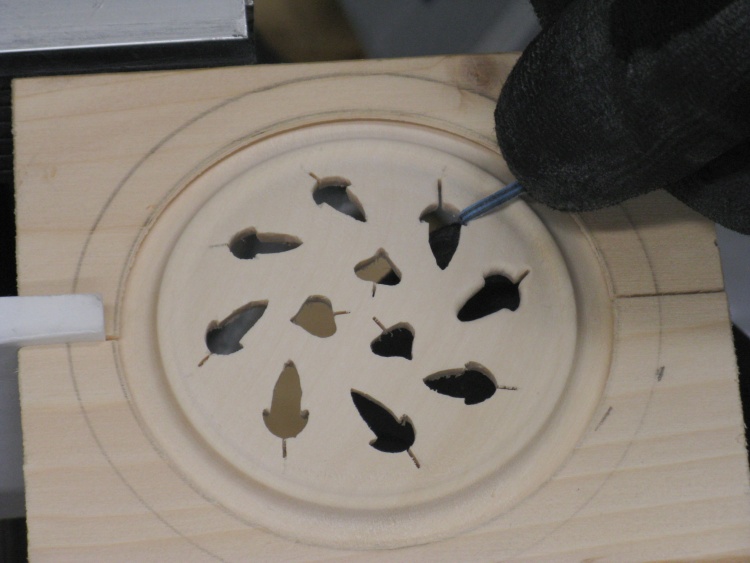
Rounding the edges
The last step was to round over the edges of the perforations which was accomplished using narrow strips of 220 grit sandpaper.
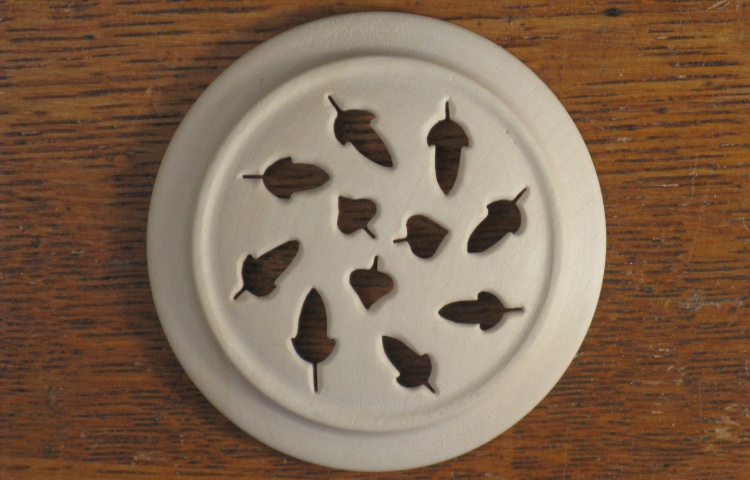
Perforations done
Ventilation complete.
Once done, I added a guard coat of varnish to the cover as it will receive similar inscribed leaf shapes to the base.
Once done, I added a guard coat of varnish to the cover as it will receive similar inscribed leaf shapes to the base.
Side Project
The wooden handle
Handle with shortened rope
The fancy new handle
Now isn't that neater?

Oh yah. Coulda just done this.
Totally unrelated tangent:
After chopping off some branches with our pole pruner, I decided that it needed some work. It has a rope to activate the pruners but unless the pole is at maximum length, the rope is too long. This has been a minor pain for many years and I finally decided to do something about it.
After chopping off some branches with our pole pruner, I decided that it needed some work. It has a rope to activate the pruners but unless the pole is at maximum length, the rope is too long. This has been a minor pain for many years and I finally decided to do something about it.
The wooden handle
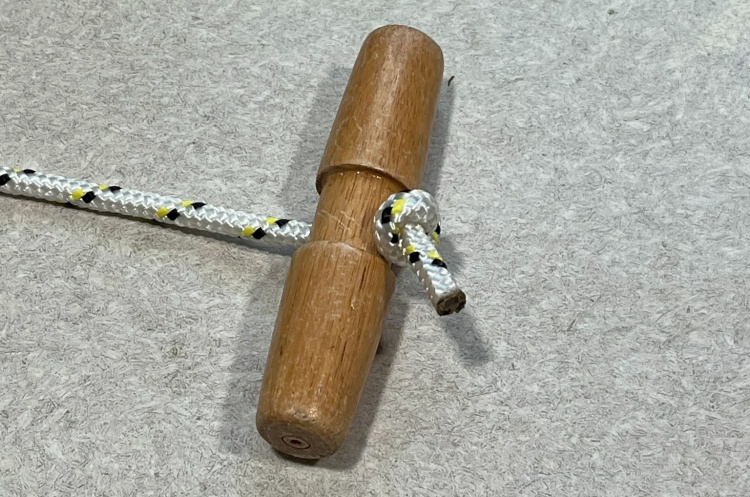
The wooden handle is held on by a knot at the end of the rope but that is pretty useless unless the pole is extended to the maximum length - an unusual situation.
Handle with shortened rope
So for a more-normal pole extension, you need to get rid of a bunch of rope to still be able to pull hard on the handle.
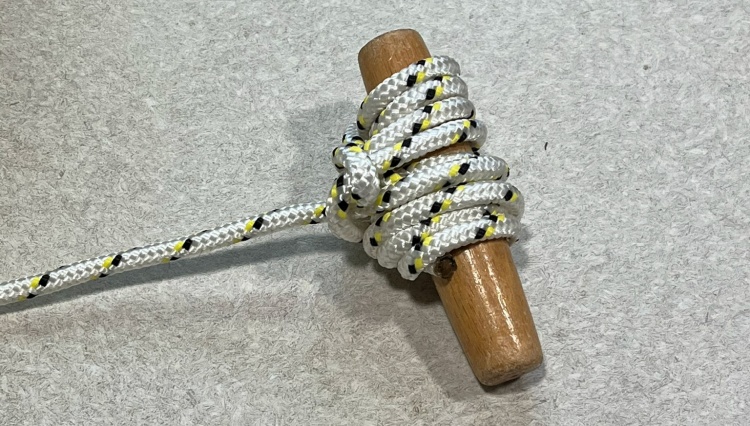
I would usually wrap it like this - a bunch of times around and a half-hitch or two to hold it in place. But that's kind of a pain to do and makes the handle large and not really ideal for pulling.
I would usually wrap it like this - a bunch of times around and a half-hitch or two to hold it in place. But that's kind of a pain to do and makes the handle large and not really ideal for pulling.
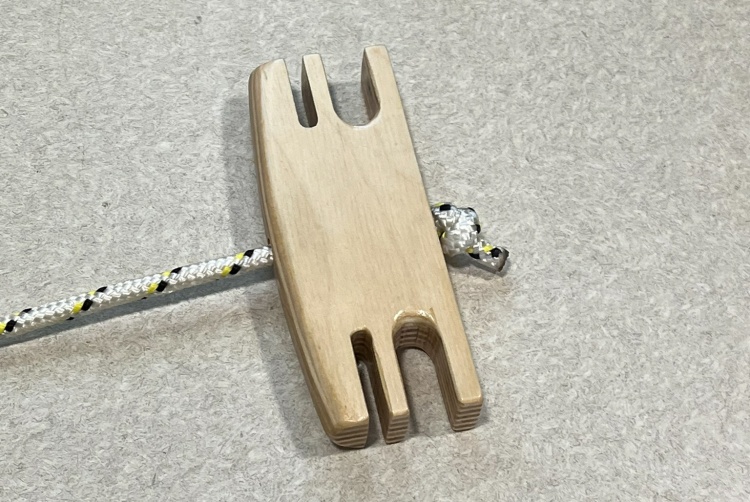
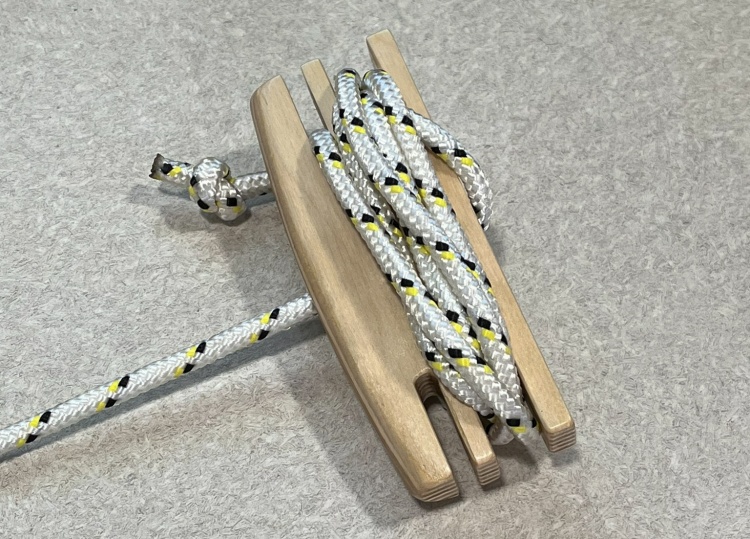
The fancy new handle
With the wrapping being a problem, I whipped up this Baltic Birch plywood version to solve that issue with a specific wrapping portion and end-holding slots.
It has a few coats of varnish to give it some weather protection.
It has a few coats of varnish to give it some weather protection.
Now isn't that neater?
Here it is wrapped up with the end through one of the slots. You can still hold the handle comfortably and it doesn't try to unwind when you pull on it.
Mission accomplished.
Mission accomplished.
Oh yah. Coulda just done this.
Although when taking the photos later I realized I could have just pulled the rope through the appropriate amount and added a couple half-hitches to hold and that would work fine with no modifications.
Ah well, my new one looks more custom so I'm leaving it on.
Ah well, my new one looks more custom so I'm leaving it on.
Now back to our regularly scheduled programming;
Container Decoration
OK then - back to the container base. The varnish used as a guard coat was dry so I could proceed to add the leaf shapes.
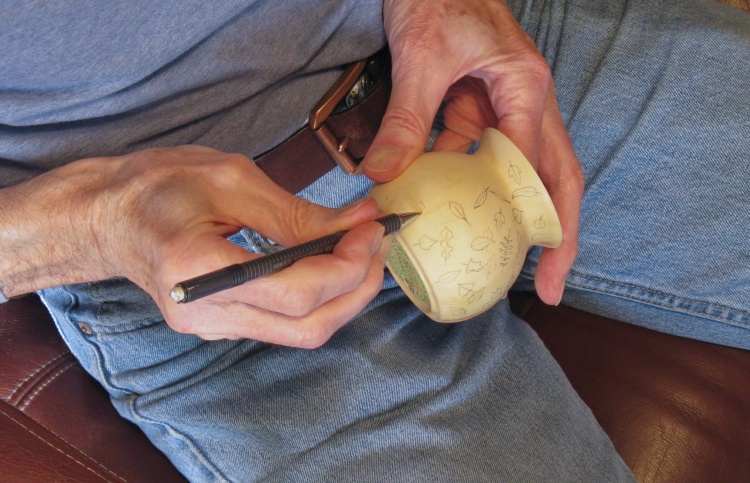
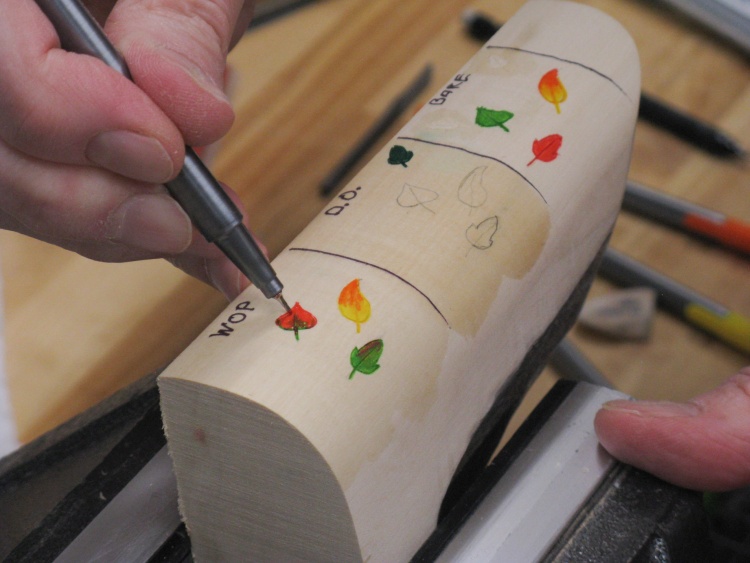
Drawing on a selection of leaf types
I thought a bit about potential leaf patterns but resisted my own urges toward regular organizations, opting for a random-ish arrangement of leaves.
With that decided, I could just start drawing on various leaf shapes in various sizes at various orientations and in various locations.
With that decided, I could just start drawing on various leaf shapes in various sizes at various orientations and in various locations.

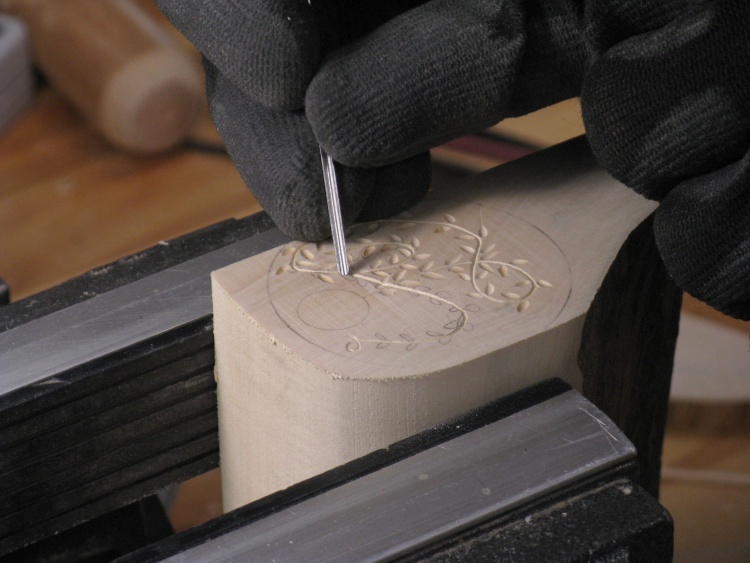
Starting to carve leaf outlines
...and then carving the outlines.
The carving was done in the bench vise with the bottom of the vessel squeezed by a dowel. The large wood disc on the left prevents any marring of the design on the bottom.
I wore the magnifying headset to get a more-detailed view of the carving.
The carving was done in the bench vise with the bottom of the vessel squeezed by a dowel. The large wood disc on the left prevents any marring of the design on the bottom.
I wore the magnifying headset to get a more-detailed view of the carving.
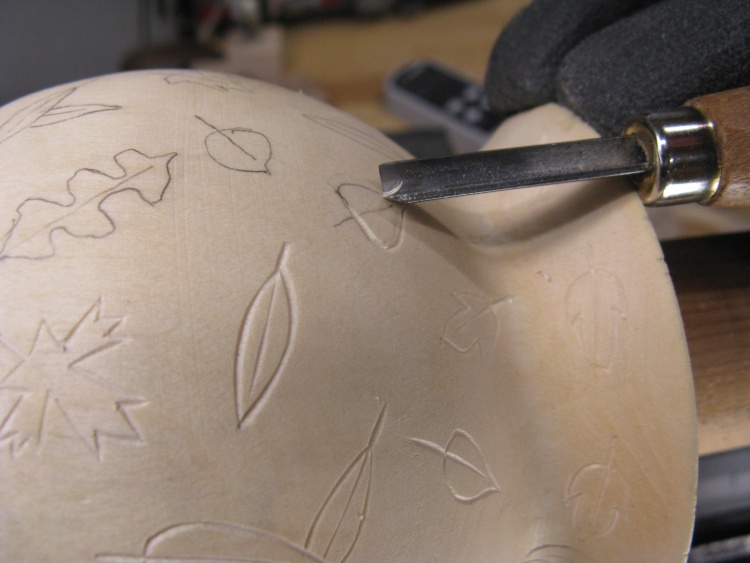
A bit more detail
A Poplar leaf outline-ing in progress.
I used this 90° V-tool to outline the leaves. It was kept sharp by honing it periodically on a motorized leather belt.
I used this 90° V-tool to outline the leaves. It was kept sharp by honing it periodically on a motorized leather belt.
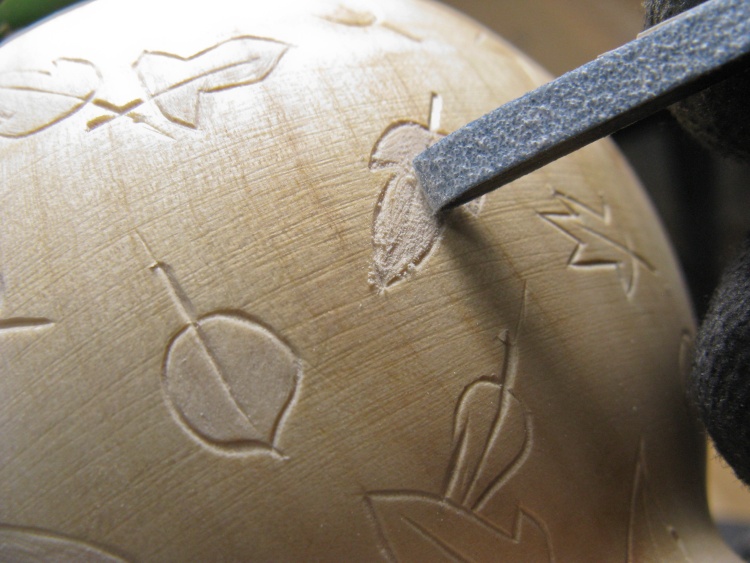
Roughening up the varnish layer on the leaf body
When the cutting was done on all the outlines, I switched to the sanding phase.
While I didn't need to completely remove the varnish, the surface inside the leaves had to be porous enough to let the wood absorb the dye from the pens. I mostly used 220 grit on small sanding jigs like this one.
While I didn't need to completely remove the varnish, the surface inside the leaves had to be porous enough to let the wood absorb the dye from the pens. I mostly used 220 grit on small sanding jigs like this one.
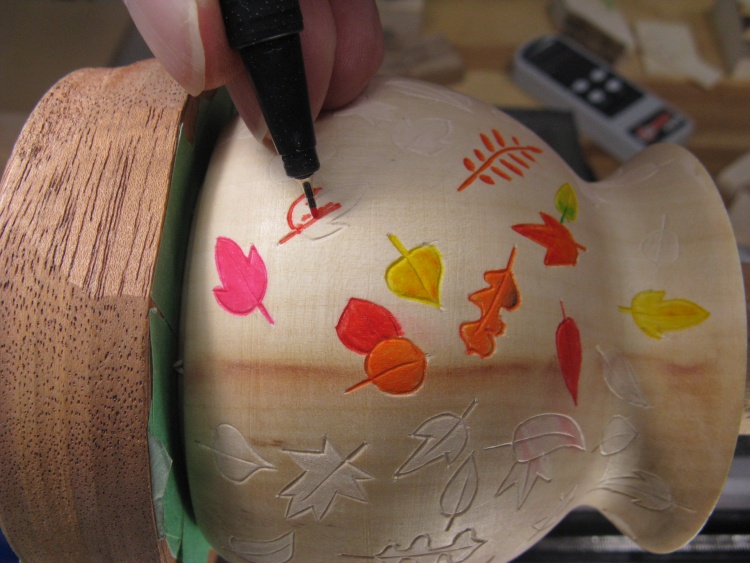
Let the coloring begin!
And then it was time for the color. I exclusively used fine felt pens like this one to trace the carved outline and then fill in the interior of each leaf.
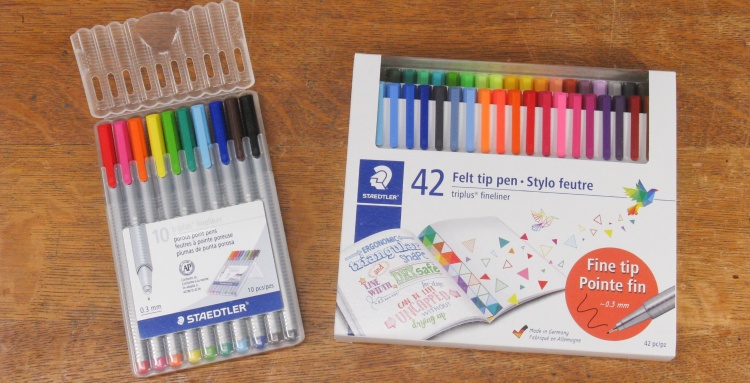
Original and new sets of felt markers
I started with the set of 10 pens on the left. There were really only four or so valid autumn colors so I figured I could use a bit more variety and picked up the 42-pen set on the right.
Surprisingly that only added a few more decent colors (the fluorescent pink and purples and all the browns, blues and black not being very convincing autumn leaf colors). However I did some color mixing to give a bit more variety.
Surprisingly that only added a few more decent colors (the fluorescent pink and purples and all the browns, blues and black not being very convincing autumn leaf colors). However I did some color mixing to give a bit more variety.

The cover getting its own carved leaves
Once the body was done, I moved over to the cover. I had previously added a coat of guard varnish so I proceeded to draw on the leaves, carve the outlines, sand the leaves and finally color them in.

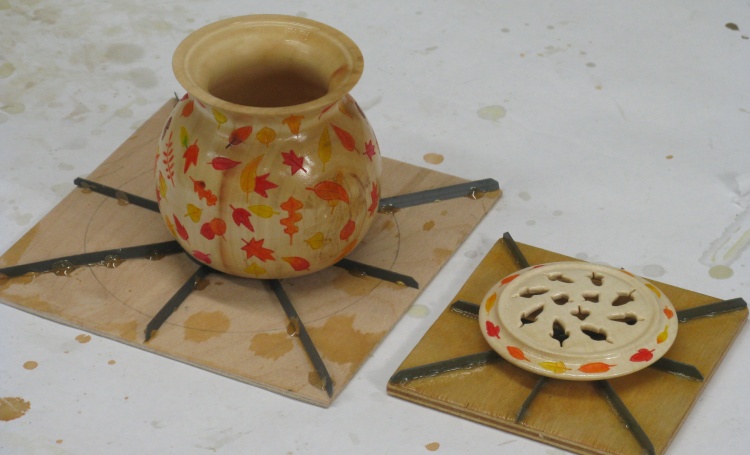
Both container and cover done
Container woodworking done.

Guest acCountant
Now of course the question arises of exactly how many leaves are on the container. I figured that would be tough to figure out so through the magic of copyright violation, I invoked everybody's favourite Count. I then asked "How many coloured leaves are on the container and lid?"
After a bunch of faffing around and singing a juvenile song, he finally came back with "Ninety-seven wonderful leaves - Ah hahaha". So now we know.
After a bunch of faffing around and singing a juvenile song, he finally came back with "Ninety-seven wonderful leaves - Ah hahaha". So now we know.
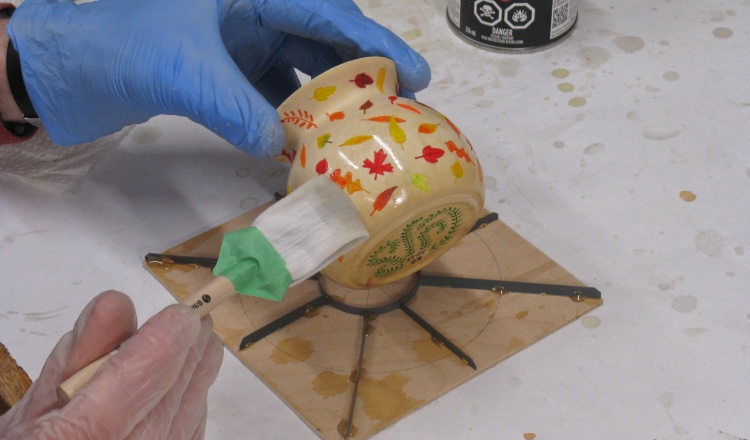
Starting the on-top-of-the-color varnish coating
The colored container still needed the usual final coats of varnish so I started in on that.
Base and cover with the first coat of varnish
The first coat of varnish on the pieces is still wet in this photo. I used my usual Minwax Fast-Dry Poly (the same as I ended up using for the guard coats) and added three coats with the usual steel-wool treatment between them.
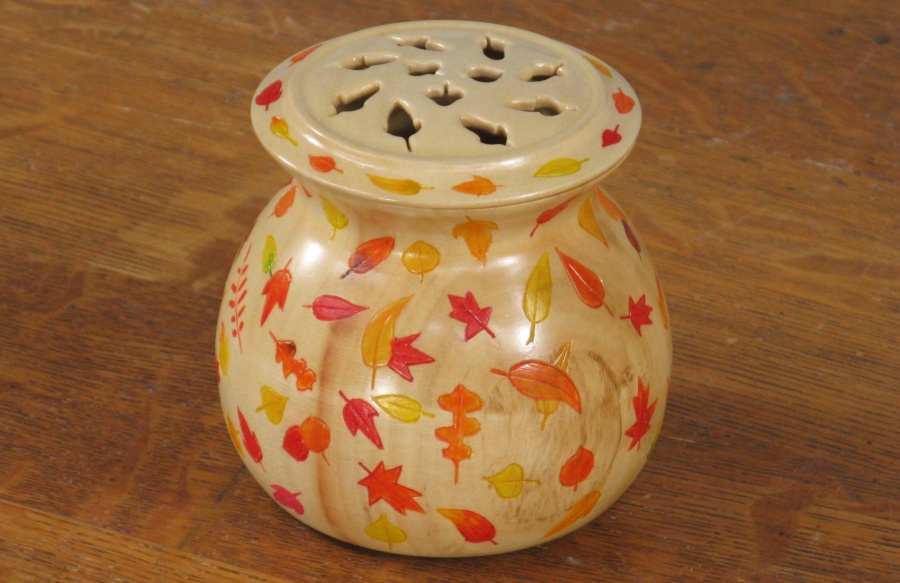
Done

Top

Inside
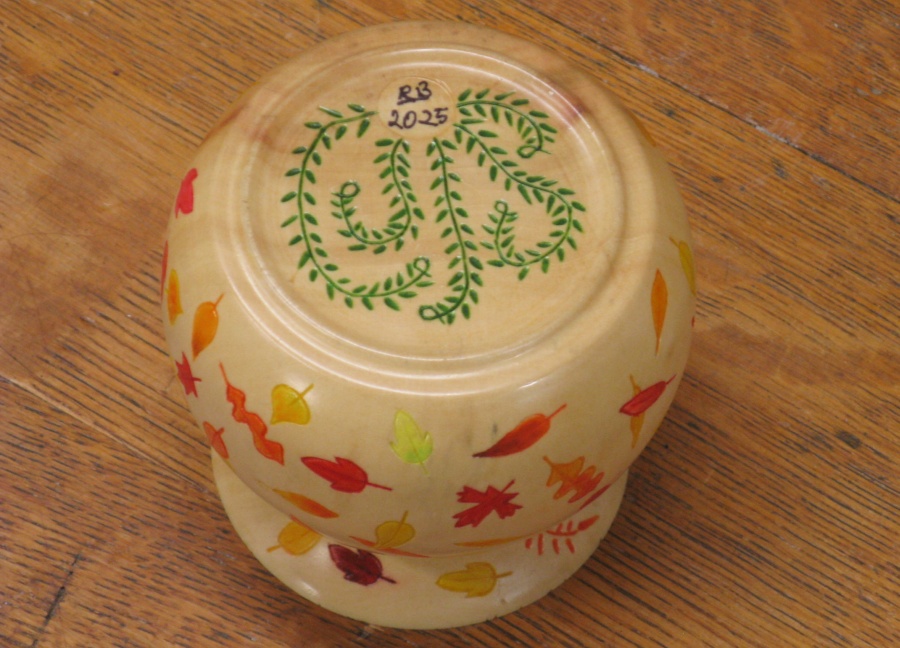
Bottom


