I had actually intended to make a vessel like this back in 2016 but once it was turned the grain looked interesting enough that I left the walls solid. This time I took a run at it and managed to break through that psychological barrier and punctured the walls thoroughly. And speaking of breaking, both the first vessel and this one ended up cracked in the hollowing process and had to be glued back together. In fact this one actually had a few pieces knocked out but fortunately I was able to find them all; they just needed to be glued back into place. And since there was maybe 10% of the wood left when I was done, the joints weren't even very obvious.

A simple plan for the shell
Turning the Body
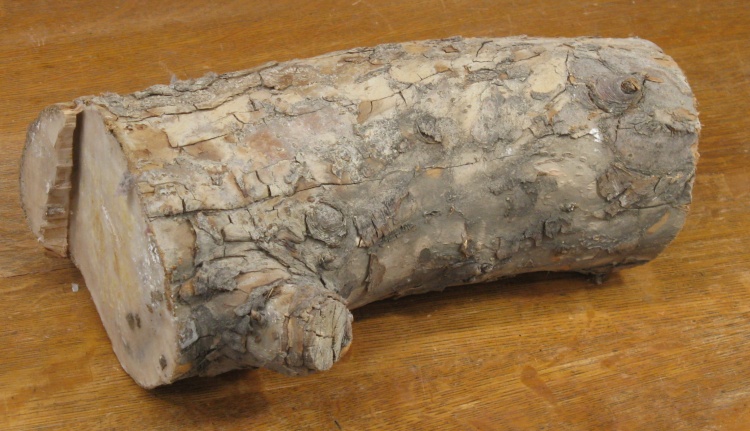
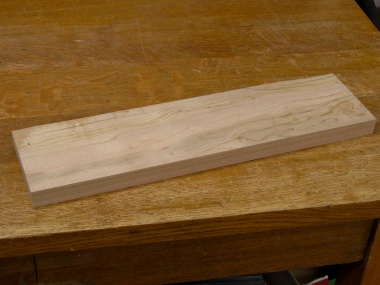
A piece of tree carefully preserved
This photo shows the branch section that I started with. The ends had been sealed with wax back when it was stored in 2004 to slow the moisture loss and as a result the ends were crack-free.
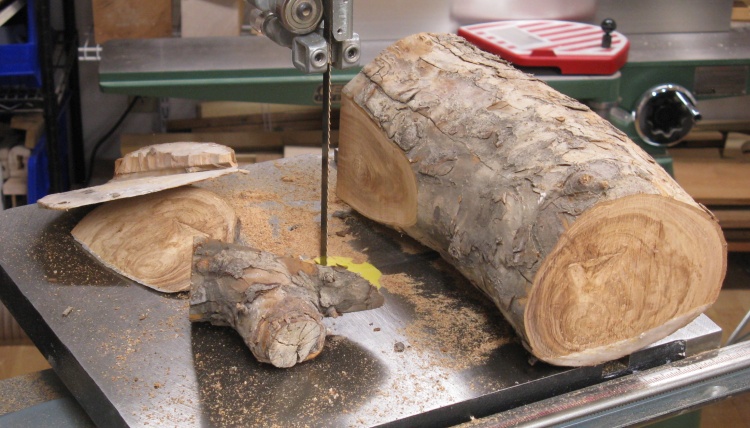
A few cuts to make it more lathe-friendly
The ends hadn't been cut particularly straight plus it had a branch remnant sticking out and both those issues were dealt with using the same "cut it off" technique at which the bandsaw excels.
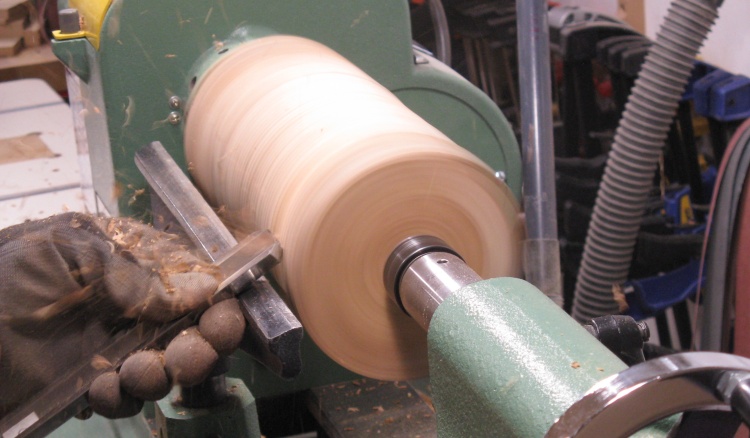
Starting to round it off
The branch went onto the lathe between centers (i.e between a drive spur and a live center) to get rounded off and have the ends trued. In this shot the roughing gouge is working on the rounding part.
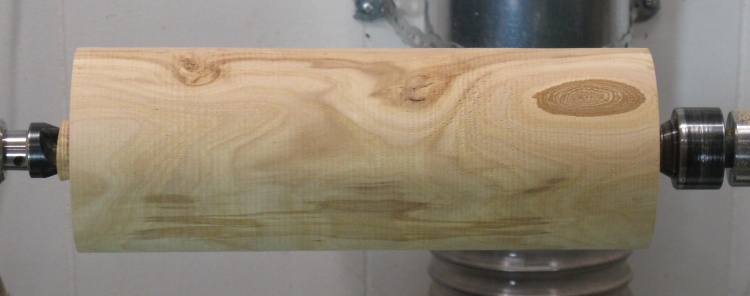
Nice and round and with flat ends to boot
Here the wood's been rounded to a roughly consistent diameter and the ends have been trued up.
Unfortunately the wood wasn't long enough to be able to sacrifice an inch or two for the faceplate to screw into, so I was going to need to extend it.
I grabbed a scrap piece of cherry since I had a bunch of short boards left over from a recent drawer-set project. That got chopped up and glued together to make an end-grain extension for the Ornamental Crab. When the glue was dry, the extension was mounted to a faceplate and rounded on the lathe.
End-grain glue joints are weak (which I've discovered to my disappointment more than once in past lathe work) so I added some shallow circular joinery to increase the strength of the connection.
A cherry scrap
Laminating four short pieces
Rounded off and here working on the face
A simple(?) combination circular tongue and groove plus mortise and tennon joint
This shows the Cherry extension with the Ornamental Crab piece sitting beside it.
In the center of the Ornamental Crab is a circular nub (AKA tennon) which will fit into a matching hole (mortise) on the extension, plus I cut matching ring and slots (tongue and groove respectively in joinery-speak) to increase the gluing area further.
In the center of the Ornamental Crab is a circular nub (AKA tennon) which will fit into a matching hole (mortise) on the extension, plus I cut matching ring and slots (tongue and groove respectively in joinery-speak) to increase the gluing area further.
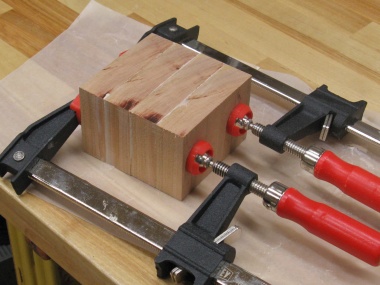
Extension piece added on
Then those two pieces were glued together and clamped using the the lathe itself.
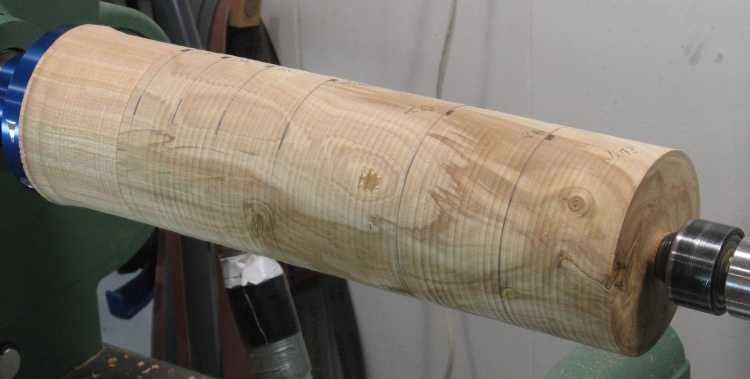
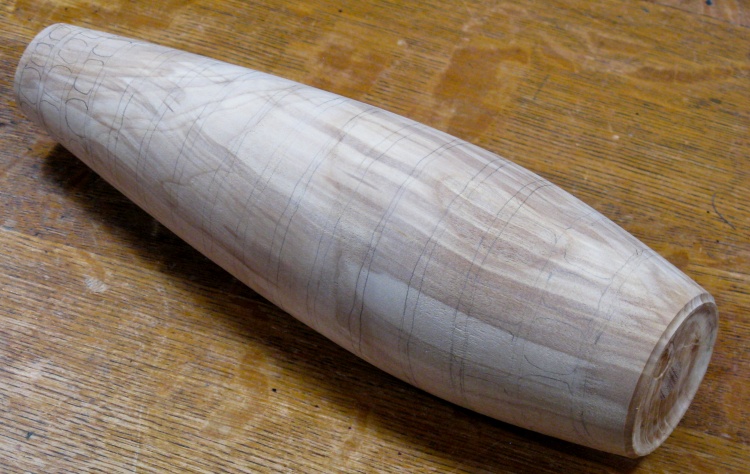
Re-rounded (crudely) and marked for reference diameters
A bit of re-rounding eliminated any imperfect centering plus any remaining bark remnants.
The wood was then marked with locations to cut reference diameters.
The right end of the wood in the photo actually has a very dramatic grain pattern, almost evocative of a bird of prey. Unfortunately, it's going to be turned into sawdust. C'est la vie.
The wood was then marked with locations to cut reference diameters.
The right end of the wood in the photo actually has a very dramatic grain pattern, almost evocative of a bird of prey. Unfortunately, it's going to be turned into sawdust. C'est la vie.
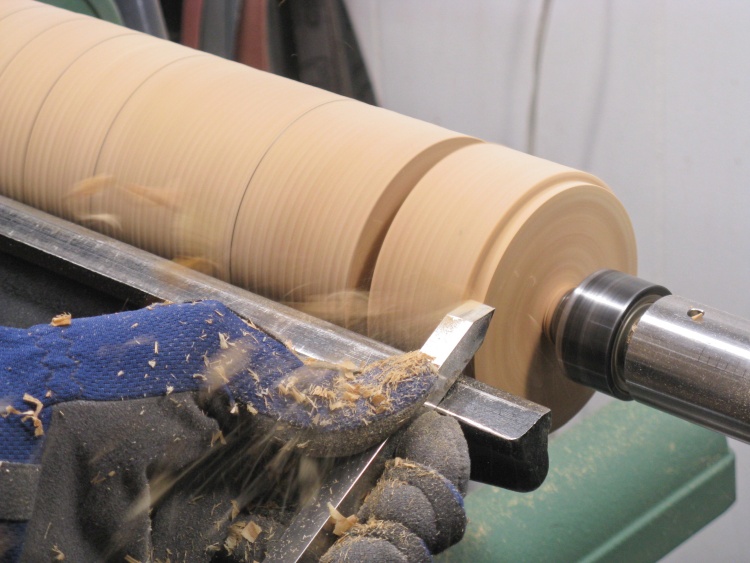
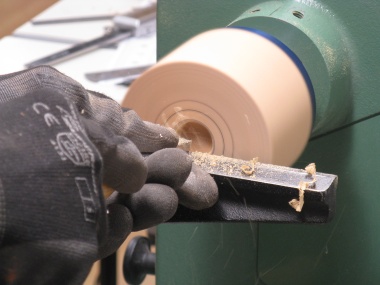
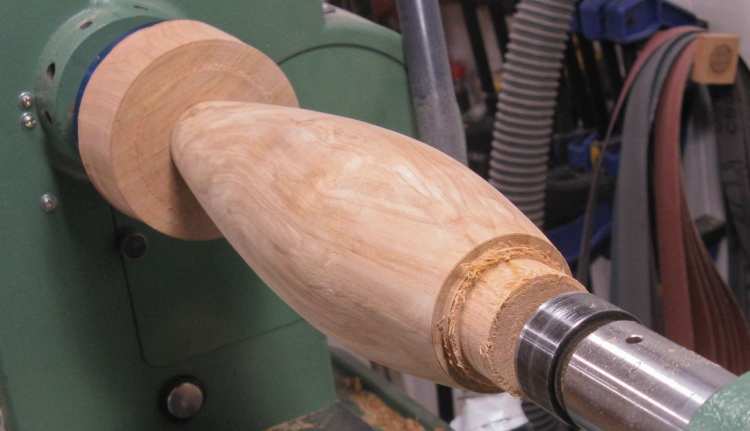
Reducing the end diameter with a thick chisel
Here a biggish chisel is being used to reduce the wood diameter at the top of the vessel.
I stop the lathe periodically and measure the diameter as I get closer to the target until it matches the size shown on the drawing.
I stop the lathe periodically and measure the diameter as I get closer to the target until it matches the size shown on the drawing.
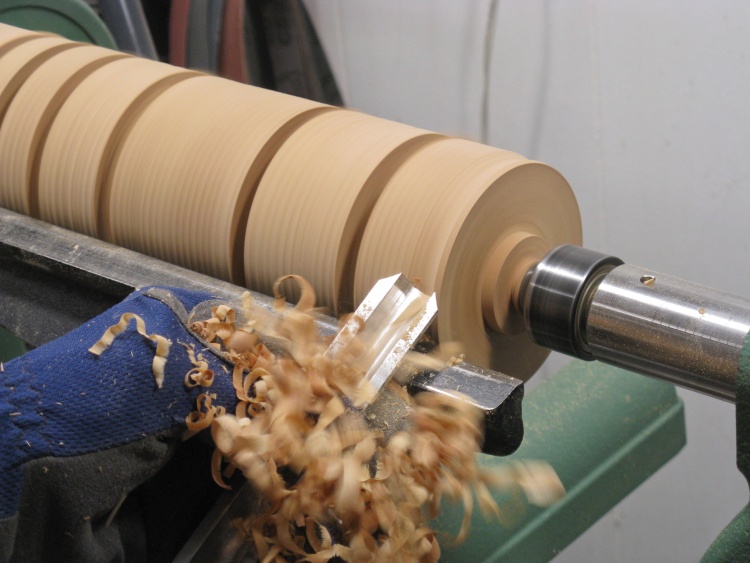
Starting to remove extra wood between slots
Once all the reference diameters were cut to the proper sizes, I started removing the extra wood between the slots.
I began with the roughing gouge as seen here and then switched to a large scraper for the final adjustment and smoothing.
I began with the roughing gouge as seen here and then switched to a large scraper for the final adjustment and smoothing.
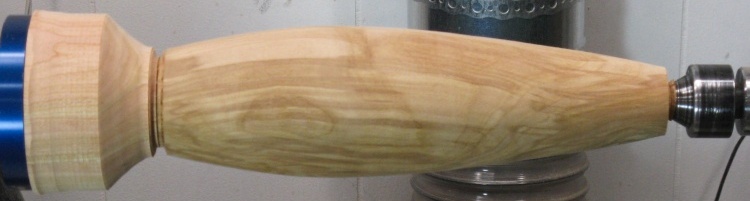
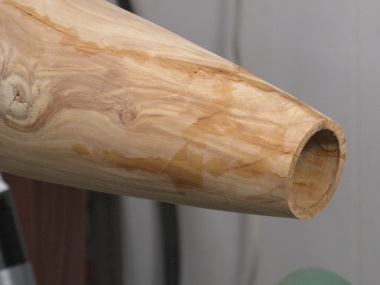
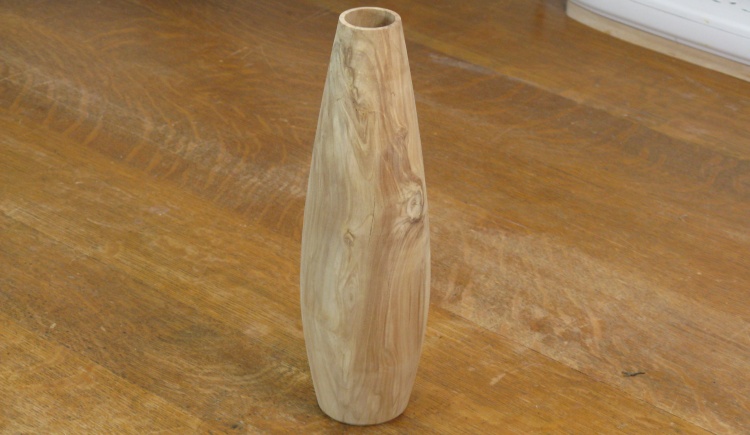
Outside shaping all done
This short little photo shows the finished outside profile of the vessel.
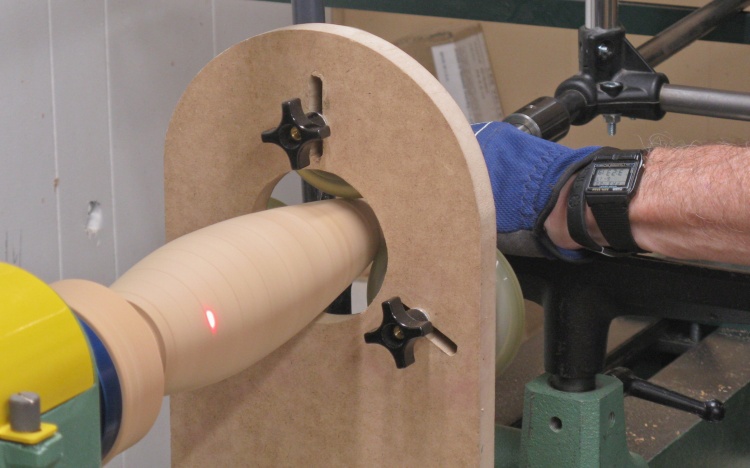
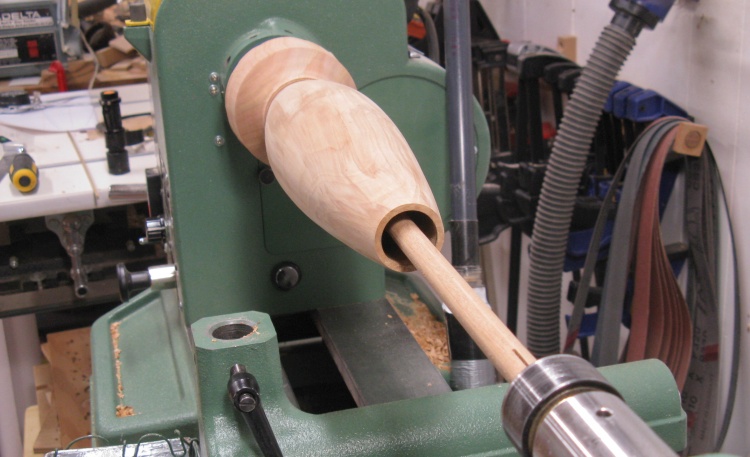
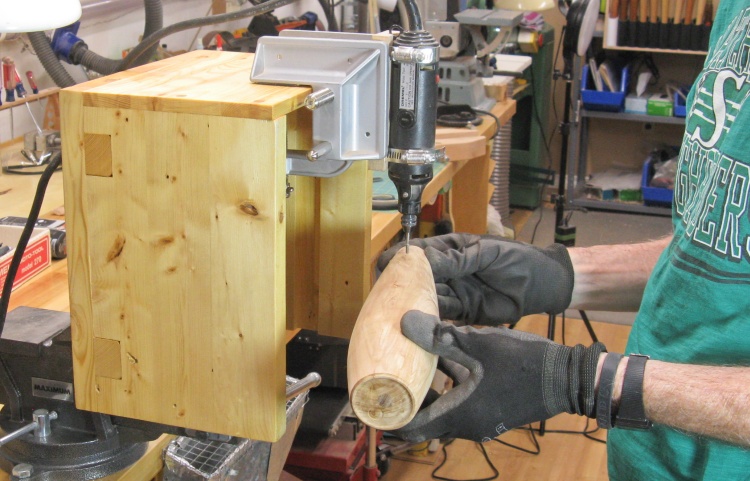
Working on the hollowing
Next step was hollowing.
Between the last photo and this one I've:
1. Added the steady rest,
2. Drilled out the center of the vessel and
3. Started removing the wood inside.
As can be seen from the laser-spot position, the hollowing is mostly done at the time this photo was taken.
Between the last photo and this one I've:
1. Added the steady rest,
2. Drilled out the center of the vessel and
3. Started removing the wood inside.
As can be seen from the laser-spot position, the hollowing is mostly done at the time this photo was taken.
Adding a 1/2" plug
When I got to the bottom I discovered that I'd drilled my depth-setting hole too deep - in fact right through the bottom of the vessel.
I was fairly sure that I had double and maybe triple-checked the drill depth but there was difficult-to-ignore evidence that something went wrong.
So then I needed a plug to fill the hole in the bottom; I used the long 1/2" dowel shown here which was cut 90% of the way through near the end inside the vessel. Then I applied glue to the end of the dowel and pushed it into the hole in the bottom. After the glue was dry, I just twisted the dowel which broke it at the almost-cut-through area near the plug end.

Oops
I tried re-flattening the bottom but for some reason that particular action caused the tool to jump around erratically. Since the mouth of the vessel was so small, contact with the tool shattered the top as seen here.
Fortunately the breakage was fairly clean and I was able to find the three pieces to refill the hole. The repair was simply to replace the pieces as accurately as possible, glue them in place along with the edges of a few additional cracks, and tape it tight until the glue dried. Then I re-turned the end inside and outside to re-smooth the surfaces.
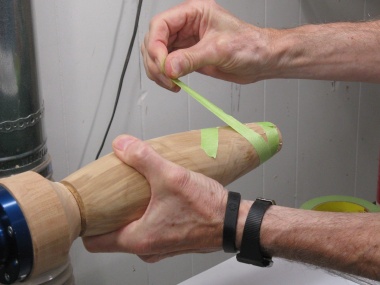
Taping up glued-in pieces
Glue dry

Smoothing the end again
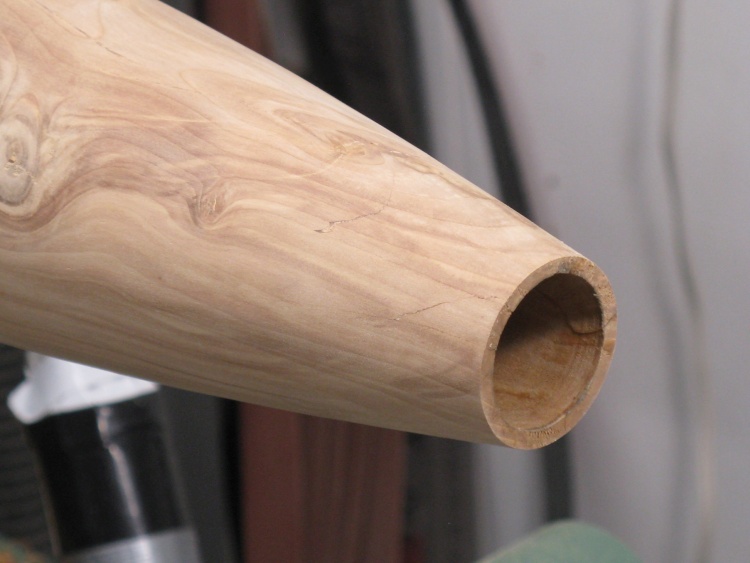
Repaired end
This shows a close-up of the repaired end. Some cracks are visible but they don't look too bad.
Flipped around to work on the bottom
I decided to deal with the uneven bottom after the outside was carved to prevent a repeat of the crackage issue.
So the next step was to finish off the bottom;
- First I reduced the diameter of the extension piece near the vessel and cut it off about an inch from the bottom. Then;
- Made a jam chuck from what was left of the extension piece and;
- Flipped the vessel around.
So the next step was to finish off the bottom;
- First I reduced the diameter of the extension piece near the vessel and cut it off about an inch from the bottom. Then;
- Made a jam chuck from what was left of the extension piece and;
- Flipped the vessel around.
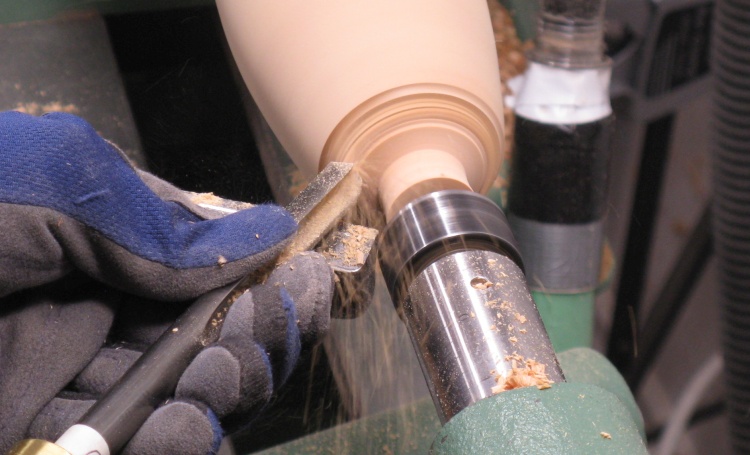
Cutting away extra wood
Then it was a matter of removing the remains of the extension and cutting in a foot.
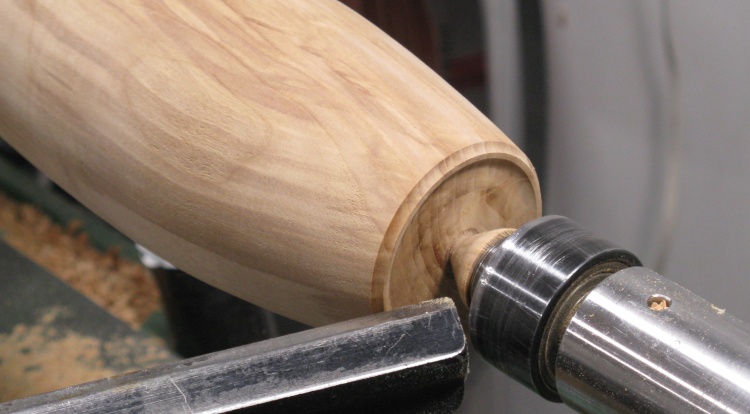
Bottom mostly done
Here the bottom is done except for removing the conical nub that still contacts the live center ("live" meaning it spins with the wood).
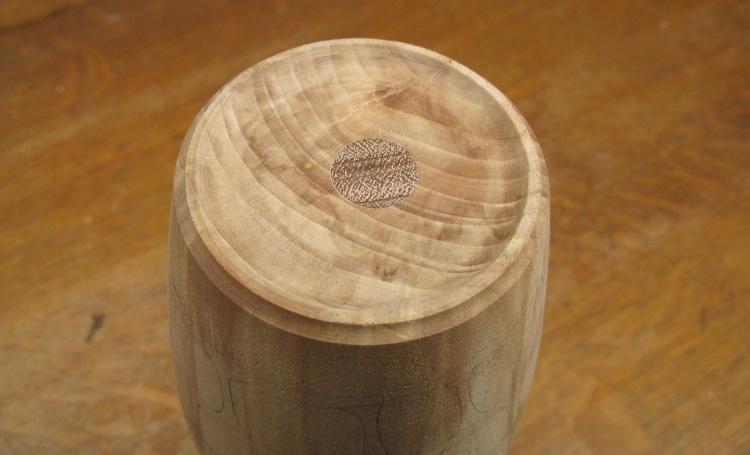
Completed bottom with patch rather obvious
Some grinding and sanding work with the Dremel removed the nub and this shows the completed bottom, including the pretty-darned-obvious 1/2" plug.
Also evident is the fact that the plug isn't very well centered. That's actually pretty typical when drilling a long hole with a twist drill (around 10" in this case); the bit deviates off-center due to the wood grain and/or density and/or just because it's ornery.
Also evident is the fact that the plug isn't very well centered. That's actually pretty typical when drilling a long hole with a twist drill (around 10" in this case); the bit deviates off-center due to the wood grain and/or density and/or just because it's ornery.
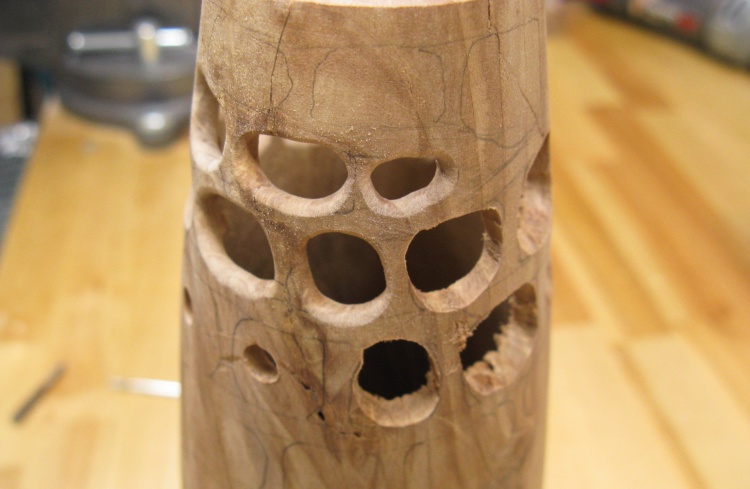
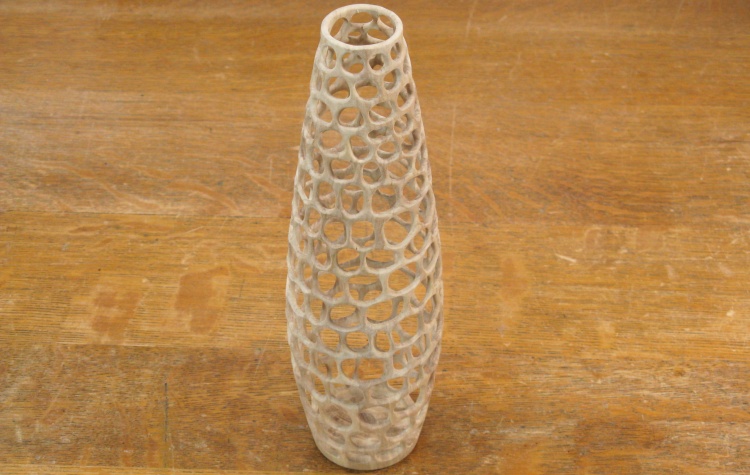
The basic vessel ready for some holes
So that completes the vessel body.
Perforating

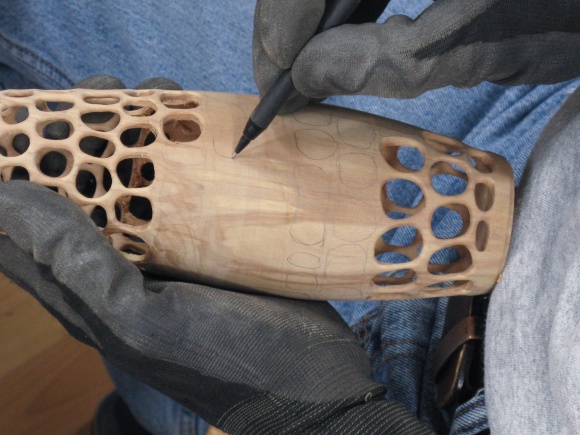
Marking rows on the vessel
I pencilled on a rough pattern guide by hand that was generally a spiral up the vessel. I didn't need to make it particularly consistent since the design was intended to be somewhat irregular.
This was taken on June 23, a Rider game day. But a sad game day since Montreal won 37 - 13.
This was taken on June 23, a Rider game day. But a sad game day since Montreal won 37 - 13.
Rows marked
With the spiral in place, I marked the top few rows with "cells" of various widths to give me enough to try out carving techniques.
Starting the openings with 3/16" drill
I started the holes by drilling a 3/16" pilot hole with a brad-point bit. Fortunately there was very little splintering on the inside so I didn't need to take any special anti-splinter measures which simplified the hole drilling.

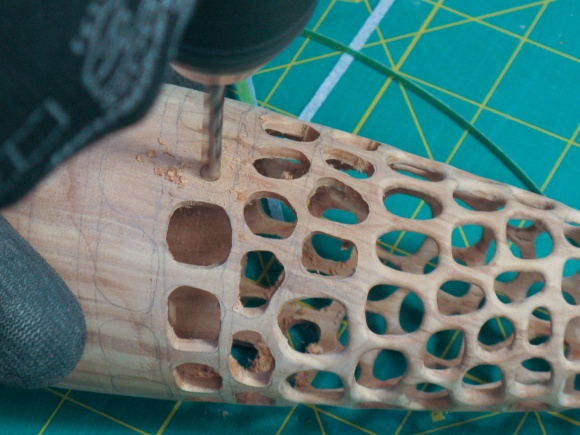
Roto-Zip bit used for enlarging holes
To expand the holes to their finished size, I tried a few different bits and settled on this 1/8" spiral bit from a roto-zip (although I used it in a Dremel rotary tool).
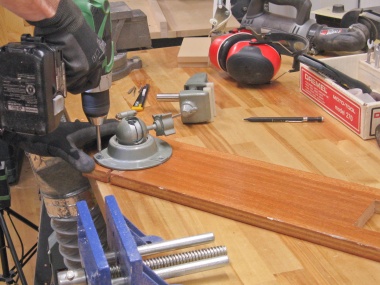
Enlarging one of the holes
I kludged together a suitable setup using the bench vise holding a wooden step with another right-angle vise clamped on to hold the Dremel. This assemblage served to put the work at a convenient height and angle.
Here I'm enlarging one of the drill holes near the top of the vessel.
Here I'm enlarging one of the drill holes near the top of the vessel.
A selection of drilled, enlarged and sanded holes
This photo shows holes in a variety of completion stages, from marked to drilled to enlarged to sanded.
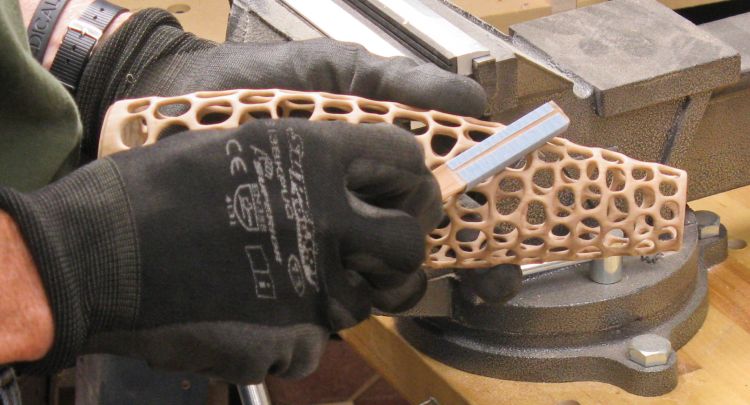
Trying out the hole sanding
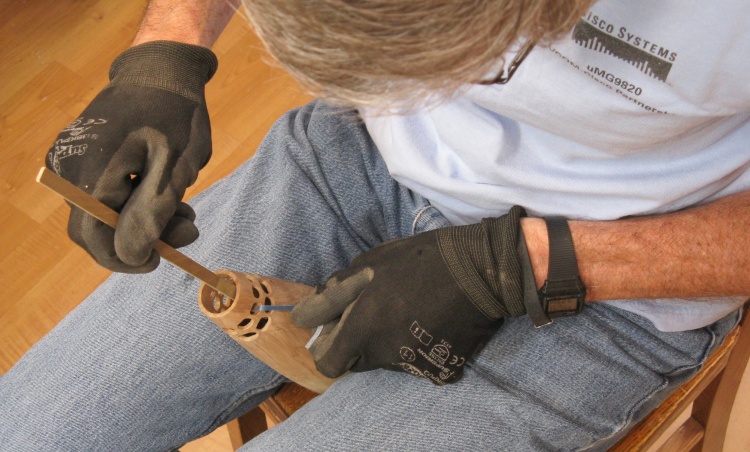
The sanding was done using thin strips of 150-grit sandpaper. For the first holes, one end of the strip was taped to the end of a thin stick which allowed the bottom of the holes to be sanded.
I initially tried holding the vessel between my legs and leaning over to get a close view of the sanding as seen in this shot. However after one short session of that, it was obvious I needed a better method if I wanted to be able to walk after finishing the vessel.
I initially tried holding the vessel between my legs and leaning over to get a close view of the sanding as seen in this shot. However after one short session of that, it was obvious I needed a better method if I wanted to be able to walk after finishing the vessel.
So then it was Jig Time; I needed to be able to hold the vessel that would become increasingly fragile up near eye level and be easily able to move and rotate it to work on various parts.
To address the fragile part I decided to use insulation foam (R-5 for you trivia buffs) to make a cradle so it would be supported with soft material at many points. I used another type of foam (remnants of a camping sleeping pad if memory serves) to make nice soft straps to hold the vessel in place. Finally I made a height-adjustable vertical board and attached a spare Pana-vise which allowed me to adjust the height and angle. Below are a few shots of that concept being made physical.
To address the fragile part I decided to use insulation foam (R-5 for you trivia buffs) to make a cradle so it would be supported with soft material at many points. I used another type of foam (remnants of a camping sleeping pad if memory serves) to make nice soft straps to hold the vessel in place. Finally I made a height-adjustable vertical board and attached a spare Pana-vise which allowed me to adjust the height and angle. Below are a few shots of that concept being made physical.
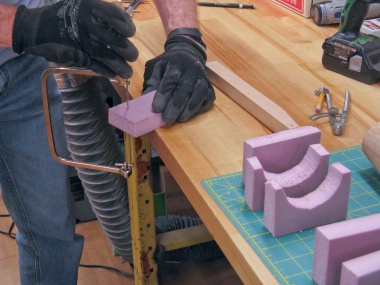
Cutting up a foam piece
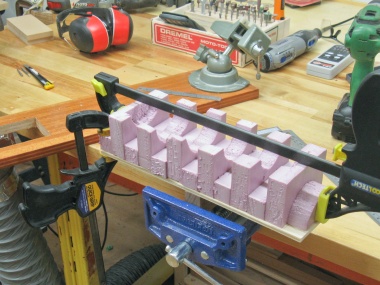
Gluing contoured pieces to backing
Making the stand
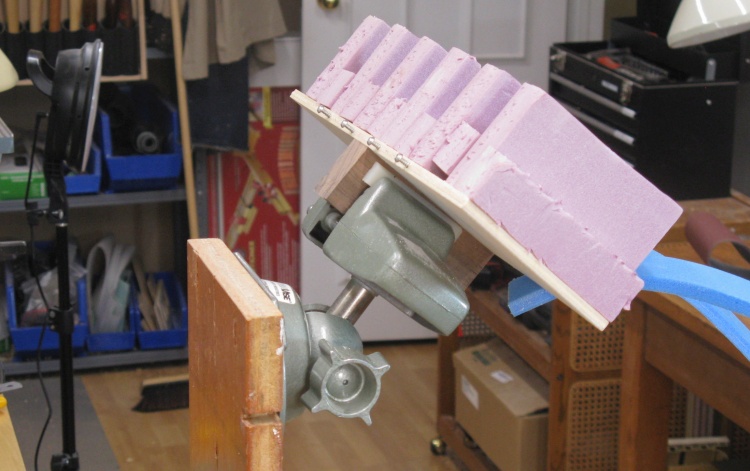
The business end of the positioning jig
This shows the top of the positioning jig after it was all assembled.
I wasn't actually able to find any good adhesive to hold down the foam (contact cement melted it, latex and silicone adhesives didn't stick) but a firm hold wasn't very important so I didn't worry too much about it.
I wasn't actually able to find any good adhesive to hold down the foam (contact cement melted it, latex and silicone adhesives didn't stick) but a firm hold wasn't very important so I didn't worry too much about it.
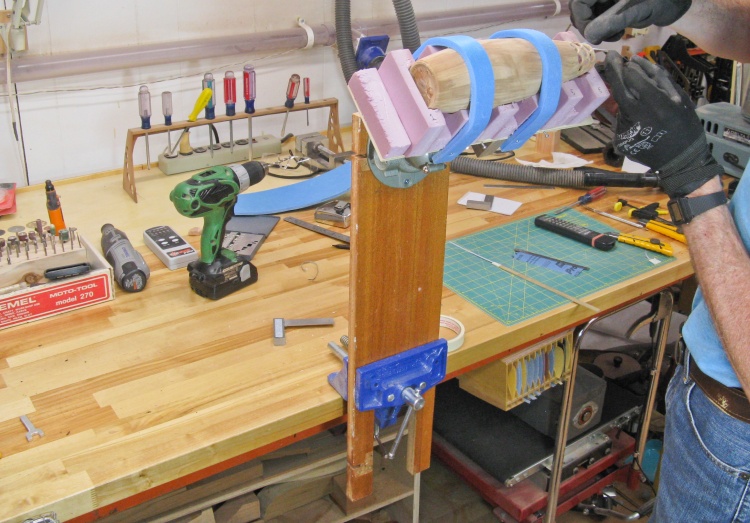
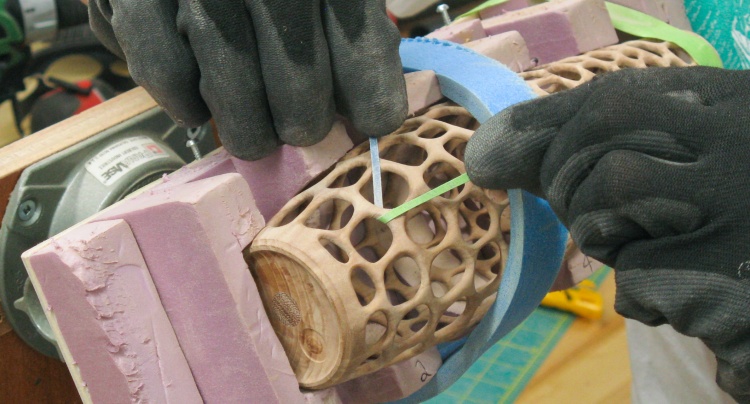
The jig in action
Here the jig has the vessel strapped to it while I do some sanding at a nice standing height. My back was much happier.
I also positioned another lamp on the ceiling to provide a bit more light right where I was working.
I also positioned another lamp on the ceiling to provide a bit more light right where I was working.
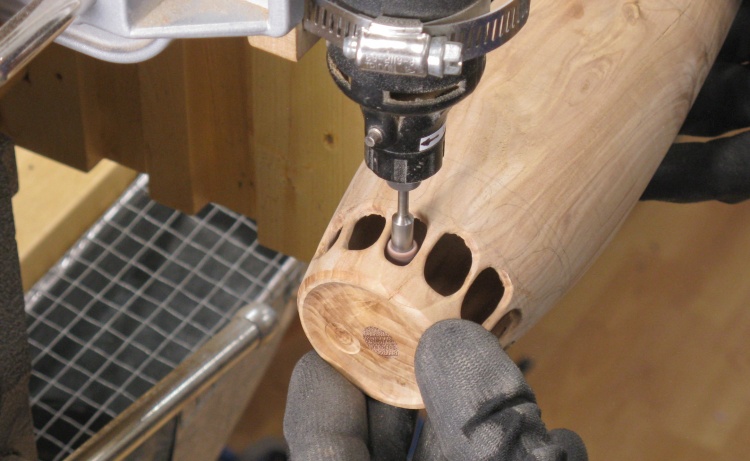
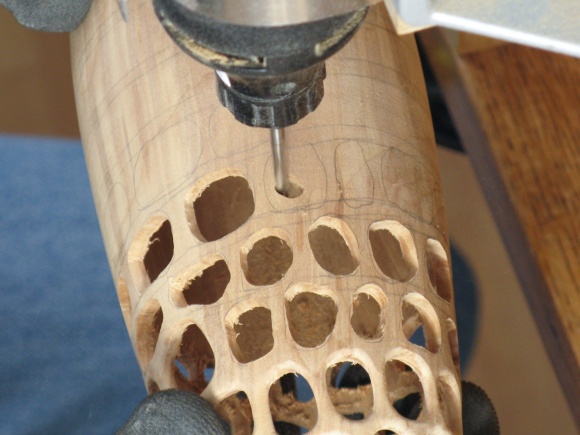
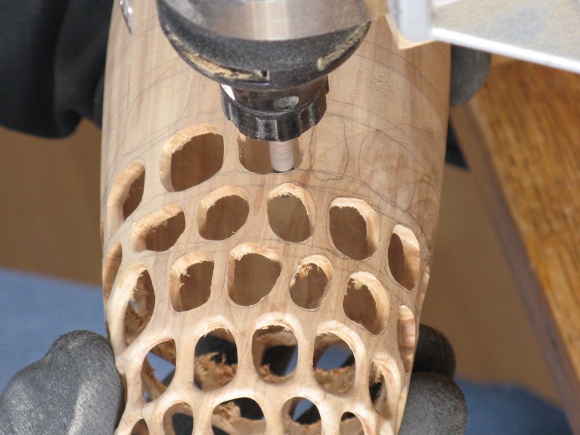
Finally getting around to flattening the bottom
I wanted to address the inside bottom which had been left "unflat" due to the problems encountered trying to smooth it on the lathe. So after forming the first few holes at the top, I switched to making a row of bottom holes to provide access to the inside of the vessel.
Then as shown here, I used a small sanding drum to reach through the holes and smooth out the bottom.
Then as shown here, I used a small sanding drum to reach through the holes and smooth out the bottom.
The technique for forming the holes was eventually refined to what is shown in this montage:
I would use a pencil to draw a couple rows of holes and then;
Drill one or more 3/16" pilot holes in each
The pilot hole was expanded to the marked lines using the spiral Roto-Zip bit;
The edges of the holes were smoothed using a coarse sanding bit;
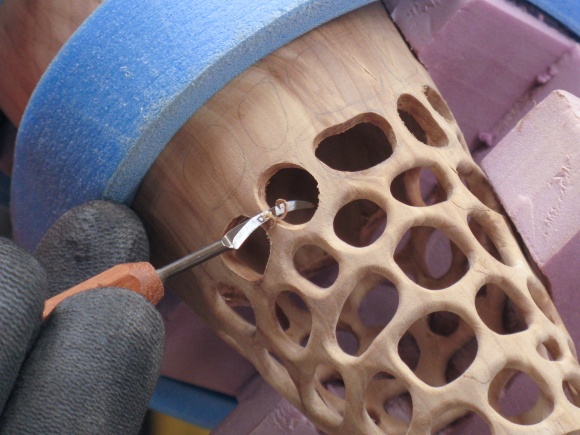
Hole edges were bevelled (so there was less to sand off) using a tiny carving blade and finally;
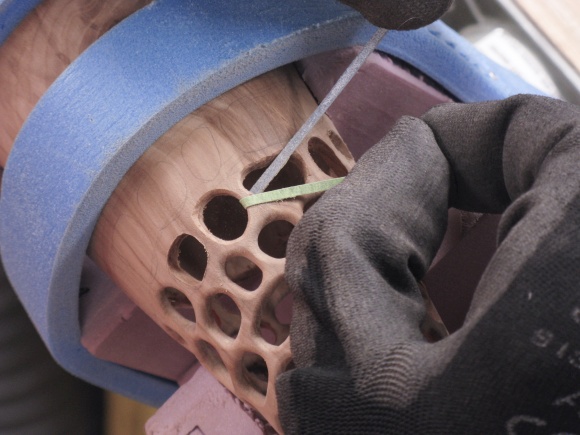
The edges of the hole were sanded to a rounded profile using strips of 150 grit sandpaper.
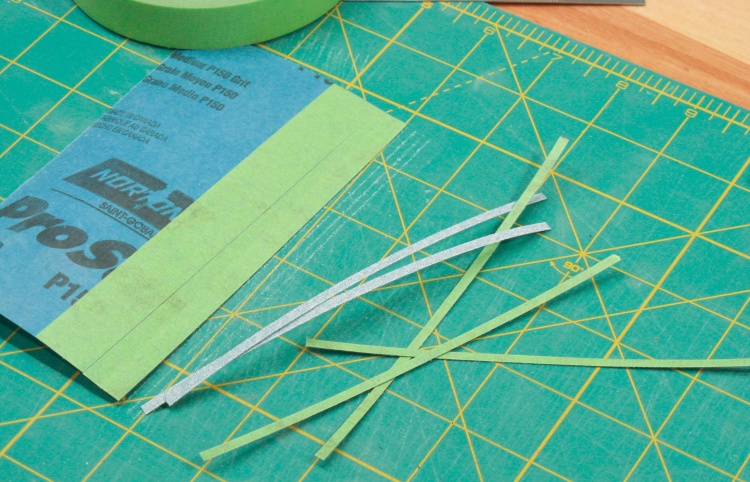
Some strips of reinforced sandpaper ready to go
After hole formation the wood webs between each hole needed to be sanded so that usually meant sanding in half a dozen areas around each hole, which might take two or three strips of sandpaper.
The thin strips of the paper-backed sandpaper I used tended to break before the abrasive wore out so I reinforced the paper backing with a layer of masking tape.
Cloth-backed sandpaper would have been stronger but I had no shortage of masking tape, so I stuck with that technique (yuk, yuk).
The thin strips of the paper-backed sandpaper I used tended to break before the abrasive wore out so I reinforced the paper backing with a layer of masking tape.
Cloth-backed sandpaper would have been stronger but I had no shortage of masking tape, so I stuck with that technique (yuk, yuk).

Drawing on some more holes
And then it was just a matter of working around the vessel.
In this shot I'm around half done and sketching on another set of hole shapes.
In this shot I'm around half done and sketching on another set of hole shapes.
It was a fairly busy summer so I was outside a lot and only worked sporadically on the vessel; maybe half an hour to an hour a day. Its fabrication stretched over some holidays where we stayed in a variety of hotel rooms. Why do they almost never have a towel rack for the hand towel in the bathroom? You end up having to just throw it on the vanity. Of course that lack is better than design ineptitudes like having the bathroom sink outside the bathroom or having a "barn door" on the bathroom. One otherwise-reasonable room (except for the lack of a hand towel rack, of course) had an "electric mirror" in the bathroom which consisted of a small TV screen embedded in the mirror with an associated remote control. One assumes the idea is that you would sit in the soaker tub with your head cranked to the side watching a tiny TV while you soaked. Bliss!
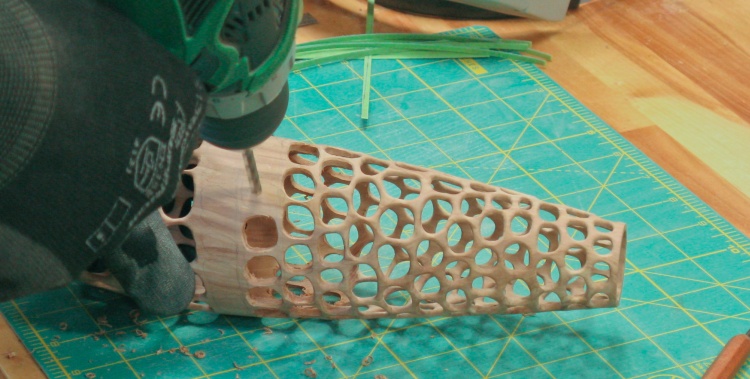
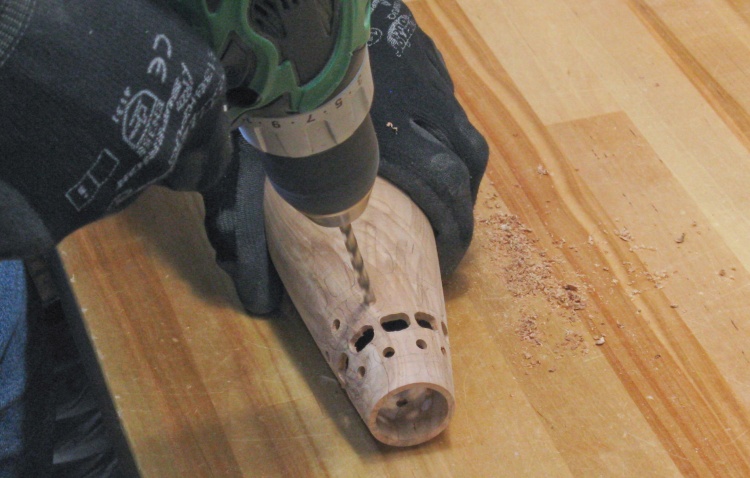
Drilling some of the last few holes
I'm down to the last couple of rows in this shot.
Holes and sanding done. Well, first stage anyway.
And finally all the holes were in place and sanded. This shot was taken a bit over 2 months after the first holes were made.
Of course it had been sanded with 150 grit which is fine for roughing up an old fence before repainting, but that wasn't going to cut it on a small object with features measured in millimeters.
Of course it had been sanded with 150 grit which is fine for roughing up an old fence before repainting, but that wasn't going to cut it on a small object with features measured in millimeters.
Starting out on second stage of sanding
I didn't want to do this too many more times, so I jumped directly to 320 grit and went over all the surfaces with the strips as shown in this shot. It was still a bit laborious, but quite a bit faster than the first go around.
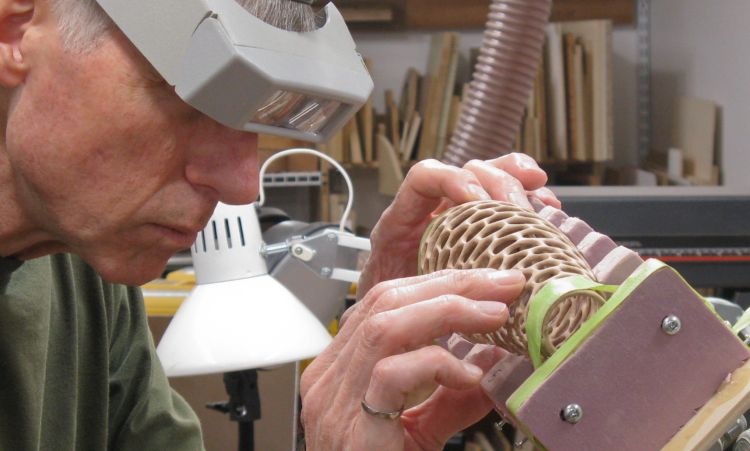
Rigorous QA inspection
Once I was done resanding all the hole edges it was time to call in the QA team. And good thing I did. This shot shows one of them carefully checking things over for problems.
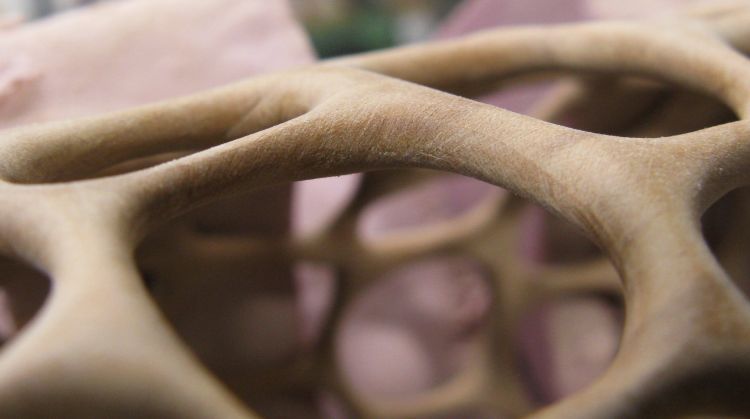
Sloppy, sloppy, sloppy
...like this travesty of inept sanding.
Sanded smooth
Any problems that were found (many dozens) were re-re-sanded. The above scratch looked like this after the treatment.
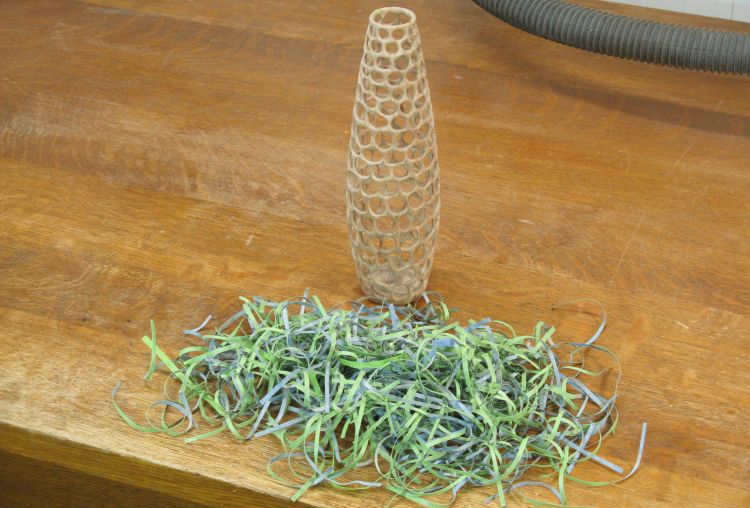
The vessel and the strips that made it
Eventually everything looked good. Here the vessel sits behind the carefully preserved* pile of used sanding strips.
*In the garbage can, from where they were retrieved for their much-less-than-15-minutes worth of fame.
*In the garbage can, from where they were retrieved for their much-less-than-15-minutes worth of fame.
A final surface sanding to smooth the outside
The surface received a final going-over with 320 grit, which took way, way less time then any of the other sanding stages.
Woodworking done
And that was it for the woodworking.
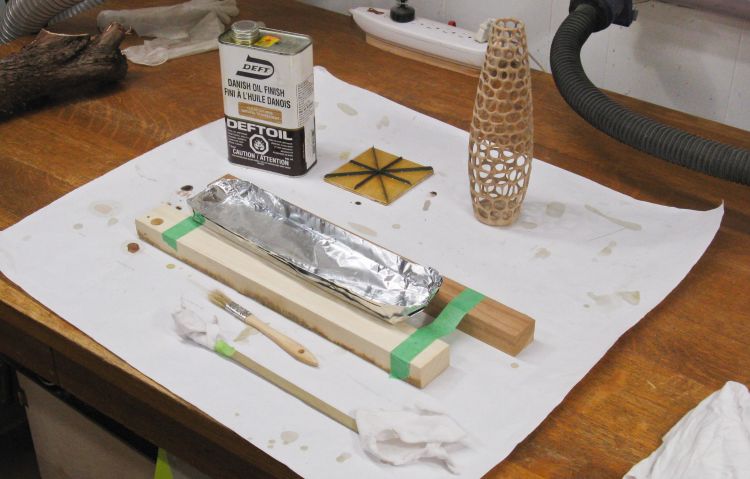
Setup used to immerse the vessel for finishing
I decided to use Danish Oil as a finish since my default varnish would require roughing up the surface between coats (including the inside of 198 holes) which I thought would be nice to avoid.
Each coat of the Danish Oil just goes on heavily and soaks in for 1/2 hour or so before being wiped off - no roughening required. To ensure that every part of the surface was covered, I planned to immerse the sides in a shallow puddle of the finish.
Each coat of the Danish Oil just goes on heavily and soaks in for 1/2 hour or so before being wiped off - no roughening required. To ensure that every part of the surface was covered, I planned to immerse the sides in a shallow puddle of the finish.

Starting the dip process
In this shot I'm rotating the vessel so the entire periphery gets immersed. The two faces of the vessel's bottom were just coated using a finish-impregnated cloth.

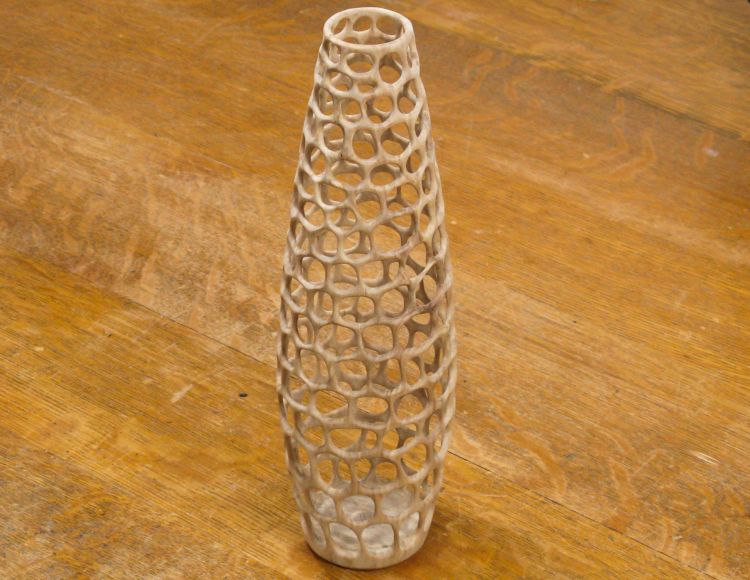
First coat of finish has darkened the wood nicely
After a few dips the excess finish was wiped off using a soft cloth. This is the vessel after the first coat.
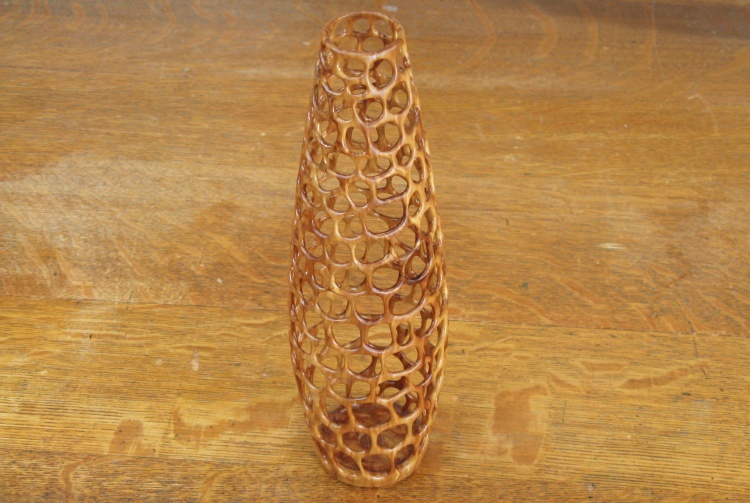
Done
Complete.


