I was thinking about turned vessels and for some reason a tower with an impractical exterior staircase came to mind. I'm not sure if an external staircase like this one ever existed in reality, but it is not unheard of as a tension-building device in fiction novels.
When looking for some tower examples, I came across photos of one in Massaret France which had an intriguing sub-tower at the top, which I have dubbed the annex. This seemed like an ideal destination for the scary staircase, so it was incorporated into the design.
When looking for some tower examples, I came across photos of one in Massaret France which had an intriguing sub-tower at the top, which I have dubbed the annex. This seemed like an ideal destination for the scary staircase, so it was incorporated into the design.
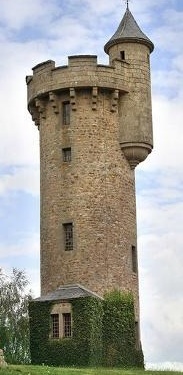
Massaret tower
Interestingly, the image of the impenetrable medieval defensive citadel that the Massaret tower projects is rather tarnished by the fact that it was actually built in the mid-20th century to house a water tower. However it's still way cooler than your average water tower (Wilikie) but only slightly cooler than the rather interesting Weyburn water tower.
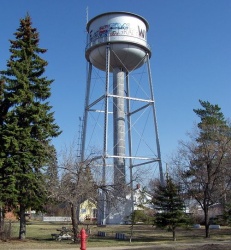
Wilkie
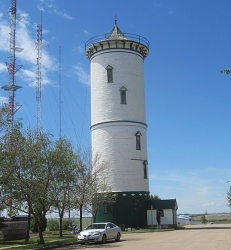
Weyburn
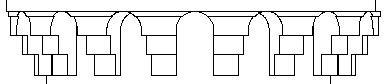
The tower turning is 1/64 scale, so a full-sized tower carved out of a really really large walnut log would be 16' in diameter and a bit over 80' tall at the peak. The staircase would be a not-very-generous 24" wide with about 7"-high steps.
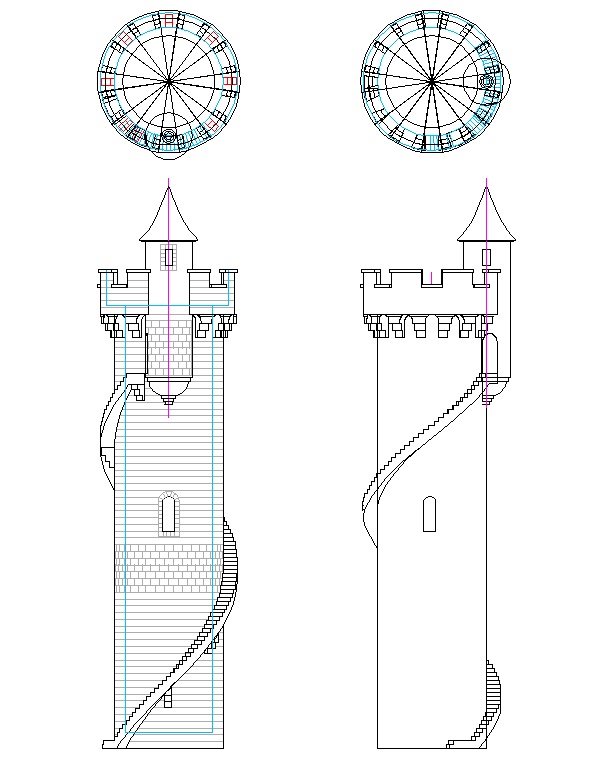
The plan
Stairway Check
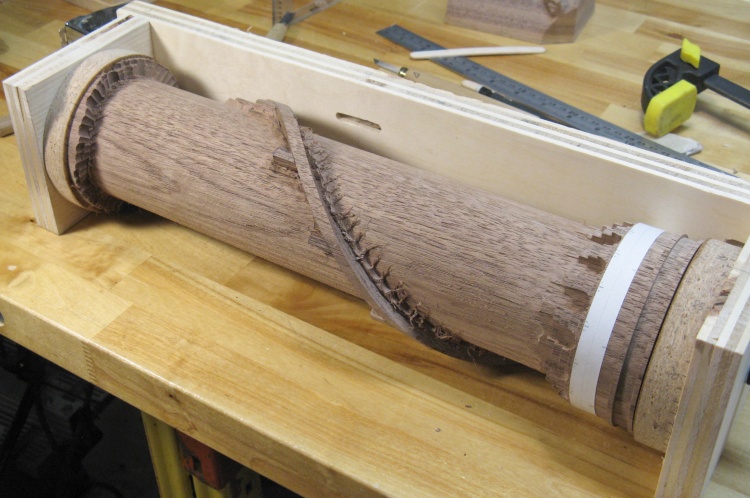
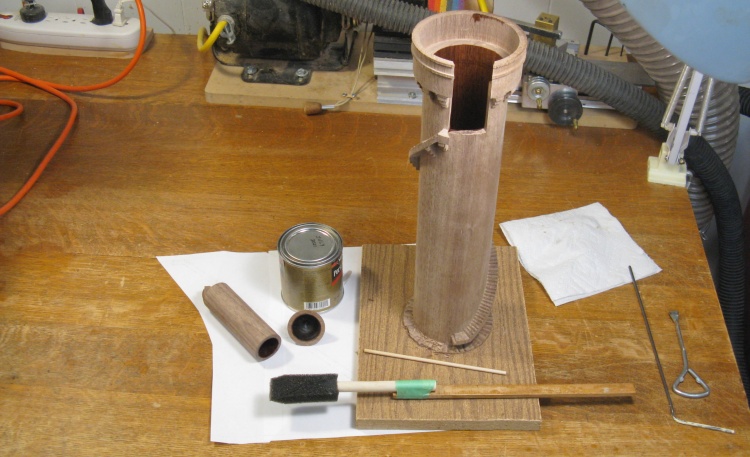
A little piece of tower to practise on
I wasn't too sure about the feasibility of carving the winding external staircase so I thought I'd try that out first.
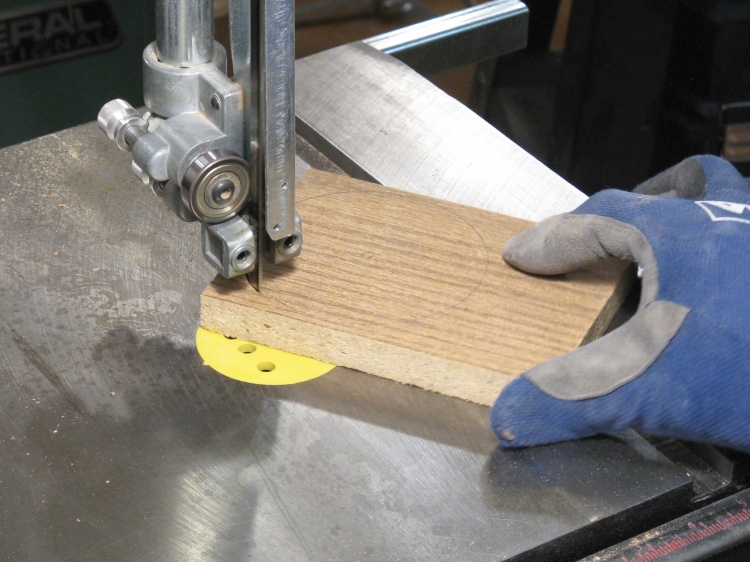
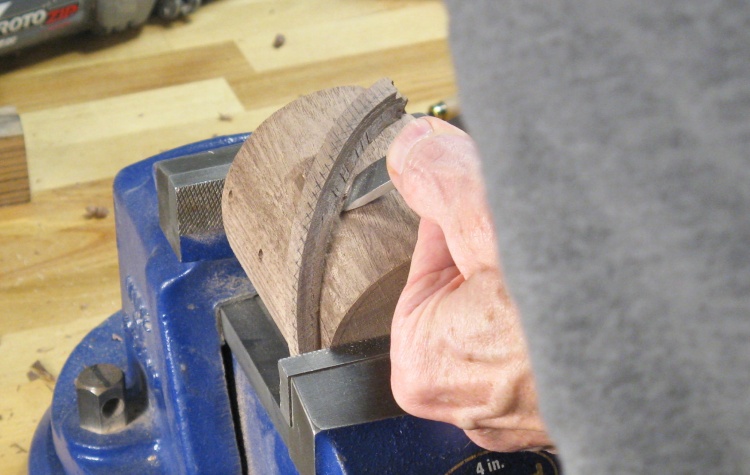
I started with this re-used piece of walnut that I taped to a block for convenient handling and then cut to the diameter I planned to use.
I started with this re-used piece of walnut that I taped to a block for convenient handling and then cut to the diameter I planned to use.
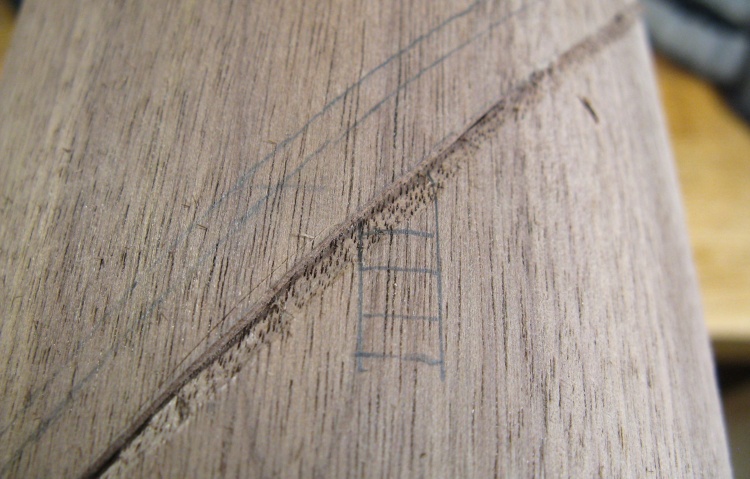
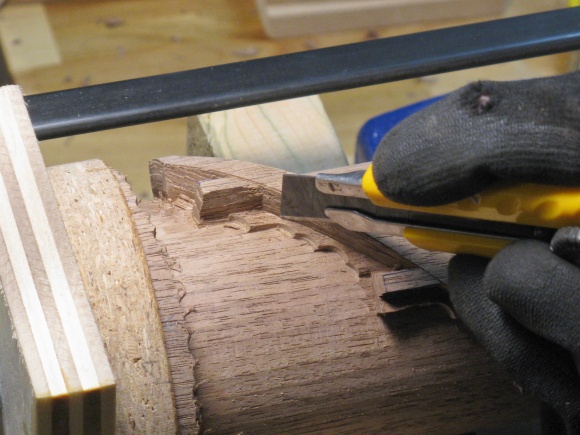
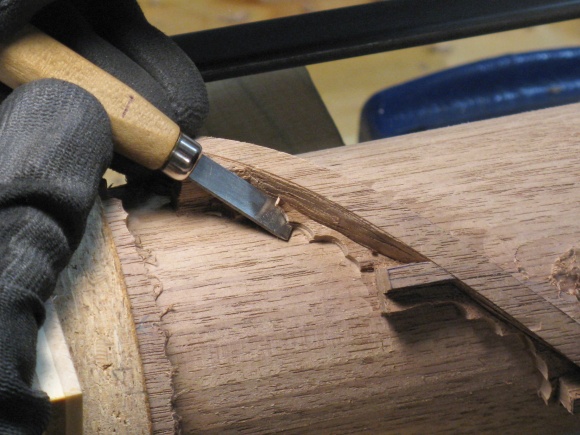
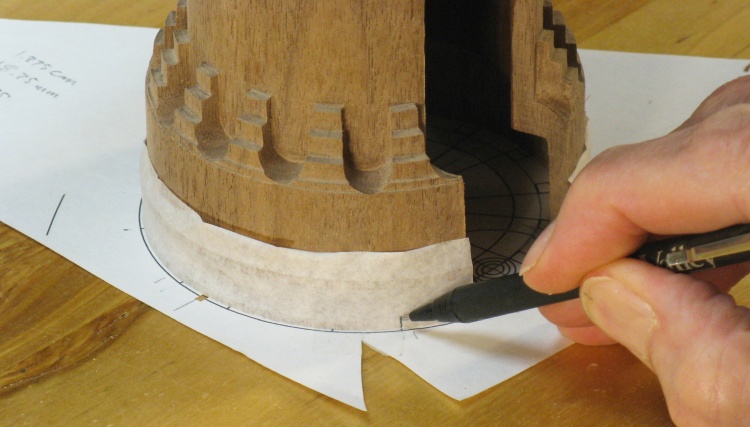
Starting to outline the staircase
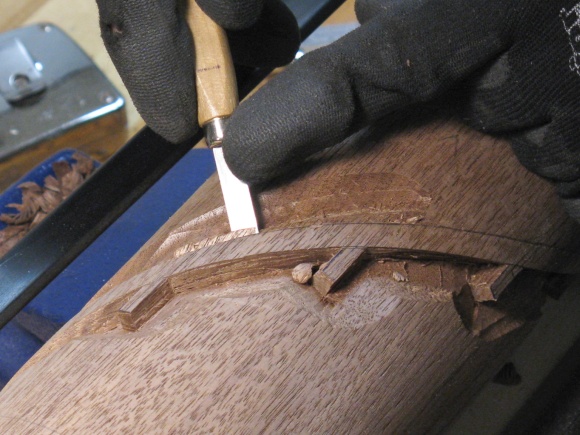
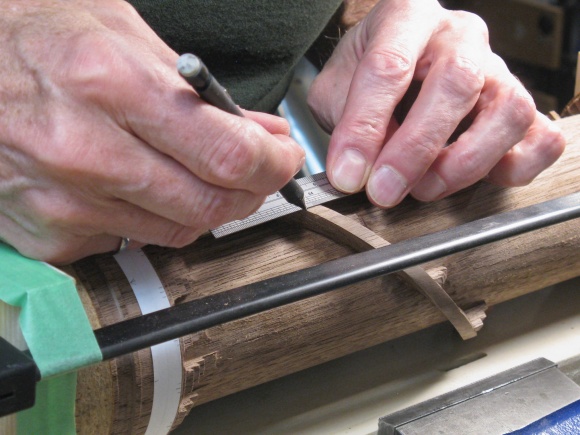
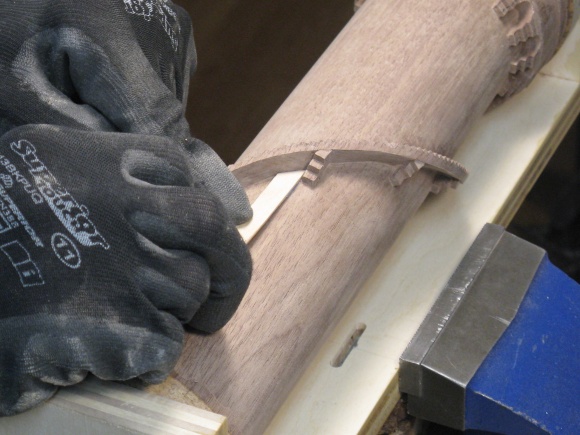
Here the staircase outline has been marked and I'm starting to work on the edge, which will eventually be carved to about 1/3" deep.
The plan is to define the edges of the staircase and buttresses with hand carving, then route away the rest of the wood.
The plan is to define the edges of the staircase and buttresses with hand carving, then route away the rest of the wood.
----- Jig Break -----
But to do the routing, I was going to need a jig to hold the ends of the tower so a layer of wood could be routed off down the tower side. Then the tower could be rotated on the jig, another line routed and so on all the way around. The shots below show a few of the jig frame fabrication steps:
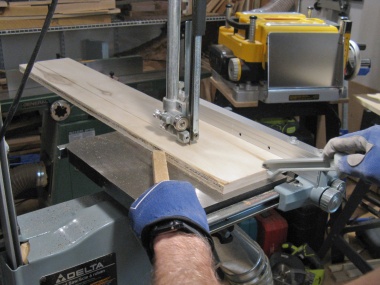
Ripping the back piece for the jig
Cutting back piece to length
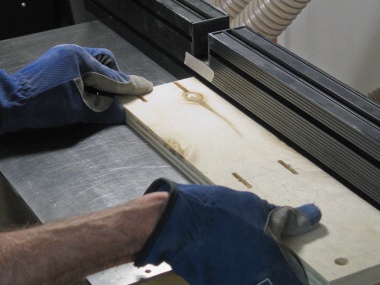
Routing in some screw slots
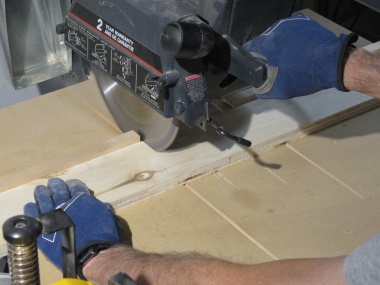
Cutting one of the end pieces
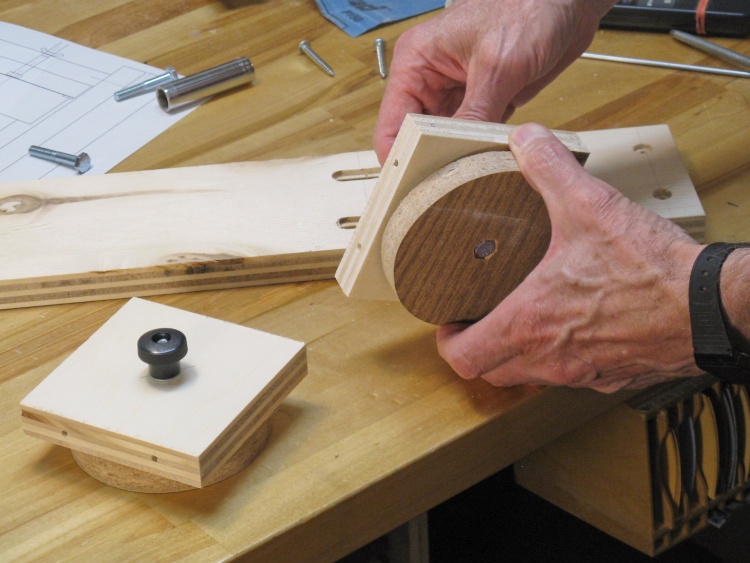
The tower would be taped to circular end pieces which could rotate in the jig. Here one of them is being cut from a cheesy particleboard shelf piece.
Assembling the routing jig
The jig is going together here as I attach one of the circular pieces to an end wall.
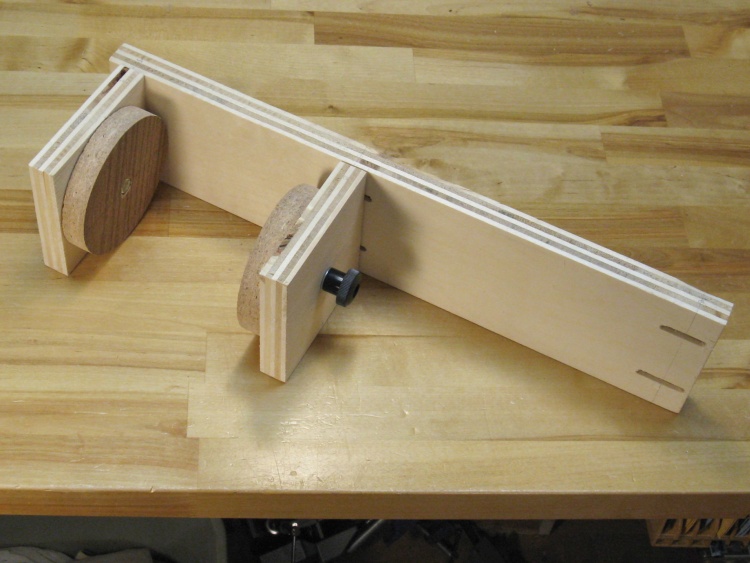
Fully-assembled jig
This is the fully-assembled jig. The right-side wall is in the position to accommodate my short little test piece, while the full length will be used for the actual tower if this all works out.
----- OK - Back At 'Er -----
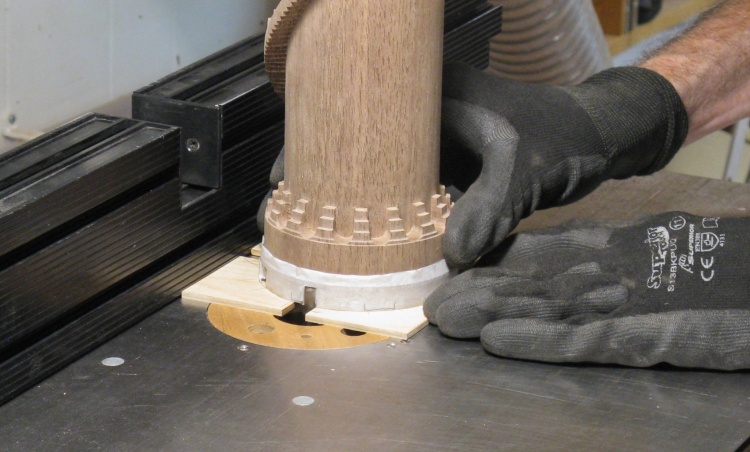
Routing sides up to staircase
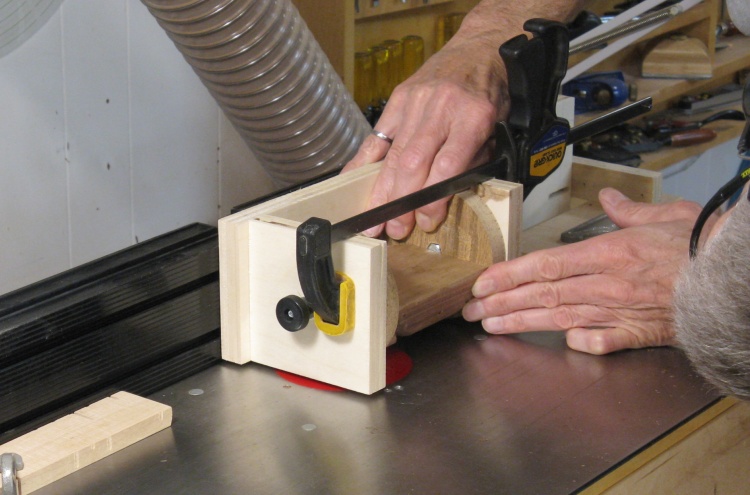
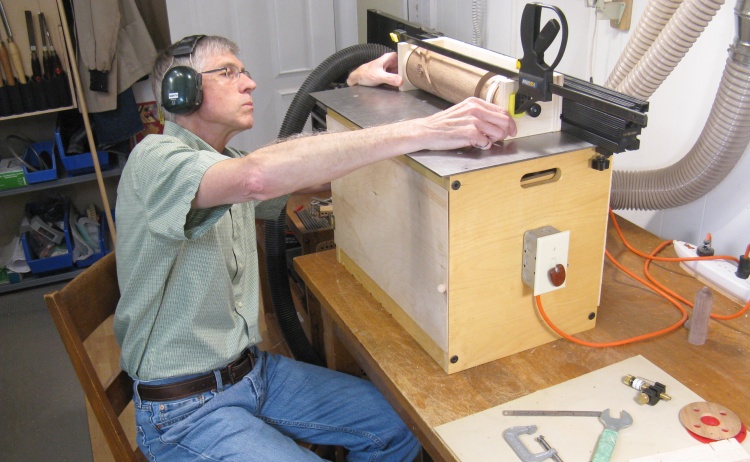
In this shot the test piece has been mounted to the jig using double-sided tape (which was clamped for a firmer hold). The router bit is set to take a small amount of wood off the bottom of the test piece when the jig is slid over the bit.
Of course this must be carefully done so just the ends are cut but not the carved staircase and butresses near the middle (hence my peering-underneath posture).
Once a cut was made, the test piece was rotated a bit and another cut taken. When done all the way across the face, the router bit was positioned a bit higher and the process repeated. It took four or five rounds to cut off the necessary amount of wood.
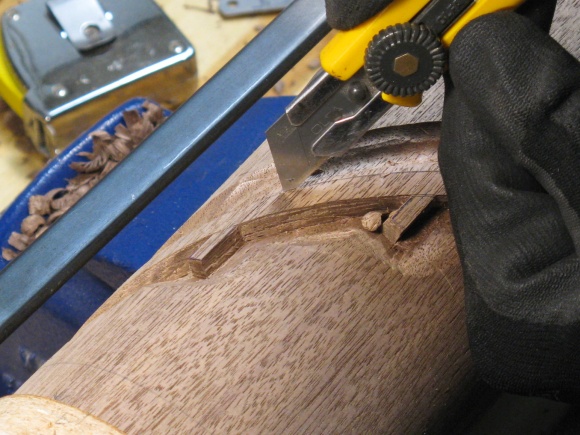
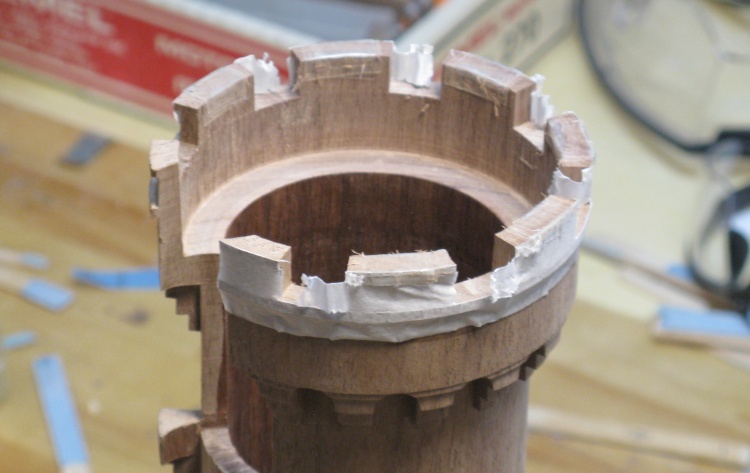
Cleaning up the staircase edges
The routing operation went reasonably well so the test piece was dismounted and put back in the bench vise so I could clean up the corners where I feared to let the router bit tread.
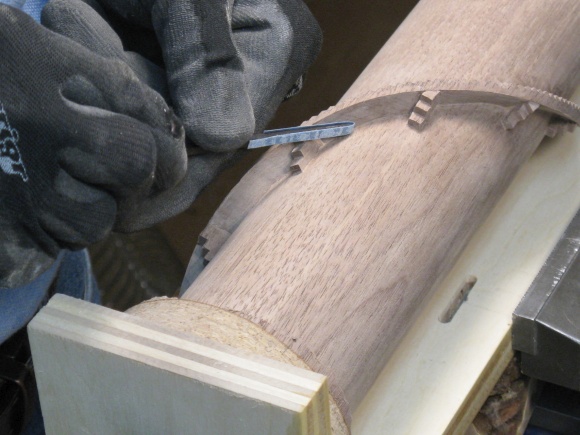
In this shot I've already marked the steps on the staircase side in preparation for carving.
In this shot I've already marked the steps on the staircase side in preparation for carving.
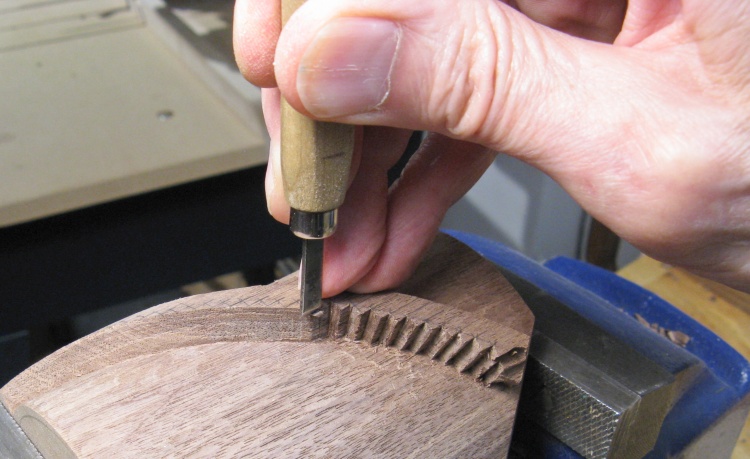
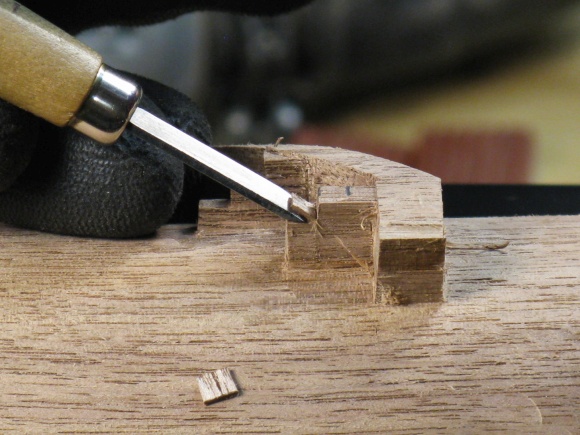
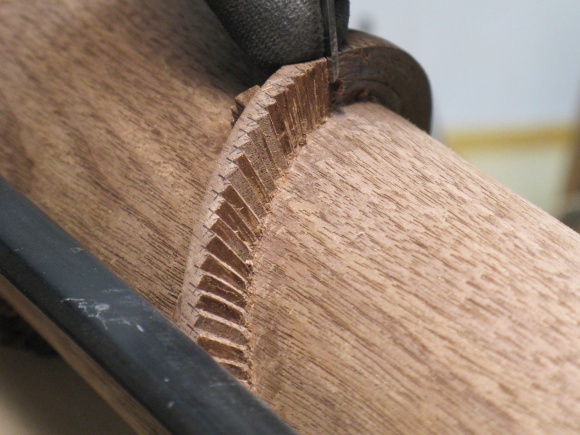
Carving the stairs
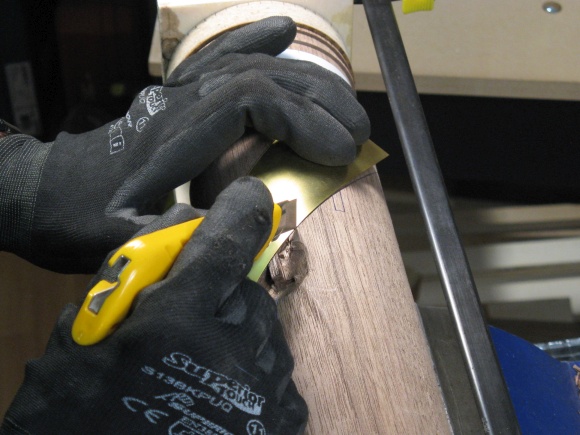
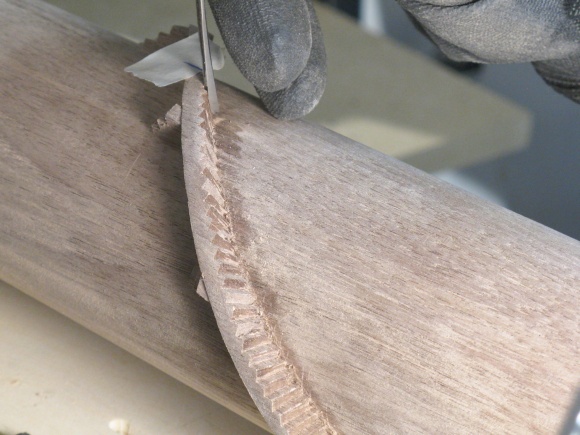
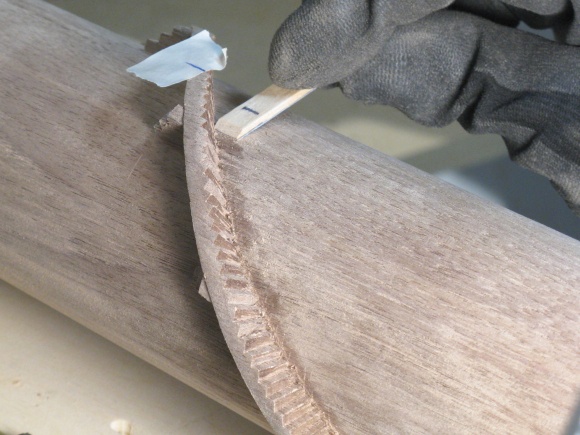
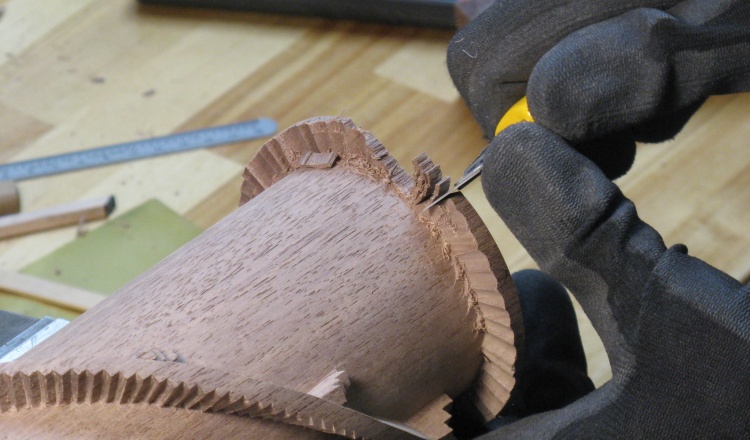
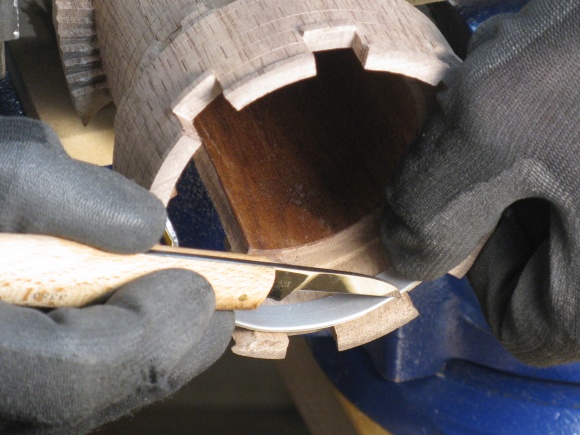
Finally I carved out the staircase using a combination of utility knife and small chisel.
The utility knife was used to cut the fibers along the top of the step and then in this shot I'm taking a slice off a stair riser.
The utility knife was used to cut the fibers along the top of the step and then in this shot I'm taking a slice off a stair riser.
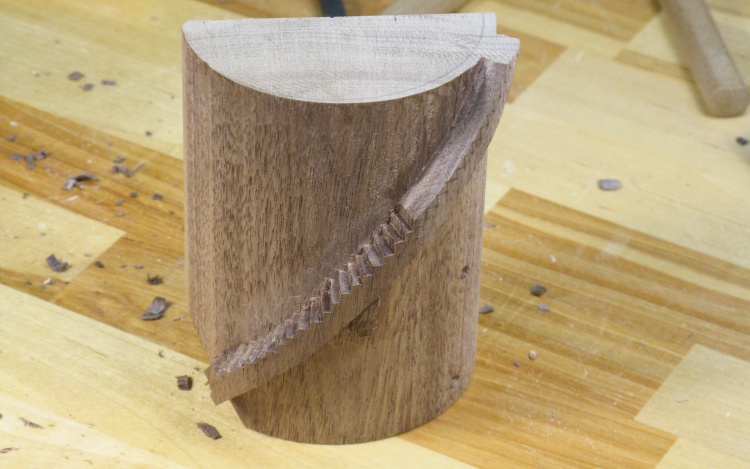
Looks like that's gonna work
The routing and stair carving seemed to work out fine so the proof-of-concept could be declared a success. On to the real thing!
Annex
A small blank for the annex body
I thought I'd start with the little side tower that I dubbed the annex.
I wanted it to be hollow to avoid upsetting the balance of the main tower too much. So I made it in two pieces - body and roof - to be able to access the centers for hollowing.
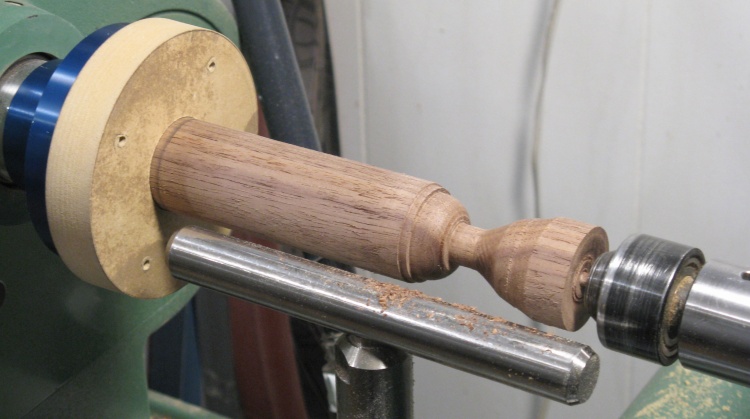
In this shot I have a little walnut blank on the lathe ready to start turning into the body portion.
I wanted it to be hollow to avoid upsetting the balance of the main tower too much. So I made it in two pieces - body and roof - to be able to access the centers for hollowing.
In this shot I have a little walnut blank on the lathe ready to start turning into the body portion.
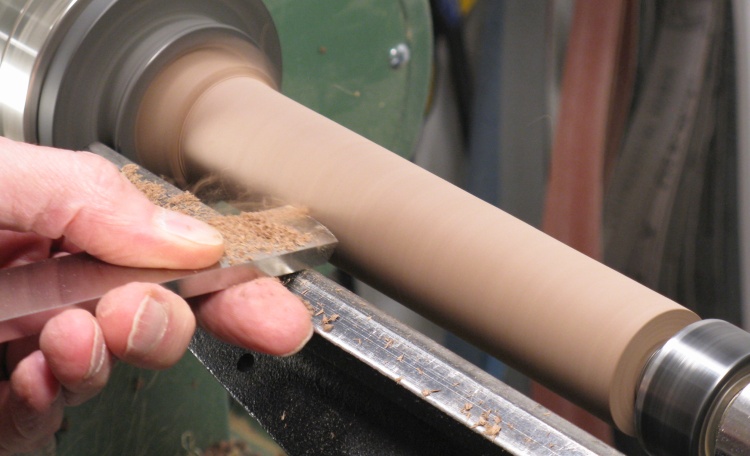
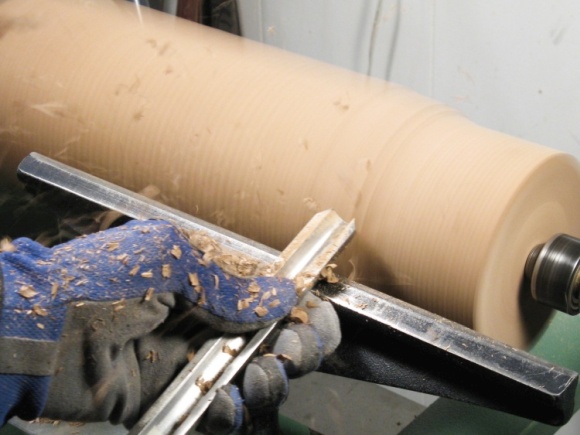
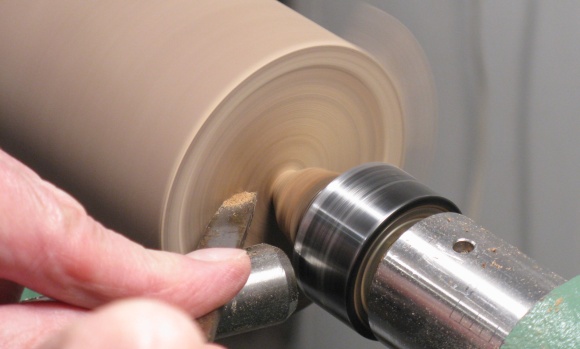
Smoothing the surface
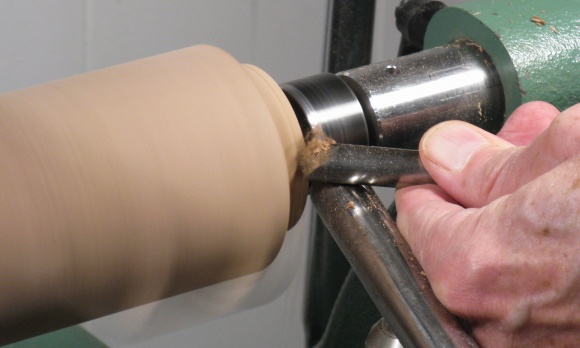
It was first rounded off with a roughing gouge and then the surface was smoothed with a large scraper as seen here.

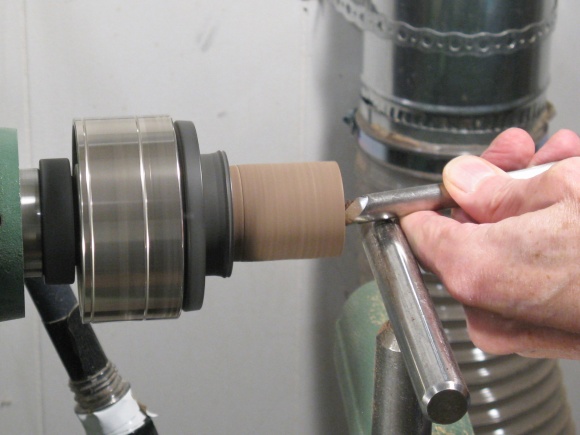
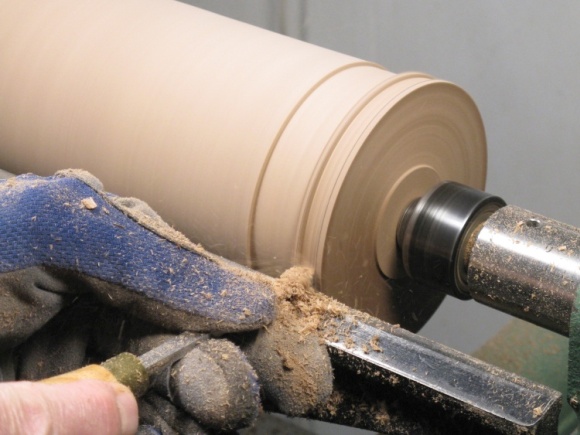
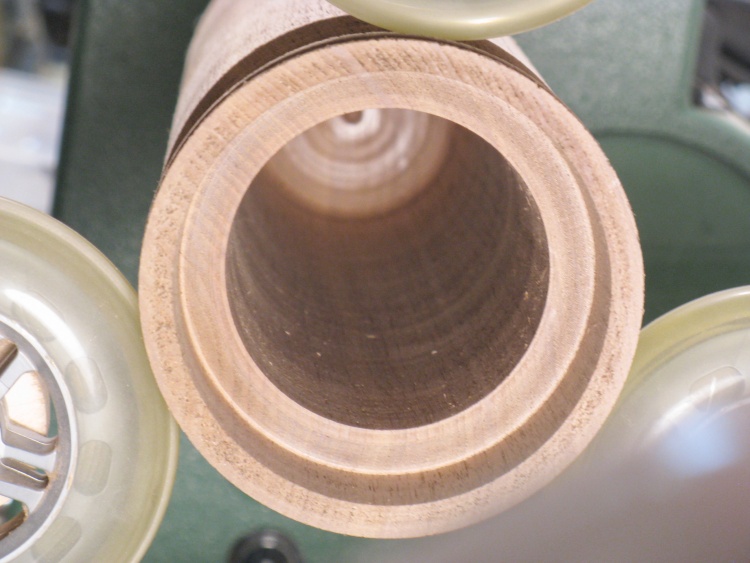
Hollowing out the annex body
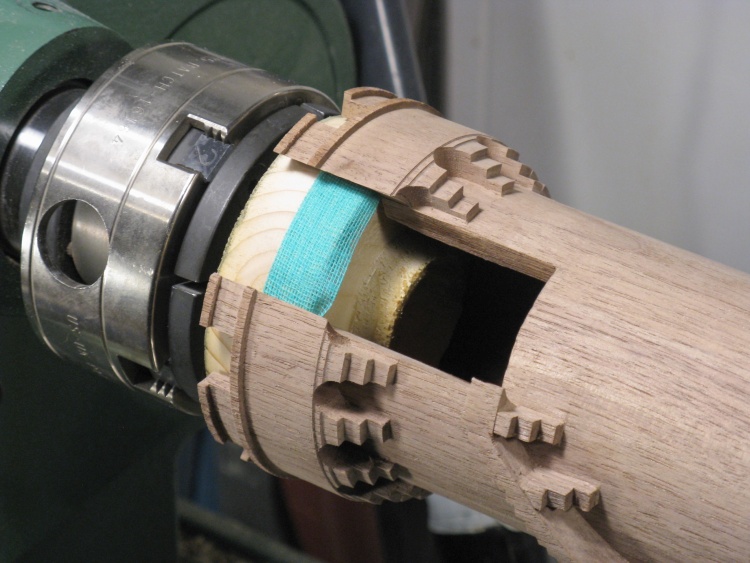
The steady rest and hollowing tool were deployed to hollow out the body. In this shot I'm almost to the bottom, indicated by the laser dot nearly at the penciled-on bottom line.
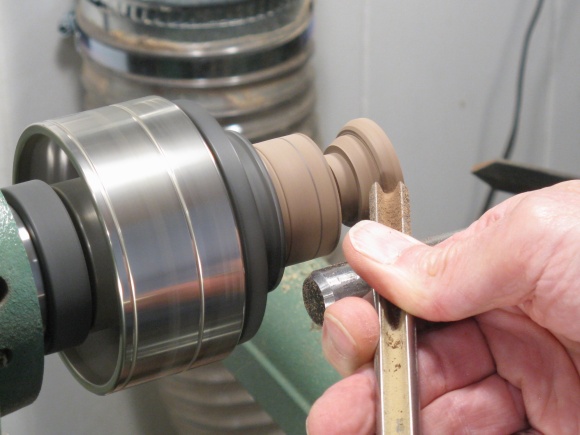
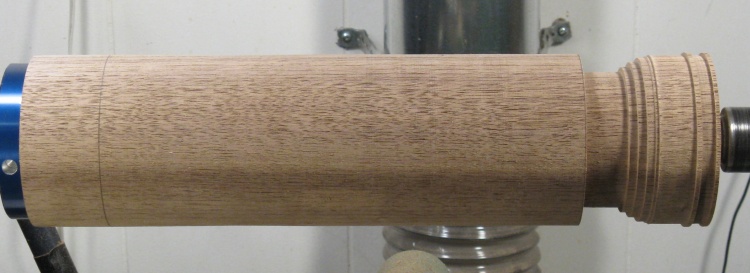
Body flipped around to do bottom
Once the hollowing was done I made an MDF jam chuck and flipped the body around to work on the bottom.
After this shot I turned some details into the bottom and then cut off the excess wood (the bits to the right of the thin neck).
After this shot I turned some details into the bottom and then cut off the excess wood (the bits to the right of the thin neck).
The roof was pretty simple, just being a hollow curved cone. I started with a cylinder of walnut that I had kicking around and then I hollowed the interior, shaped the taper on the outside and finally cut the roof away from the extra wood.
Hollowing the roof piece
Shaping the top of the roof
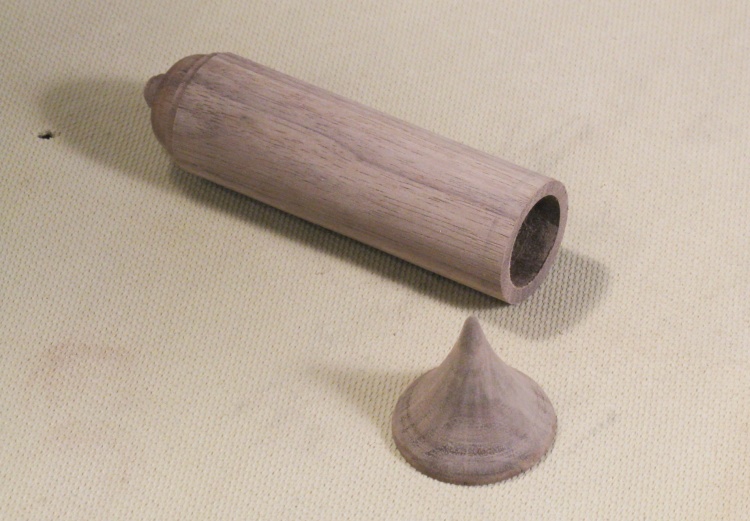
Annex body and roof
This shot shows the completed annex body and roof. Those would get set aside while I started on the main tower.
Tower Turning
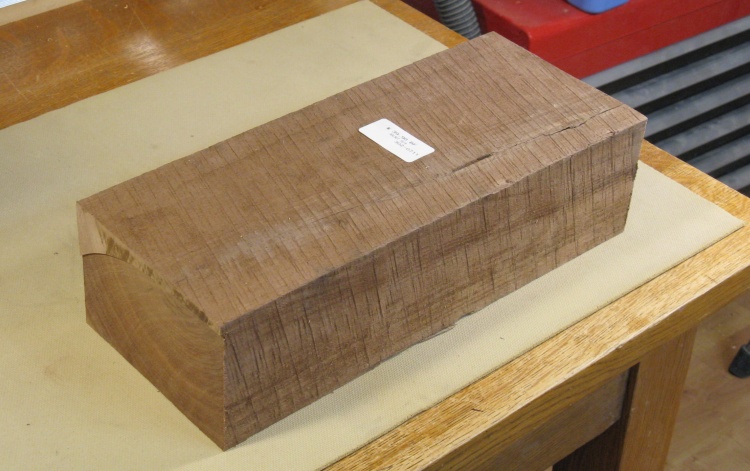
A nice thick walnut block
I was pleasantly astounded to find walnut of sufficient thickness at the local Windsor Plywood store - I needed a 4" thick piece and I don't think I'd ever seen that size there before.
I was also astounded (perhaps slightly less pleasantly) at the egregious price which was two or three times the highest I've paid for walnut before. Oh well, it wasn't much more than a good restaurant meal for two. With wine. And a generous tip.
Ah, the comforts of rationalization...
I was also astounded (perhaps slightly less pleasantly) at the egregious price which was two or three times the highest I've paid for walnut before. Oh well, it wasn't much more than a good restaurant meal for two. With wine. And a generous tip.
Ah, the comforts of rationalization...
In preparation for turning, the blank was cut square using the bandsaw. Fortunately one end was flat and square to the block so I could just find the center and attach the blue faceplate.
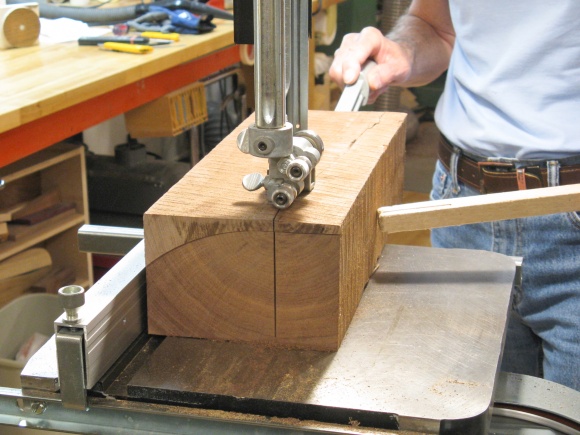
Cutting to width
Adding a faceplate

Tower blank mounted to the lathe
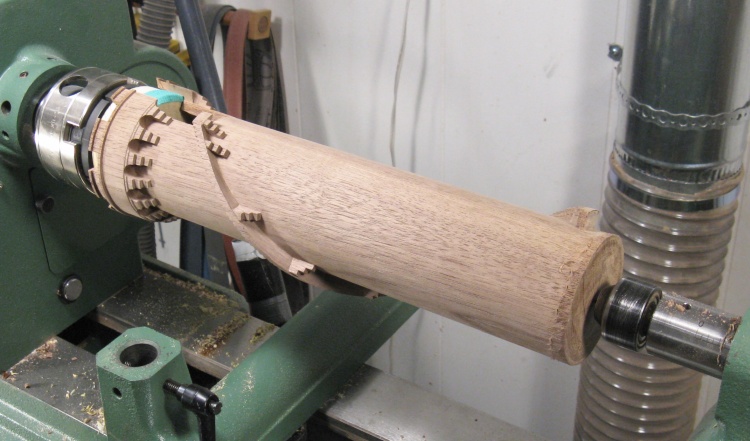
Mounted on the lathe and ready for turning.
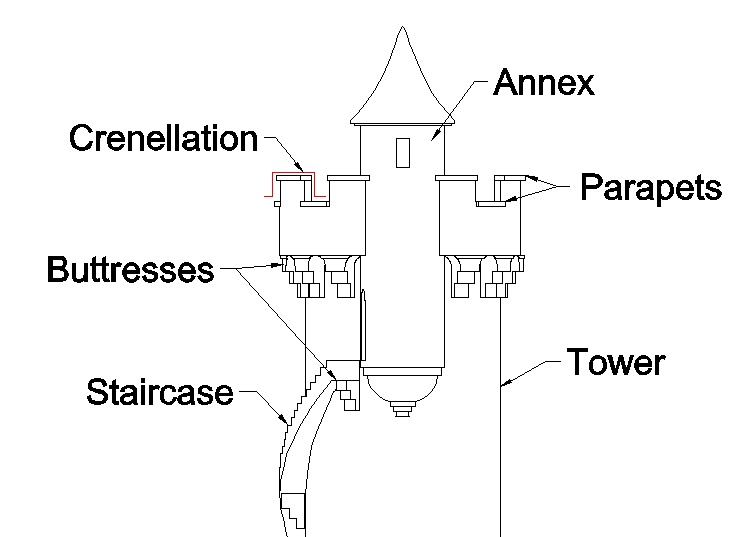
Some terminology
For those who don't read enough fantasy novels, here's some terminology that may find it's way into these pages.
Now I'm a Sci-Fi guy by preference but read a fair amount of fantasy since there just isn't enough good Sci-Fi. The question is why can't many librarians tell the difference? I mean, if it's got a dragon on the front, it ain't a Sci-Fi.
Now I'm a Sci-Fi guy by preference but read a fair amount of fantasy since there just isn't enough good Sci-Fi. The question is why can't many librarians tell the difference? I mean, if it's got a dragon on the front, it ain't a Sci-Fi.
The outside turning was pretty straightforward; a roughing gouge was used for rounding and a scraper smoothed the surface. I also cut some ridges in the top which would become the caps for the parapet. After these shots I cut the diameters of the buttresses under the top portion.
Rounding
Forming some top detail
Outside shaping done
Here the outside shaping is done.
Steady rest deployed for hollowing
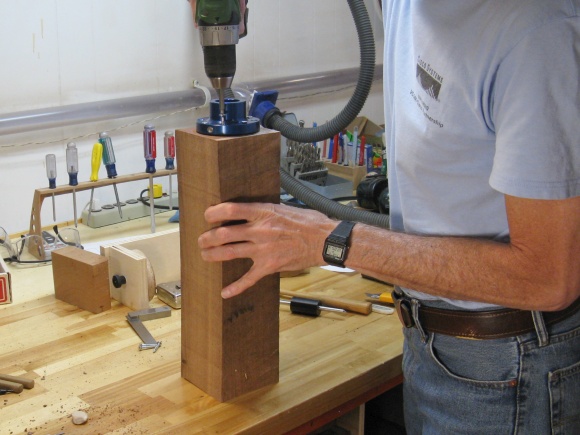
The next step was hollowing so I installed the steady rest and got out some large drill bits to start clearing out the center.
I started with this not-very-long blue 36mm Forstner, then was able to use a 2-5/16 Forstner for an even larger hole, and finally a 1/2"-diameter twist drill to reach all the way to the bottom.
I started with this not-very-long blue 36mm Forstner, then was able to use a 2-5/16 Forstner for an even larger hole, and finally a 1/2"-diameter twist drill to reach all the way to the bottom.
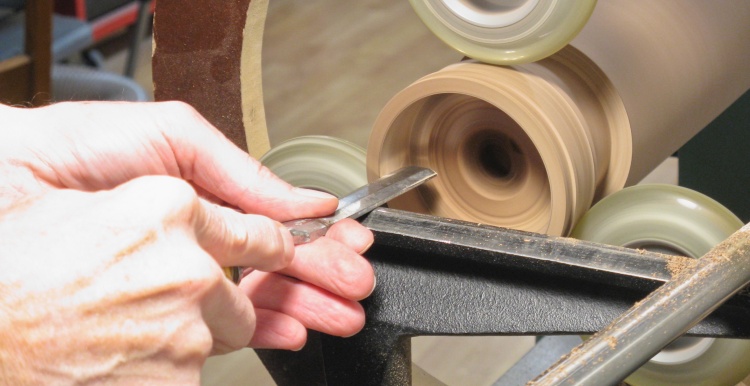
Cutting the inside wall straight
The top section composing the parapet needed the walls cut straight and I didn't really have a proper tool for that. So I grabbed an old chisel out of an unused set and ground it to cut on the end and side.
In this shot I'm cutting the inside wall.
In this shot I'm cutting the inside wall.
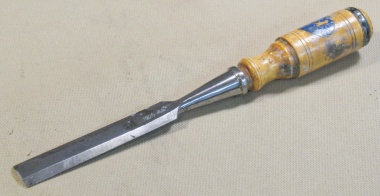
An old chisel modified into turning tool
The rest of the hollowing was more conventional and for that I used the captured hollowing tool. I just needed straight walls all the way down.
Hollowing the body
First few inches done
Hollowing complete
After the cutting and a bit of sanding, the interior was declared complete.
Staircase
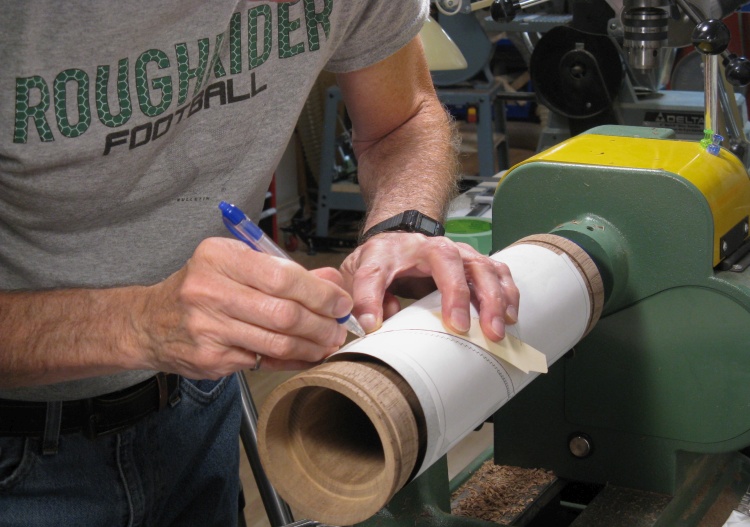
Tracing on the staircase outline
The stairs go up at a 45° angle with what would be at full-scale a 7" riser height and tread width (0.11" on this tower).
I wrapped a paper plan around the tower body and used carbon paper to transfer the outlines of the stairway to the wood.
To help keep the lines straight, I used a strip of thin cardboard wrapped on and alligned with the pattern to act as a straightedge.
I wrapped a paper plan around the tower body and used carbon paper to transfer the outlines of the stairway to the wood.
To help keep the lines straight, I used a strip of thin cardboard wrapped on and alligned with the pattern to act as a straightedge.
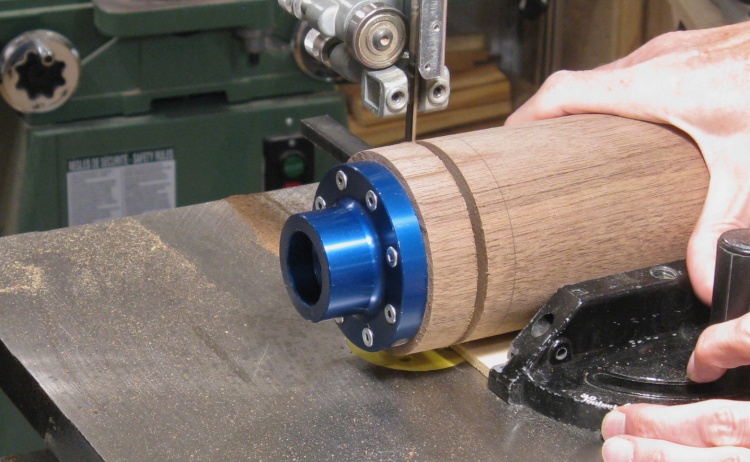
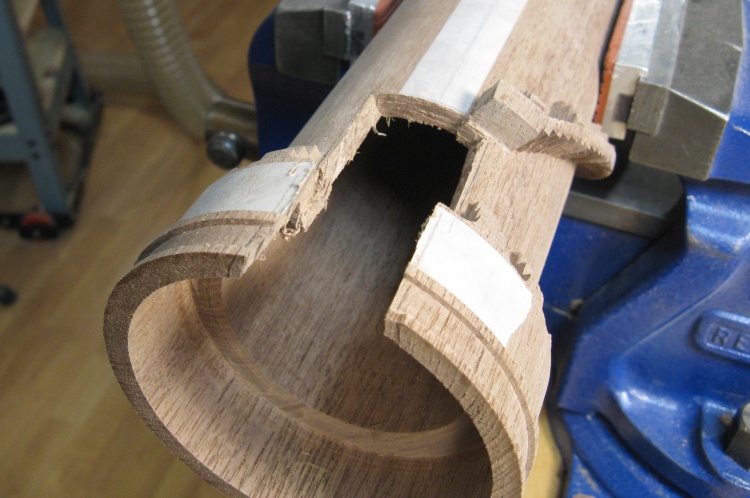
Cutting off the bottom inch or so
Then the turning was pulled off the lathe and had its bottom section holding the faceplate and screws cut off. I had started with extra length in the wood for this eventuality.
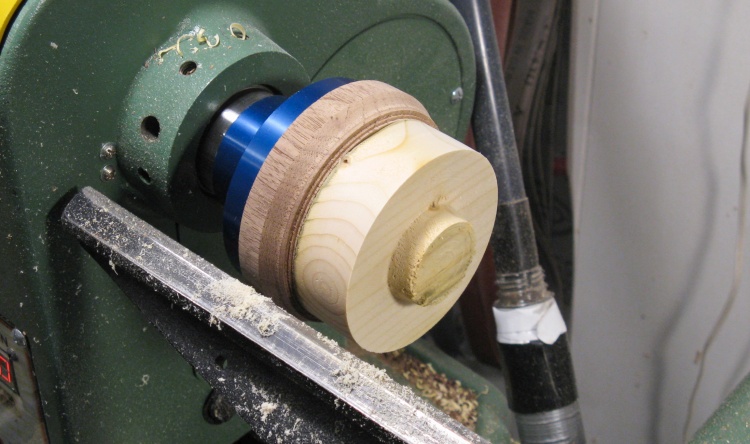
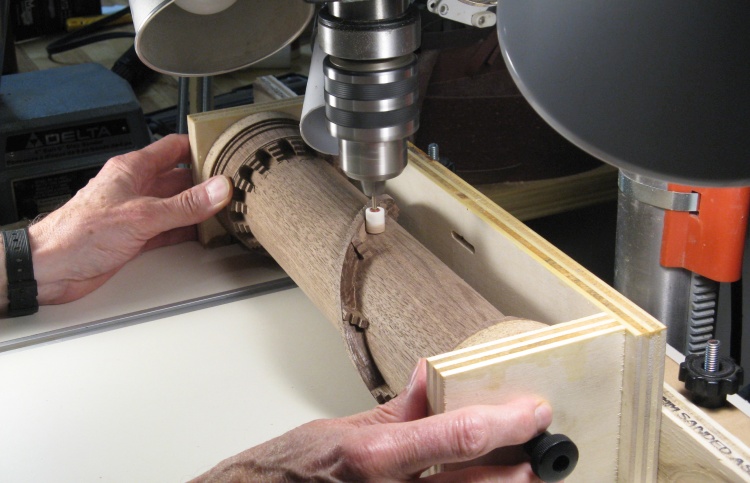
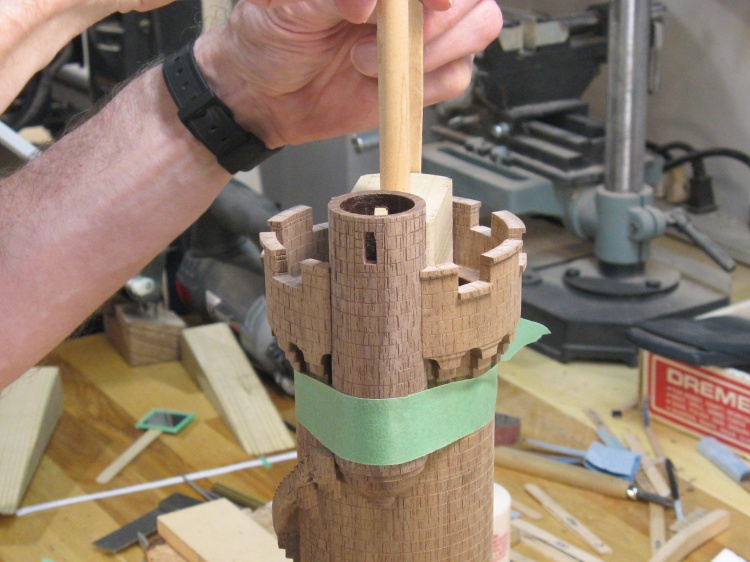
Spruce plug made to fit into the top
The plan was to tape the tower to the routing jig. The bottom had plenty of surface area for taping, but the top was just a thin edge.
To give the top more taping surface, I turned a plug that just fit into the top and protruded a bit.
To give the top more taping surface, I turned a plug that just fit into the top and protruded a bit.

Installing the tower in the jig
Here the tower has been taped to the circular pieces of the routing jig and I'm putting it all together.
The jig held the tower securely (particularly when clamped to increase friction) so I left it in there to do the hand carving I needed to do before the routing.
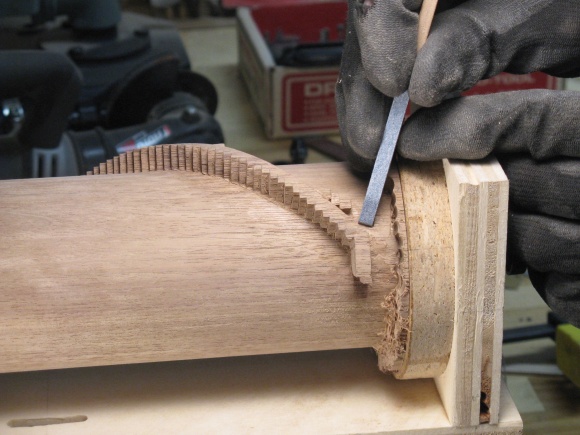
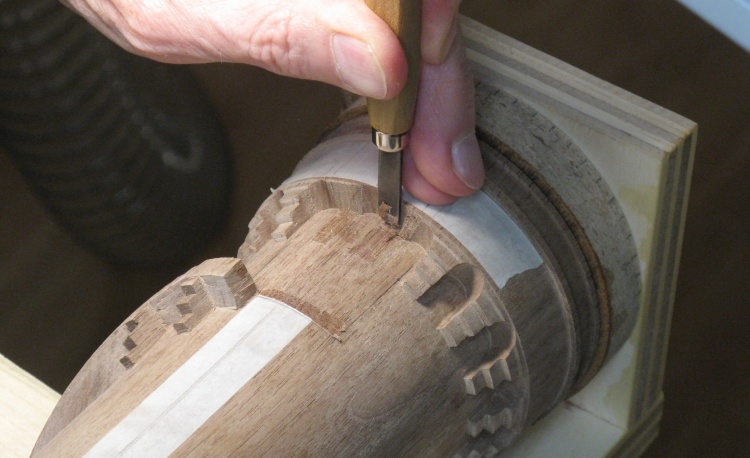
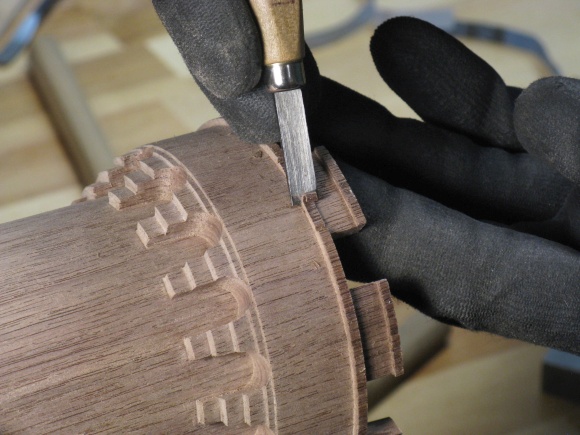
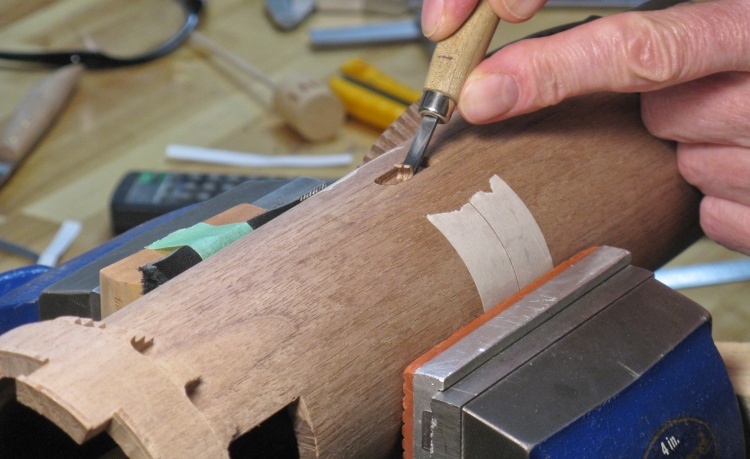
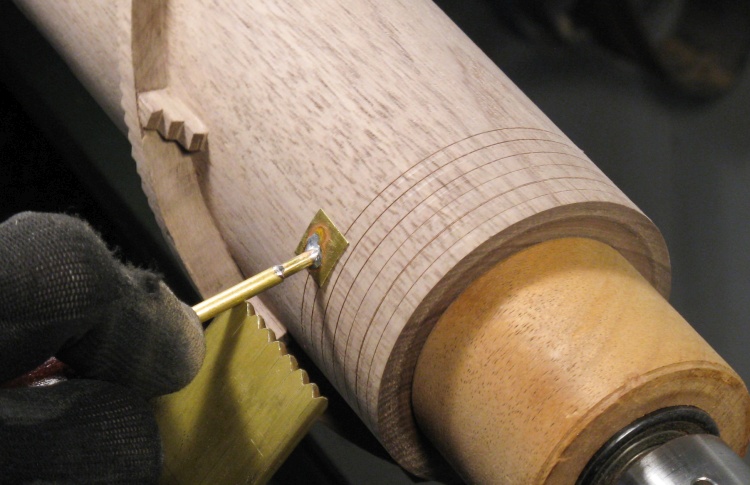
The jig was mounted in the bench vise and these photos show the staircase outline carving. I used the gouge to remove wood beside the staircase and buttresses. Then the wood fibers at the edge of the staircase were cut with the utility knife, using a flexible piece of brass as a straightedge. The wood next to the cut was removed with a small chisel, and I repeated the cut/remove sequence until the wood was cut away to about 0.3" deep.
The jig was mounted in the bench vise and these photos show the staircase outline carving. I used the gouge to remove wood beside the staircase and buttresses. Then the wood fibers at the edge of the staircase were cut with the utility knife, using a flexible piece of brass as a straightedge. The wood next to the cut was removed with a small chisel, and I repeated the cut/remove sequence until the wood was cut away to about 0.3" deep.
Adding some clearance beside the staircase
Cutting to the marked line
Cutting out at edges
Cutting wood fibers before removal

Staircase and supports cleared out
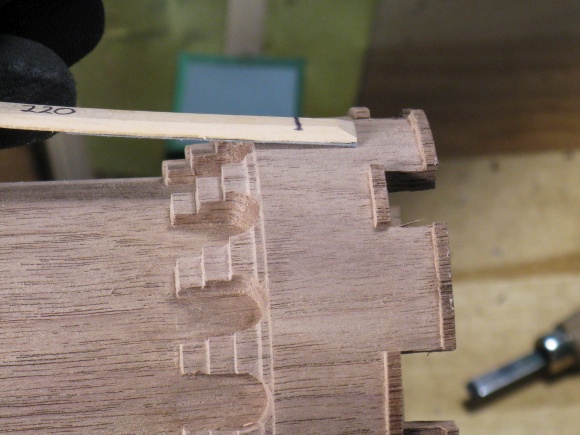
This shot shows the staircase carving completed. The plan is next to rout away the extra wood on both sides of the staircase.
You can also see a paper label near the top that was taped on to more-easily see the position markings for the top buttresses.
You can also see a paper label near the top that was taped on to more-easily see the position markings for the top buttresses.
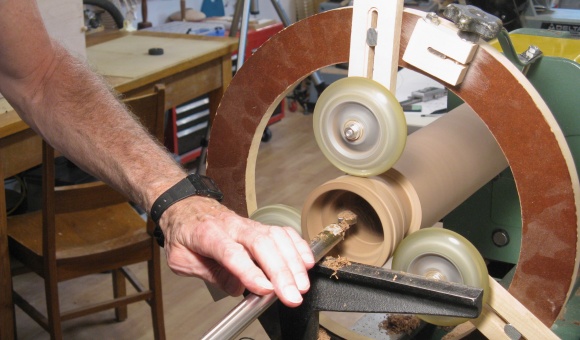
Routing off the extra wood
Then it was routing time; I sat with eyes level to the routing table so I could see the bit and make sure it didn't touch the staircase or its buttresses.
I would set the wood down positioned so the bit was in the thin portion near the top and then slide the wood over the bit until it was close to the staircase. Then I'd lift off the wood and reposition it so the bit was on the other side of the staircase and finish routing to the bottom.
I would set the wood down positioned so the bit was in the thin portion near the top and then slide the wood over the bit until it was close to the staircase. Then I'd lift off the wood and reposition it so the bit was on the other side of the staircase and finish routing to the bottom.
Router bit doing its stuff
This is the guy-in-the-chair's-eye view of the cutter taking a slice off the bottom of the tower. I took less than 1/8" per cut.
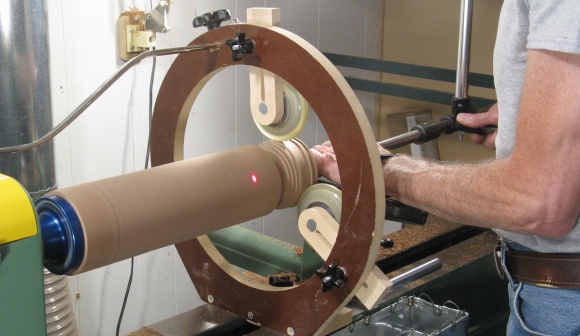
Rotational index
Once the cut was complete, the guy in the chair stood up, loosened off the clamp, turned the tower one mark, retightened the clamp, sat back down and started the next cut. There were 51 marks around the tower (I'm at #30 in this shot). Once a full revolution was done, I increased the height of the bit and did another round. It took about five height settings of the bit to cut to the diameter I needed.
The next day my legs were a bit sore and I wondered why until I realized I stood up out of the chair a couple hundred times. Yah, probably that.
The next day my legs were a bit sore and I wondered why until I realized I stood up out of the chair a couple hundred times. Yah, probably that.
An added-on index for the top buttresses
I used the router to cut the spaces between the top buttresses as well. I taped on some card stock with a reference line and rotated the tower to allign index marks on the taped-on paper ring to that line to make each cut.
The original plan was for square buttresses but I kind of liked the arched look left by the router bit so I decided to leave them as-is. That saved some woodworking but cost me a bunch of time to figure how to draw those to update the tower plans to "as built".
The original plan was for square buttresses but I kind of liked the arched look left by the router bit so I decided to leave them as-is. That saved some woodworking but cost me a bunch of time to figure how to draw those to update the tower plans to "as built".
Eventually got it
Routing completed
This shot shows the tower hot off the router.
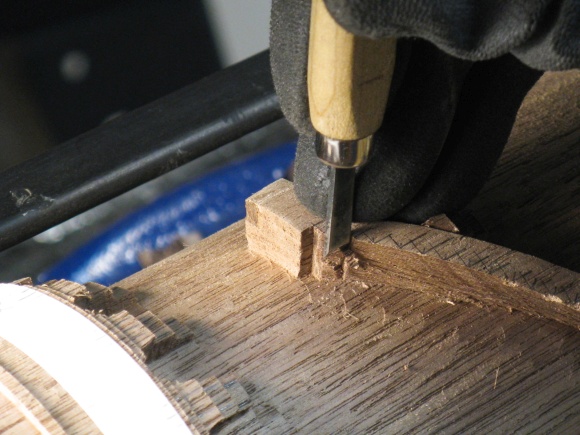
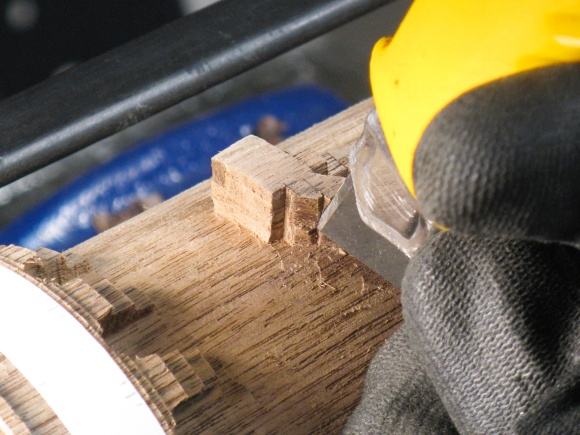
The body is decently clean but all the corners needed work. I started by cleaning up the corners of the staircase and buttresses, again using the utility knife and chisel. Next, the staircase buttresses were shaped from the original rectangles to cut three steps into each. The last shot shows the stair steps being drawn onto the edge of the staircase.
Cutting fibers before removal
Cleaning up corners
Cutting the stair buttresses
Marking the stair shapes
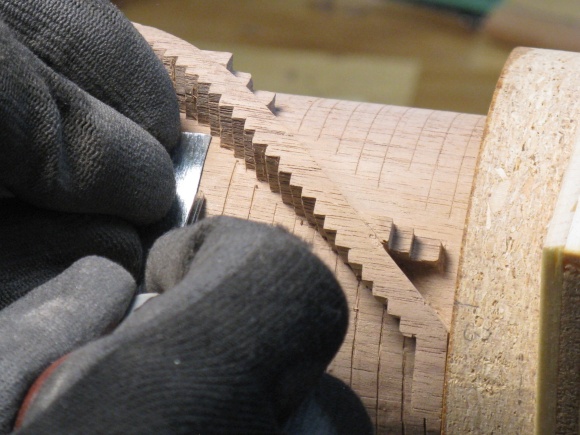
The stairs were cut out with the same technique as I developed on the test piece; I started each step by cutting into the staircase using the utility knife with a metal square to make sure the step was level, followed by carving away a small section of the riser. Then I could use the utility knife free-hand to cut a bit further along the stair-top and carve away another small section. Four of five rounds of this sufficed to cut the whole step, and it took three or four minutes per step.
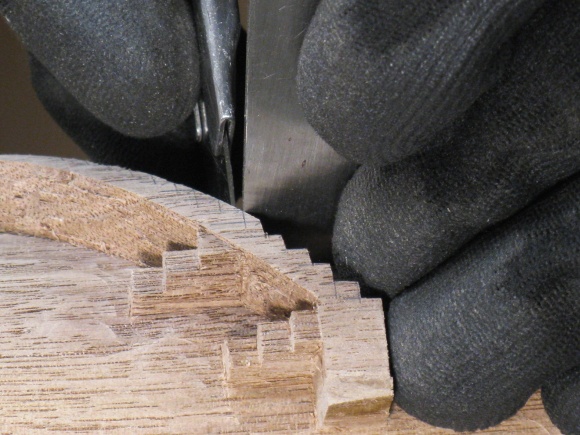
Cutting stair bottom with a square
Cutting a step
Freehand step-top cutting
Working my way around
Straightening the staircase bottom
The underside of the staircase wasn't exactly at 90° to the wall so I used an abrasive drum to sand it into conformance. I manually touched up the ends of each section where the drum wouldn't reach.
The top of the staircase wasn't actually any better but the stair cutting process resulted in a level top.
The top of the staircase wasn't actually any better but the stair cutting process resulted in a level top.
Annex Installation
The annex would eventually need to be merged with the tower. So I could either cut out the tower to fit the annex or cut the annex to fit the tower. Or perhaps use a hybrid of those techniques. Well, hybrids are all the rage these days so that's the way I'd go.
I hoped to be able to make a nice circular hole in the tower for the body of the annex, but that would be rather challenging for the curved and stepped bottom of the annex. So the plan was to make that tower hole only for the straight portion of the annex body, and then cut away the annex bottom to conform to the tower. That meant a 3"-diameter cut that passed through the center of the annex bottom section, with straight sides. That would be a challenge to do well by hand so it was time for another jig;
I hoped to be able to make a nice circular hole in the tower for the body of the annex, but that would be rather challenging for the curved and stepped bottom of the annex. So the plan was to make that tower hole only for the straight portion of the annex body, and then cut away the annex bottom to conform to the tower. That meant a 3"-diameter cut that passed through the center of the annex bottom section, with straight sides. That would be a challenge to do well by hand so it was time for another jig;
What I needed was to be able to swing the annex through a 1.5"-radius arc over a cutter on the router table. I started with a "Vertilathe" which is a commercial jig to allow one to turn things using a drill press. I believe I've used it exactly zero times, but it had a nice solid 9/16" post that would work well as a pivot point for the swivel support. Here are a couple shots of the swivel support fabrication:
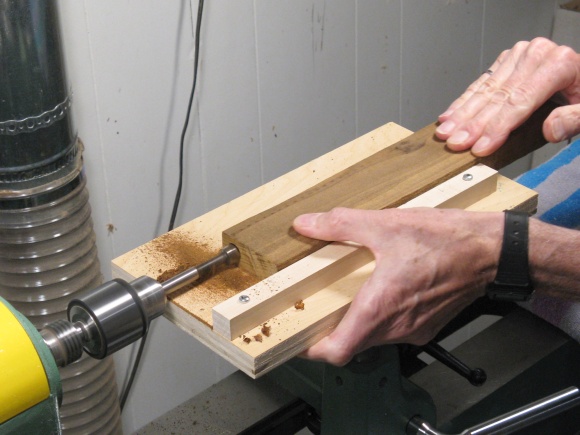
Drilling the pivot hole
Shaping a face to hold the annex
Annex all jigged up
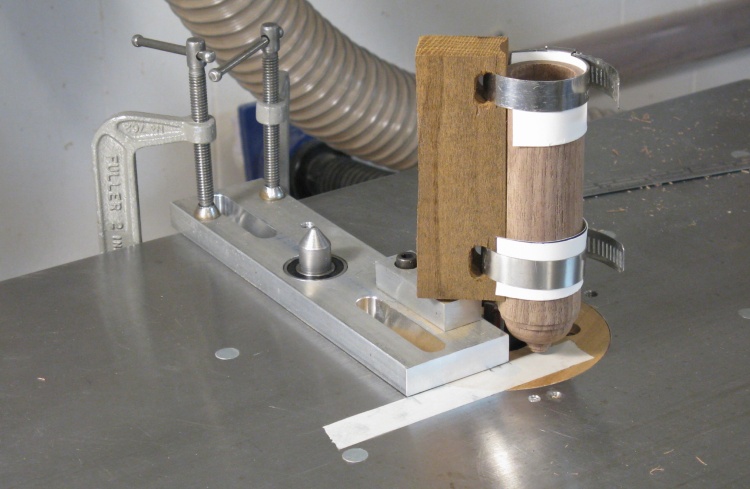
And here it is all set up; the C-clamps hold the base in the proper position and the wooden swivel support fits over a post mounted to the base. The annex is clamped to the swivel support and is ready to be swung over the cutting bit.
A pair of hose clamps handle the clamping duties, padded with some folded business cards to prevent annex gouging.
For the woodspotters out there, the swivel support is made from a piece of thermally modified poplar.
A pair of hose clamps handle the clamping duties, padded with some folded business cards to prevent annex gouging.
For the woodspotters out there, the swivel support is made from a piece of thermally modified poplar.
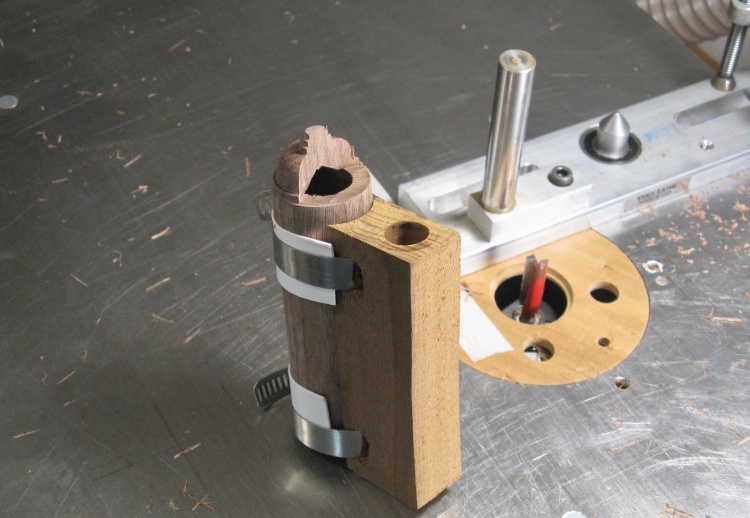
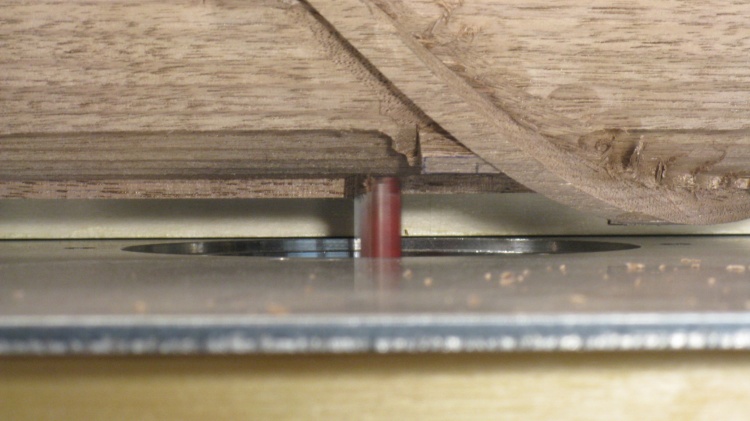
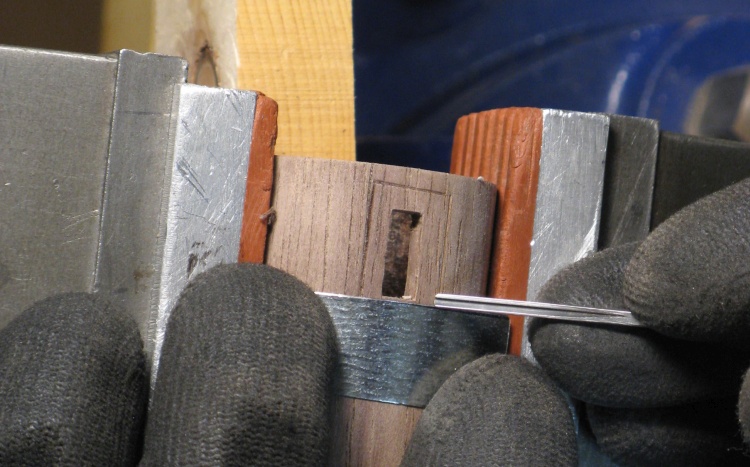
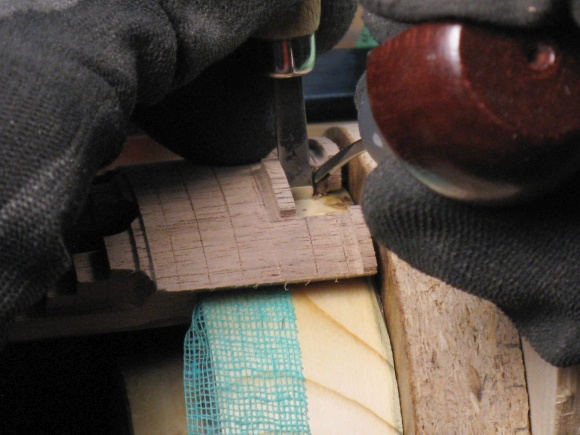
The resulting bottom cutout
The cutting was done in three steps working in toward the center. Marks on the masking tape were used to position the aluminum baseplate for the three cuts.
This worked reasonably well and the result is seen here. The annex bottom has been shaped with a 3"-diameter arc through the center, which should conform to the tower.
This worked reasonably well and the result is seen here. The annex bottom has been shaped with a 3"-diameter arc through the center, which should conform to the tower.
I thought that I should complete the outside sanding before installing the annex. This little grid of photos shows some of the sanding done to get into all the edges and corners, mostly around the staircase. Popsicle-stick sanding tools and others from previous projects figure prominently.
Sanding
Sanding
Sanding
And more sanding
The top of the staircase needed a bit more work as well. Using small chisels, I evened-out the tower walls and squared up the corners of the stairs and then sanded to smooth everything out.
Sharpening up corners
Sanding up to the stairs
Marking center line of annex cavity
Then finally I could look at cutting out the section for the annex. But first I needed to mark it;
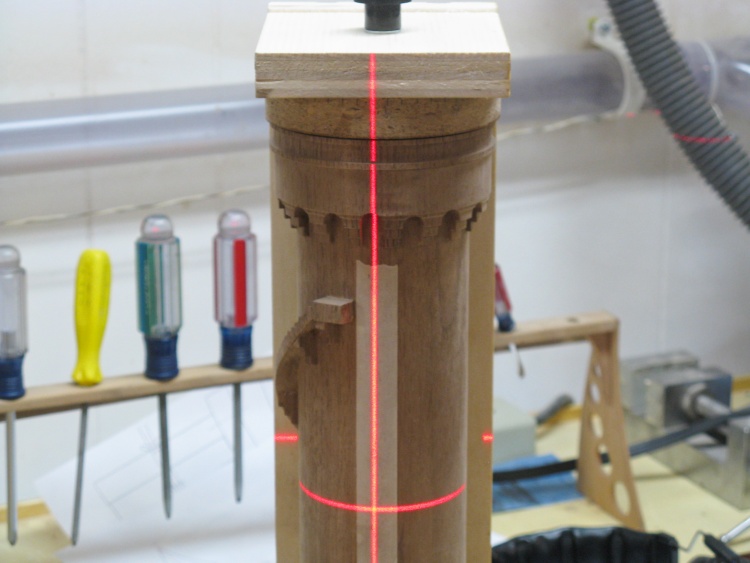
It's a bit tricky transferring a center line accurately to wood at different levels so I employed the levelling laser to help with that.
After ensuring the tower was standing vertically, I used the laser line to transfer a mark on the top edge down to the tower side (where a piece of masking tape was added for better contrast with a pencil line).
Clearing out unneeded buttresses
I used the center line as a reference to mark the section to be removed for the annex. Then I cut away the unneeded buttresses and chiseled through at the bottom of the opening.
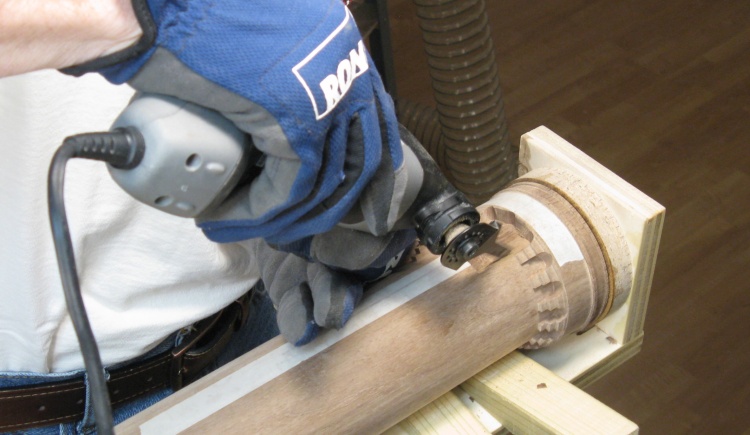
Starting to cut out annex cavity
Here I'm employing the Dremel Multi-Max (vibrating saw) to cut through the wall of the tower.
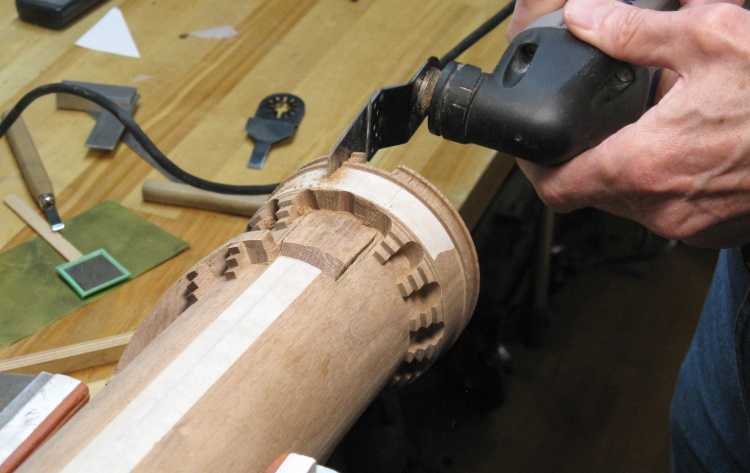
Cutting from the other direction
Then the tower was finally pulled off the routing jig and I again used the Multi-Max, this time cutting in from the top until the cuts joined.
A precision cutout!
I made sure to cut the opening smaller than the finished size. I also didn't worry too much about smoothness since the plan was to sand it to the proper size and shape.
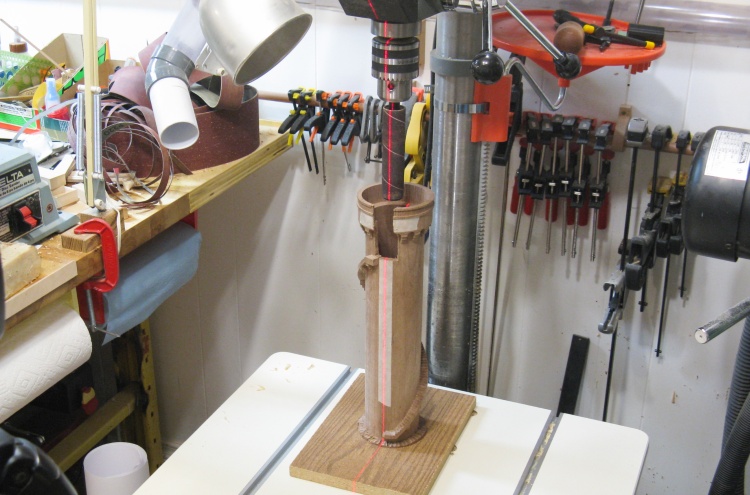
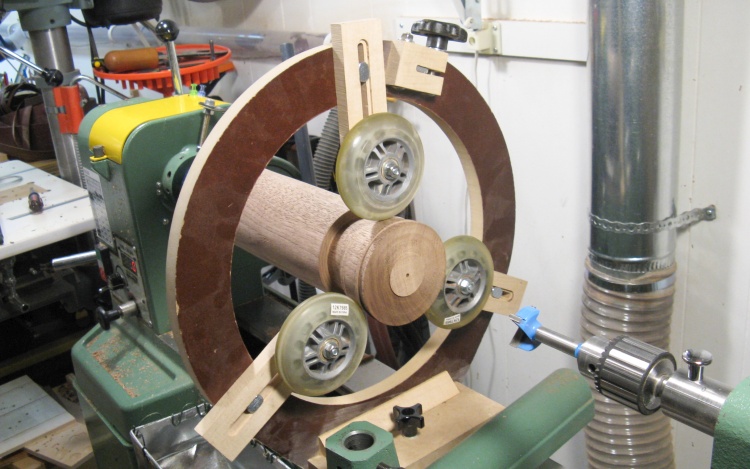
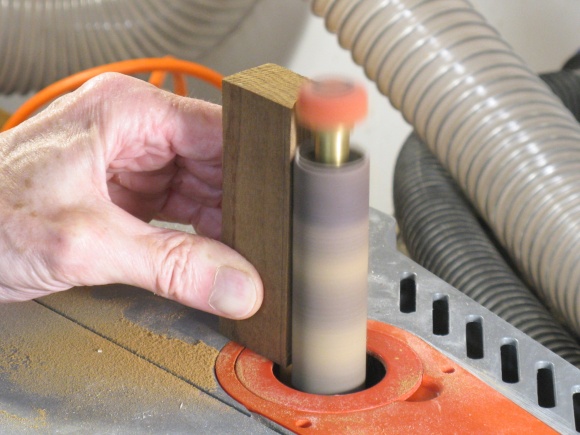
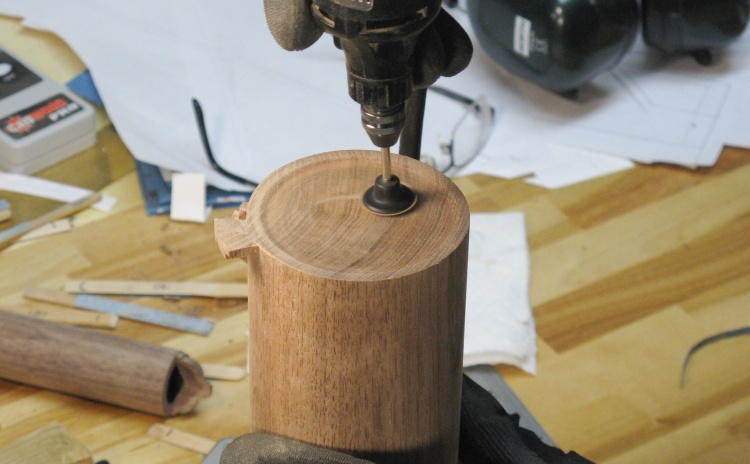
Levelling up drill press table
The plan was to use a sanding drum to enlarge the opening to the correct size. Of course I didn't have a drum the exact diameter I needed but I used the closest size from my spindle sander. I was able to jam the hollow rubber drum onto a slightly oversized shaft which let me install it in the drill press.
In this shot I'm again using the laser leveller (and shims under the table) to tweak the tower's angle to exactly vertical front-to-back and side-to-side. This ensures the sanding drum goes in at the correct angle.
In this shot I'm again using the laser leveller (and shims under the table) to tweak the tower's angle to exactly vertical front-to-back and side-to-side. This ensures the sanding drum goes in at the correct angle.
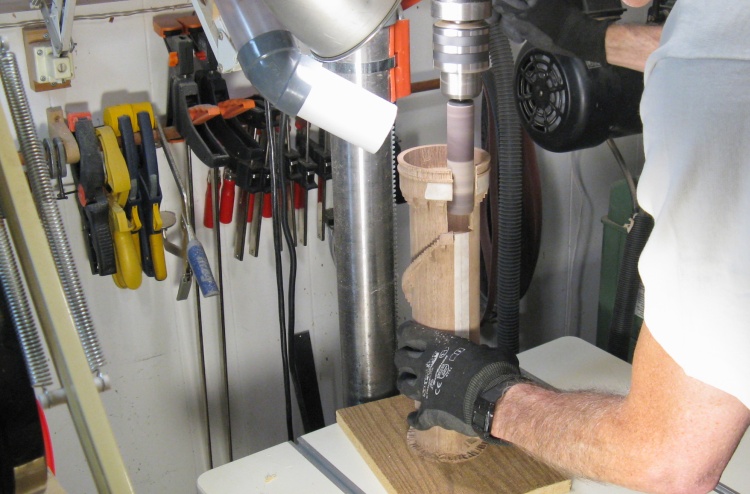
Sanding annex cavity round
Then it was a matter of sanding to a marked circle on the tower top edges. I'd sand a bit, check the fit and return to sanding until it looked like it was as close as it was going to get.
I had taped the tower to a larger piece of the cheesy shelf material to make sure it sat flat on the drill press table. This also gave it significant bottom weight, making it less likely I'd accidently knock it off the bench to a disastrous collision with the floor.
I had taped the tower to a larger piece of the cheesy shelf material to make sure it sat flat on the drill press table. This also gave it significant bottom weight, making it less likely I'd accidently knock it off the bench to a disastrous collision with the floor.
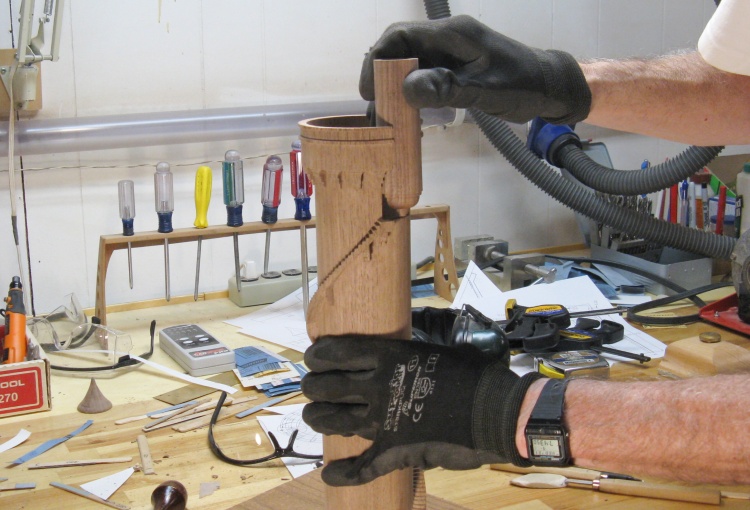
Test fit of the annex body
In this shot I'm doing a test fit of the annex. I did a bit of manual carving to improve the fit before calling it done.
Pre-varnishing the insides
It was going to be difficult (main tower) or impossible (annex) to varnish the insides after assembly so I got a jump on that by starting on the insides before things were assembled. That included the main tower, the annex body and the annex roof, all seen here with the first coat applied.
More Detail Work
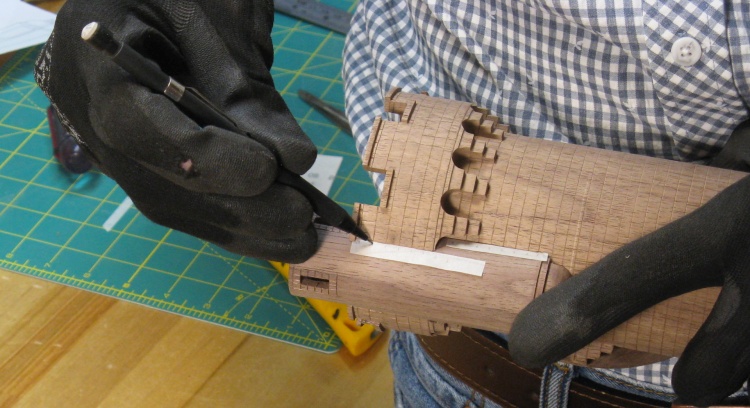
Marking the crenellations
The next critical operation was to cut the crenellations in the top. I had tested out the cutting technique using the router on the area removed for the annex, so I was reasonably confident it would work OK.
The first thing I did was to add some paper around the top so I could get decent contrast with the pencil marks. I used veneer tape which is thin paper with a water-activated adhesive that sticks to the wood when it dries.
Here I'm marking the edges of the crenellations based on a printed plan.
The first thing I did was to add some paper around the top so I could get decent contrast with the pencil marks. I used veneer tape which is thin paper with a water-activated adhesive that sticks to the wood when it dries.
Here I'm marking the edges of the crenellations based on a printed plan.
Cutting the crenellations into the parapet
Tape held the tower to a thin base and that was slid over the router bit. It took three passes to do the full opening width, repositioning the tower on the base each time.
I used a spiral bit which seemed to make a cleaner cut than the standard fluted bit.
I used a spiral bit which seemed to make a cleaner cut than the standard fluted bit.
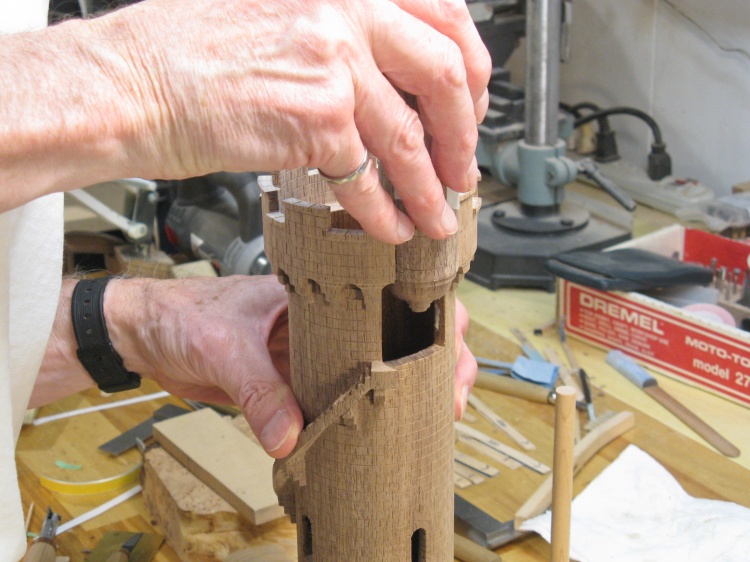
Crenellations cut
Cutting those felt like a bit of a risky operation so I was happy when that was done successfully. This is the top of the tower after cutting but before removing the veneer tape.
Removing bottom bits
The bottom still had about 1/2" of extra length so that needed to come off.
Before it went back on the lathe I prepped it by manually cutting off the leftover bits that hadn't been routed off.
Before it went back on the lathe I prepped it by manually cutting off the leftover bits that hadn't been routed off.
Using a "disc chuck"
Normally you would use a jam chuck to hold the top of a turned vessel on the lathe but that didn't seem safe with the rather fragile top edge of the tower.
Instead I reused the disc that fit into the top. It got a cavity cut into the back so the chuck could hold it by expanding, and some blue latex tape on the front to fill any gaps and provide some extra friction.
Instead I reused the disc that fit into the top. It got a cavity cut into the back so the chuck could hold it by expanding, and some blue latex tape on the front to fill any gaps and provide some extra friction.
Ready to turn the bottom
I fiddled a bit to get the best centering I could at the bottom end but fortunately it isn't very critical here since I'll just be cutting the bottom rather than the sides.
The piece seemed somewhat fragile with the staircase sticking out so I spun it at a relatively low rate - one that would keep the staircase from experiencing more than about 4 times the force of gravity, which turned out to be under 300 RPM. I first cut away the extra half-inch or so on the bottom and then indented the center to form an outside foot.
Cutting away the extra length
Forming a bottom foot
Sanding the bottom flat after stub removal
I cut off the little nub of wood remaining using the Dremel and then carved and finally sanded the center smooth.
Then from the bottom we go to the top end; I had cut two ridges at the top for upper and lower capstones on the parapets but the extra bits of the lower ridge needed to be removed. I just carved those away and then sanded the areas smooth.
Carving off the unneeded ridge sections
Removing the evidence
There were a few more details to go on before starting to add the outlines of the blocks from which the tower was "constructed". The first of those was the four small windows on the annex. They were marked and then chiseled out. A snug circular wood insert provided support under the carved areas to prevent splintering on the inside of the walls.
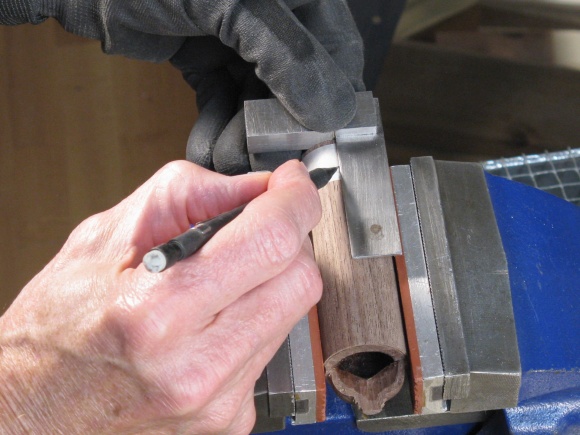
Marking a window outline
Carving it out
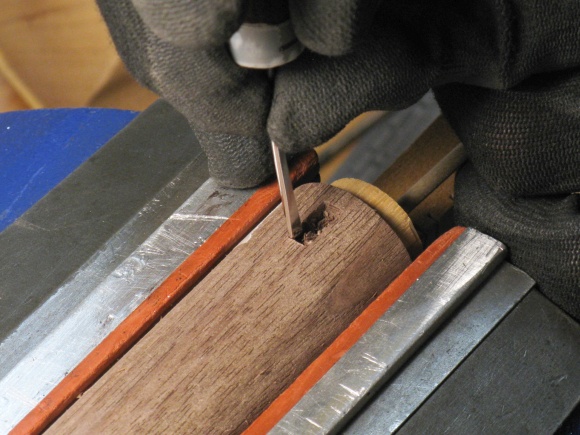
The annex also needed the door at the bottom to which the staircase led. This was concieved as a round-top wood plank door with wood cross-pieces holding it together. It was just carved out with some small chisels.
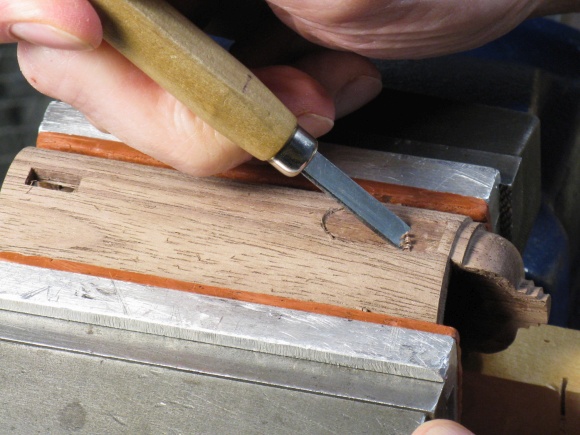
Flattening the door area
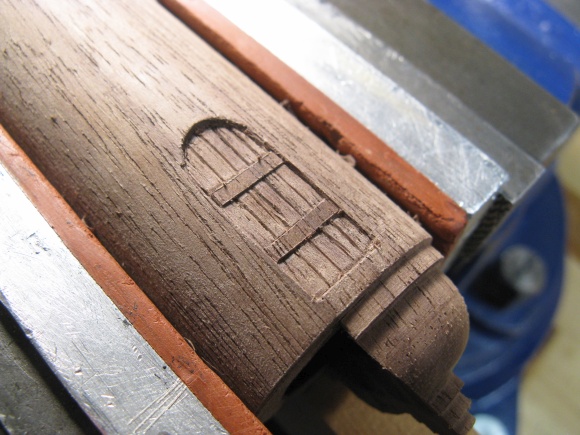
Door done (no, it doesn't open)
Carving a tower window
The tower also had three round-top windows about halfway up and this shot shows one of them being carved out.
Window-surround block outlines
The last bit of detail was to carve the blocks surrounding the windows and door. In this shot I'm carving the blocks around one of the small annex windows. The annex door and tower windows received the same treatment.
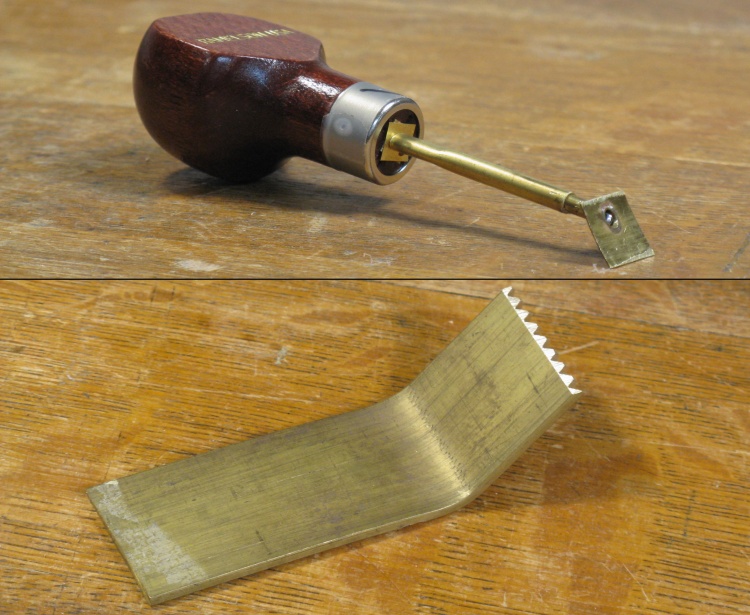
Block-carving jigs
I finally got to the point where I needed to carve the block outlines into the tower. I'd been trying to think of a way to do this consistently and finally decided to try out a jig holding the V-tool.
I really couldn't tell if this was going to work without building the jigs so I went ahead with that. The upper shot shows the jig that controls how deep the V-tool cuts (the depth is adjusted with the square shims at the handle). The lower shot is a tool-rest with notches that should place the "mortar" lines 3/16" apart (or 12" at full-scale).
I really couldn't tell if this was going to work without building the jigs so I went ahead with that. The upper shot shows the jig that controls how deep the V-tool cuts (the depth is adjusted with the square shims at the handle). The lower shot is a tool-rest with notches that should place the "mortar" lines 3/16" apart (or 12" at full-scale).
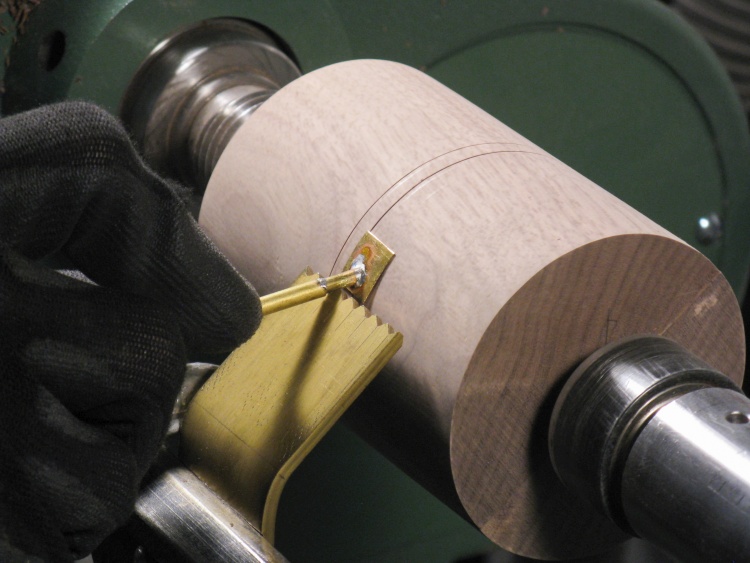
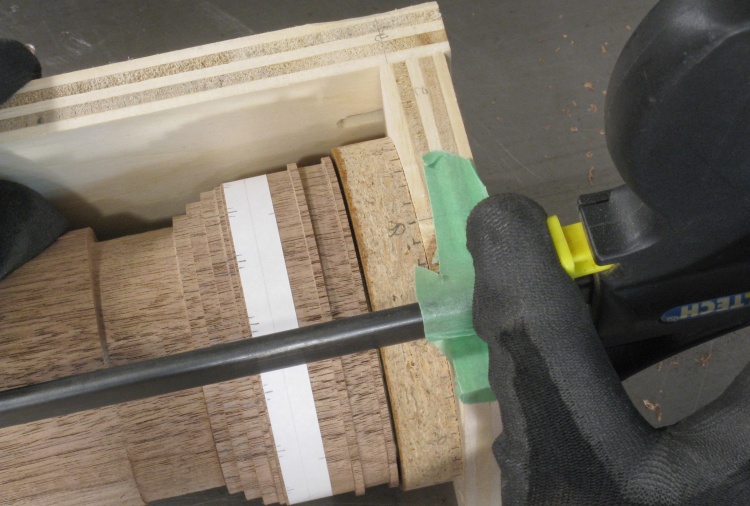
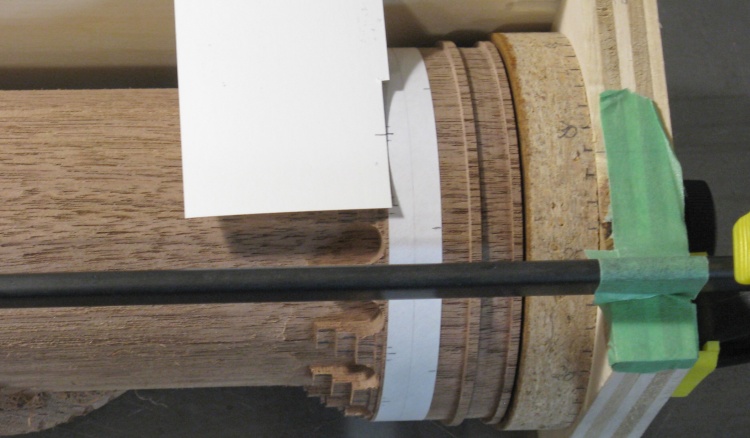
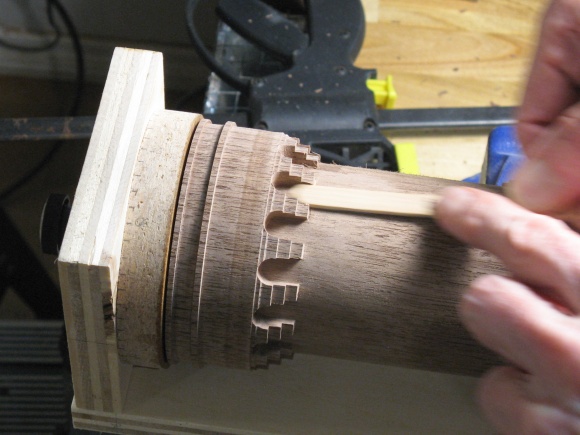
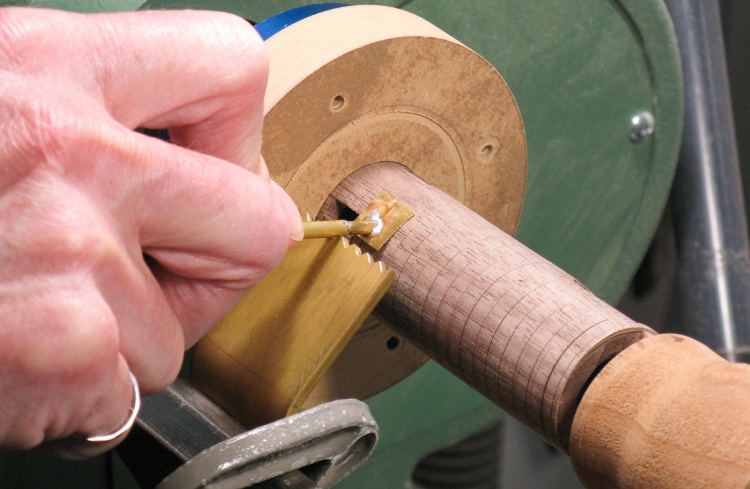
Doing some test cuts
I needed to find out how this worked and adjust the jigs without risking the tower so I made another walnut cylinder of about the right size and tried things out on it.
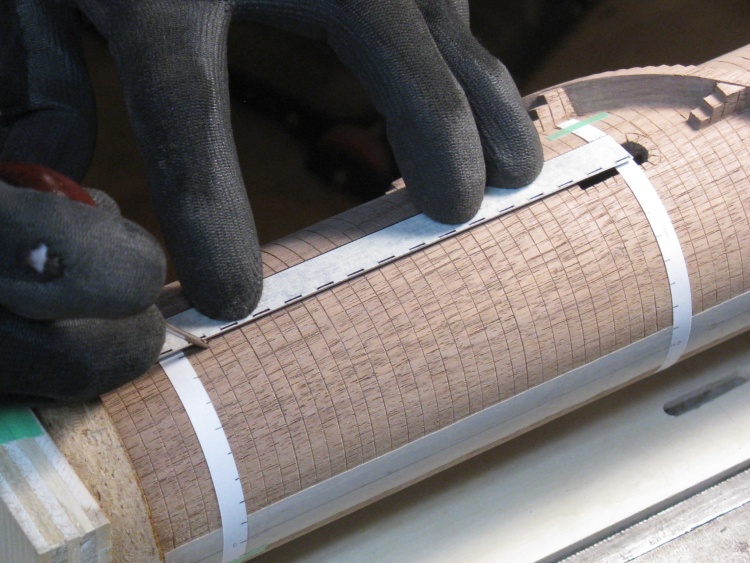
In this photo the tool rest is set up and I've taken a couple turns around. I just need a thin line cut into the wood at consistent depth and spacing. I turned the wood by hand while the tool was held against it.
In this photo the tool rest is set up and I've taken a couple turns around. I just need a thin line cut into the wood at consistent depth and spacing. I turned the wood by hand while the tool was held against it.

Test patch
I made eight lines (representing top and bottom of block rows) and then carved the sides of the blocks as well. The operation went fairly well and looked decent so this method was a "go".
Starting on tower blocks
So then it was just a matter of doing the same thing to the tower. It was mounted in the lathe and I followed the same procedure as I had for the test piece. Here I'm half a dozen lines in.
Due to the construction of the V-cutter jig, I couldn't get very close to the staircase edges so I used a curved metal guide and extended the lines all the way to the staircase. I also brought those horizontal mortar lines around the corners of the tower at the top.
Extending mortar lines manually to the edges
Lines taken around the parapet corners too
Carving block sides
Then with all the horizontal lines done, it was time to carve the sides of the blocks. I added some paper and tape guides to ensure the lines would be vertically aligned and then started carving the little 3/16-inch-long lines between rows of blocks.
Some rough calculations suggest that there were about 2000 of those little lines to carve. It took a while.
Some rough calculations suggest that there were about 2000 of those little lines to carve. It took a while.
I also carved block outlines inside the top portion of the tower using some aids to help keep the lines straight. In the left photo, I'm carving in some horizontal block lines and on right marking the parapet caps.
Making block lines inside the top

Adding parapet-top lines
Marking block positions on the annex
I wanted to allign the annex blocks with the main tower blocks so once they were done on the main tower I put the annex in place and marked positions.
Cutting horizontal mortar lines on annex
Then the annex block outlines were created through the same steps as the main tower starting with the horizontal lines shown here, followed by adding the vertical block separations.
The last bit of woodworking was to put the initial circle on the bottom. I carved a simple block outline around it first.
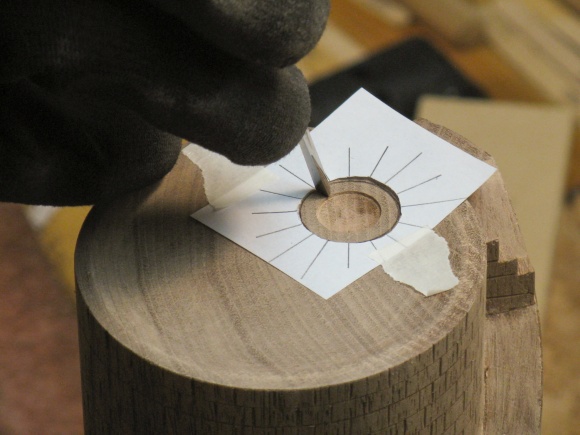
Cutting block outlines around the initial circle
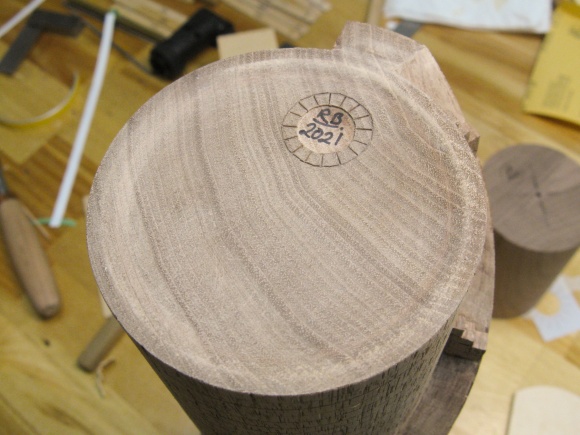
Initials in place
Finally gluing in the annex
And finally I could glue the annex in place. I added tape to the annex body to keep glue squeeze-out off the annex and here I'm sliding the annex into place.
Fixing annex in place while glue dries
Some tape on the bottom and a spacer behind the annex held it tight to the main tower while the glue dried.
After this shot I glued to roof on to the annex body as well.
After this shot I glued to roof on to the annex body as well.
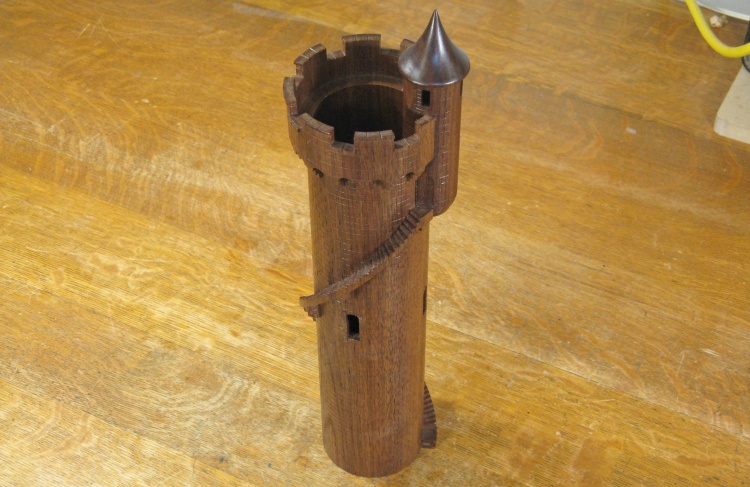
Woodworking done!
And (to paraphrase Elmer Fudd) th-th-that's all for the woodworking.
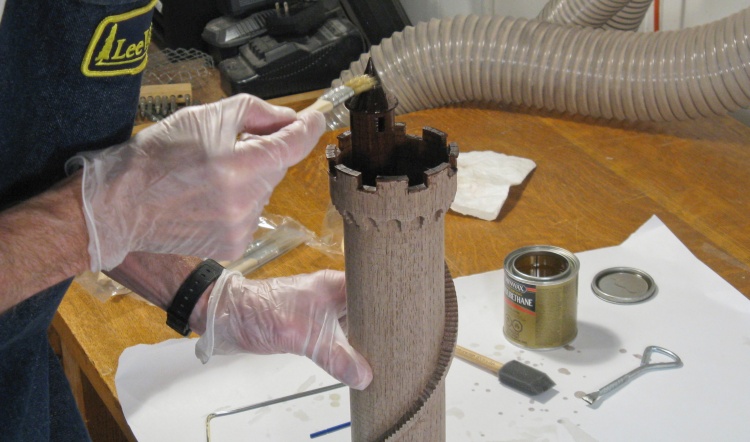
Starting on the first coat of varnish
Next, of course, was applying the finish. I had already done the insides of the tower and annex so just the outside surfaces needed to be done.
In this photo I'm starting on the first coat, working my way from top to bottom.
In this photo I'm starting on the first coat, working my way from top to bottom.
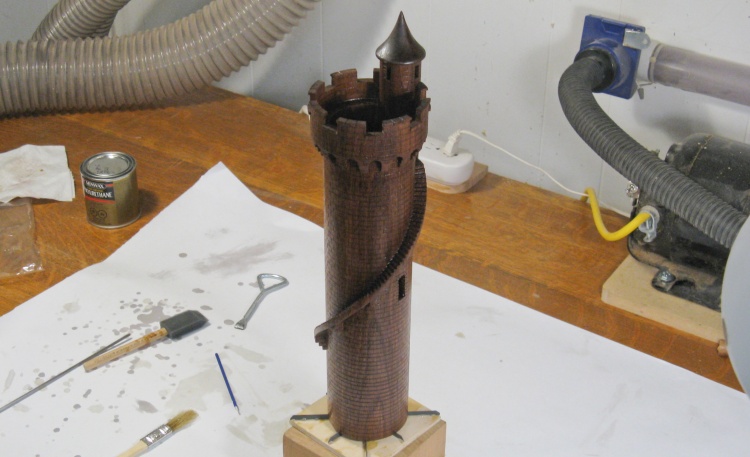
First coat of varnish drying
The first coat of varnish is on and still wet in this picture. I had used three coats of varnish inside but decided that two were adequate for the exterior.
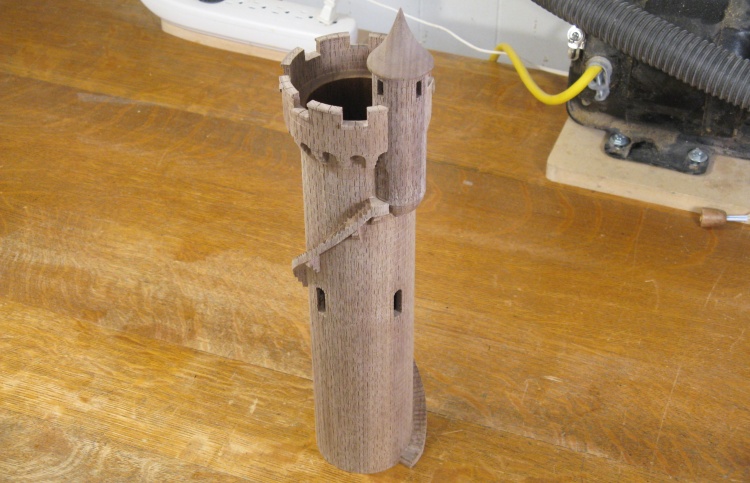
Done
Complete.
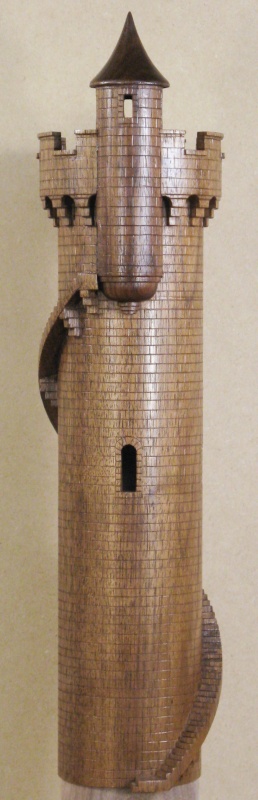

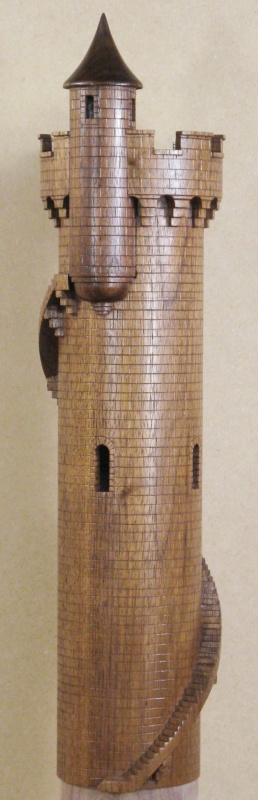

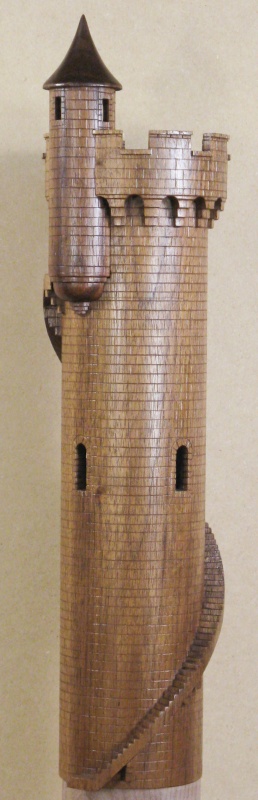
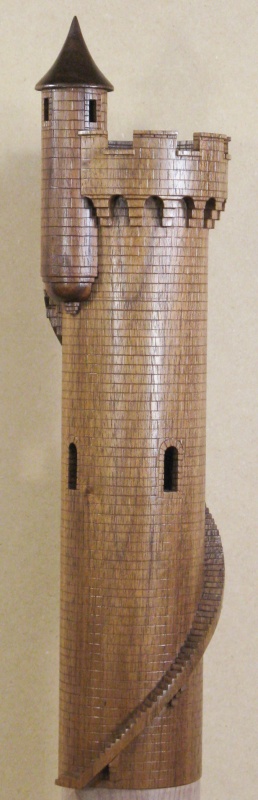

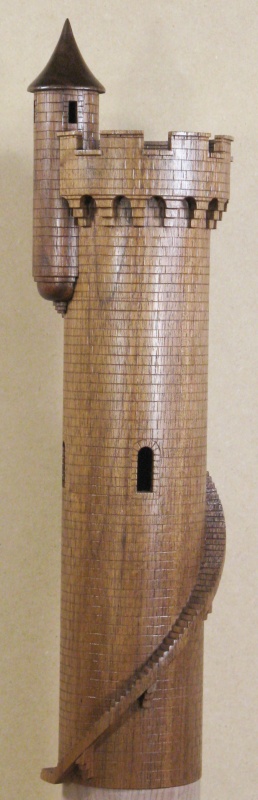
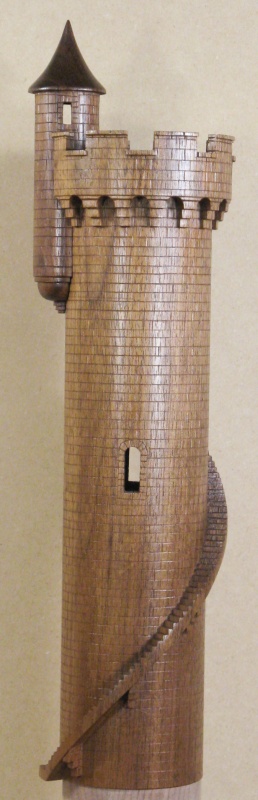

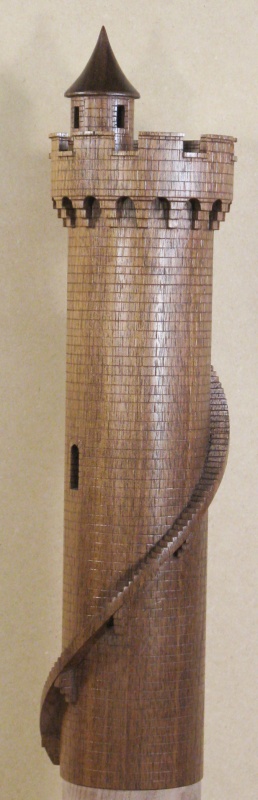
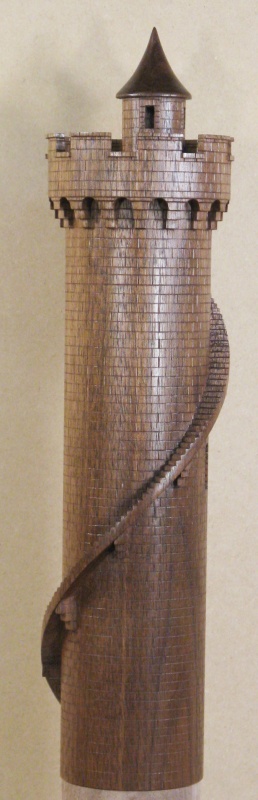
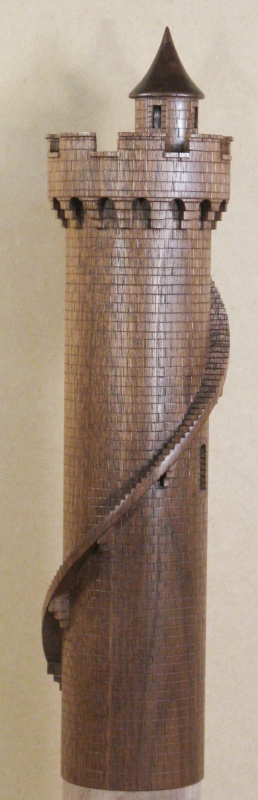
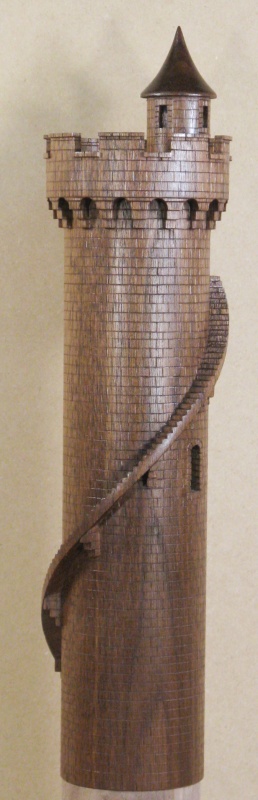
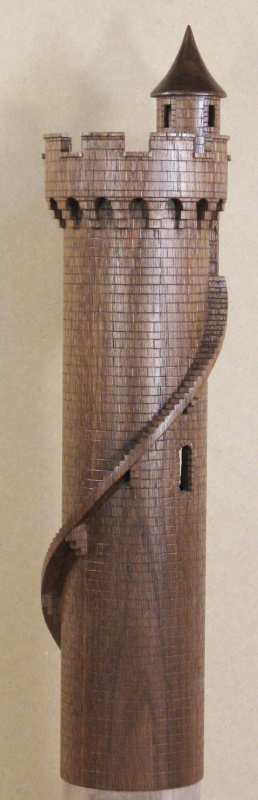
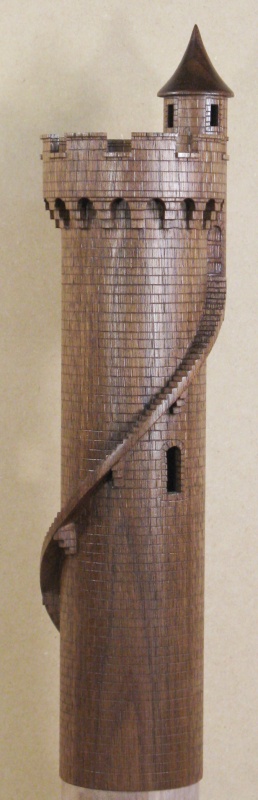
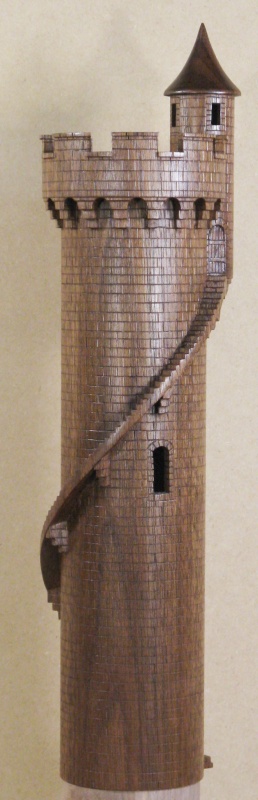
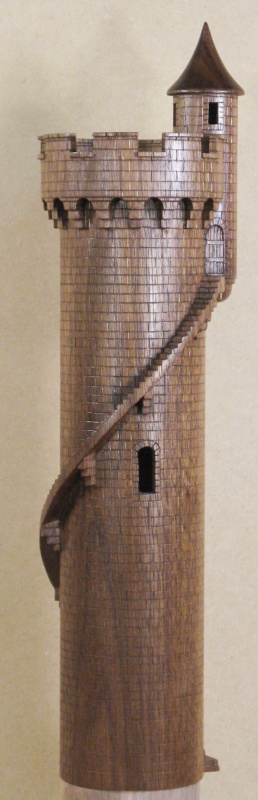
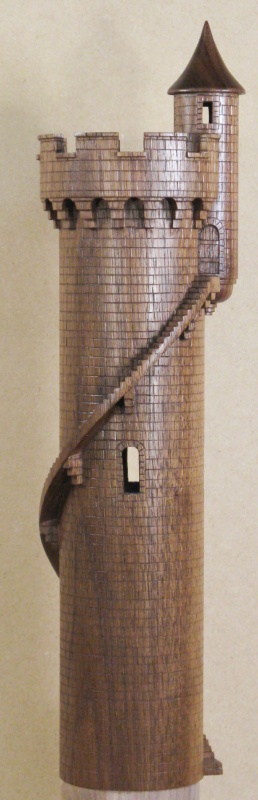

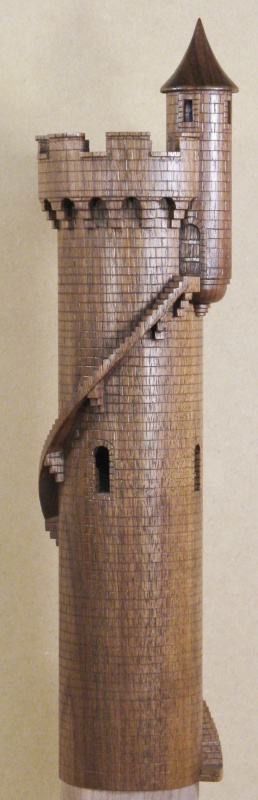
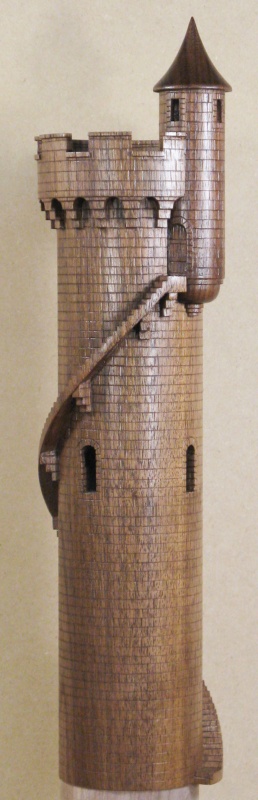
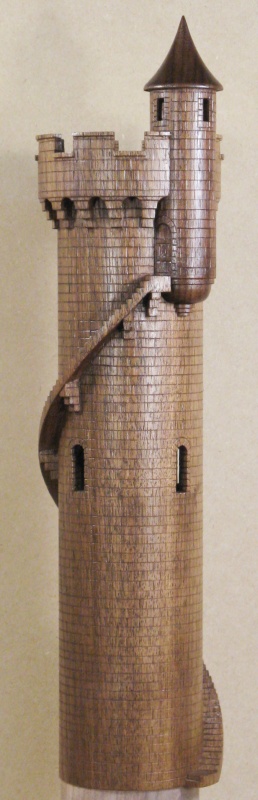

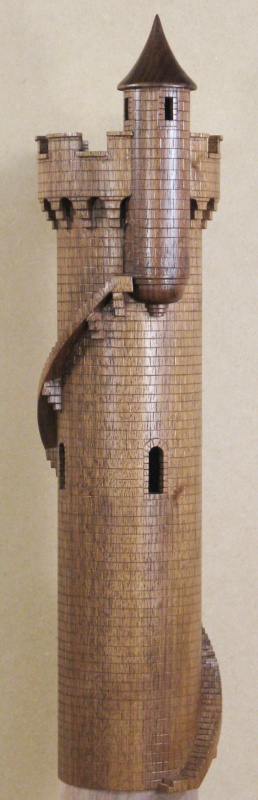
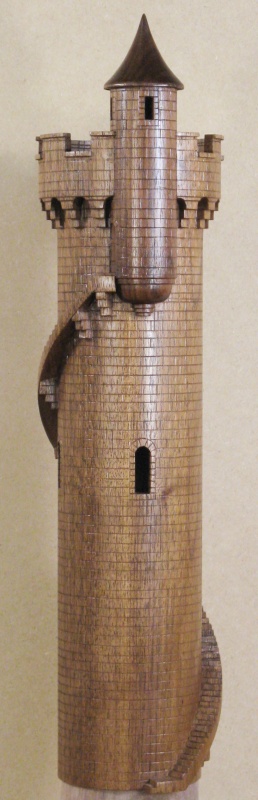
This image will show the vessel from all angles. Well, OK; 32 of them anyway.
Click the side arrows to rotate.
Click the side arrows to rotate.


