The classic log-to-bowl approach is to use half the log and turn a bowl out of it. Of course depending on the log size, you may be actually able to get a number of smaller bowls out of it with judicious sectioning of the log. But I wasn't going to do that and instead went for the full half-log.
In the past I've used hardwood for the few bowls I've made and while I've used a few hardwood logs too, they were all turned longitudinally into tallish vessels. This one by contrast is softwood and would be turned with the grain running horizontally. So this was more of a "What can I get out of this log?" project than a "We need a big bowl" project and I didn't worry overly much about the practicality of the resulting output.
In the past I've used hardwood for the few bowls I've made and while I've used a few hardwood logs too, they were all turned longitudinally into tallish vessels. This one by contrast is softwood and would be turned with the grain running horizontally. So this was more of a "What can I get out of this log?" project than a "We need a big bowl" project and I didn't worry overly much about the practicality of the resulting output.
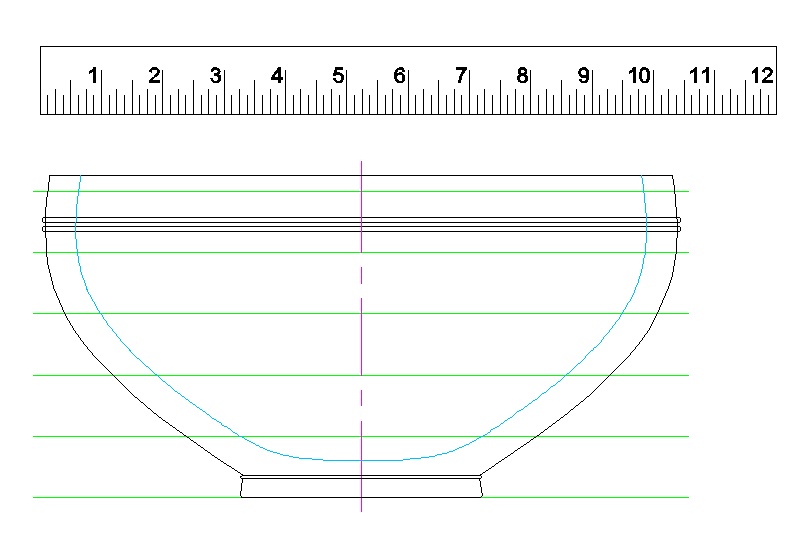
The plan, with some nice green reference lines
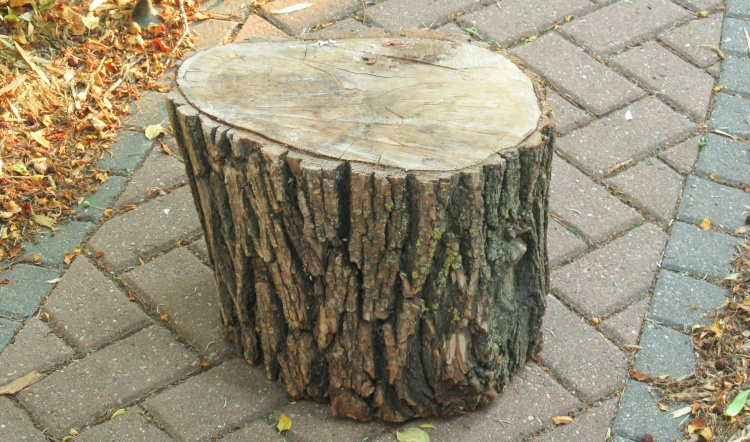
Your garden-variety log
I'd bought a log plus a spare a few years ago for some prototyping of a vessel I was doing. The original log got used as the prototype and then most of it ultimately ended up turning into a spherical vessel, while this is the backup log.
It was just sitting in the shed taking up shelf space so I thought a bowl would be a better use for it. My assumption is that the wood is spruce since pines (or larch) of this diameter are relatively rare around here and it doesn't seem to have the grain of a fir.
It was just sitting in the shed taking up shelf space so I thought a bowl would be a better use for it. My assumption is that the wood is spruce since pines (or larch) of this diameter are relatively rare around here and it doesn't seem to have the grain of a fir.
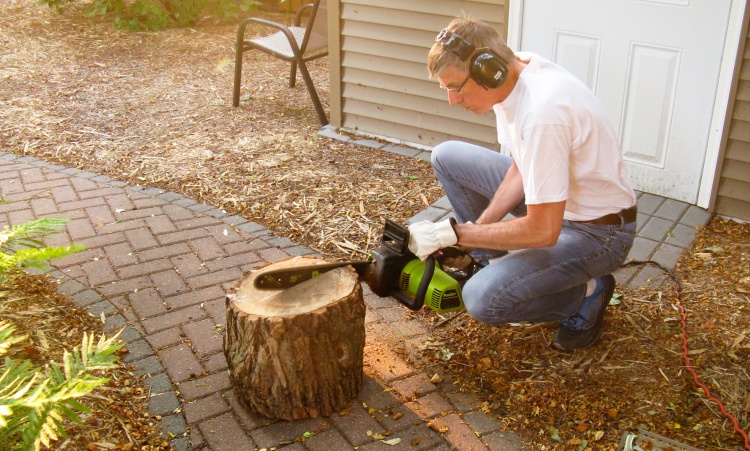
Electric chainsaw making half-logs
The log was too large to run through my bandsaw so I turned to my little-used electric chainsaw. It took longer to dig it out of the garage and get it ready to go than to actually cut the log.
A few minutes work out in the weirdly orangey sun (due to smoke from the annual Northern forest fires) produced a couple of log halves and a nice pile of sawdust.
A few minutes work out in the weirdly orangey sun (due to smoke from the annual Northern forest fires) produced a couple of log halves and a nice pile of sawdust.
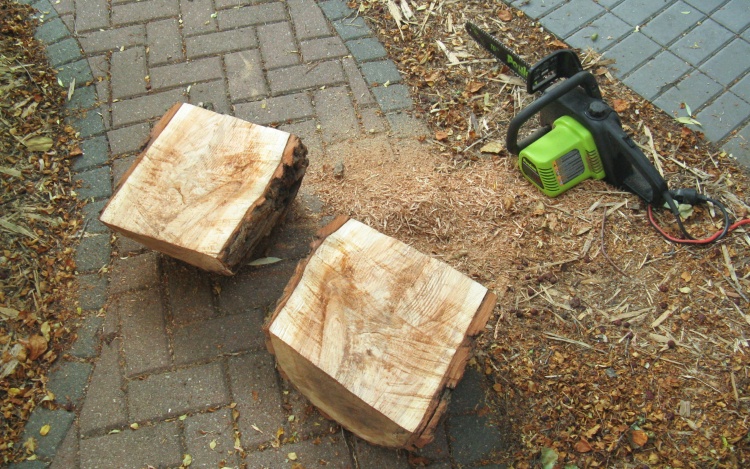
Two halves and some sawdust
Yah, like that.
I used a hammer and chisel to remove the bark out on the back path rather than do that messy job in the shop (wouldn't want any dust in that pristine environment).
I used a hammer and chisel to remove the bark out on the back path rather than do that messy job in the shop (wouldn't want any dust in that pristine environment).
My large lathe is a "16-inch" model which means the center is 8" above the bed and you can turn something up to 16" diameter. Unfortunately the corners of the log were more than 8" from the center so they needed to be trimmed so the wood could rotate freely. I marked a center point and drew a 7" circle with a large compass and then trimmed the corners to that line.
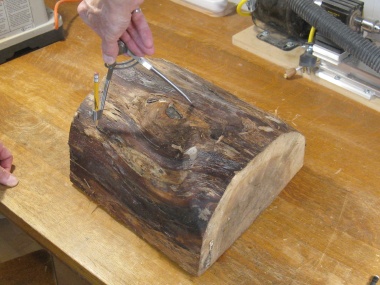
Marking a circle
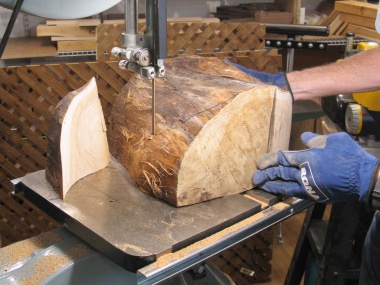
Chopping off the corners
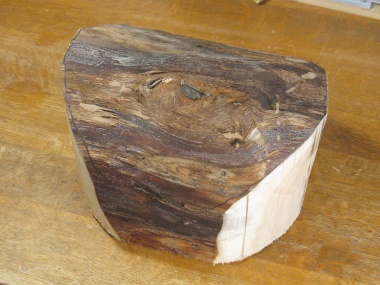
The new, lathe-friendly shape
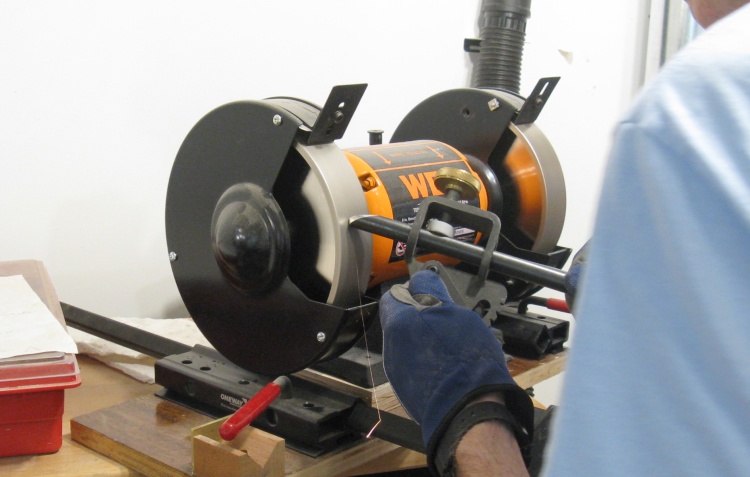
Turning step 1: Tool sharpening
One of the the first steps in doing a turning is to sharpen the tools. Here I'm sharpening my large bowl gouge on the grinder. The camera managed to catch one lone spark heading down.

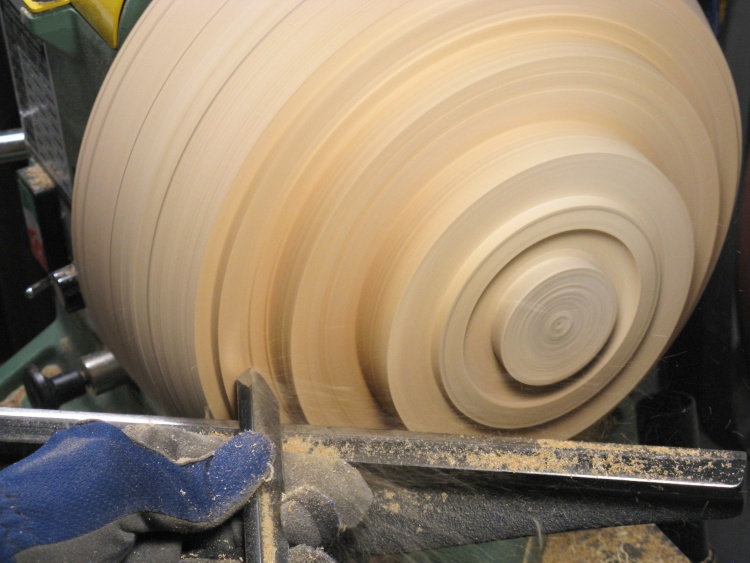
Rounding
I often use a large roughing gouge to do the initial rounding but I thought I'd try to stick with the bowl gouge for this piece.
This photo shows the gouge moving across the piece and the little blurs are flying shavings cut from the closest edges.
This photo shows the gouge moving across the piece and the little blurs are flying shavings cut from the closest edges.
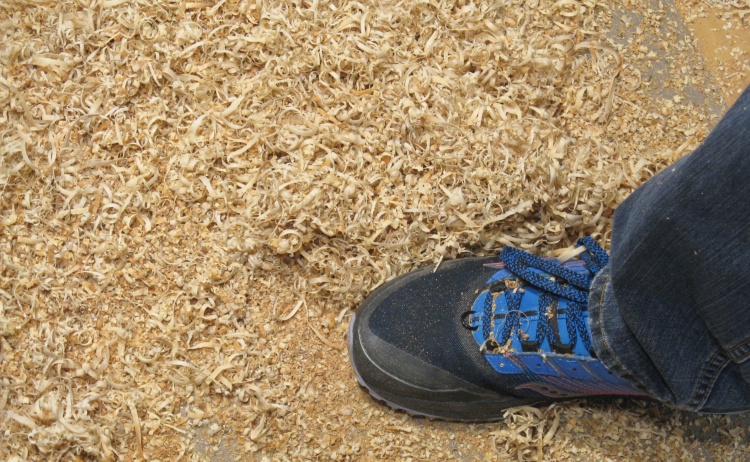
Shoe awash in shavings
Soon I had lots of shavings piling up in front of the lathe. I usually vacuum these up periodically so I'm not standing on a sawdust hill.
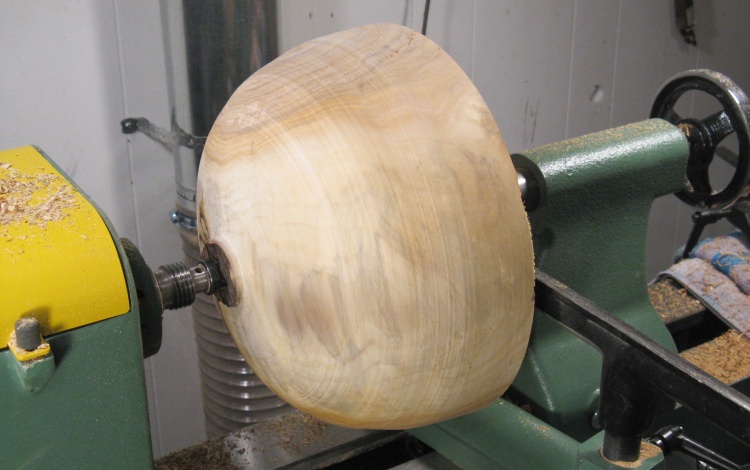
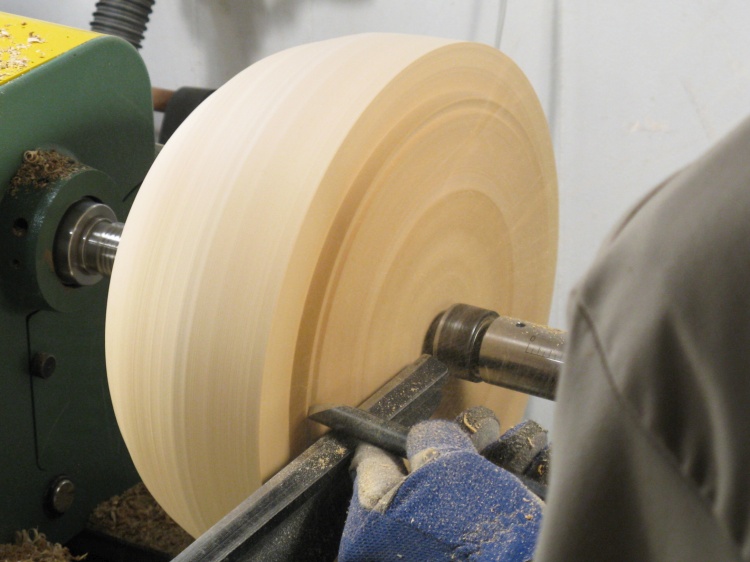
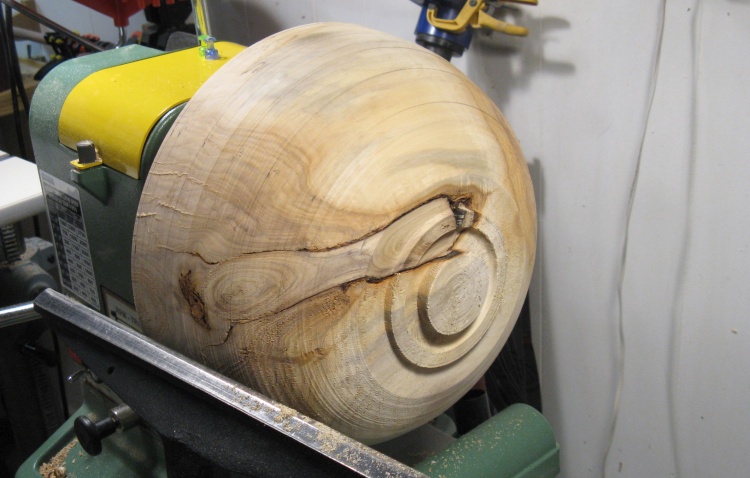
Fully rounded
While rounding, I just worked to cut away any outside sections of the log and this is the shape that emerged.
So now that I knew what the cleaned-up blank looked like, I could settle on a bowl shape and size that it would accommodate.
So now that I knew what the cleaned-up blank looked like, I could settle on a bowl shape and size that it would accommodate.
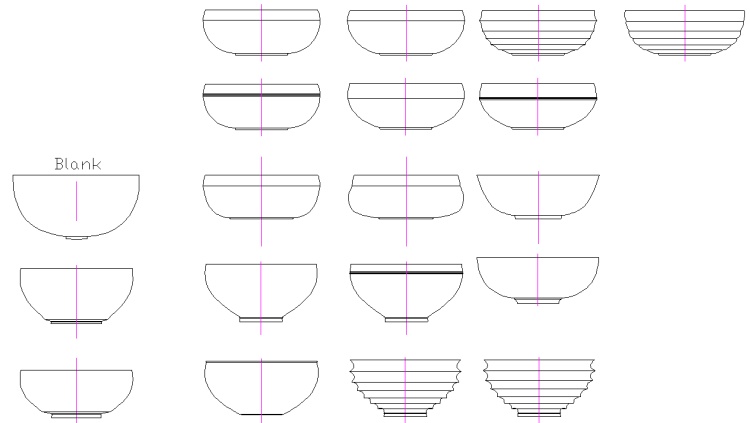
A few options were considered for bowl shapes
The number of possibilities for bowl shapes is pretty large, so I narrowed that down and drew up several of them to see how they looked. I leaned towards the ones that used up most of the blank because if you have a large blank with a, well, blank slate, you might as well use it.
Flattening what will be the top
Once the shape was nailed down then the next step was going to be adding a faceplate and flipping it around to shape the outside of the bowl. For that I needed the chainsaw-cut top to be flat. The bowl gouge was used to cut in from the edge as shown here to even out the top surface.

Checking that flatness
I periodically checked the flatness using a small ruler.
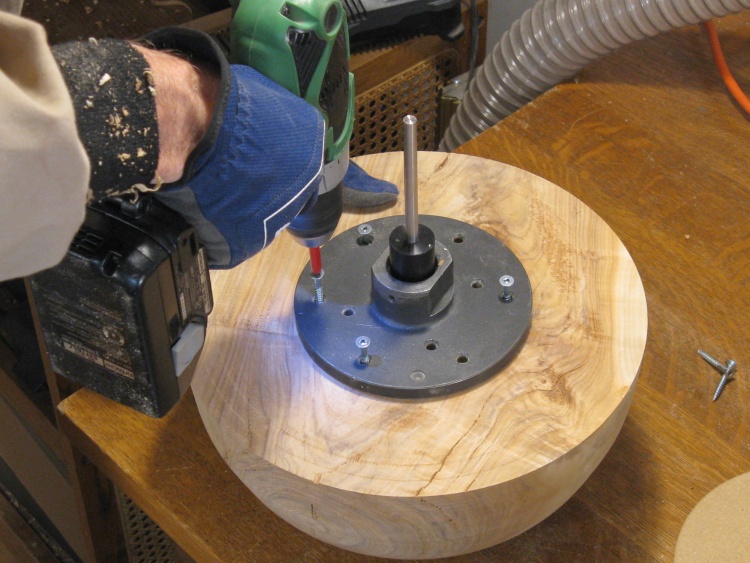
Installing a beefy faceplate
And then when flatness looked good, I pulled the blank off the lathe and installed a faceplate.
Foot and bottom tenon cut
The first order of business was to cut a foot on the bottom.
Inside the foot is a round protrusion (bottom tennon) that I'll use to hold the blank when I flip it back around to do the hollowing.
Inside the foot is a round protrusion (bottom tennon) that I'll use to hold the blank when I flip it back around to do the hollowing.
Setting diameters at reference lines
My normal process to guide the shaping is to cut narrow reference slots of appropriate diameters typically every inch along the piece.
But in this case I used the bowl gouge to make a stair-step shape instead, with the inside corners being the reference diameters (the bowl diameters at the green lines on the plan).
In this photo you can see the 1-inch spaced lines and I'm working on the second stair-step from the bottom.
But in this case I used the bowl gouge to make a stair-step shape instead, with the inside corners being the reference diameters (the bowl diameters at the green lines on the plan).
In this photo you can see the 1-inch spaced lines and I'm working on the second stair-step from the bottom.
Checking with the big woody calipers
I used my largest calipers to check the diameter against the plans as I made the stair-steps.
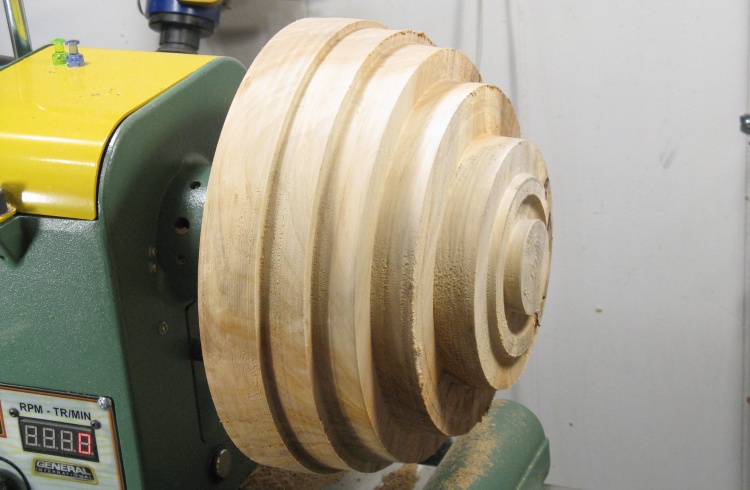
Reference diameters all cut
This photo shows all the stair-steps cut.
Now I need to join the inside corners to get to the final shape.
Now I need to join the inside corners to get to the final shape.
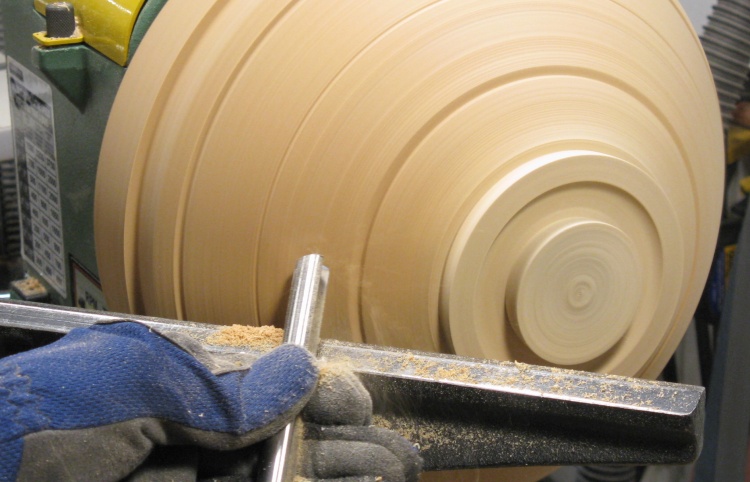
Shaping between the corners
I used a high-angle bowl gouge to do the shaping. Out of all my turning tools, this one probably cuts the most cleanly.
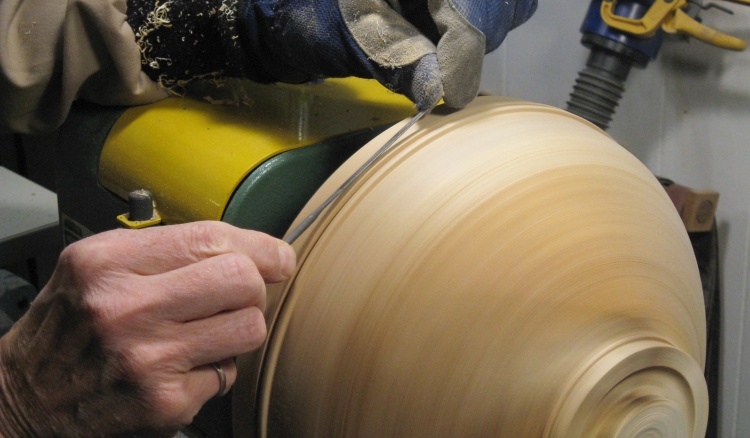
Using a file to help shape the beads
A pair of beads were formed near the top. In this photo I'm refining the shape using a small file.
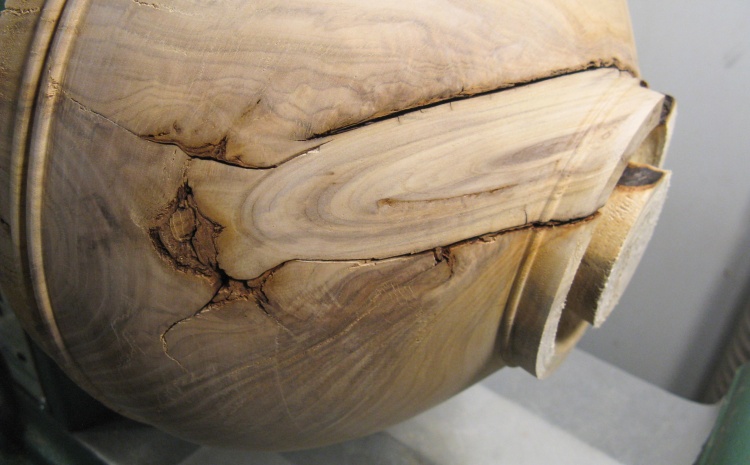
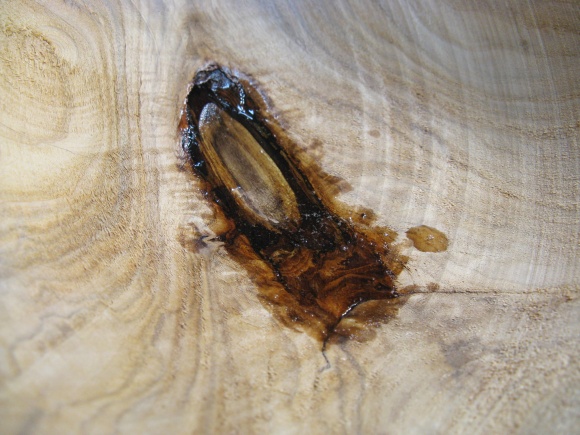
A loose piece of branch & bark
One consequence of using most of the blank was that the bottom section had a piece of branch embedded in it. There was a thin bark layer around this section and it wasn't well-attached to the rest of the wood. To make sure it wasn't going to fly apart, I was going to need to glue it into place.

Whipping up a batch of epoxy glue
The plan was to use epoxy to fill the cracks which in addition to gluing the branch in place would provide a smooth surface for the finish. Here I'm mixing up a 10 ml batch.
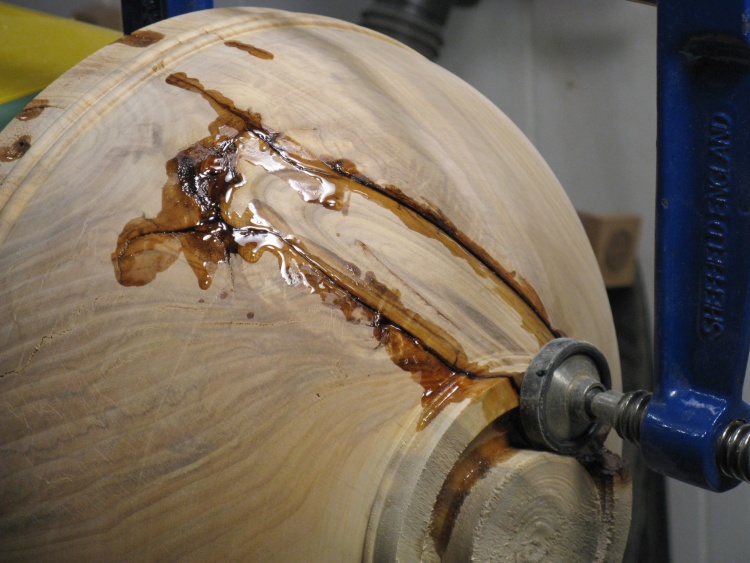
Branch cracks filled
I used the large blue clamp to make sure the branch was held tightly in place and then applied epoxy to the cracks.
Unfortunately this particular epoxy was pretty thin so it tended to run off. It also took a long time to start to harden so I needed to keep going back to reapply. Hence the rather...imprecise...application.
Unfortunately this particular epoxy was pretty thin so it tended to run off. It also took a long time to start to harden so I needed to keep going back to reapply. Hence the rather...imprecise...application.
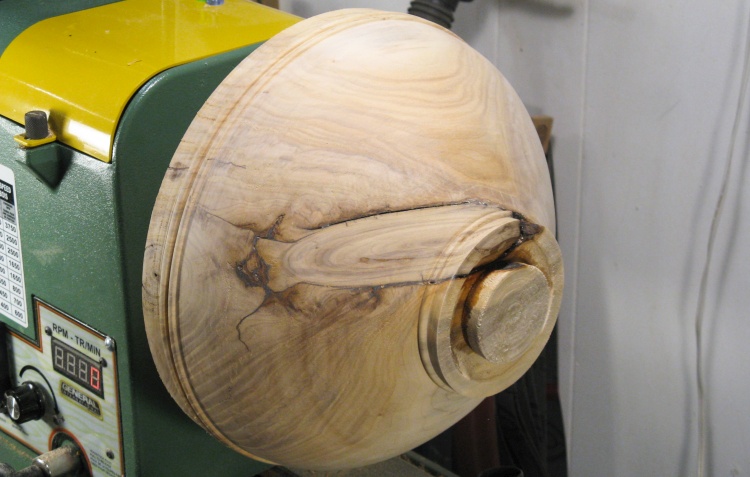
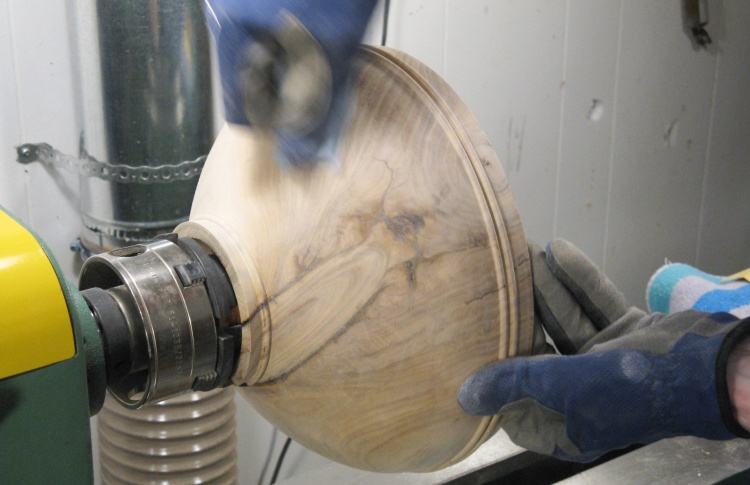
...and then re-turned
So then I re-turned the outside which removed any extra epoxy. The shape had changed a bit since the last turning so this also re-rounded the bowl.
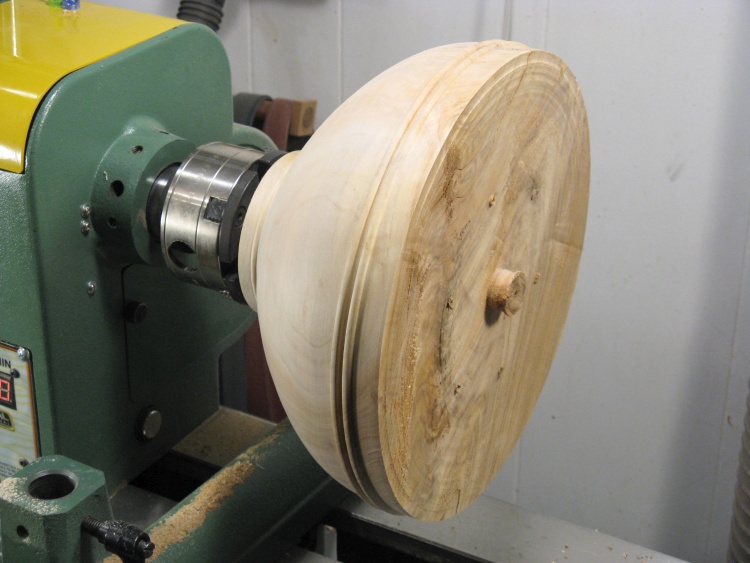
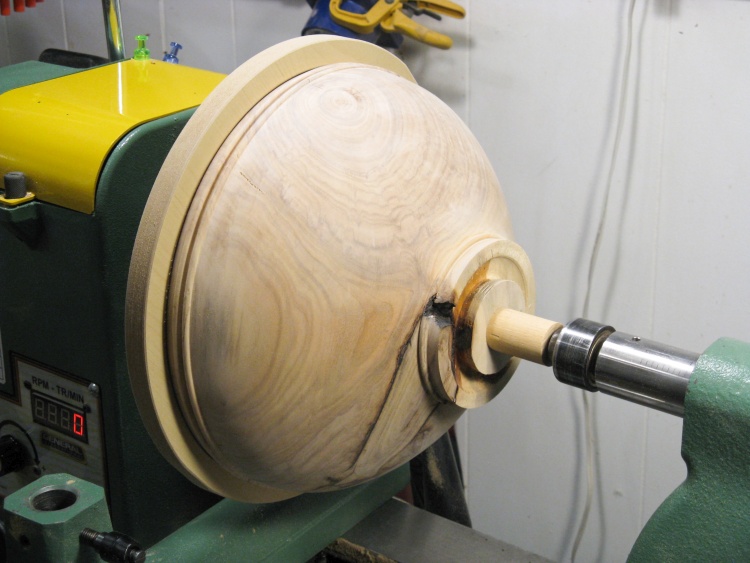
Flipped around to do the top
Then with the outside done it was time to work on the inside.
The bowl was pulled off the lathe and the faceplate was removed. The wood went back on the lathe flipped around, now with the bottom tennon gripped with a 4-jaw chuck.
The bowl was pulled off the lathe and the faceplate was removed. The wood went back on the lathe flipped around, now with the bottom tennon gripped with a 4-jaw chuck.
Hollowing typically starts with drilling a hole to make the process easier. I started with a pretty large bit (1-1/2" diameter) and drilled a hole, then switched to the Mother Of All Bits (as Saddam might say); a 2-5/16" Forstner bit acquired years ago to make holes for clock mechanisms. That made quick work on the inside couple of inches.
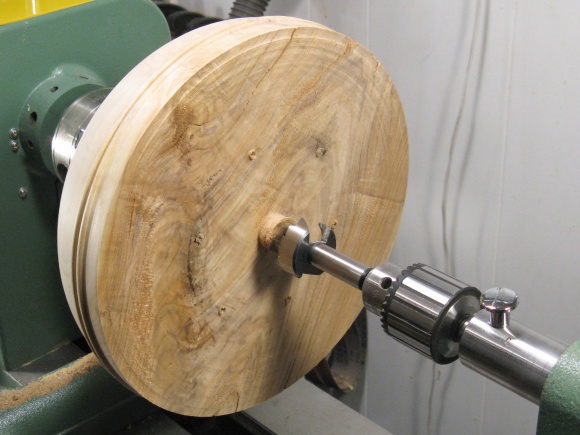
Drill #1; 1-1/5" diameter
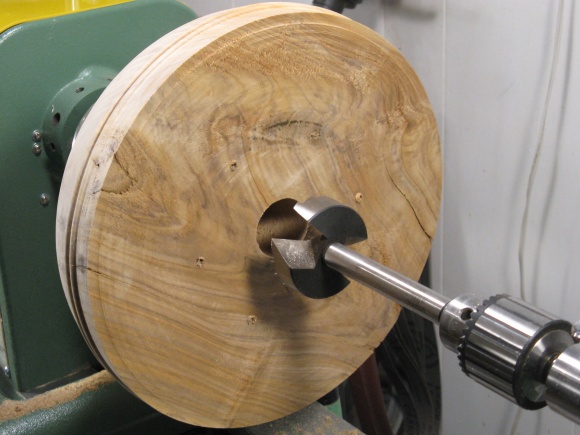
Drill #2; 2-5/16" diameter
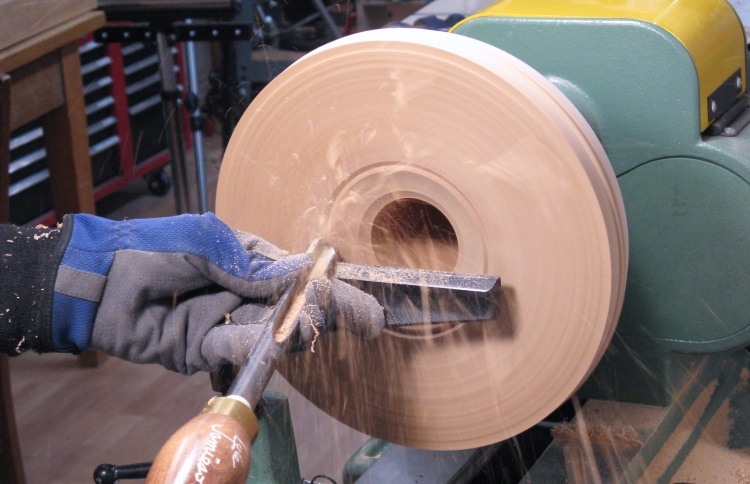
Starting the hollowing
I decided to stick with the bowl gouge for the hollowing and here I'm just starting to work on the center around the drilled hole.

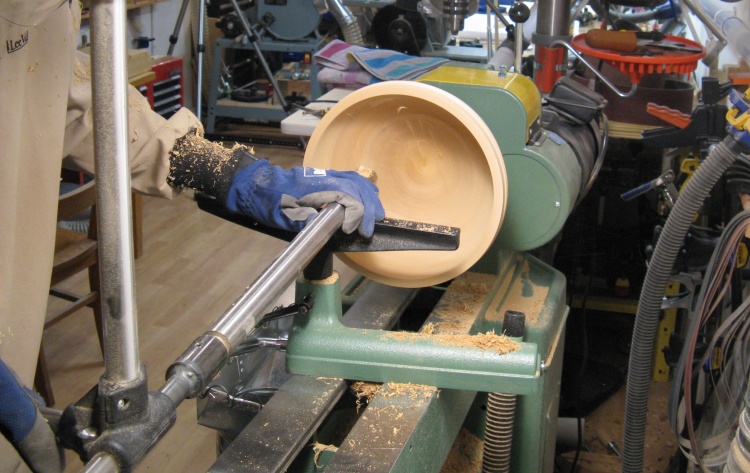
A bit further along
Here it is a bit further along with the first inch or so done.
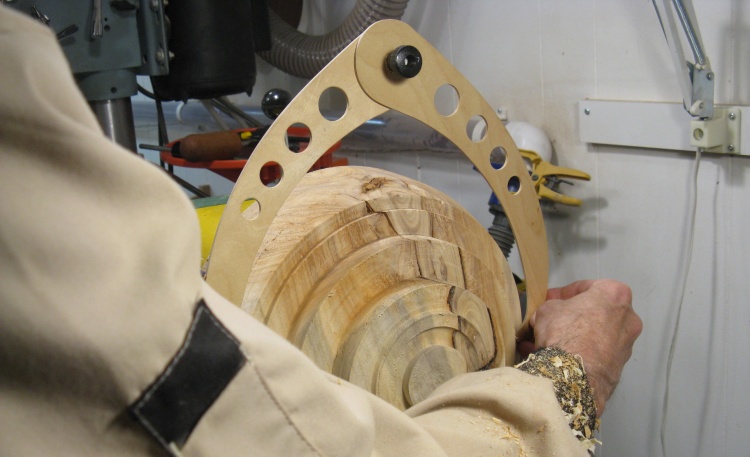
Hollowing jig used for final shaping
When almost done I switched to the captured hollowing tool so I could use the laser guide to gauge the thickness of the wall of the bowl.
The branch extended to the interior of the bowl and there were gaps around the embedded bark layers so I decided to give the epoxy treatment from the inside as well.
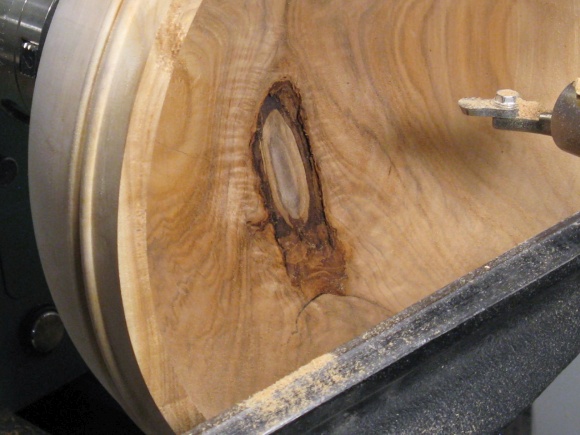
Inner side of the branch
It got the same epoxy treatment

Power sanding the inside
Once again the inside was re-turned to re-round the bowl and re-move the excess epoxy. The wood may not have been completely dry which might account for the shape changes.
I then started sanding the inside using a power sander as seen here.
I then started sanding the inside using a power sander as seen here.

Manualy sanding the inside (after power sander broke)
Unfortunately the sander shaft broke off the foam head long before I was done so then it was back to hand-held sanding.
Final hand sanding
Both inside and outside were first sanded with the bowl spinning as above and then again with the lathe stopped as shown here. When stopped it was easier to see any scratches that needed to be sanded out.
I sanded to 600 grit on both surfaces.
I sanded to 600 grit on both surfaces.
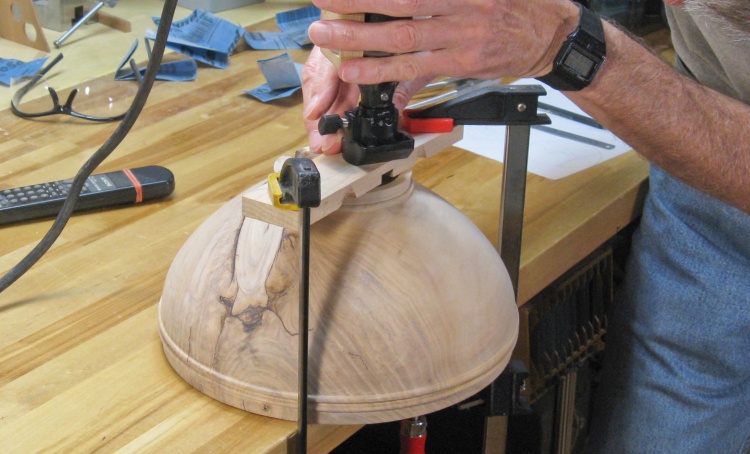
The last major operation was to remove the bottom tennon. I would need access to the bottom which meant flipping the bowl around yet again, which in turn meant that I needed a jam chuck - a flat piece with a slot that tightly fit the rim of the bowl. For the jam chuck I cut a piece of surplus MDF shelving material to size, rounded it on the bandsaw and added a faceplate. Then (off-stage) a suitable slot was cut into it to tightly fit the bowl rim.
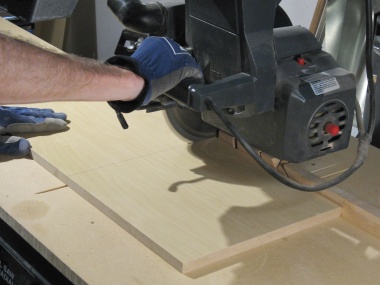
Cutting up some MDF for a jam chuck
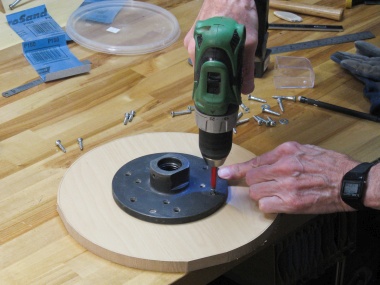
Installing the faceplate
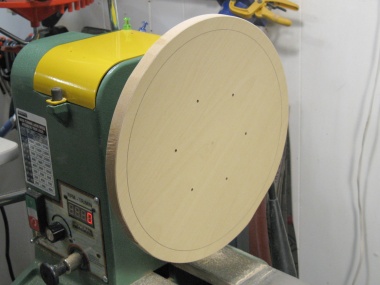
Mounted on the lathe
Bowl mounted in jam chuck to access the bottom
Here the bowl has been flipped around and fit into the slot in the jam chuck. This took a bit of fiddling due to the imperfect state of roundness of the rim.
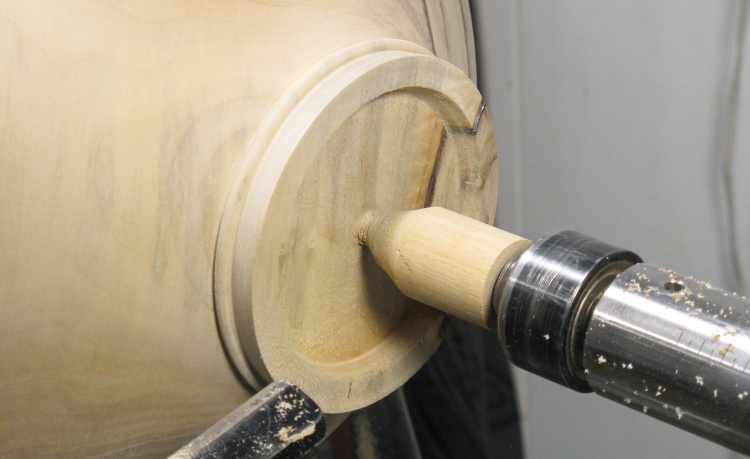
I also glued a short piece of dowel onto the bottom to provide a bit more clearance for the turning tools.
I also glued a short piece of dowel onto the bottom to provide a bit more clearance for the turning tools.
Bottom cleaned up
A few minutes of turning and the tennon was mostly removed, the foot profile cleaned up and the bottom rendered flat(ish).
Carving in a circle for initials
The Dremel was used to remove the remaining center stub and then was employed to cut the shallow circle for the QA signoff and the birth year.

Some test carving for the bottom
The bottom was a fair-sized pallet so I thought I'd add some detail. I decided on a spruce motif with spruce trees in a spruce forest and - well, you get the idea.
But first I wanted to try out the concept so I grabbed a leftover piece from the first spruce log and tried out some carving as shown in this photo.
But first I wanted to try out the concept so I grabbed a leftover piece from the first spruce log and tried out some carving as shown in this photo.

Doing the actual carving on the bottom
My trial carving worked out fine so I sketched the forest onto the bottom of the bowl and carved it in there.
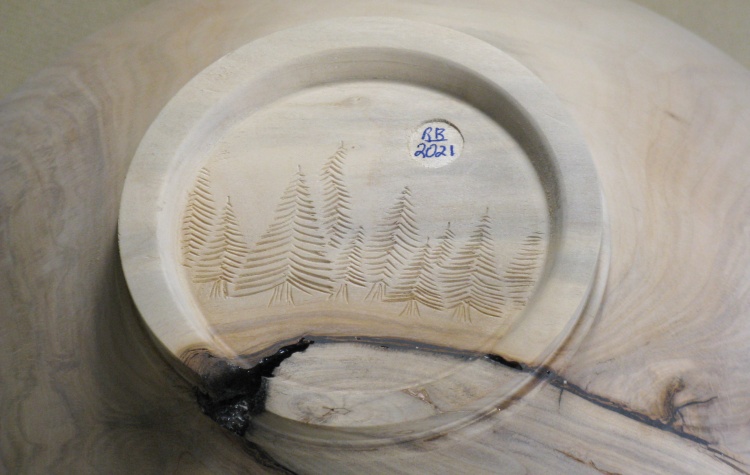
Sprucey bottom done
Here's the finished version, recruiting the crack at the edge of the branch as a stream and the initial circle as a moon (if the moon had 900 km-high blue alphanumerics on its surface).
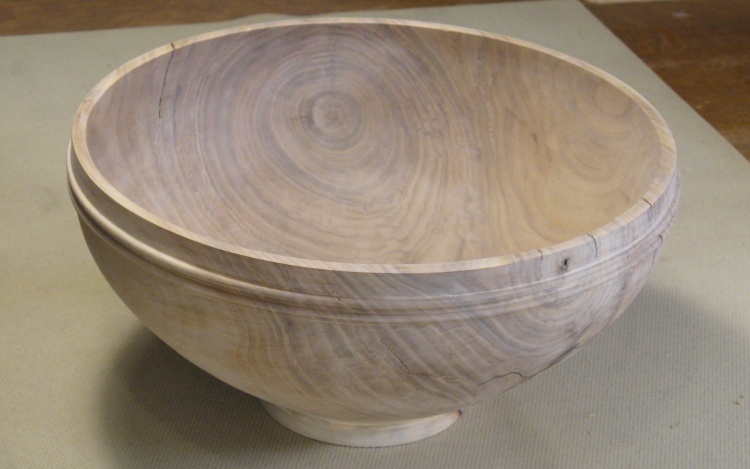
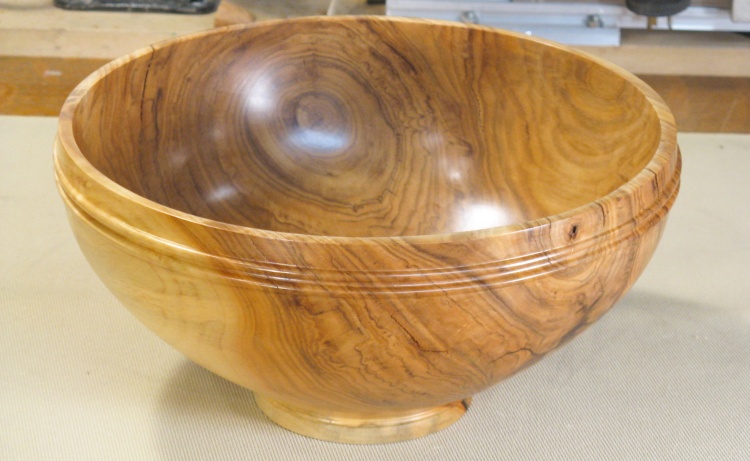
Woodworking done
That was it for the woodworking. This shows a side view.

The top view
Inside of the bowl
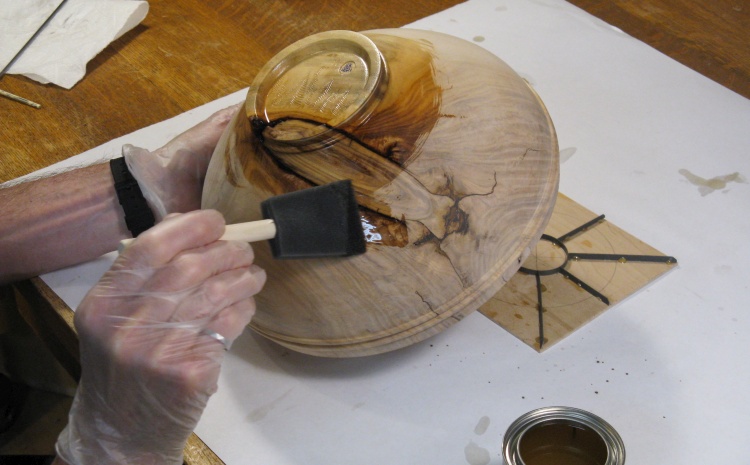
Starting with the varnish
The bowl would receive the standard three coats of polyurethane varnish with this photo showing the start of the process.
First coat of varnish
Here the first coat of varnish is fully applied and still wet.
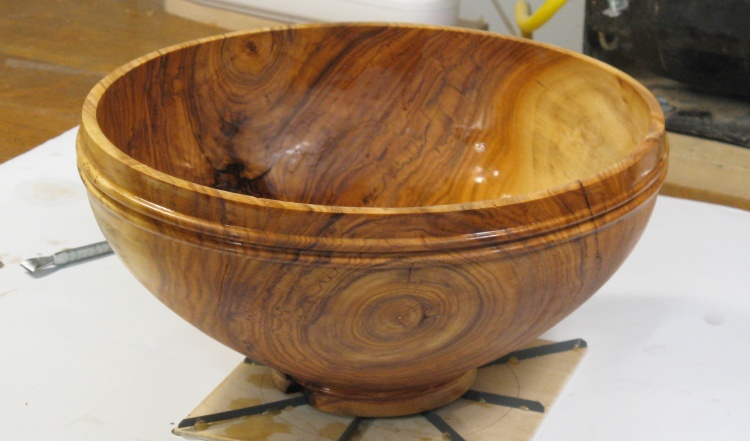
Done
Done


